ART protocol templates that have previously been created by the clinic in the Art Protocol Library are used to create a patient's treatment calendar.
The clinic will likely have created several templates depending upon the cycle type and necessary protocol (ie antagonist, long lupron, etc). These protocol templates are the basis for creating the patient's treatment calendar.
Navigation: Calendar Wizard

Treatment calendars for patients are created by using Calendar Wizard.
Creating an OI/IUI Cycle

From within Calendar Wizard, a new cycle will be created for the patient. After searching for the patient on the search toolbar, choose either a new OI/IUI Cycle or an ART Treatment Cycle.
We will Create an OI/IUI Cycle in this example.

Once you have selected the OI/IUI:
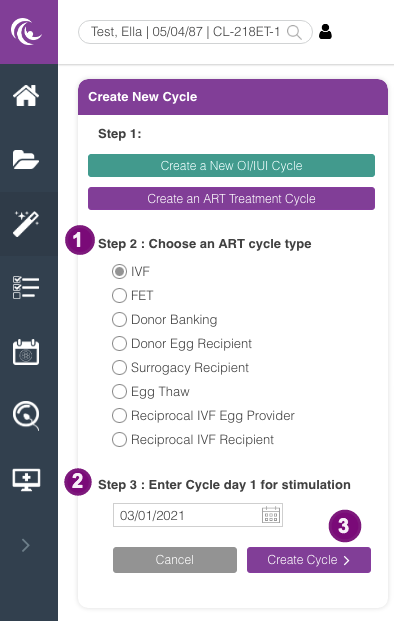
1. Select the ART cycle type (OI, IUI/OI or Natural Cycle) (in this example IUI/OI)
2. Enter the Cycle day 1 for stimulation. This is the date that the patient will start their stimulation meds, (ie Clomid).
3. Click Create Cycle.

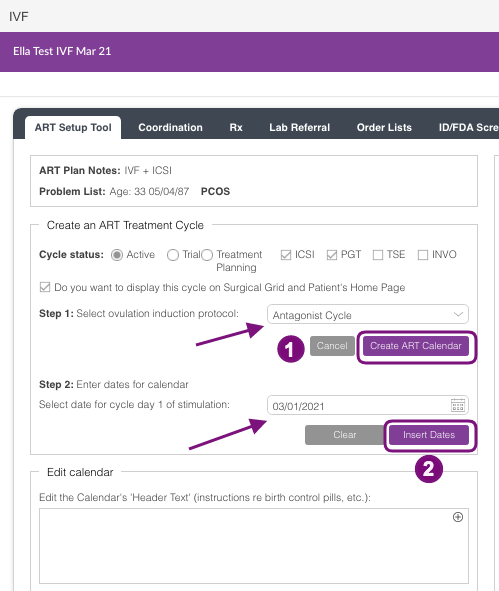
1. Select the Cycle Status: Active or Trial.
2. Select ovulation induction protocol.
3. Select the specific ovulation induction protocol from the pull-down list. These protocols are the templates from the ART Protocol Library that have been previously built.
4. Click Create ART Calendar.

Confirm date for cycle day 1 of stimulation by clicking Insert Dates.
If at this point the dates are unknown, you may stop here and close. All work will be saved in the patient's chart, and when you are ready to apply the dates to the cycle you may.

You will now have the patient's treatment cycle with the corresponding dates.
1. Click the Delete ART calendar if you wish to delete the Treatment cycle. Click the Start Over button if you wish to start from Step 1.
2. Click the Clear button if you need to change the Stim Start date then click Insert dates.

This window will appear once you click on the Delete Art Calendar or Start over Button. Click Yes if you wish to continue.

This pop-up window will appear if you clear the dates in Step 2.
Note: If a cycle progress note has been created or if a prescription has been sent electronically within the treatment calendar you are unable to delete the calendar.

The calendar's Header Text can be edited from this screen by typing into the box indicated by the arrow.
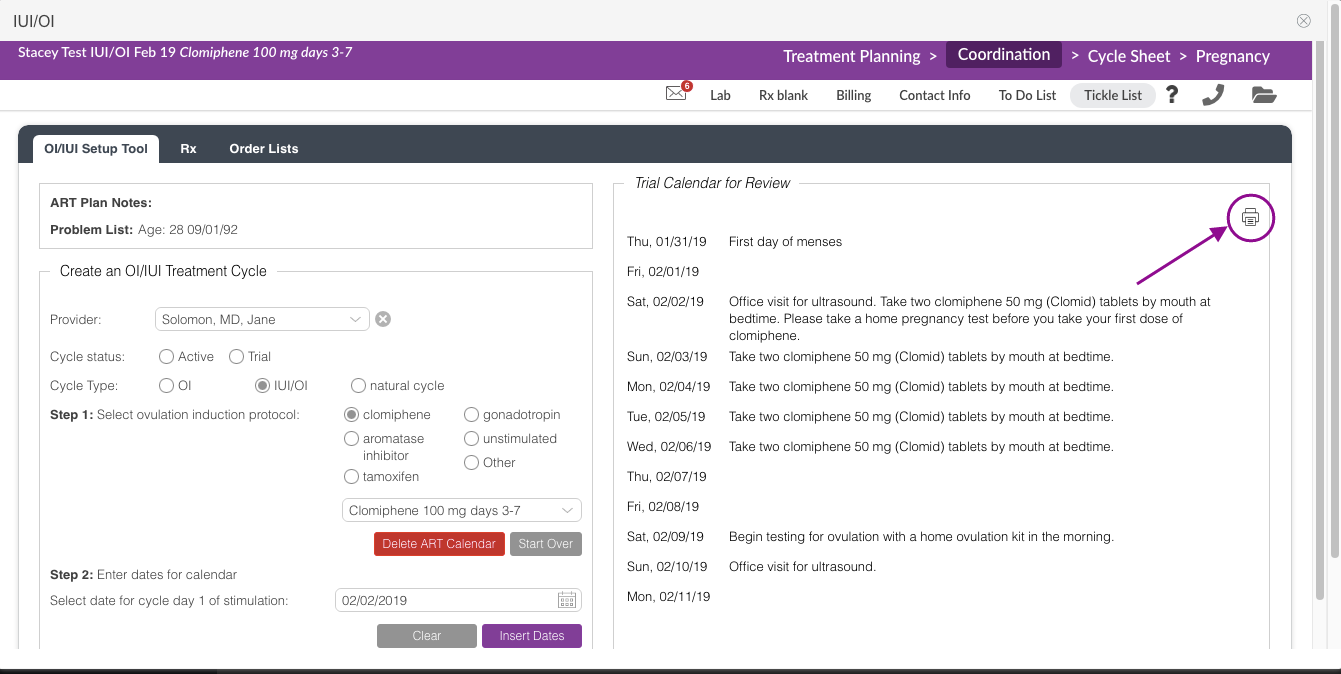
Select the Printer icon to open up the treatment calendar. This will allow you to either print/send to the Patient Portal/Patient App.

From within the treatment calendar:
1. The treatment calendar can be sent to the patient via the Patient Portal/App by selecting Send E-mail. This will send all of the information securely to the patient.
2. The treatment calendar can be printed out and given to the patient directly by selecting Print.
3. Choose Close to close the calendar.
Follow the same process to create an OI or Natural Cycle.
Creating an ART Treatment Cycle
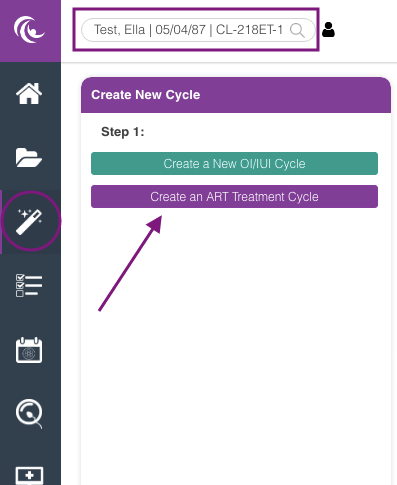
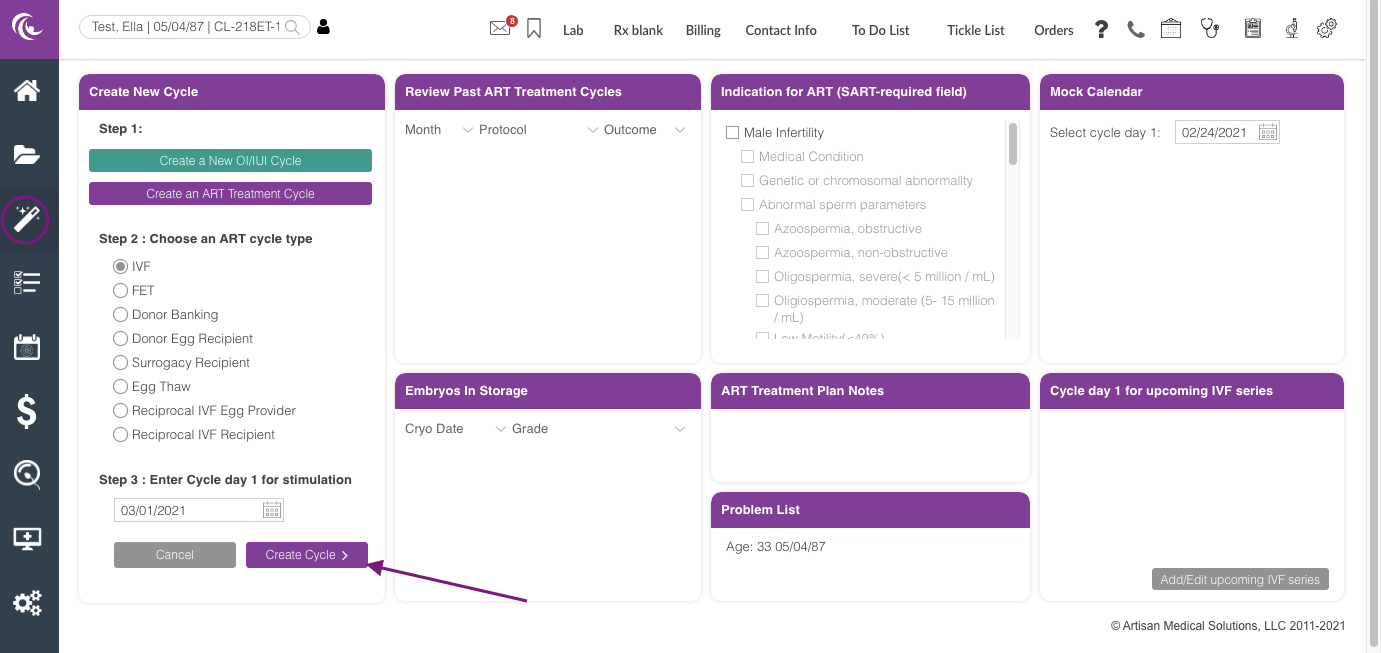
From within Calendar Wizard, a new cycle will be created for the patient. Choose Create an ART Treatment Cycle.
Once you have selected the ART Treatment Cycle:
1. Select the ART cycle type (IVF, FET, Donor Banking, Donor Egg Recipient or Surrogacy Recipient). In this example, IVF has been selected.
2. Enter the Cycle day 1 for stimulation. This is the date that the patient will start their stimulation meds, (ie Gonadotropins or Clomid).
3. Click Create Cycle.
In the event you do not know the exact day that stimulation will begin, use this as an estimate and select the day you think the patient will start.
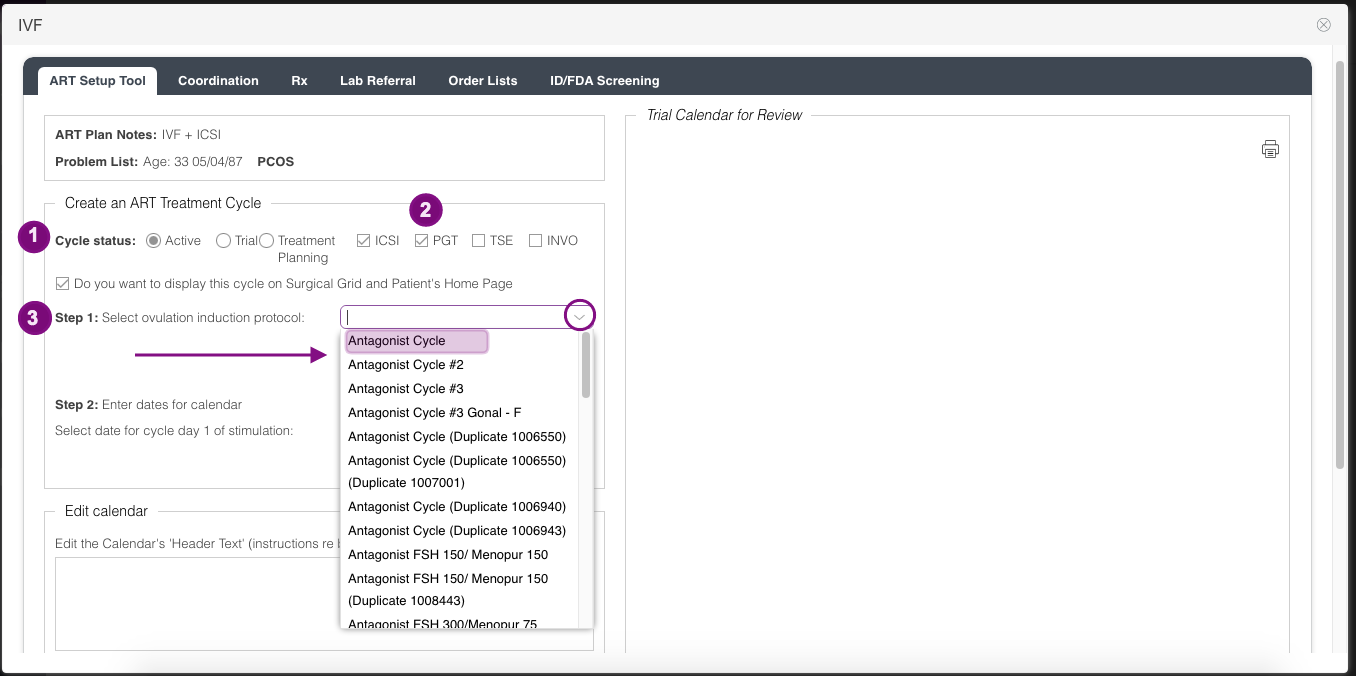
1. Select the Cycle Status: Active (patient who will be in an actual treatment); Trial (for example if a physician would like to see if the patient will respond to a medication; Treatment Planning (will provide clinical information regarding their treatment plan and a sample calendar. See Treatment Planning below for more information)
2. (Optional) Select specific treatments: ICSI, PGD, TSE, INVO, if appropriate. (This will not change anything about the cycle, it will only add these notations to the cycle in certain displays of the system).
3. Select the specific ovulation induction protocol from the pull-down list. These protocols are the templates from the ART Protocol Library that have been previously built. Click here to learn more.
1. Choose the desired protocol from the pull-down list and then click Create ART Calendar button.
2. Confirm date for cycle day 1 of stimulation and click Insert Dates.
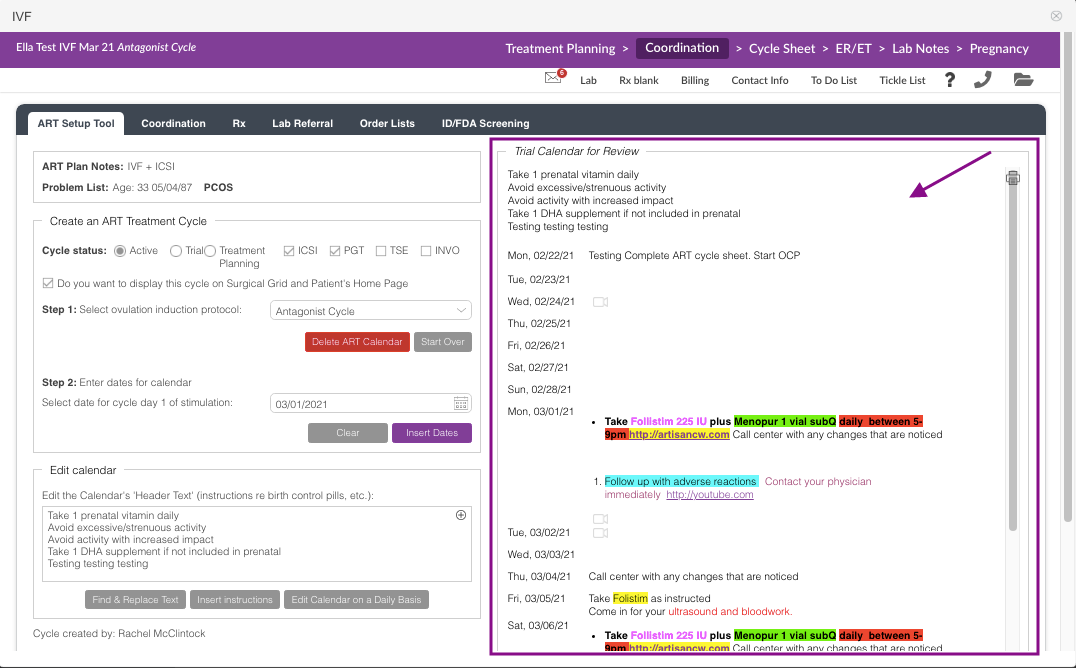
You will now have the Protocol instructions with the corresponding dates on the right-hand corner of the screen.
If at this point the dates are unknown, you may stop here and close. All work will be saved in the patient's chart, and when you are ready to apply the dates to the cycle you may. Click the X icon to the upper right-hand corner to exit the screen.
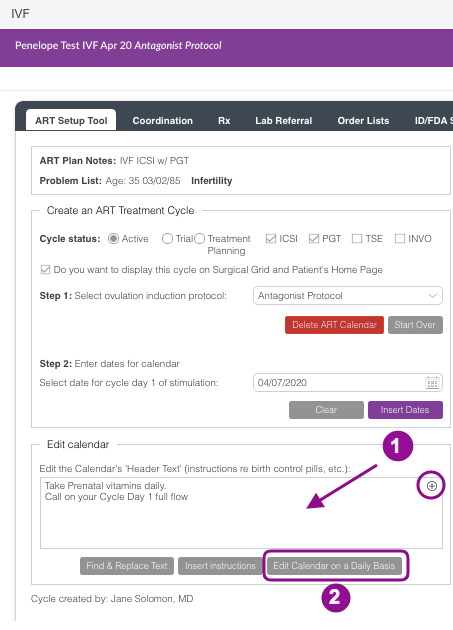
1. The calendar's Header Text can be edited from this screen by typing into the box indicated by the arrow. To use the stock text feature within Artisan, click the plus sign icon open your stock text library. Click here to learn more.
2. Instructions and/or doses can be changed daily if necessary by clicking the Edit Calendar on a Daily Basis.
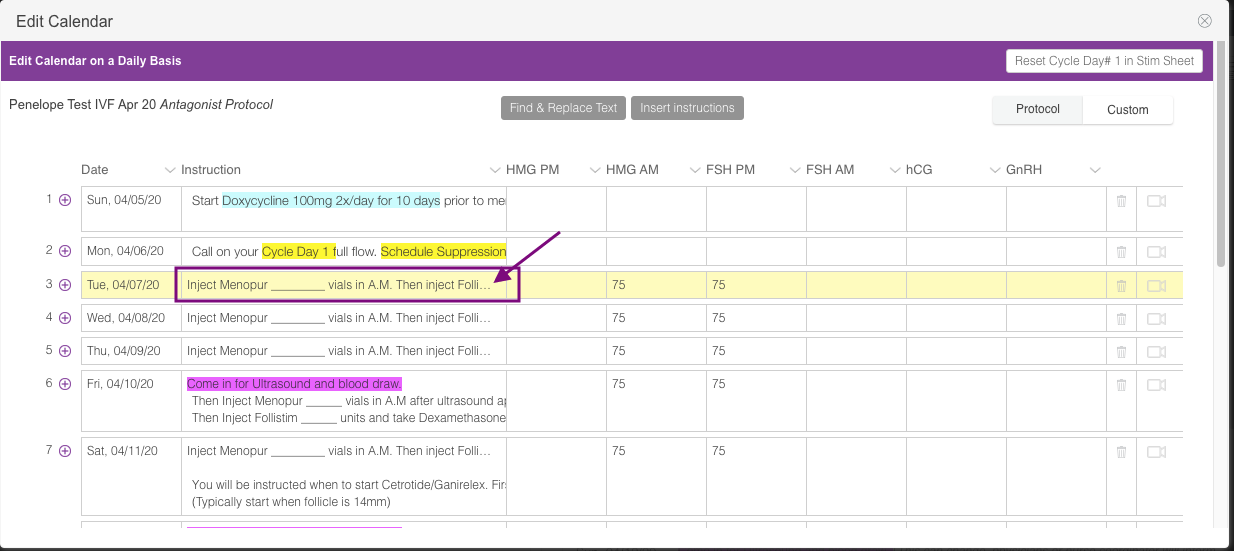
Click into the instruction box to bring up the format text box.
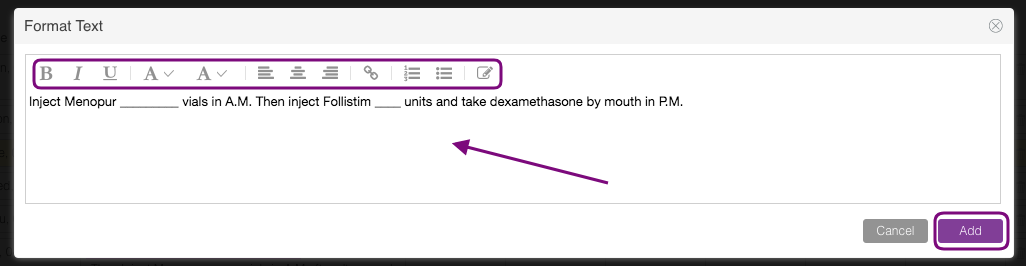
The instructions can be edited within the format text box, including changing highlighting, bolding, etc. Then, click the add button.

Click into the medication dosage box to edit specific doses.
Note: The Medication Grid is what the clinic sees on the cycle sheet. The instruction column is what the patient see on their end through the patient portal. These two areas do not speak to each other so it is important to update the patient instructions every time the medication grid is updated or vice versa.

Click the + icon to add a blank row. As you add this blank row, the date for all of the following days is increased by one day.
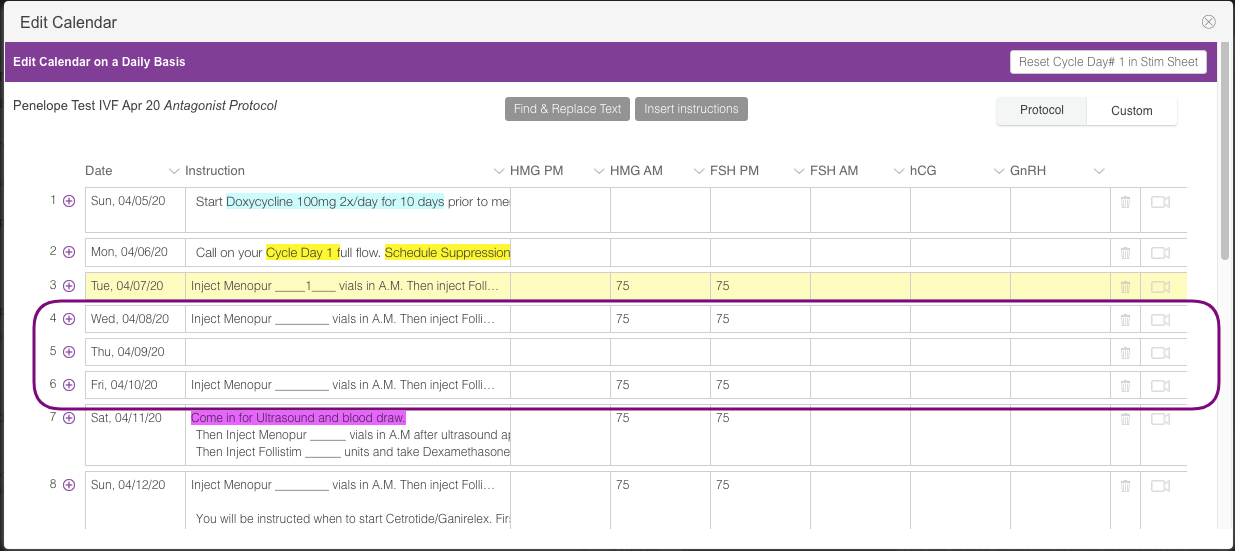
A new row has now been added.
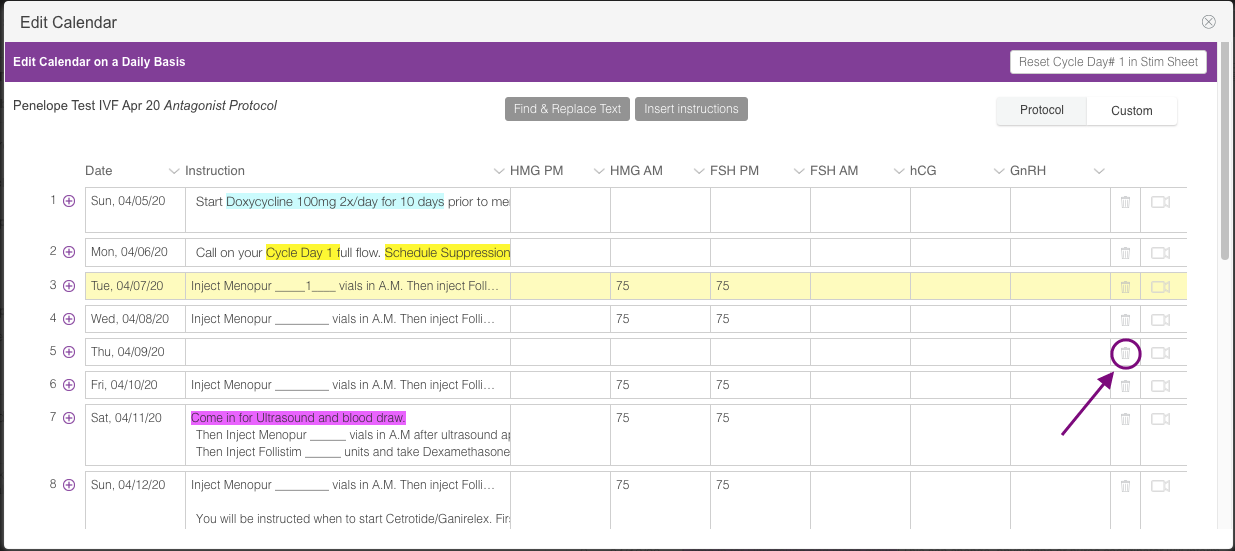
A row can be easily deleted by clicking on the Trash Can icon that corresponds to the appropriate row.

Click ok button. Please note that a deleted row cannot be undone.
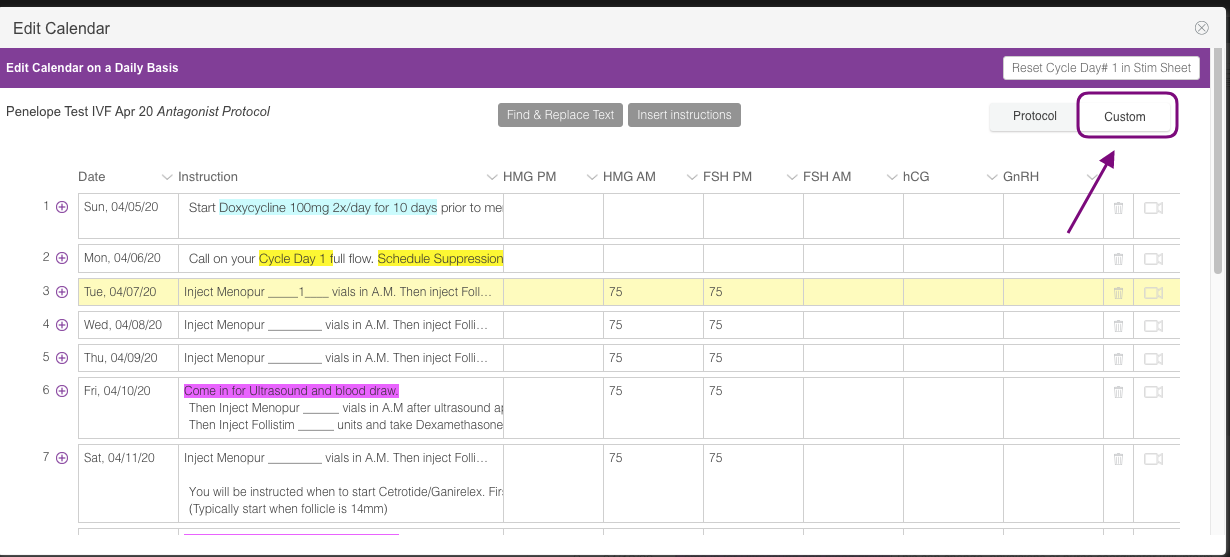
The row is now deleted. Click the Custom tab if you need to create an additional medication grid. See Adding a Custom Medication Once a Treatment Plan has been Established manual for more information.
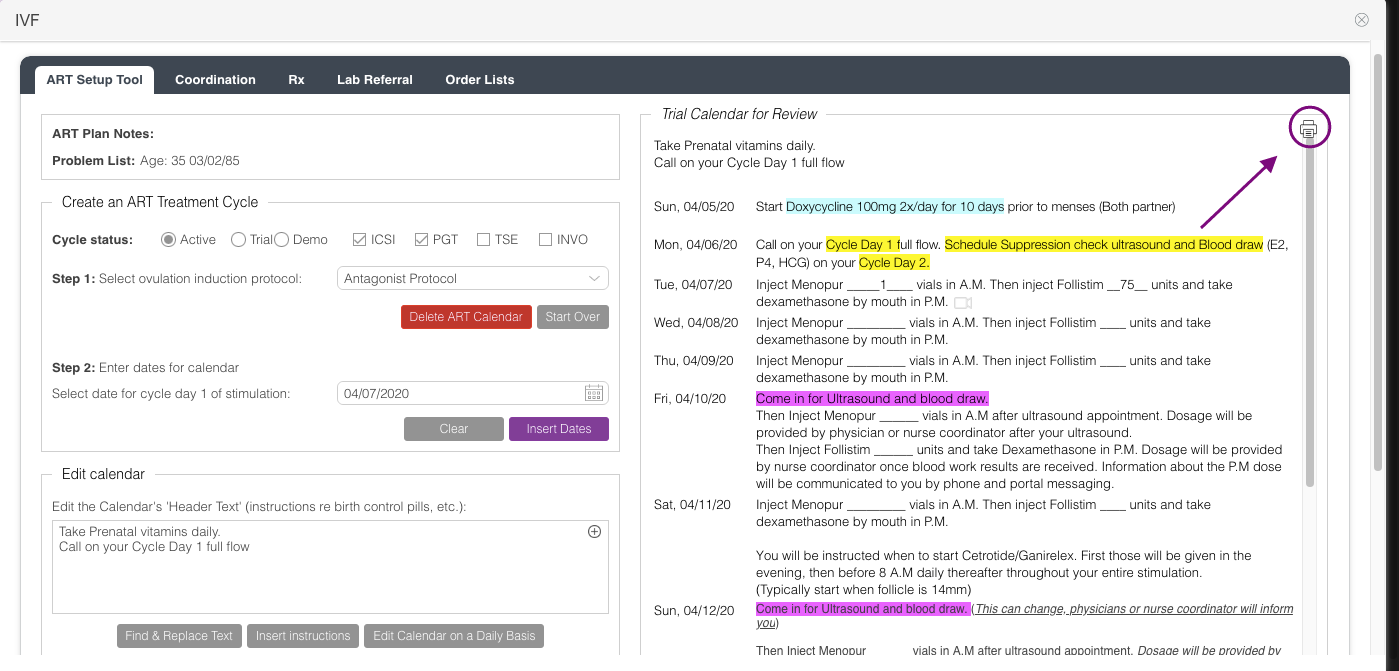
Select the Printer icon to open up the treatment calendar. This will allow you to either print/send to the Patient Portal/Patient App.
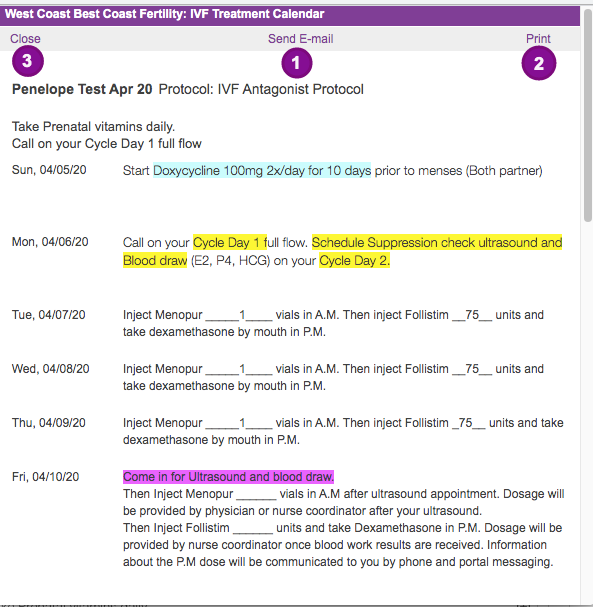
From within the treatment calendar:
1. The treatment calendar can be sent to the patient via the Patient Portal/App by selecting Send E-mail. This will send all of the information securely to the patient.
2. The treatment calendar can be printed out and given to the patient directly by selecting Print.
3. Choose Close to close the calendar.
Treatment Planning
Treatment Planning will provide patients clinical information regarding their treatment plan and a sample calendar. This will work in conjunction with the Patient Expense Estimator that allows the financial team creates an ART expense estimate for the patient.
From the calendar wizard, create the patient's treatment cycle.
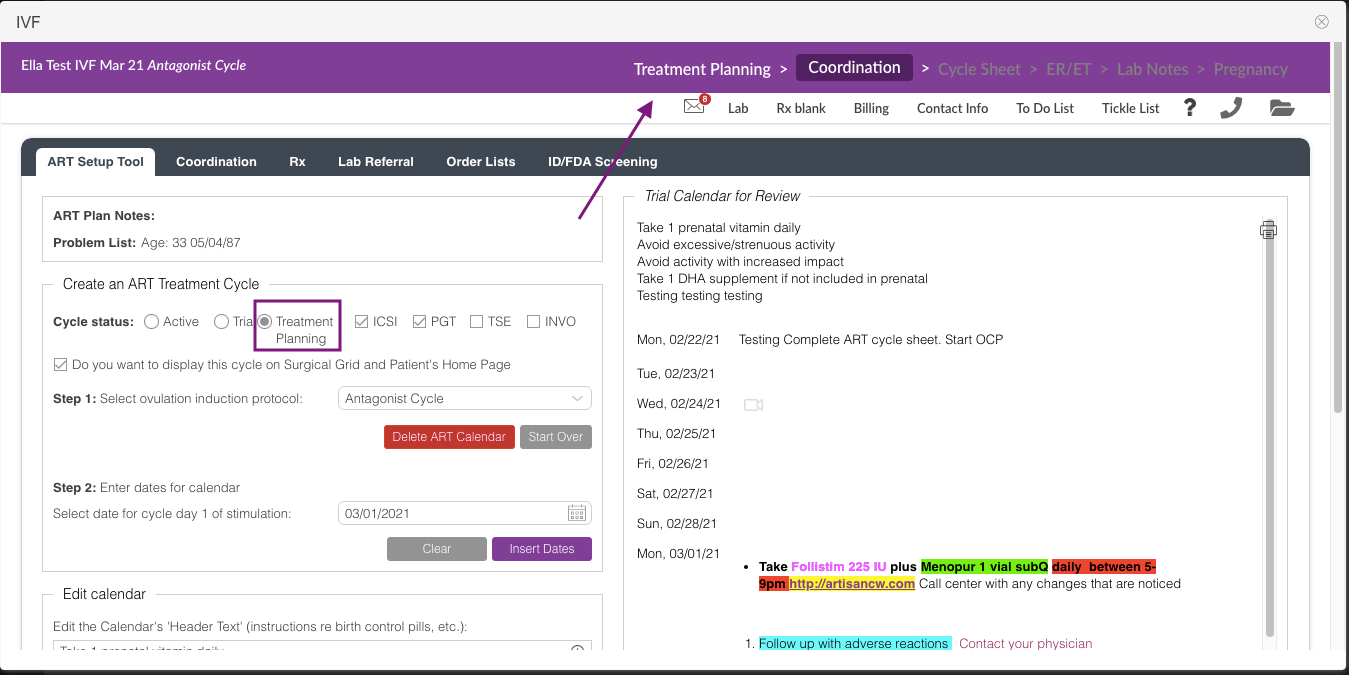
It will take you to the Coordination tab. Set up the patient's treatment calendar in the ART Setup Tool and select Treatment Planning as the cycle status.
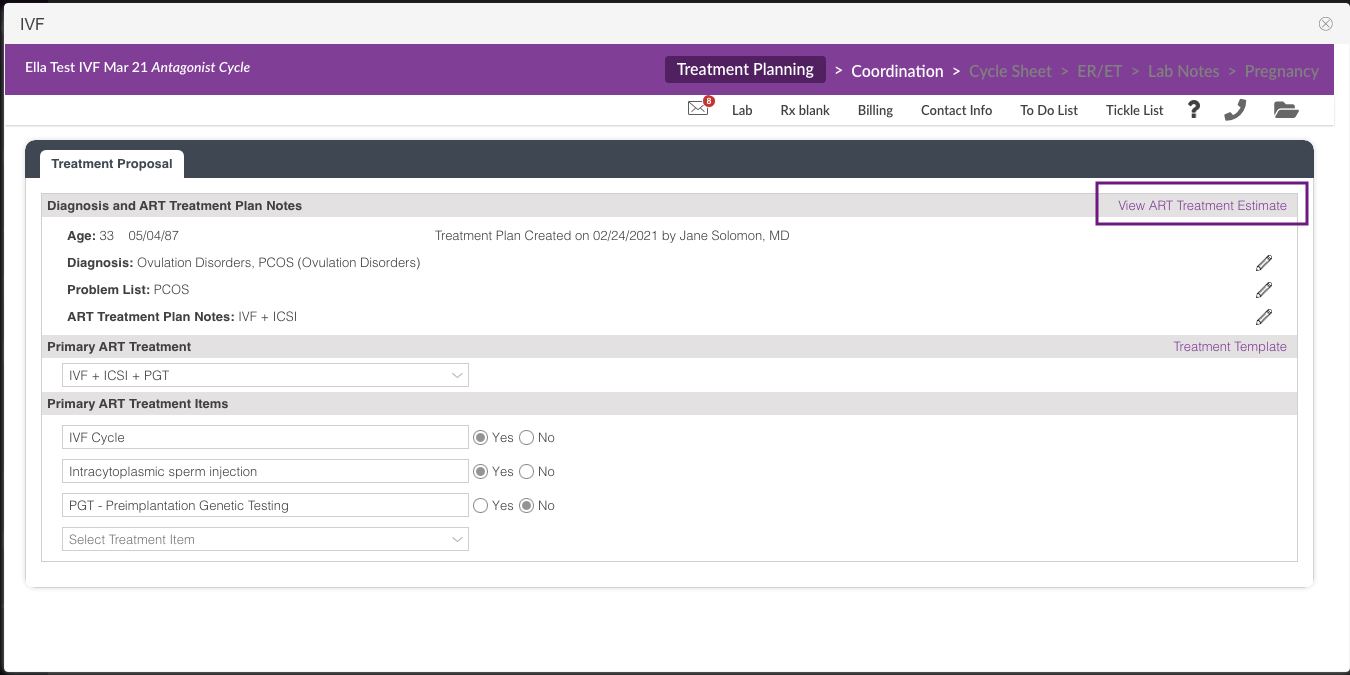
After completing the setup, click on Treatment Planning up at the top.
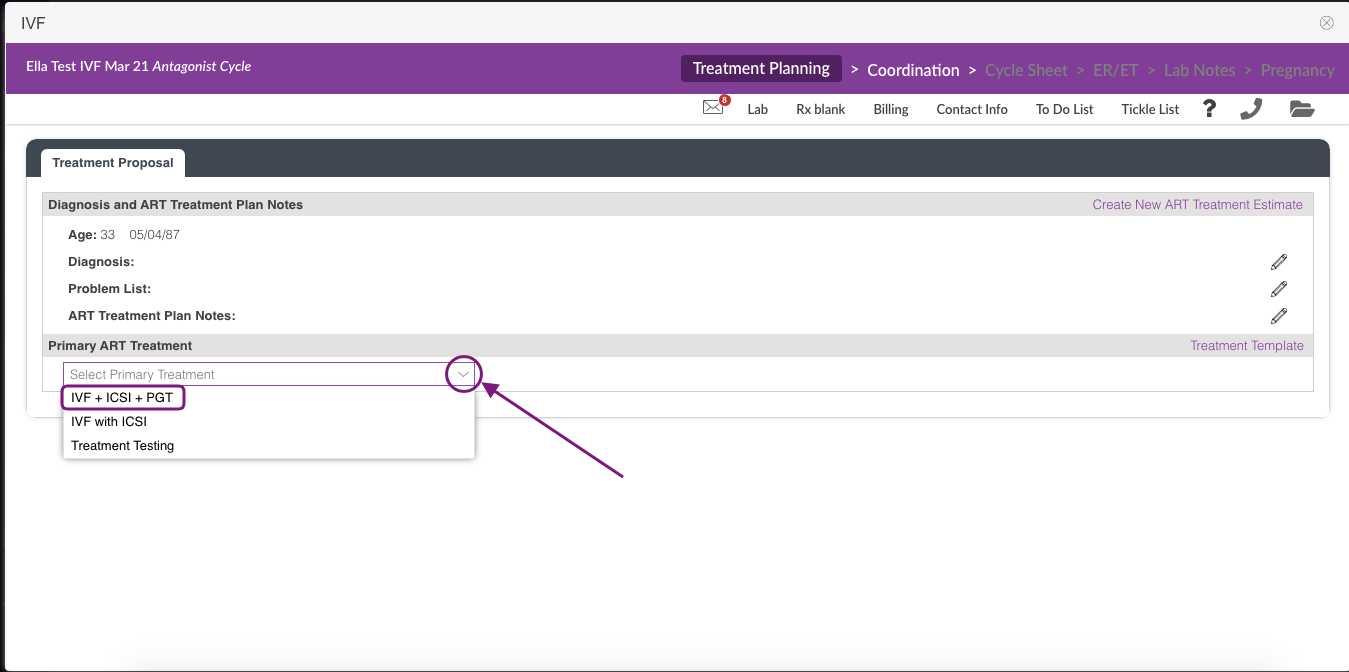
In the Treatment Proposal tab, under the Primary ART treatment click the drop-down icon and select the appropriate treatment plan template. This will only pull up the Treatment Template list that has been added to the cycle type.
Click here to learn how to create the Treatment Planning Templates

After selecting the template, mark the appropriate template items that will apply to the patient's treatment plan.
In this example, the patient's plan is IVF cycle + ICSI no PGT.

If applicable, select the drop-down to add a treatment item. Clicking on the Treatment Template link will take you to the Treatment Template Set up.
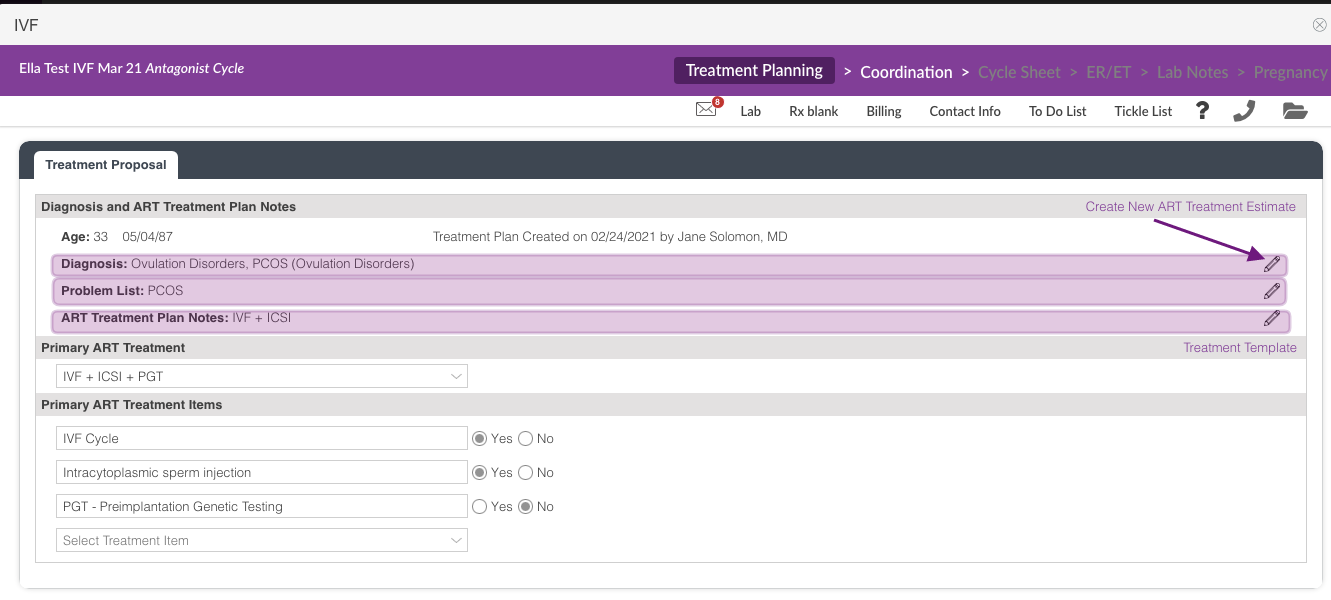
The clinical team will have an option to update the Diagnosis, Problem List and ART Treatment Plan Notes as needed. Click the pencil icon to edit.
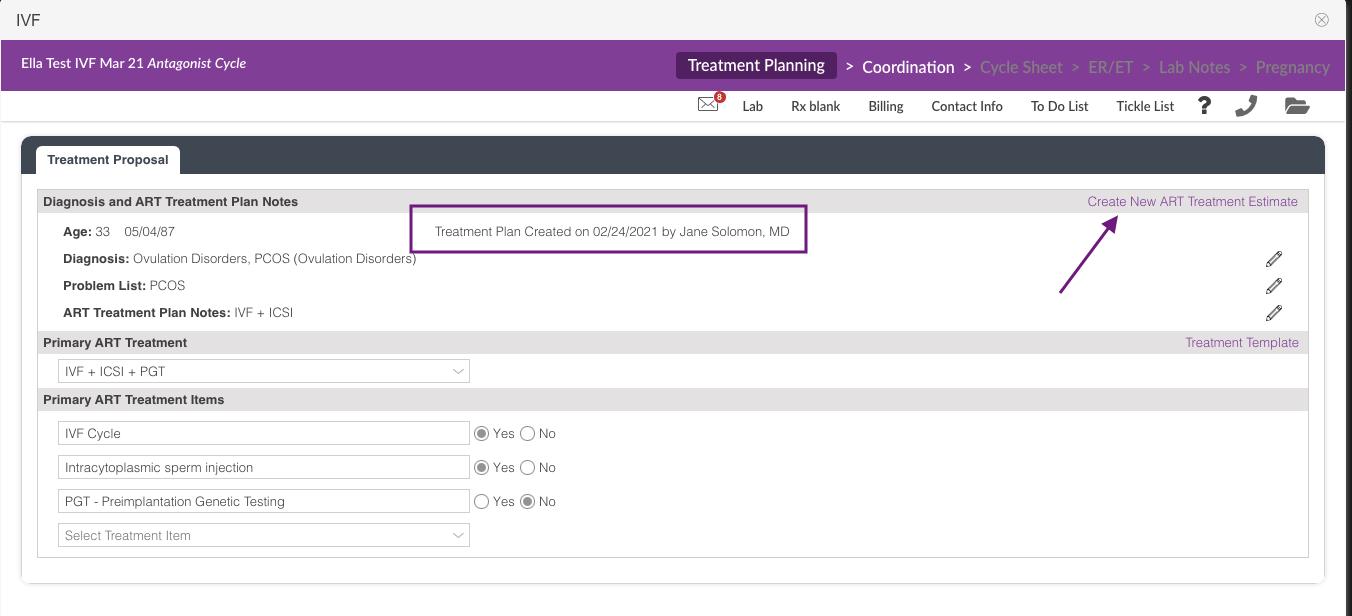
After completing the Treatment Proposal information, it will have the a date and name stamp. To send this to the financial team, click Create New ART Treatment Estimate link.

Click Yes to confirm.
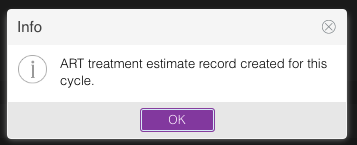
Click Ok.
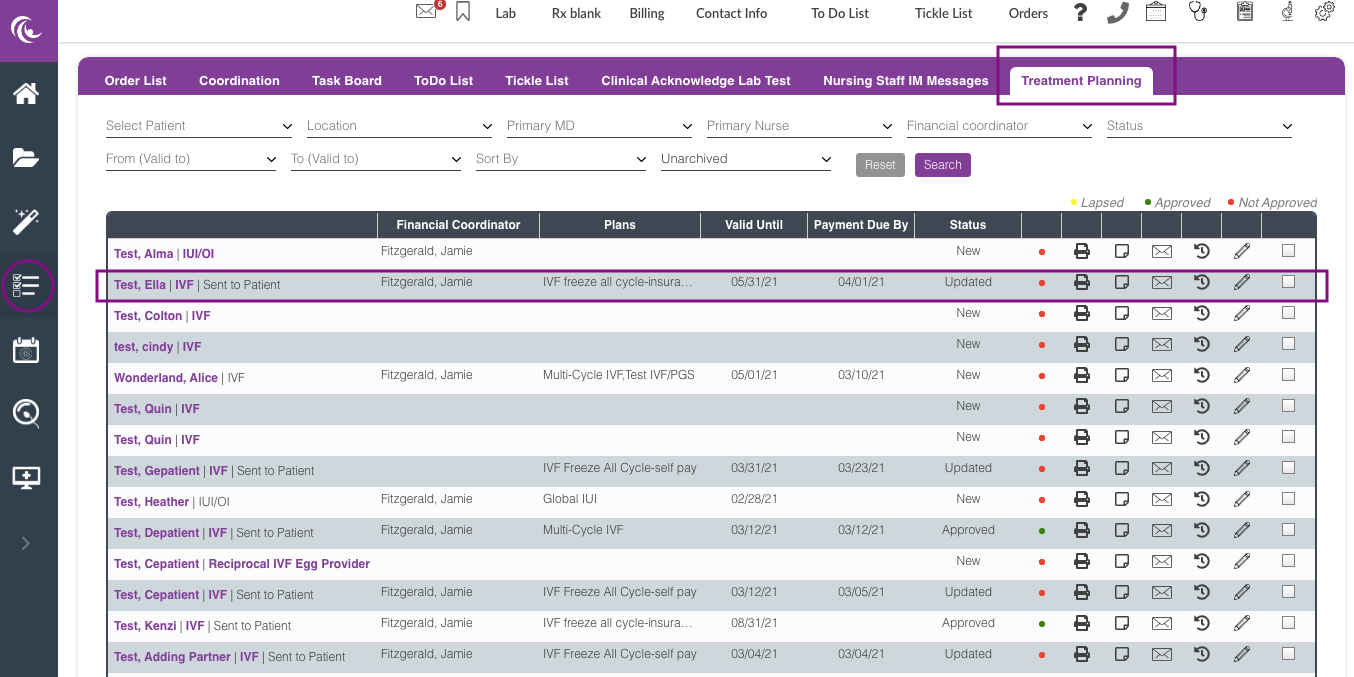
The Financial Coordinator added on the patient's Contact Info, will receive an IM Notification regarding the patient's treatment proposal, and will create the ART Treatment Expense.
Clicking on the View ART Treatment Estimate link will allow you to view the ART Treatment Expense information created by the financial coordinator once completed.
Please see ART Treatment Estimates.
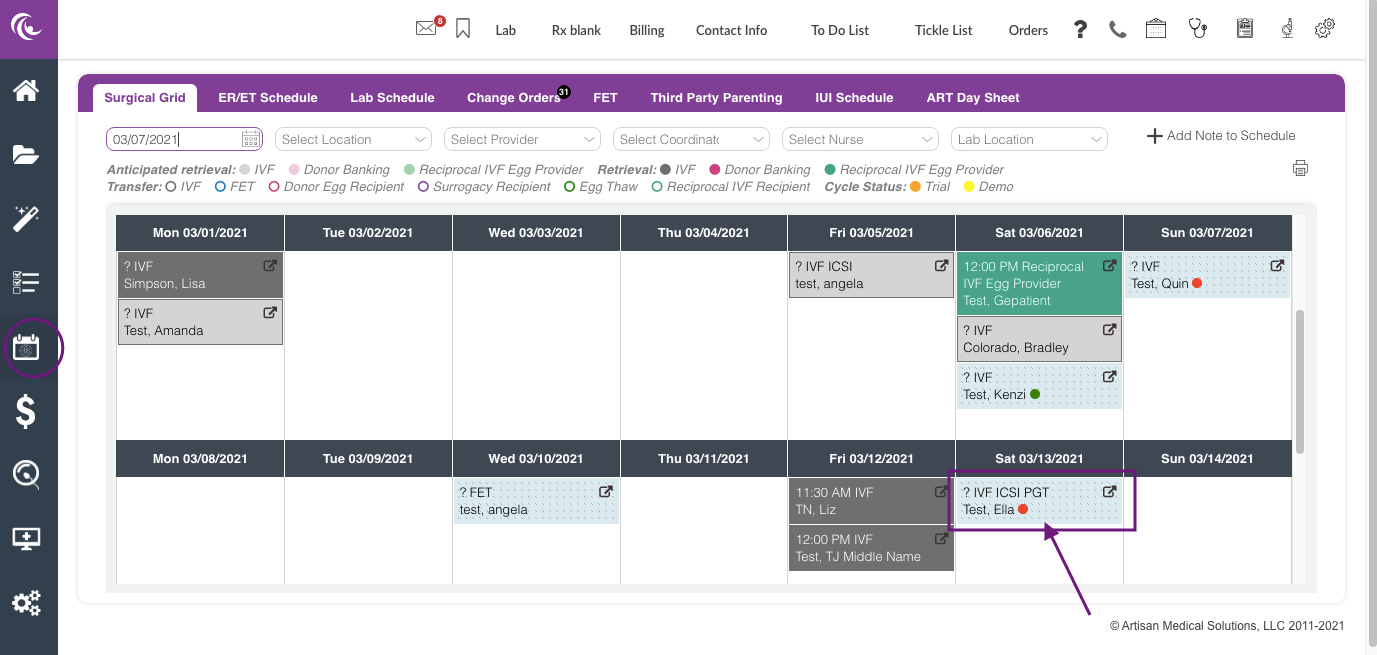
The Treatment Planning Calendar will show on the Surgical Grid in a stippled box with the cycle information and a red dot notification indicating that this is not a financially approved cycle.
- I did not see anywhere about the ability to click on the dots within the cycle to pull up statuses and write notes to the FC.
- Should Treatment Planning in the manual after the stim start is entered as this is meant to be prior to giving dates...etc
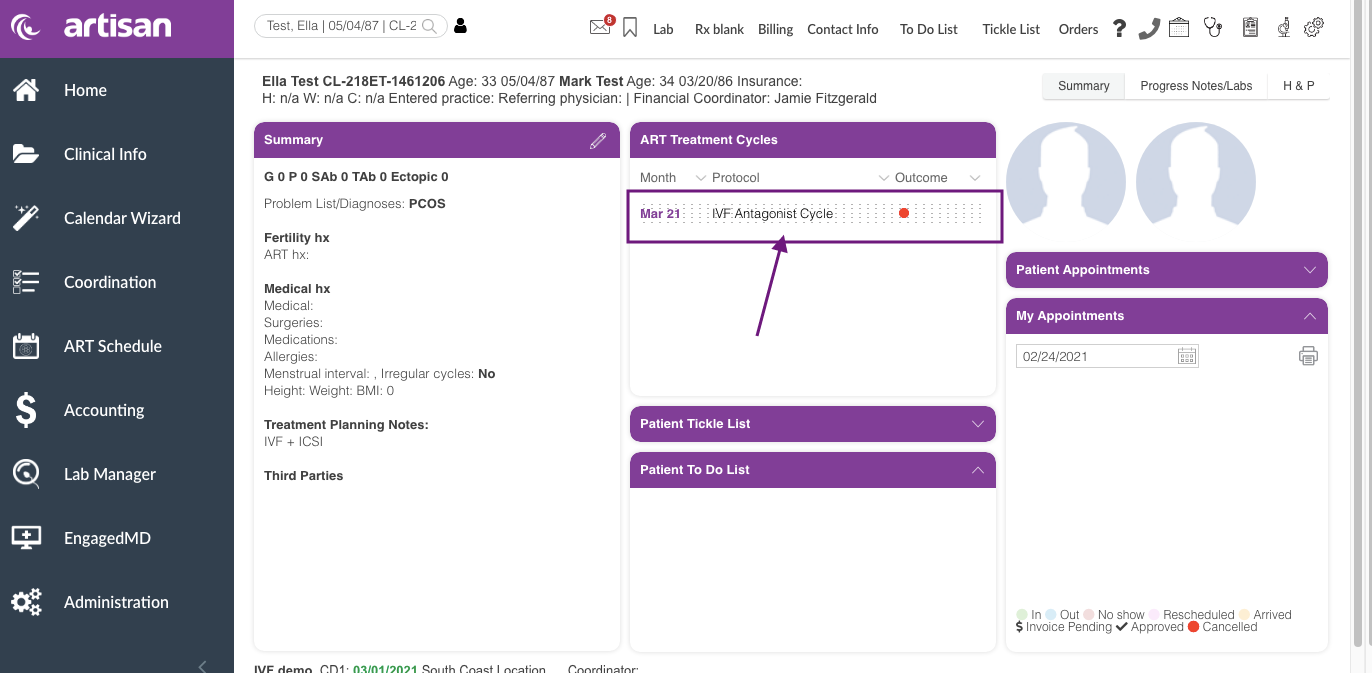
View from the patient's chart.
View from the Coordination Tools Treatment Planning tab.
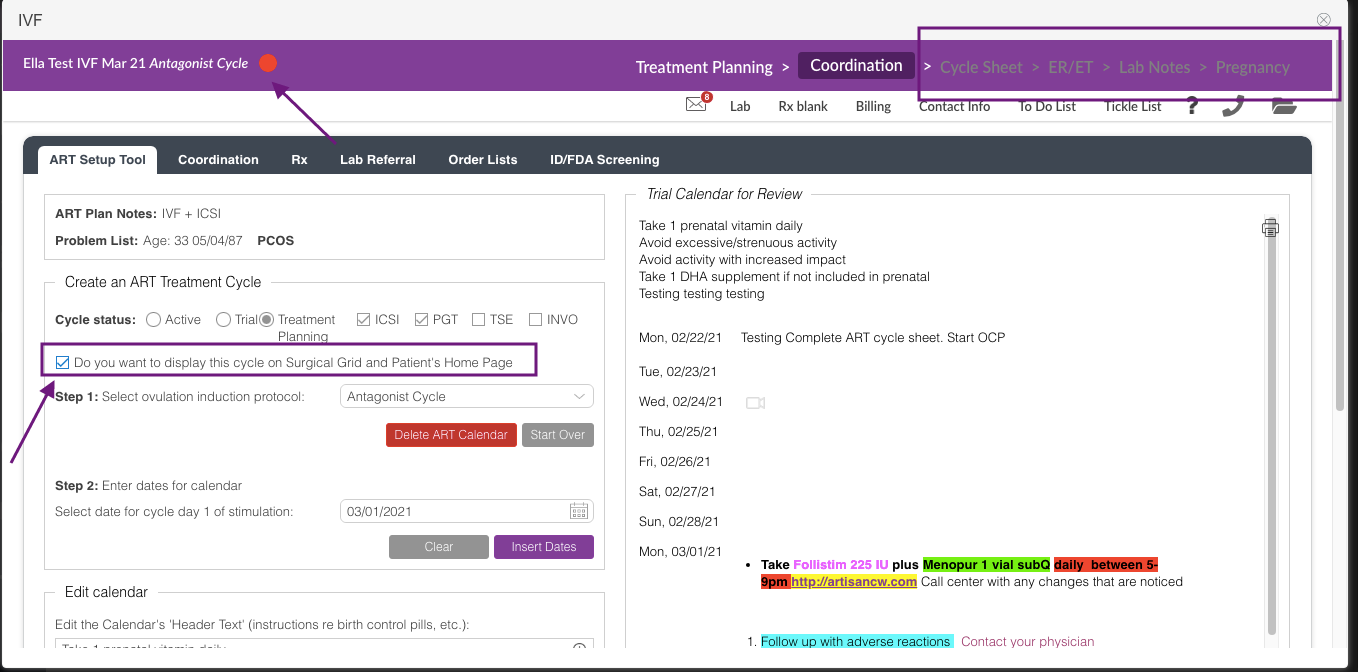
An option to not display the treatment planning cycles on the surgical grid and patient's home page is available on the Coordination tab by unchecking the box under the cycle status.
The red dot icon will also populate into the cycle once the ART treatment expense has been created for the patient. The rest of the cycle tabs will be inaccessible in a treatment planning cycle status.
Grid View/Calendar View and List View
In the Patient App, patients will receive their daily treatment instructions. In both Artisan and the Patient Portal, we have two printable views of the treatment calendar available, list view and grid view, which appears like a traditional calendar.
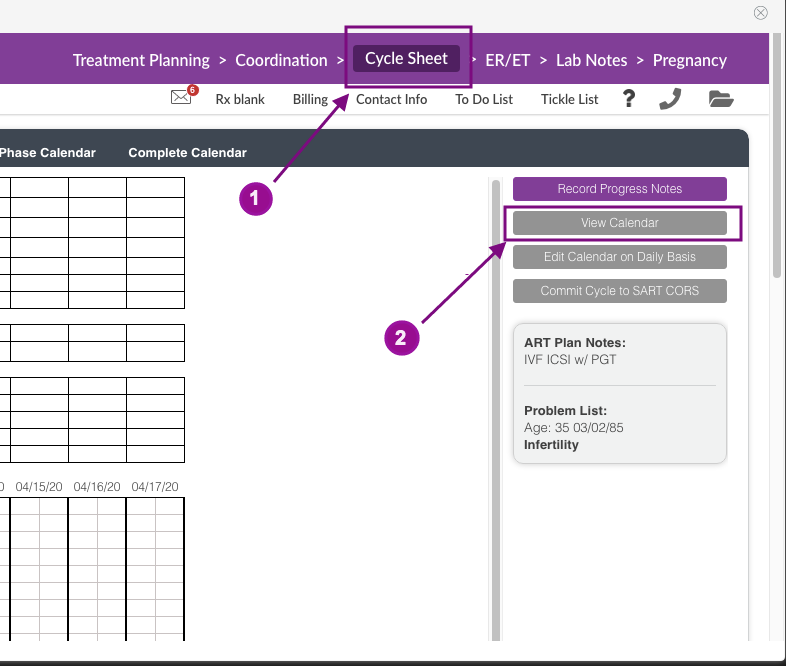
1. Click on the Cycle Sheet tab to access the View Calendar option.
2. Click on the View Calendar to open the patient calendar.
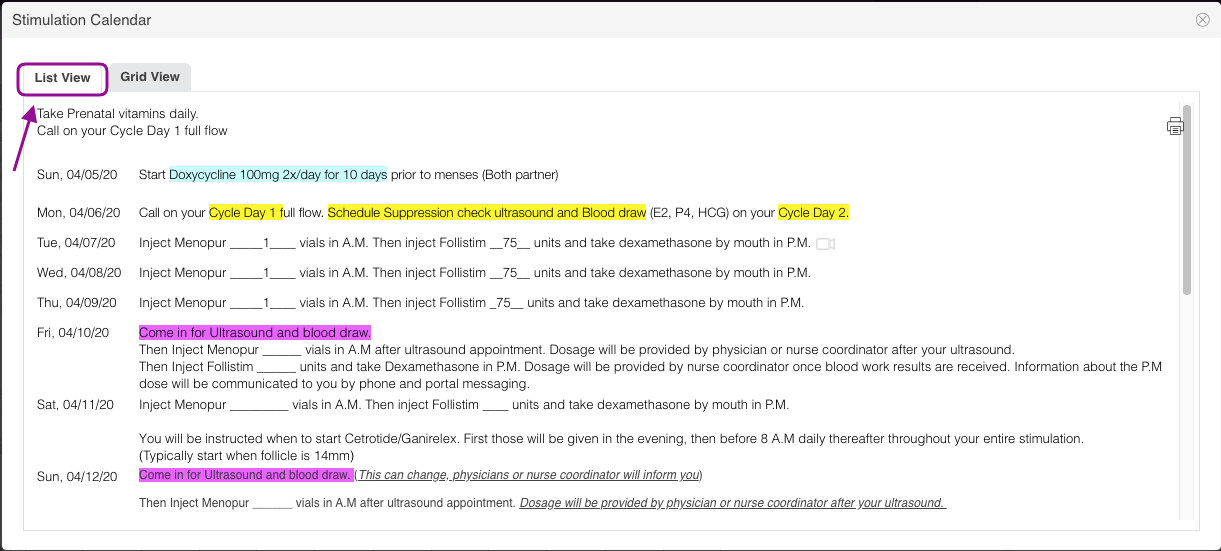
1. The patient's calendar can be seen in List View or
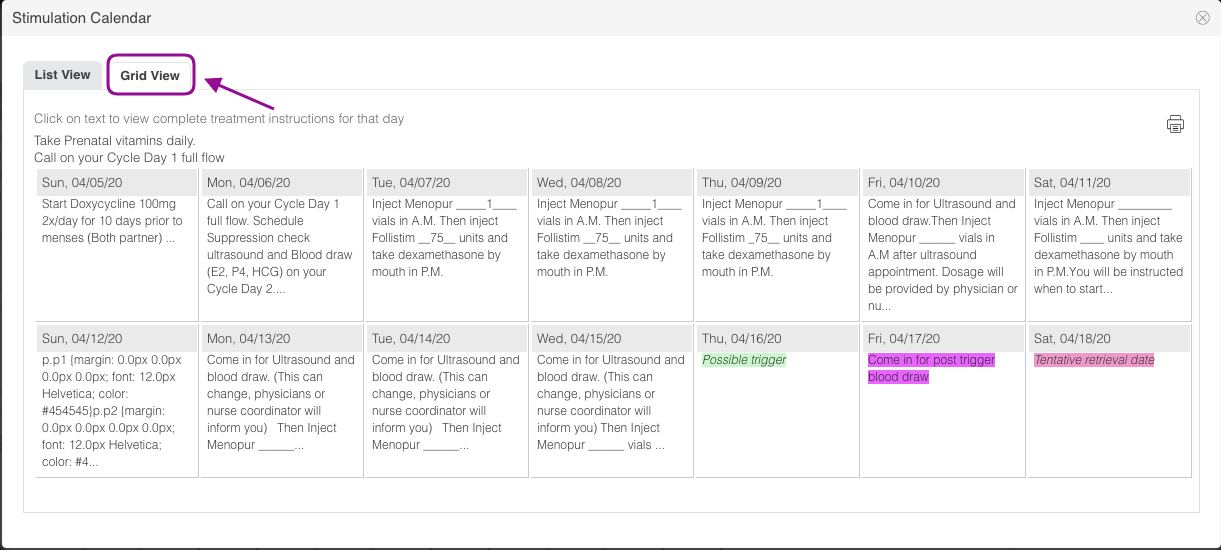
2. Grid View (calendar).
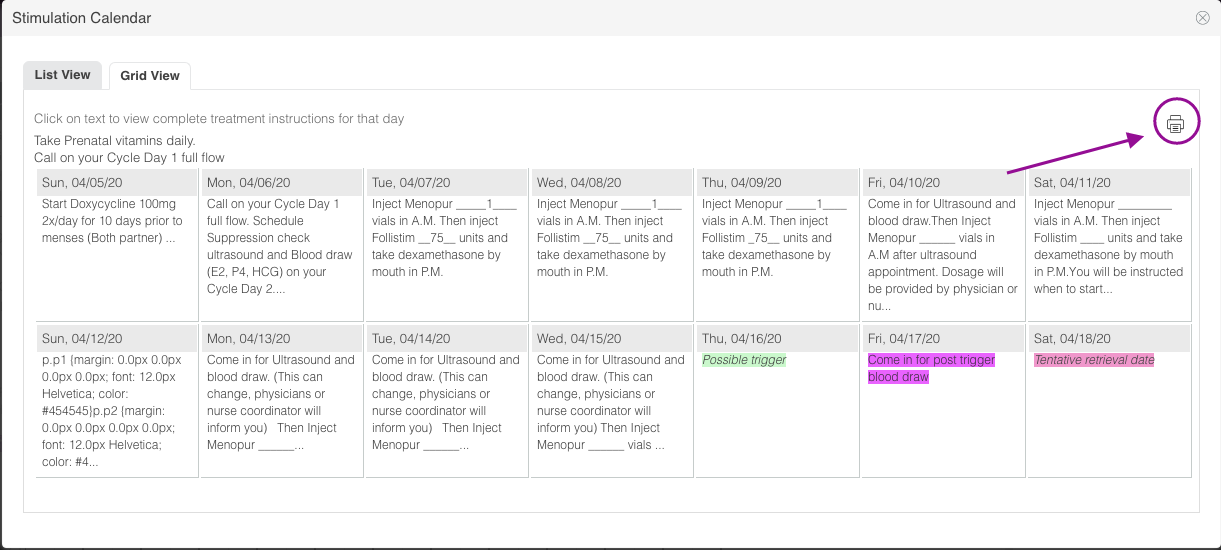
Click on the printer icon to send the patient their calendar.

1. Click on Send E-Mail to send the calendar to the Patient Portal/App.
2. Click on Print to print a copy to be given to the patient directly.
3. Click on Close to exit out of the calendar.
Editing/Sending Prescriptions from within the Treatment Calendar
Prescriptions can be edited and printed and/or sent electronically (if your clinic is set up to ePrescribe) from within the Calendar Wizard.
Templated prescriptions are created within a protocol template. They can then be edited per each patient's specific needs.

Click on the Rx tab to open the prescription field.

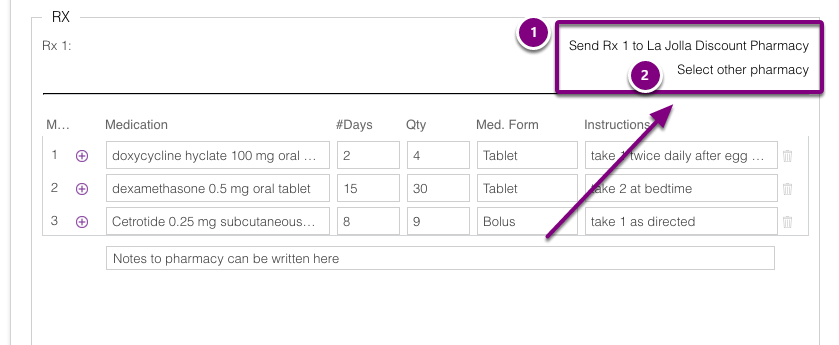
1. Click "Send Rx 1 to (Name of Pharmacy Here)" to send through the E-Prescribe Integration.
2. A different pharmacy may be selected by choosing Select other pharmacy.
3. Fill out the Prescription Manager section then click MDtoolbox Prescriptions to confirm and e-send the medications to the pharmacy.
Click here to learn more on How to use ePrescribing.

To start, either select something from your favorites list or select the Pharmacy Search tab.
1. A specific pharmacy name can be entered. It can also be filtered by city, state, or zip code if known. This is sometimes helpful if there are multiple pharmacies with the same name in different cities.
2. Checking the mail order pharmacy box will include mail order pharmacies to the list of pharmacies.
3. Once you have located a pharmacy that you frequently use, remember to click on the star button to add the pharmacy to your favorites list.
To select the pharmacy, click on the name. This will take you back to the RX where you will click on the word Send to submit the prescription.
Printing Prescriptions (No E-Prescribe)
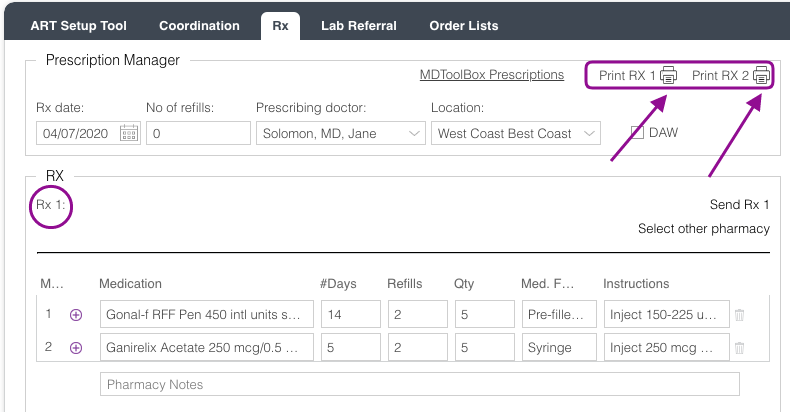
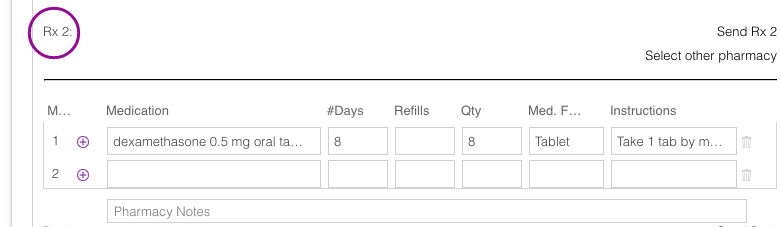
Select Print Rx 1 and/or Print Rx 2 to select the appropriate prescription(s) to be printed.

Click Print to give a paper copy of the prescription to the patient. Then hit close.
**All manuals are compliant with HIPPA regulations. No patient information has been released. All screenshots above were taken from a test clinic with fake patient information.
Artisan Support
Comments