The tools in Coordination allow the practice to view a patient's status as they prepare to do their treatment cycle. This is an organized way to determine if a patient has completed the steps necessary before proceeding with their cycle.
Navigation

Click on the Coordination icon in the control panel to launch the coordination tools.

There are 6 sections within Coordination that can be utilized to help manage your IVF Coordination.
1. Order List
2. Coordination
3. Task Board
4. To Do List
5. Tickle List
6. Clinical Acknowledge Lab Test
Order List

In this example, we filtered by Staff department and Staff name
All orders that have been created within Artisan will appear on the the Order list tab in Coordination Tool. You will be able to filter by Department, Staff name, Patient and Show All. If you only want to see the Order Lists assigned to you, you will select your staff category and your name under staff name.

Click on the patient's name to view the order list.

It will open up the Orders to be viewed. You are unable to make any changes from this window.

Click on the box to sign off on an order list.

It will require you to enter your Digital Signature confirming that the order list has been completed.

Once it has been digitally signed, it will fall off on the order list in Coordination tool.
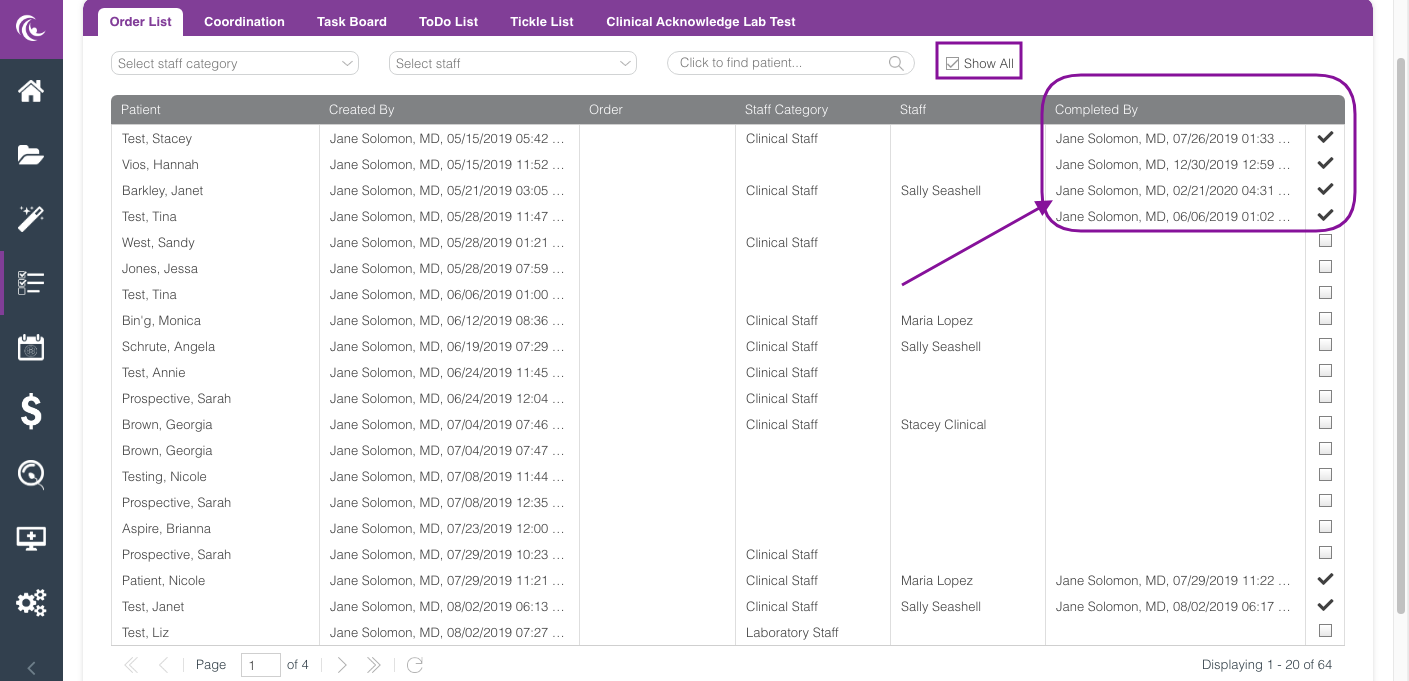
Using the Show All filter, you can access all orders that have been created within your practice. The completed orders will show the staff 's digital signature, time-stamped, and a checkmark icon right next to it.
Note: The completed order list will also be available to view and manage within the patient's chart.
Coordination
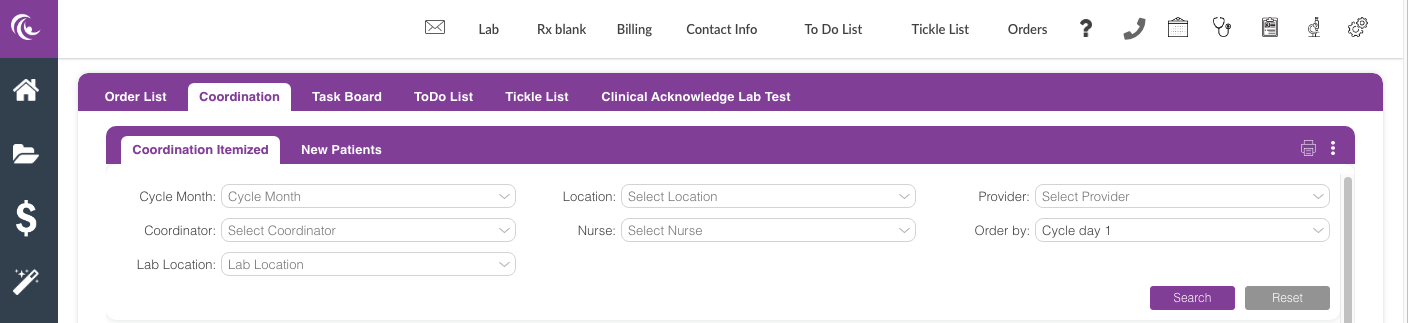
Within the Coordination tab, patients can be filtered by cycle month, Coordinator, Lab Location, Location, Nurse, Provider, or Order by: Cycle day 1 or Name. Click the 3 dots in the top right corner of the purple bar to open the search filters.
In this example, we filtered by Cycle Month.
The Coordination Itemized tab is a great snapshot of the patients that will be starting a treatment cycle in a given month that you are interested in following up with.
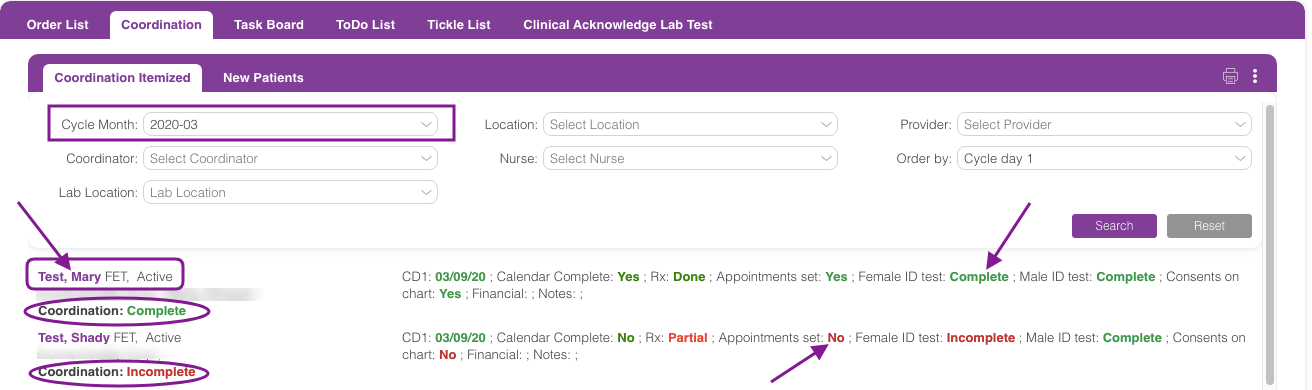
For example, you can see if their coordination has been marked complete or still need to be completed. These items are pulling from the coordination tab checklist within the patient's treatment cycle.
Items that have been completed are green and if they have not been completed, they will be red.
Clicking on the patients name within the coordination tab will bring you directly to their current treatment cycle.
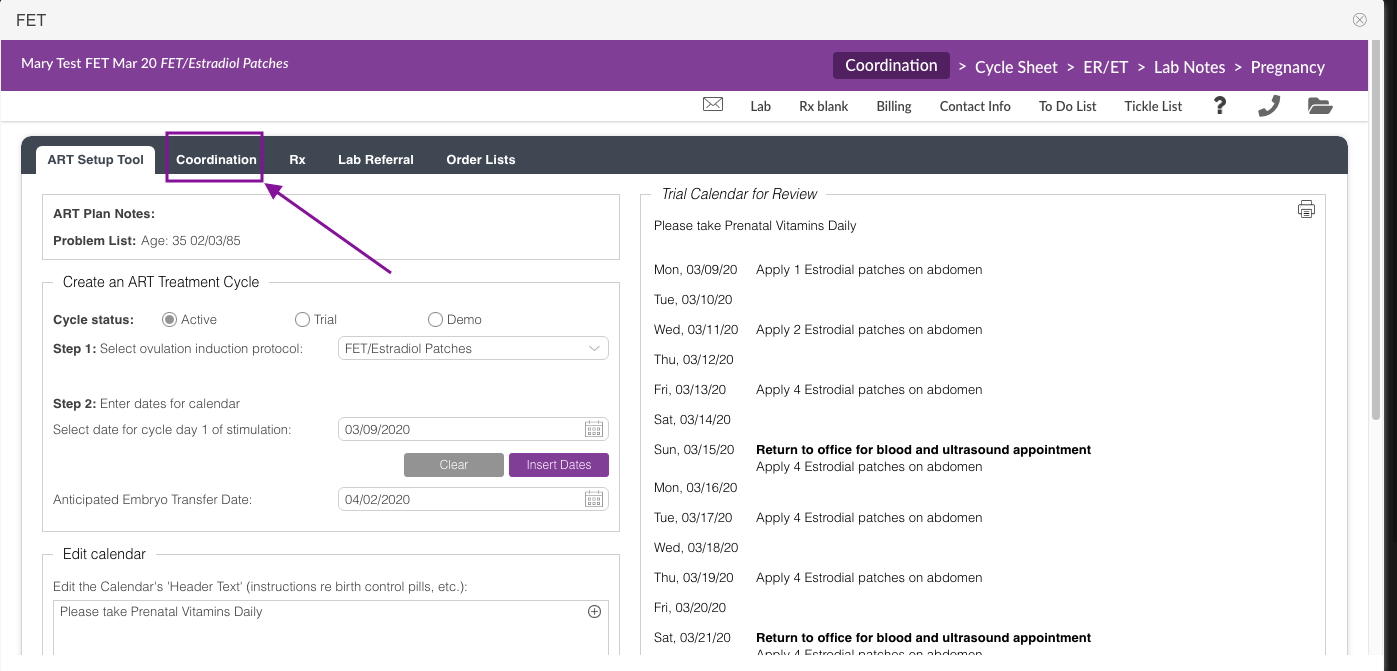
Click Coordination to open up the coordination checklist.
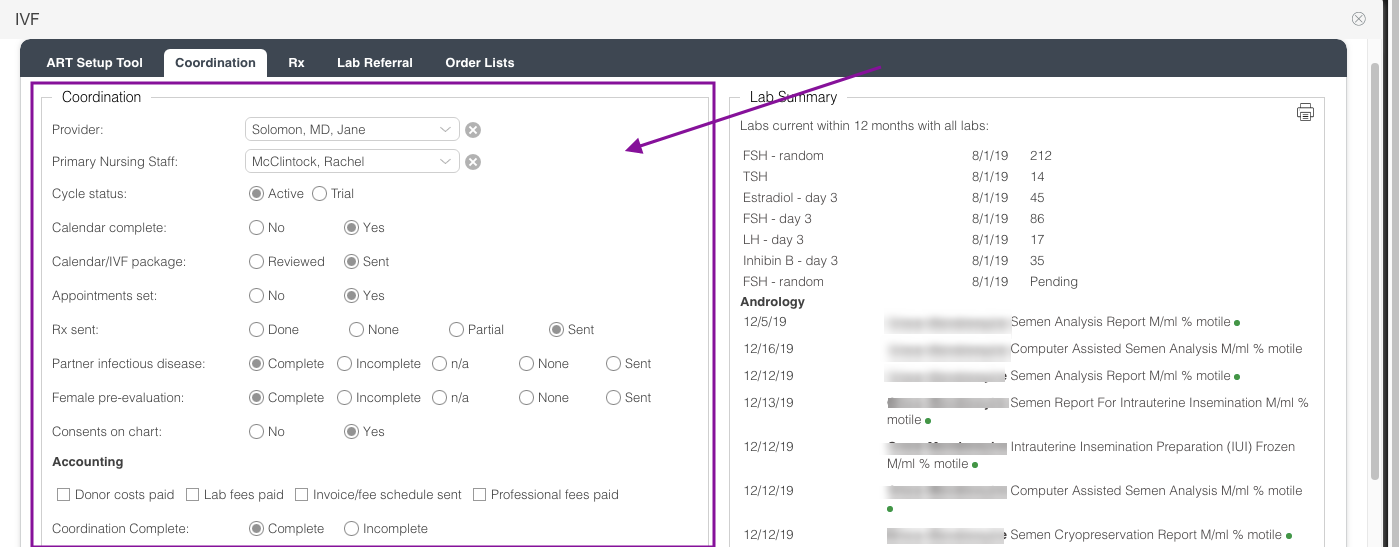
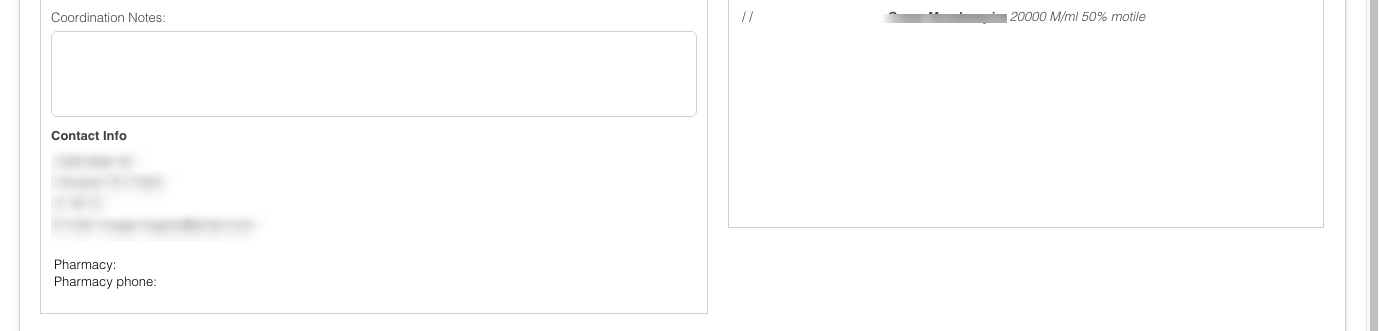
Under the coordination tab is the hardcoded checklist built within Artisan. Marking the items complete/incomplete will update the coordination itemized section within the coordination tools. To the right side of the screen is the patient and partner's (if applicable) lab summary for reference.
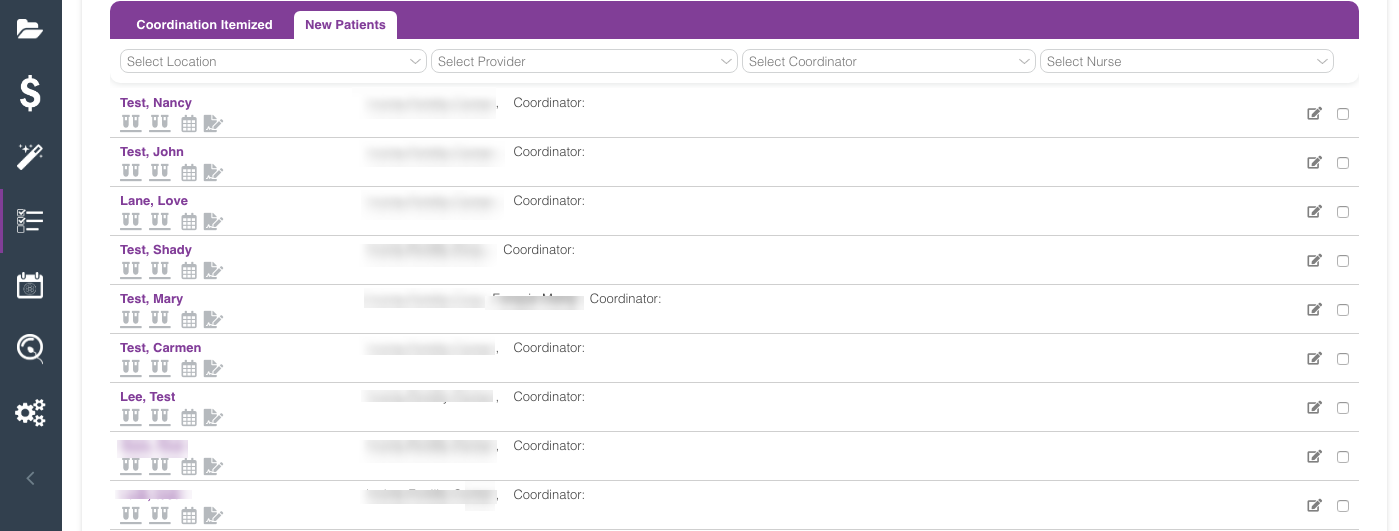
The New Patients tab is a tool that can be used to manage a new patient's coordination progress.

1. There are 4 icons under the new patient's name.
- Test tube icon - indicates patient testing
- Test tube icon - indicates partner testing
- Calendar icon - indicates Treatment consult
- Paper pencil icon - indicates Treatment plan
Click on any of the icons.
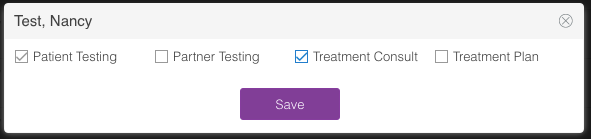
It will open up a dialog box where you can check off items that has been completed by the new patient. Select the appropriate box that has been completed then click save.

The icons that has been selected will turn green indicating that those items have been completed.
2. To remove a patient on the New patient's list, click the box icon.
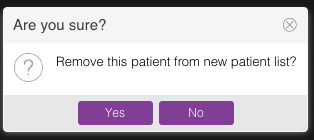
Click Yes to proceed.

3. Click on the paper and pencil icon.
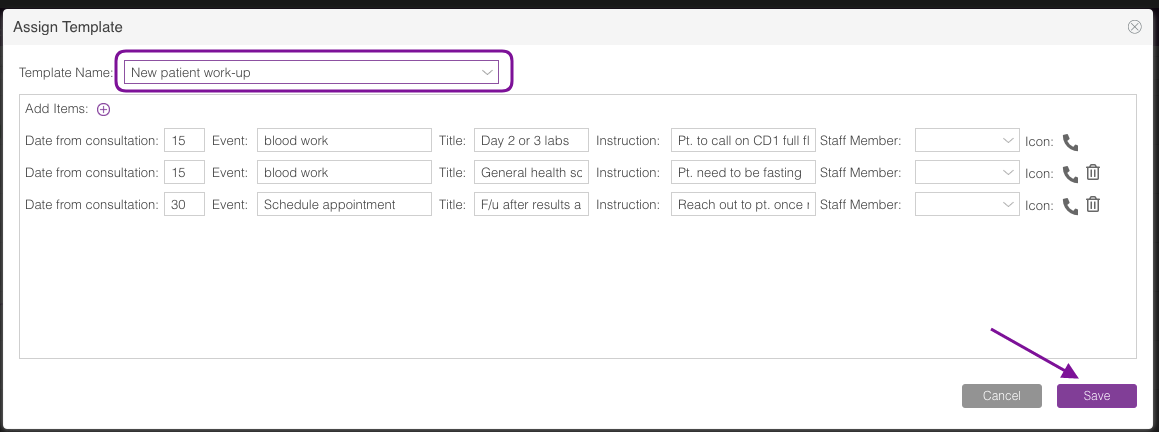
The Assign Template dialog box will populate where you can add templates to further manage the new patient's next steps. In the above example we have selected the New patient work-up template. Click the save button.
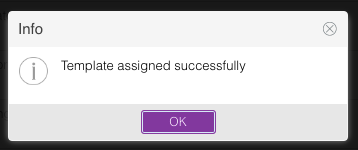
Click the Ok button.
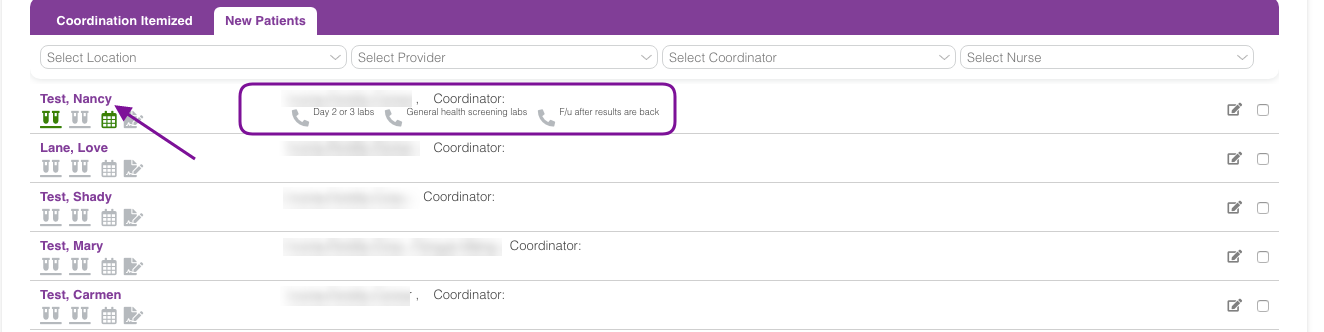
The assigned template will populate within the corresponding New patient template.
Clicking on the patient's name will open up the chart.
See New Patient Coordination Templates Manual to learn how to create the templates.
Task board

The Task Board encompasses:
1. New Patient
2. ART Coordination: In Progress
3. ART Coordination: Complete

1. In the New Patient task board, selecting the 3 dots on each section will give you the ability to use filters to sort through patients. Under New Patient, the location and the provider can be chosen to filter to specific patients.

In the above example, we filtered by location.
This column will list all New patients in your practice. Within the patient's name, a consultation date will appear once this information has been updated in the H&P.
Click on the patient's name.

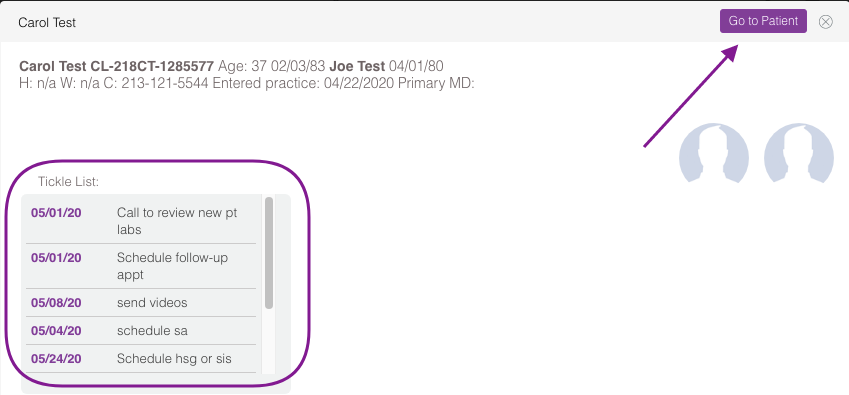
The New patient demographic information will be noted on top of the dialog box.
1. All Tickle list items that have been created for this patient will populate here.
2. An option to add notes is available to help with the New patient coordination. Click the Add Note button to create one.
3. A check box to complete pending items
4. An option to select priorities from high, medium to low.
5. Click the Go to Patient tab to open up the patients chart.
The Tickle list section will consist of the due date and the Tickle list name. To manage these items click the go to patient button.
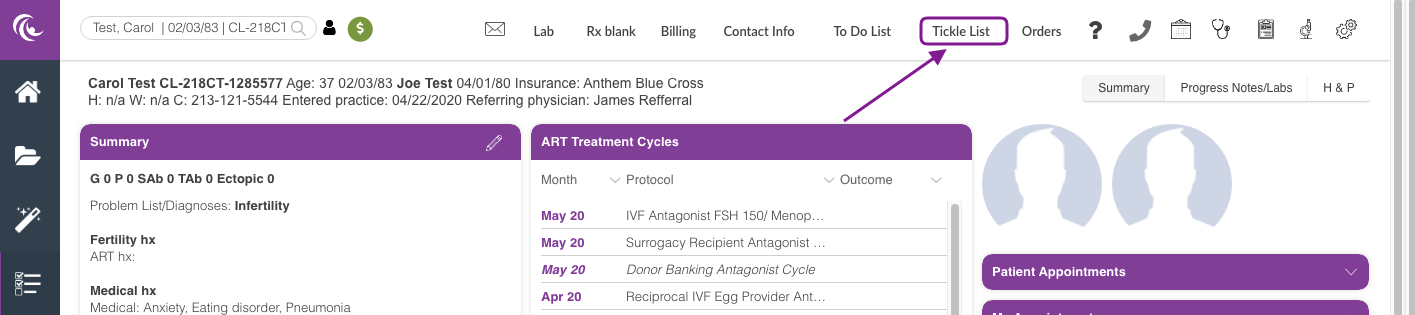
From within the patient's chart, click Tickle List.
Click here to learn how to manage Tickle list items.
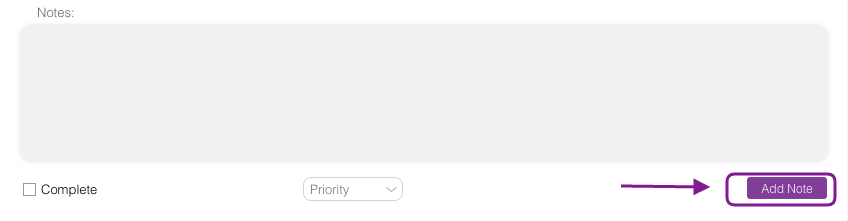
To add a note, click the Add Note button.

Enter the notes in the free text box then click Add.
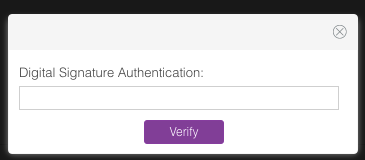
Type in your Digital signature.
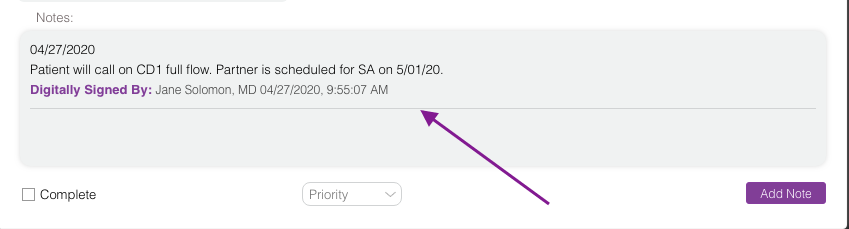
The note will live in the Notes section with the date, digital signature, and time-stamp of when the note was created. You can create multiple notes as needed.
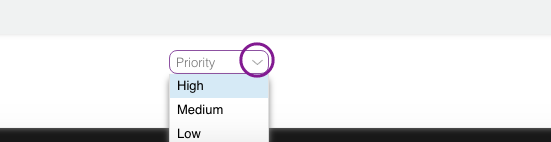
To mark the patient's priority level, click the drop down icon and select the appropriate level from the drop down list.
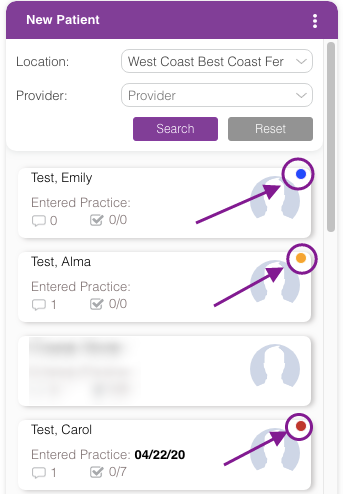
Marking the patients with different priority levels will produce a colored dot icon on top of the patient's image.
- High-level priority - red dot icon
- Medium level priority - yellow dot icon
- Low-level priority - blue dot icon
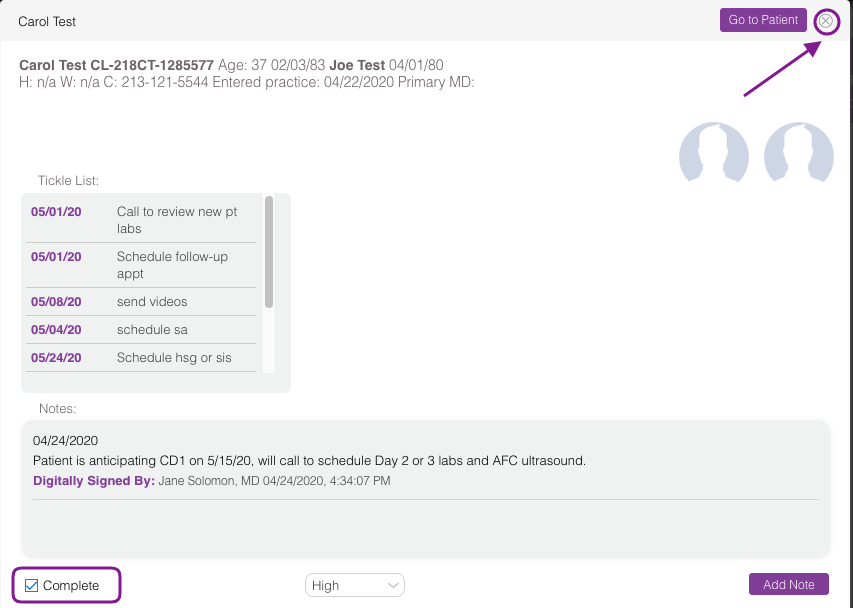
To mark a New patient coordination as complete, click the Complete box then click the x icon. The patient will fall off on the New patient Task Board list.
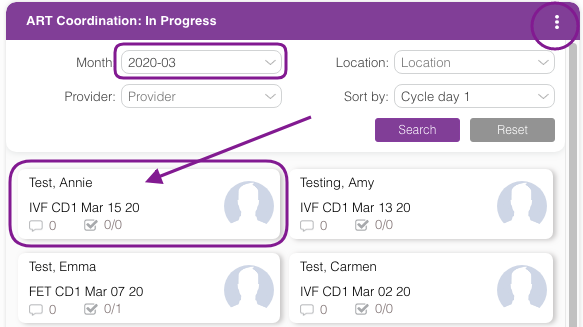
2. The ART Coordination: In Progress, track patients that have ART cycles created within the calendar wizard but have pending completion of coordination (in the cycle) items before starting stim medications.
You will be able to filter by month, provider, location or sort by: (Cycle day 1, or name) can be chosen to filter to specific patients. Click the 3 dots in the top right corner of the purple bar to pull up the filtering fields. In the above example, we filtered by month. Click on the patient's name that you wish to manage.
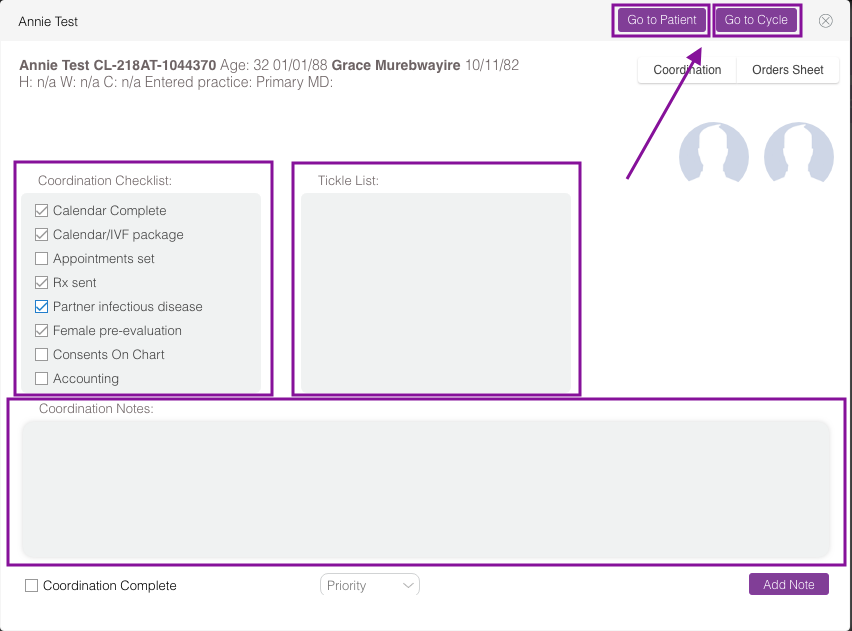
Within ART Coordination: In Progress, there is the coordination checklist that can be edited, the tickle list, and Coordination Notes. Go To Patient or Go to Surrogate (if there is a linked 3rd party) may be clicked to open up the appropriate chart. Go to Cycle may be clicked to open up the patient's current cycle.
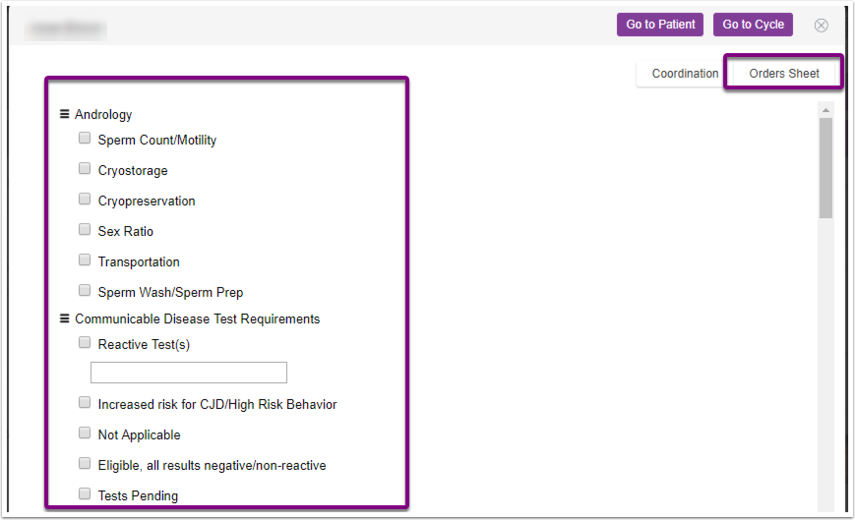
Click on the Order Sheet to open up the orders page, this will allow you to see orders that have been placed for the patient's current treatment cycle. Click on the Coordination tab to get back to the previous page.
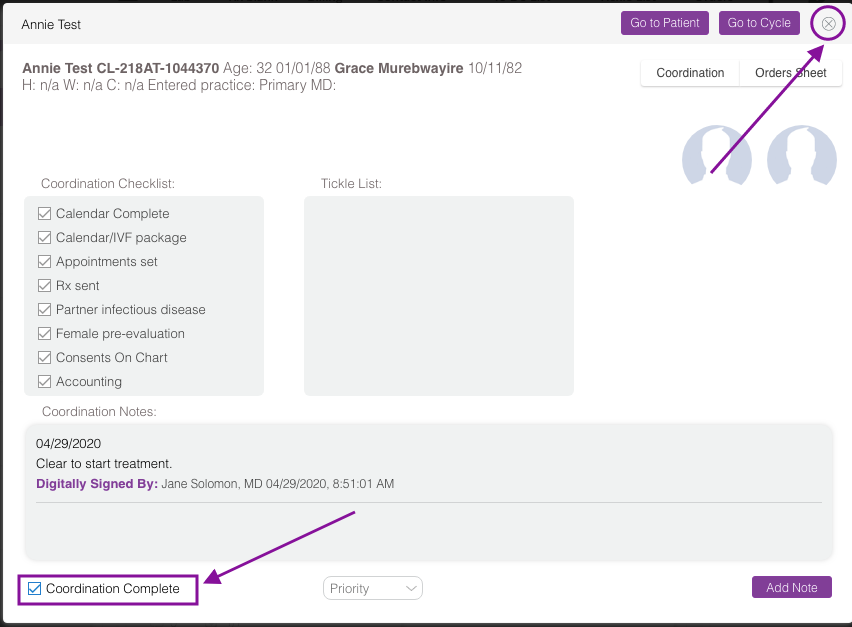
Once the ART coordination: In Progress has been completed and the patient is ready to begin treatment, mark the coordination complete box then "x" out of the screen.
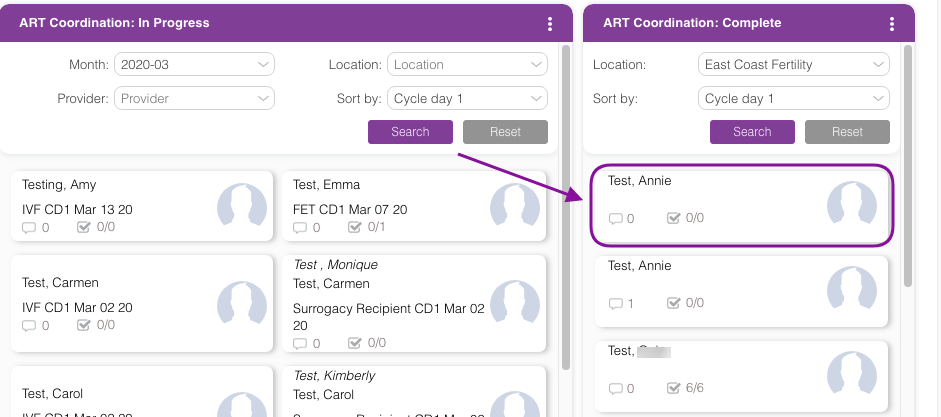
The patient will fall off the ART Coordination: In Progress list and will then move to the ART Coordination: Complete task board.

3. The ART Coordination: Complete task board is used for patients who have completed their ART cycle coordination and are currently in a treatment cycle.
Select the location and Sort by: (Cycle day 1 or name) to filter to specific patients. To open the filter fields, click on the 3 dots in the top right corner of the purple bar. On the task board, click on the patient's name.
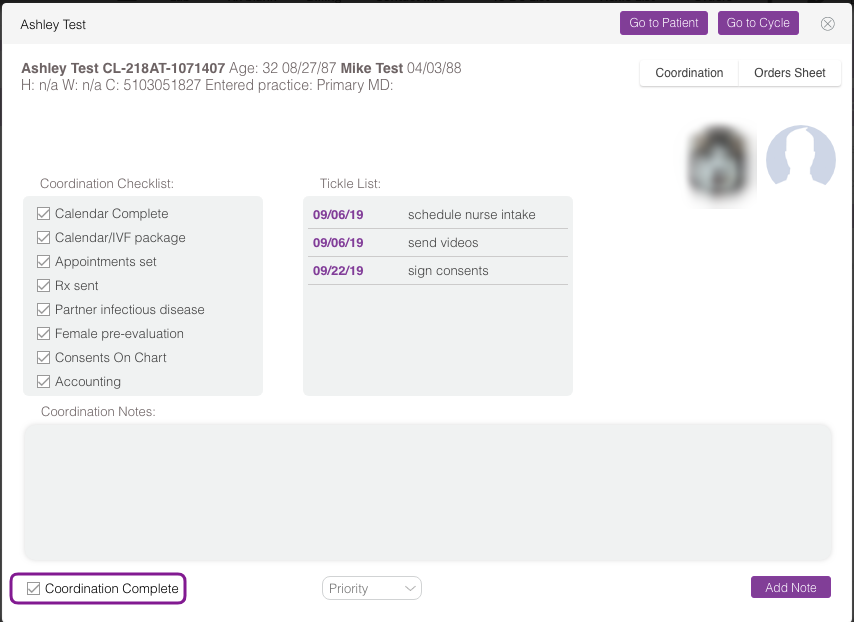
Within the ART Coordination: Complete, the Coordination Checklist, Tickle List, Coordination Notes can be seen. Go To Patient or Go to Surrogate (if there is a linked 3rd party) may be clicked to open up the appropriate chart.
To Do List
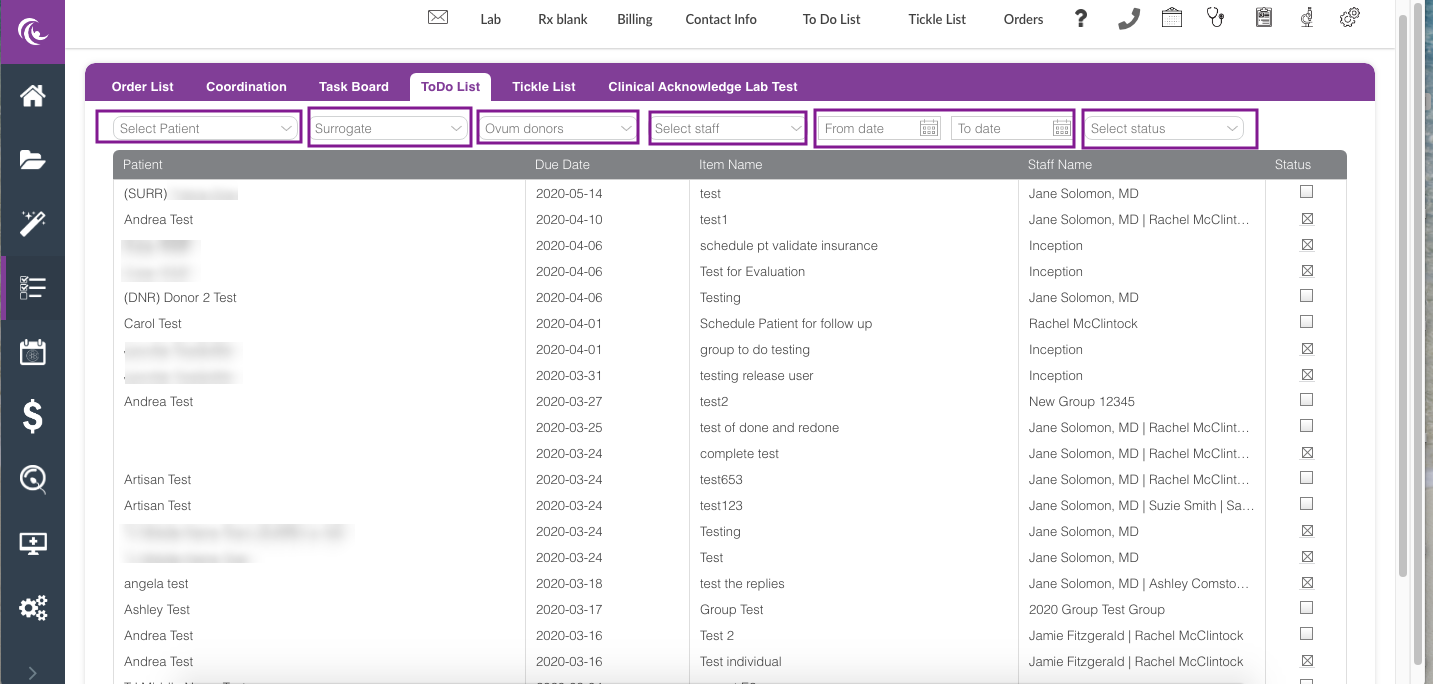
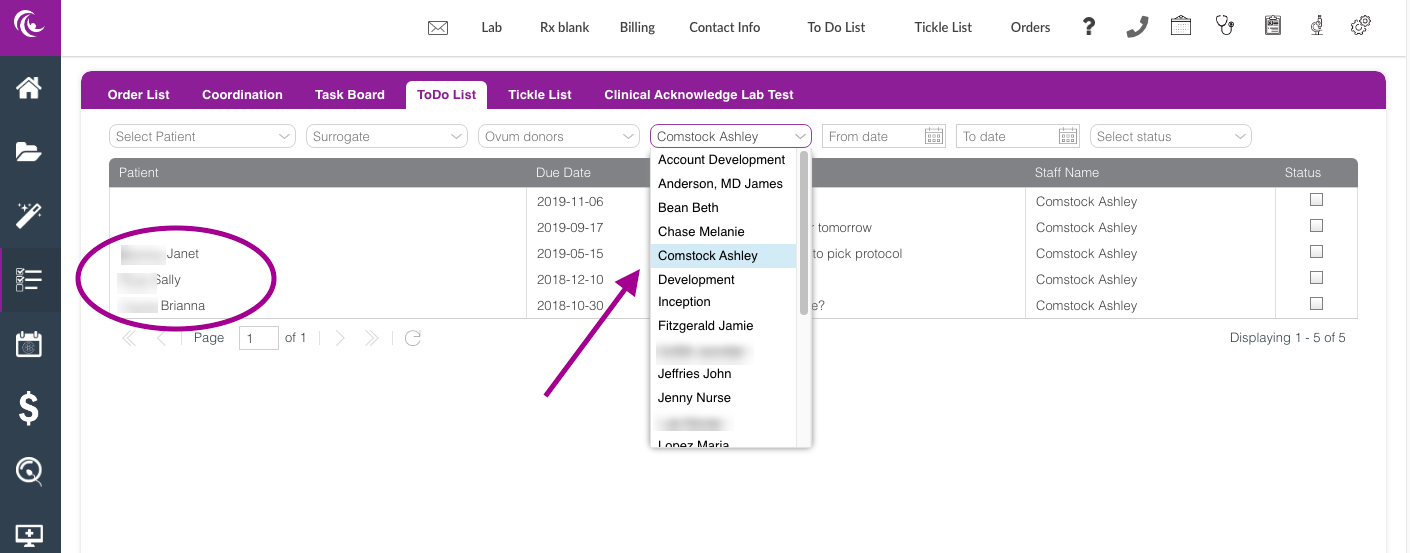
The To Do List tab allows you to see and manage items that have been assigned to staff either through a patient chart or directly to staff outside of a patient's chart. They can be filtered by patient's name, surrogate, donors, staff name, date range, or status.
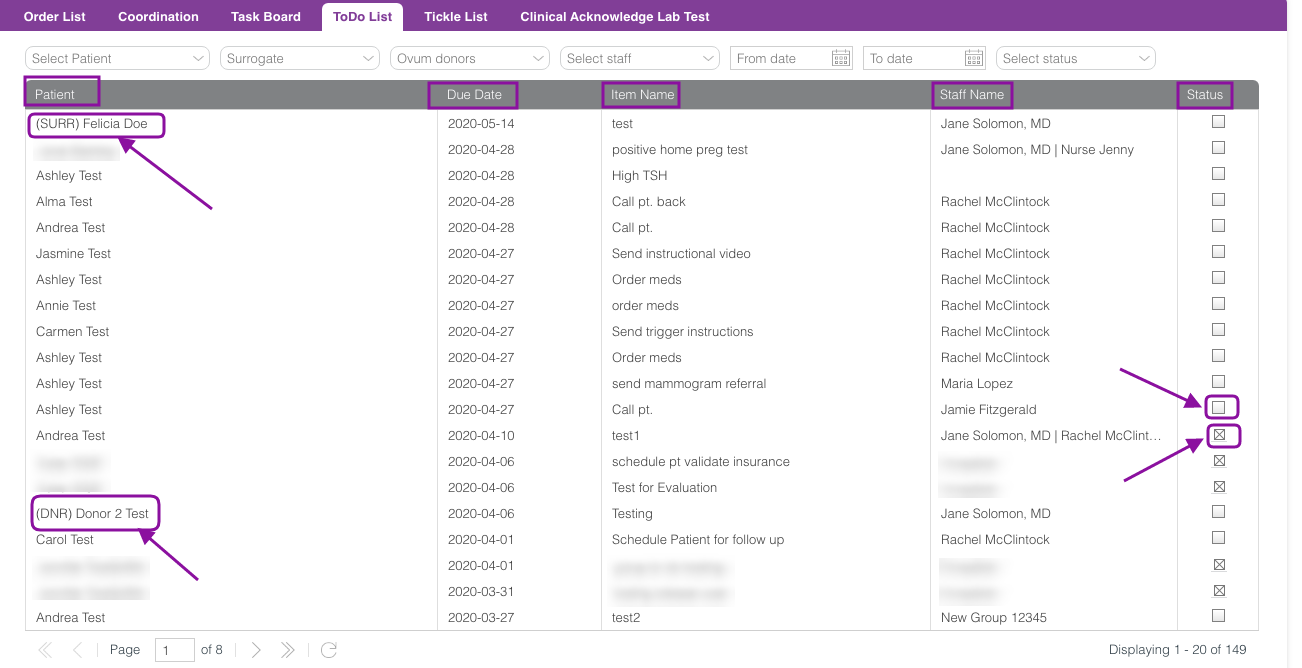
The patient column will consist of the patient, surrogate, and donor's name. Surrogates will be indicated with "SURR" and Donors will have "DNR" next to their names.
The Due Date column will display dates of when the To Do item should be completed. The Item Name will provide information regarding the task and the Staff name column will list the responsible staff information.
The last column will display the status of the To Do with the boxes icon. Unmarked boxes indicate that the To Do is incomplete and the boxes that have been marked with an "x" indicate that the item has been completed.
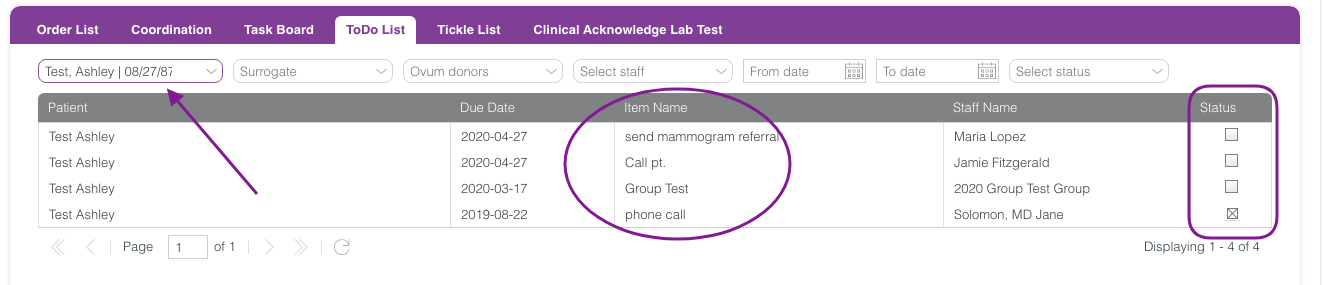
To Do List filtered by patient name: You are able to view the item name and the status of the To Do.
To Do List filtered by staff name: The corresponding patients who have items on a To Do List assigned to that specific staff member will be listed.
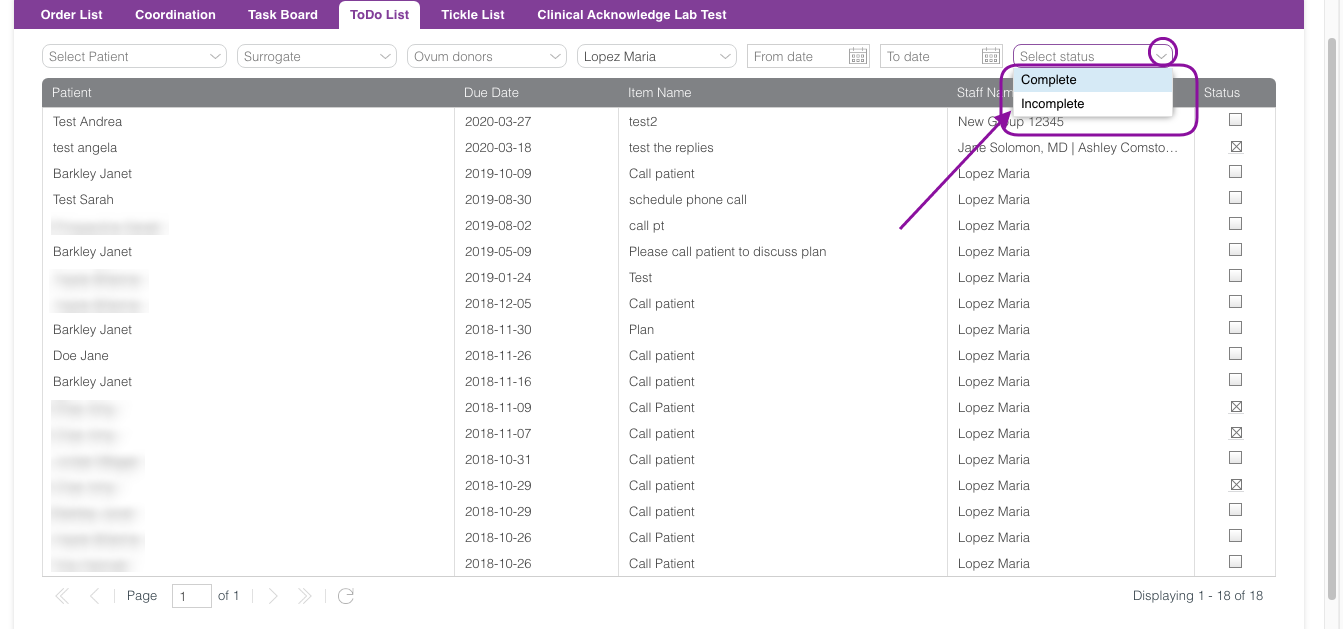
To Do List filtered by status: Click the drop down icon then select the status (complete/incomplete) that you wish to filter.
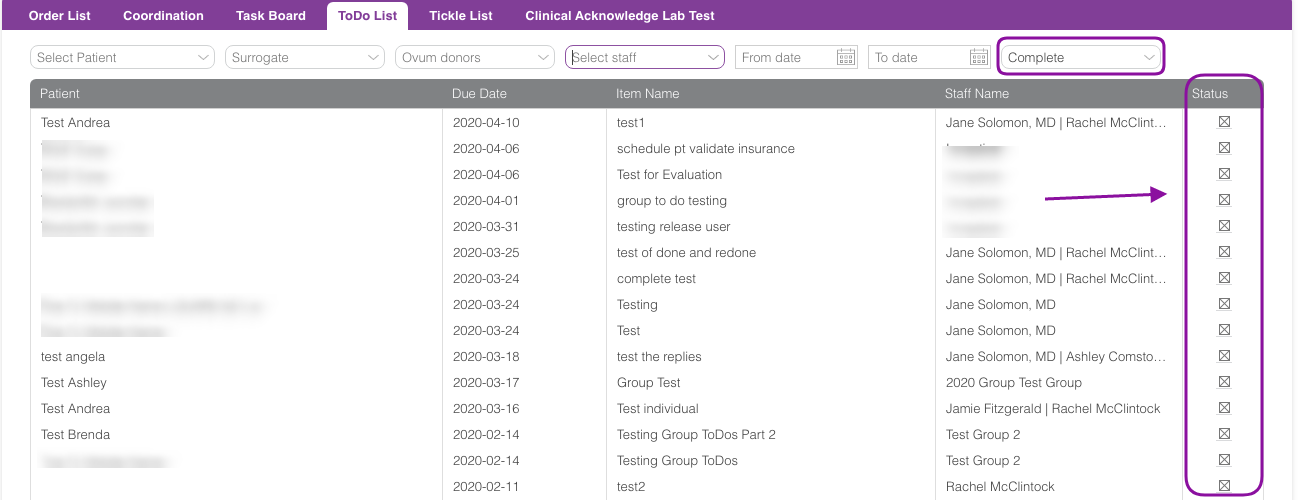
The above example is filtered by complete status.
The status column will display all boxes are marked with an "x" indicating that the To-do has been completed.
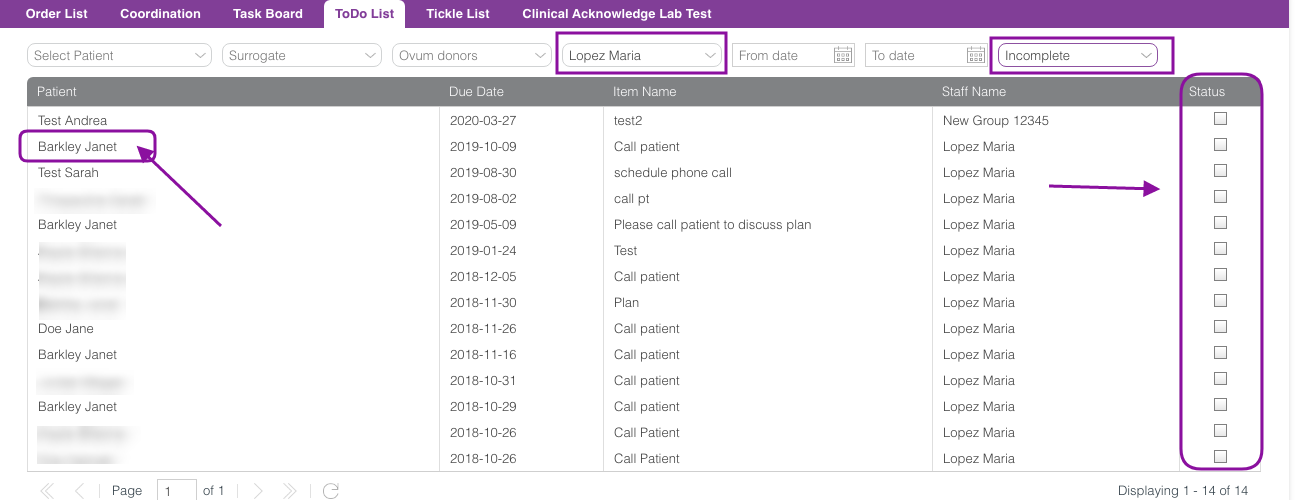
In this example, we filtered by staff and Incomplete Status
Click on the Patient's name to manage a To do Item.

This window will pop up to allow you to view the To Do item and mark it as complete or respond to the Author. See How to use To do List for more information.
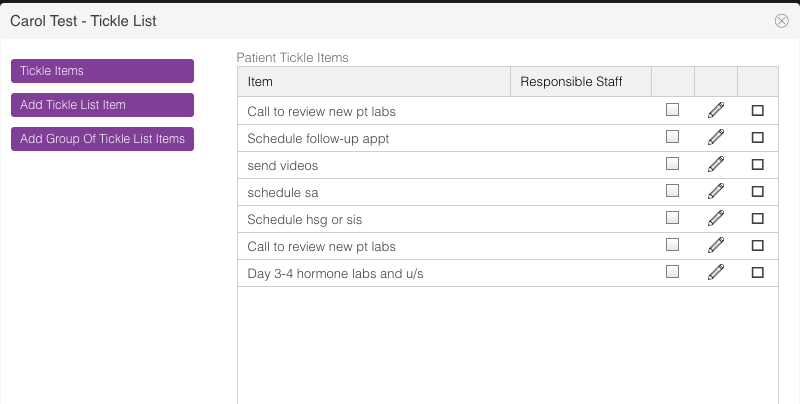
Tickle List
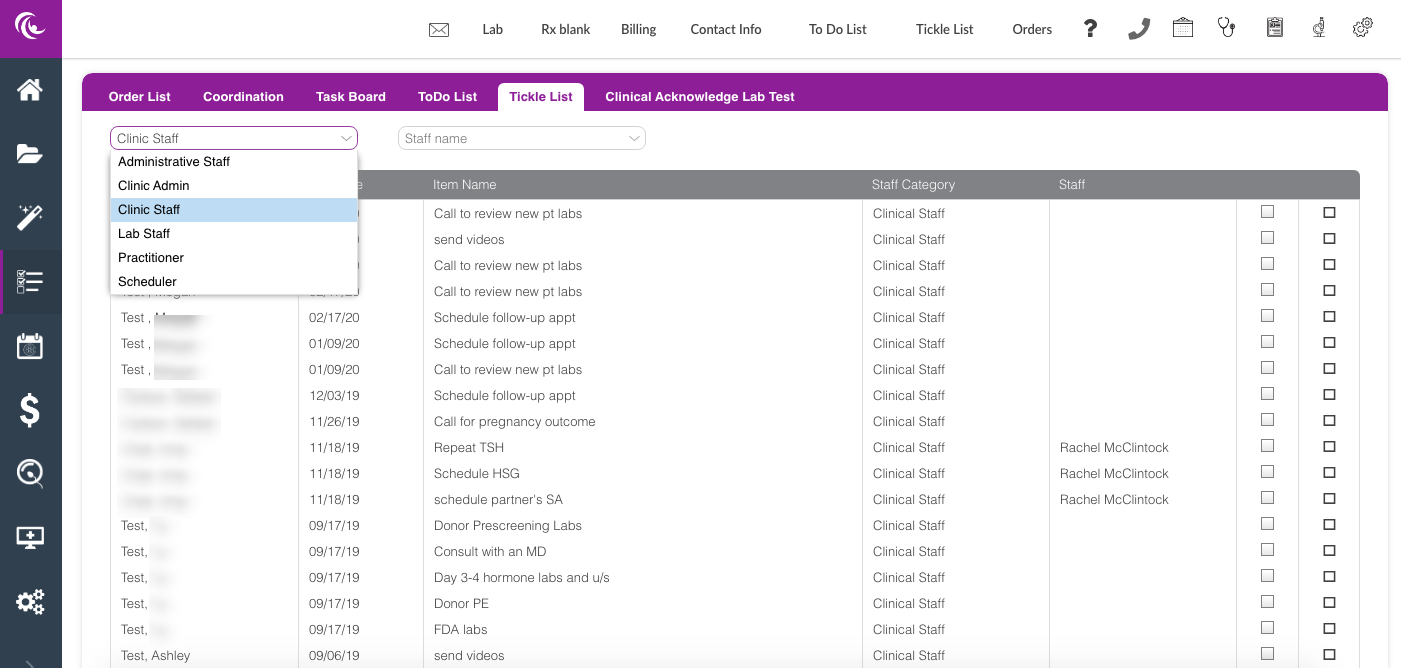
The Tickle List tab allows you to see patients that have current tickle list items. This list can be sorted by Staff Category and Staff Name.
In the above example we filtered by Clinic staff
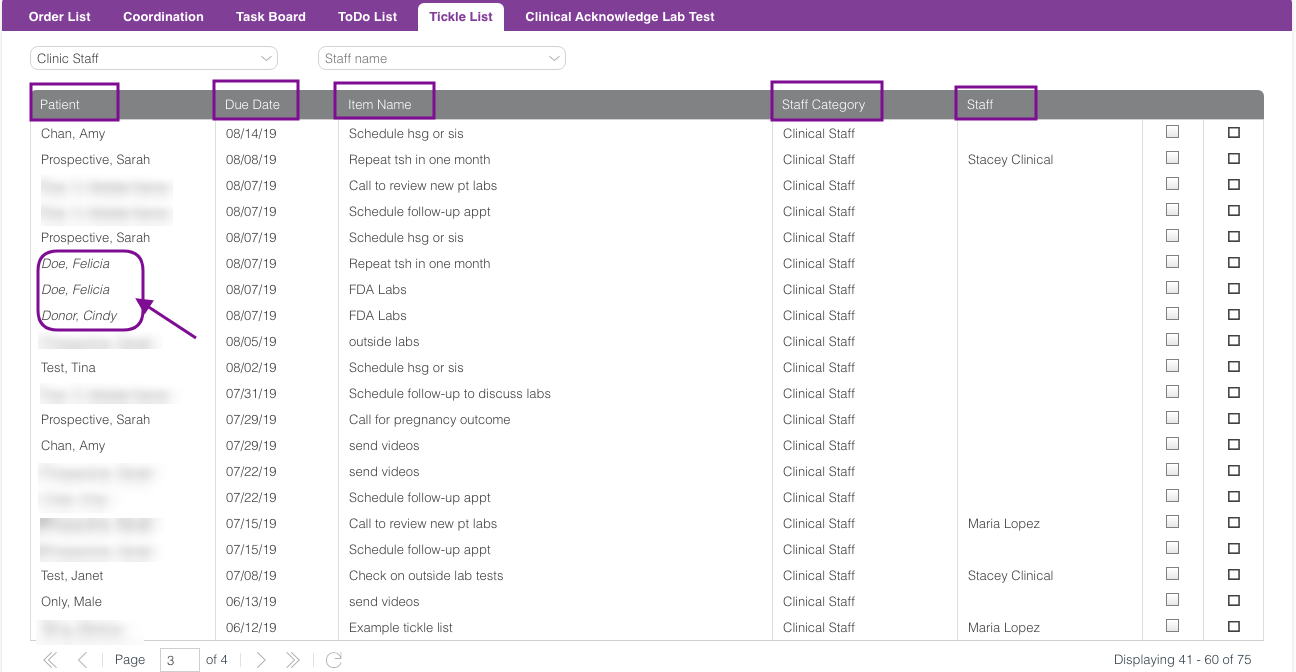
The tickle list tab will display columns of the patient name, surrogate, and the donor's name (will appear in italics), due date, item name, staff category, staff name. You are unable to manage the tickle list item from this section. To learn how to manage a tickle list click here.
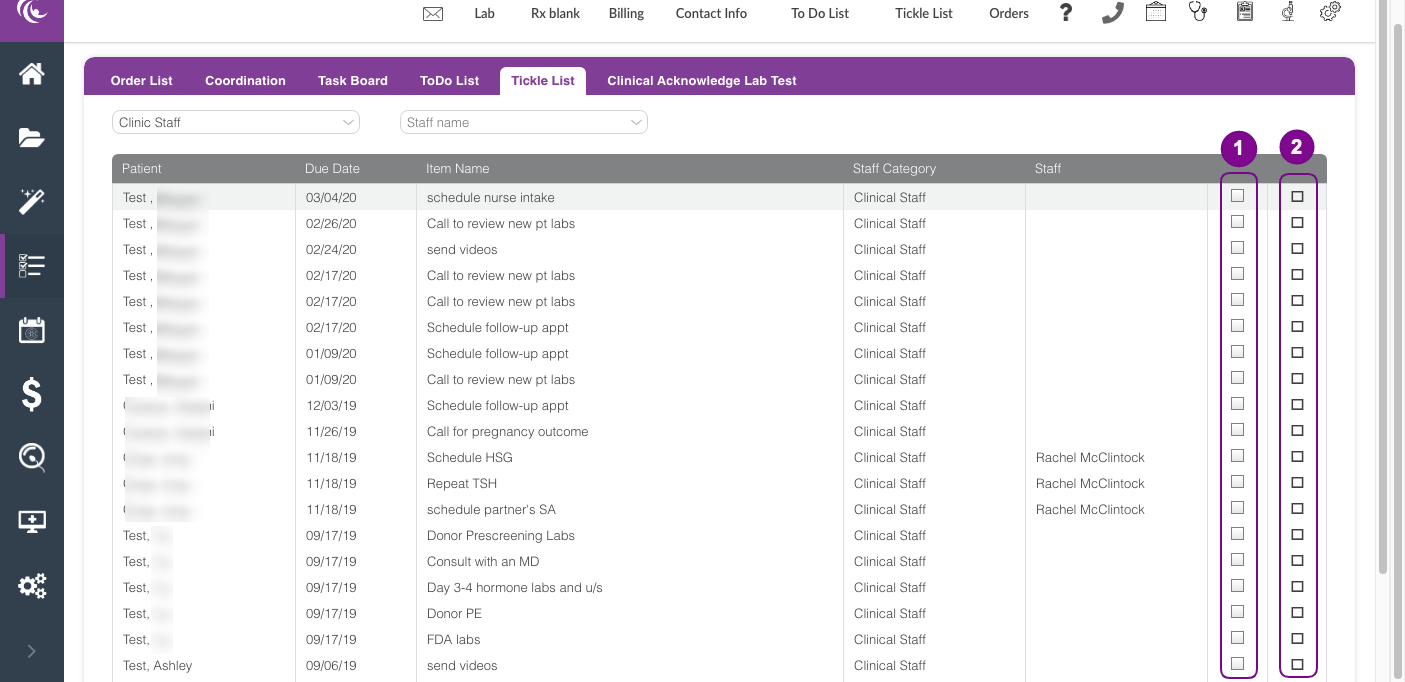
1. Complete/Incomplete - Select the box to mark the tickle list item "complete". Once selected, the tickle item will fall off the list.
2. Delete - Select the box to delete the tickle list item

A confirmation window will pop up when deleting a tickle list item.
Click the Yes button to proceed. The item will fall off of the list.
Clinical Acknowledge Lab Test
The Clinical Acknowledge Lab Test tab allows clinical staff/nurses to acknowledge or "sign off" on all labs, ultrasound and Semen Analysis results outside a cycle with or without an integration. This then pushes the results to the practitioner for their "sign off" and approval.

Select Patient, Donor, or Surrogate database to view results specifically for these patient categories.
Filter options are available by patient name, location, status, or practitioner. It can also be filtered by Lab Test, Ultrasound, and Semen Analysis. Select All to see the results of all tests.
Under the filters, the columns will display the patient, surrogate, and donor's name. The date, test name, practitioner, and the result information. The last two columns will display boxes to be marked as acknowledge and critical value.
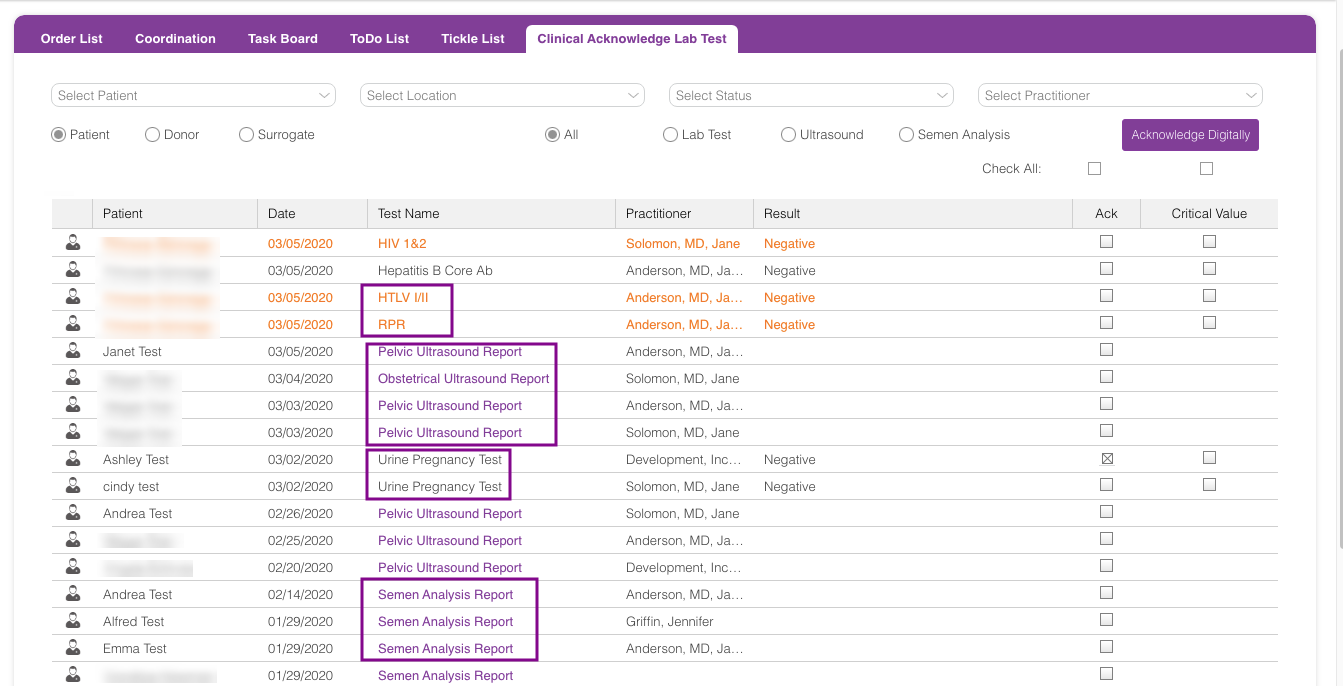
Test results will populate in different colors. Purple test names are a hyperlink allowing you to view the reports of tests that result through a lab integration. Test Name in orange are for partner and the dark grey are manually entered within the patient's chart.
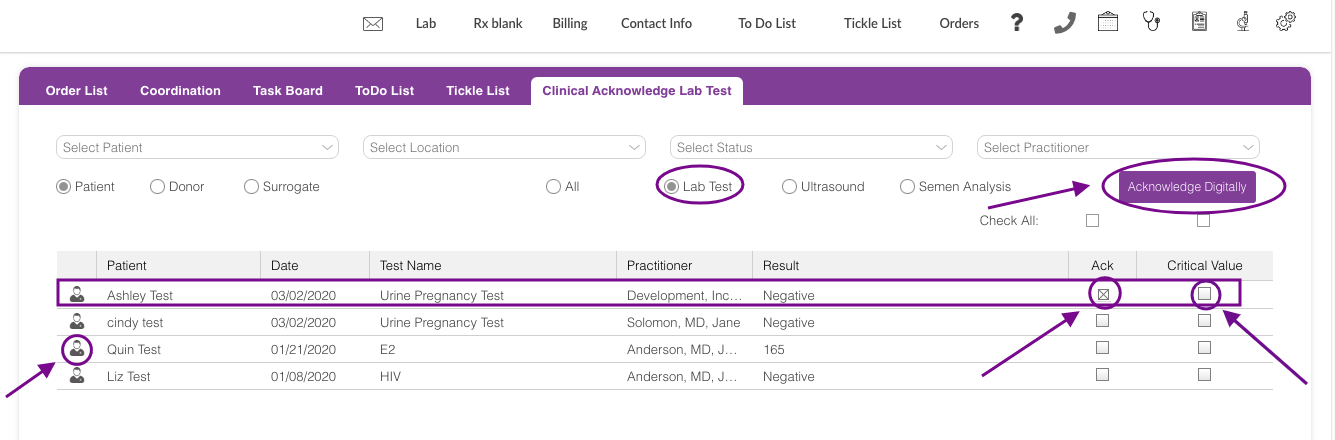
Click on the people icon to open up the patient's chart.
On the applicable patient's test, click on ACK box, mark it as a critical value if applicable in the box under that column, and then click on the Acknowledge Digitally button.
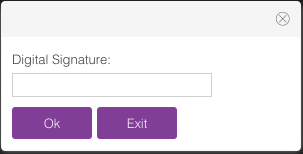
Enter your Digital Signature then click ok. The test result that has been acknowledged will fall off of the list and will be pushed to the physician for them to review and sign off.
**All manuals are compliant with HIPPA regulations. No patient information has been released. All screenshots above were taken from a test clinic with fake patient information.
Artisan Support
Comments