Introduction
The To Do List system provides a means for staff to communicate important messages regarding patient care by tasking one another with "To Dos" for the patients, partners, surrogates and donors in the practice.
Overview
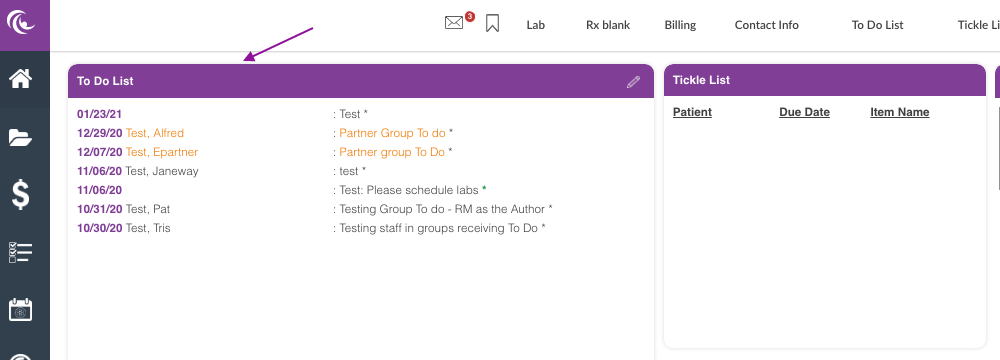
Each staff member has a To Do List on their Home Page.

Additionally, each patient has a summary of pending To Do items in their summary page on the Patient Info layout.
Creating a New To Do List Item

The Pencil Icon on your Home Page creates a new To Do item for a patient, donor or surrogate.

The ToDo for window will pop up allowing you to select if this is for a patient or partner. In this example we selected patient. Then, click the Proceed button.

Fill in the fields that communicate the To Do item:
1. Subject: What is being requested is listed here
2. User Type: Select Staff if you wish to send a To do to an individual staff. Select Group if you wish to send a Group To do. To create a Group click on Manage Group hyperlink.
3. Responsible individual: Assign to the appropriate staff member or group.
4. Patient/Donor/Surrogate: Link to the appropriate individual receiving care.
5. Priority level: High, Medium or Low
6. Due date: To Do Item is use for short term task
7. Notes: Use this field to provide any additional information about the To Do.
8. Click Save.
The newly created To Do item will show up on the home page of the responsible staff member and on the patient’s chart.
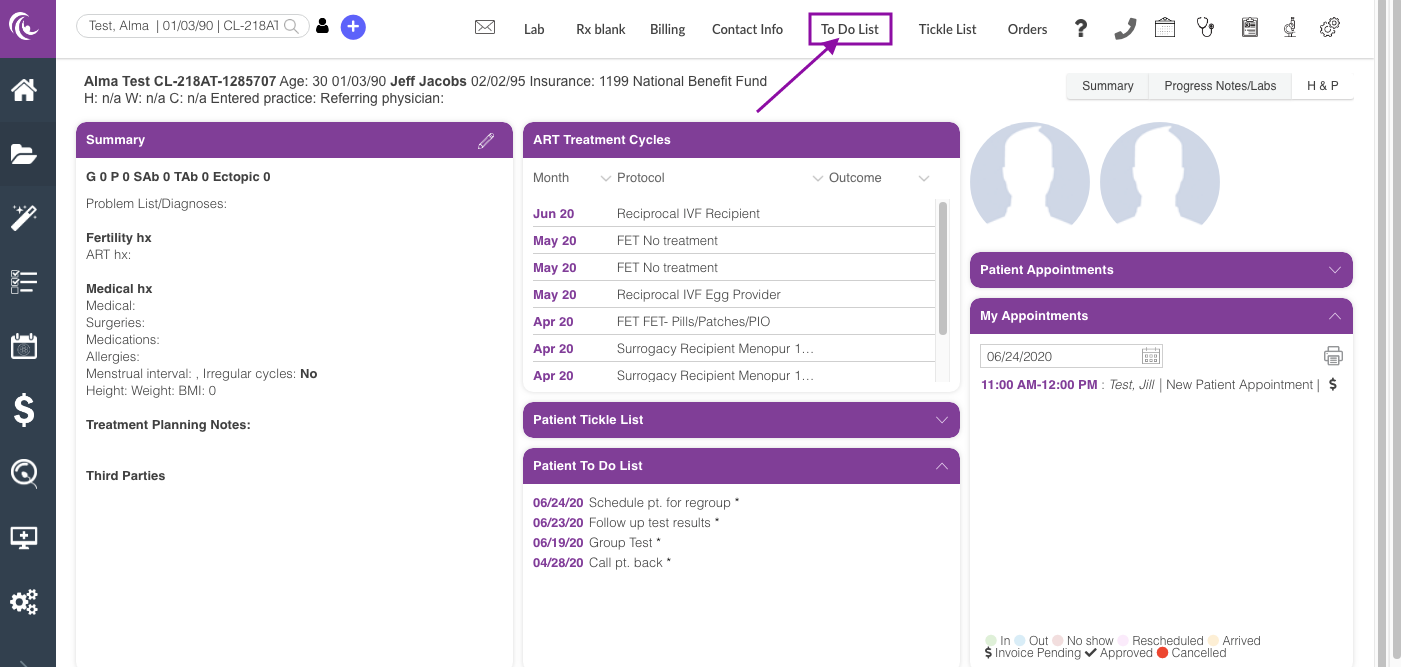
You can also create a To Do item within the patient's chart by clicking To Do List on your quick tools.
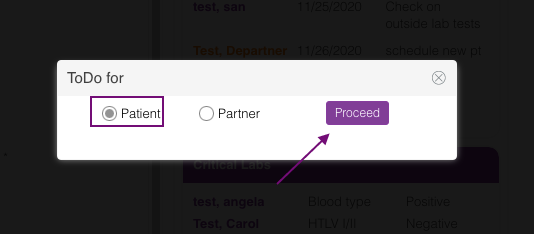
In the above example, we selected patient.

It will open up the same window on your home screen and the patient's name will automatically populate. In this example, we will create a group to do.
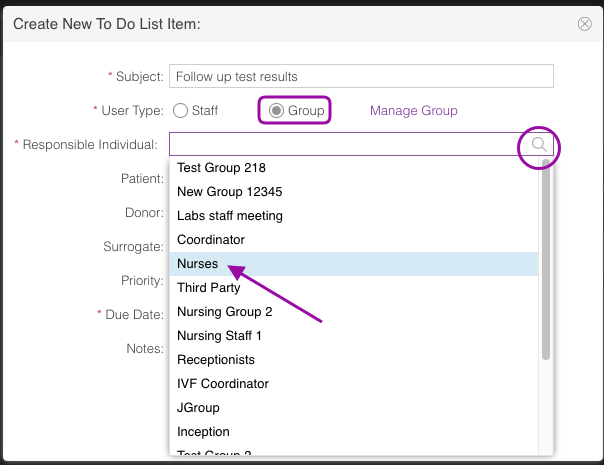
After entering the subject and marking the user type as Group, click the magnifying glass then select the responsible group.
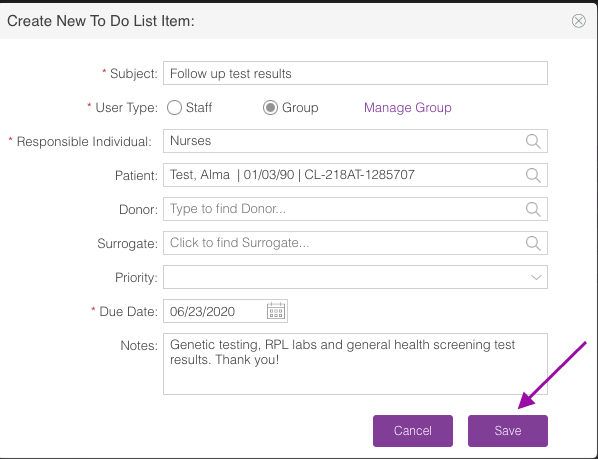
Fill in the appropriate fields then click the Save button.
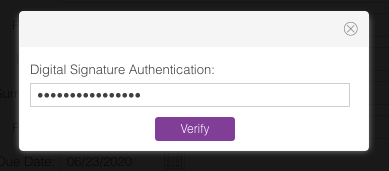
Enter your Digital Signature. Click the Verify button.
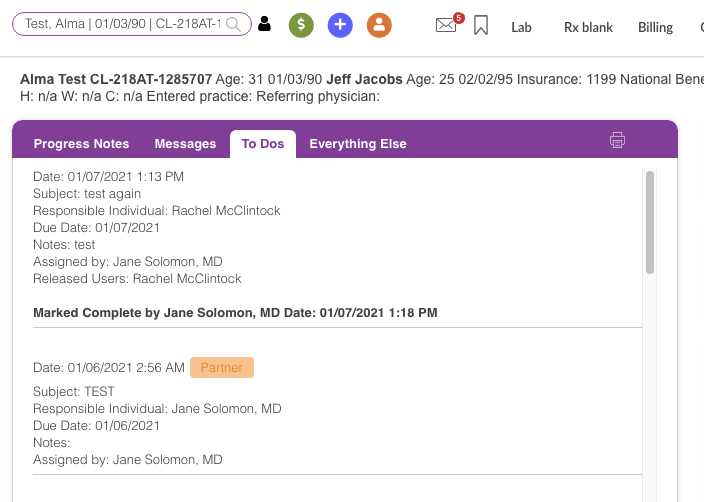
All To Do items that has been created and attached to a patient or partner will remain on their chart under To Dos on Progress Note Layout.
MANAGE GROUP
Group To Do's are use to communicate specific tasks regarding patient care to a group of staff or departments.
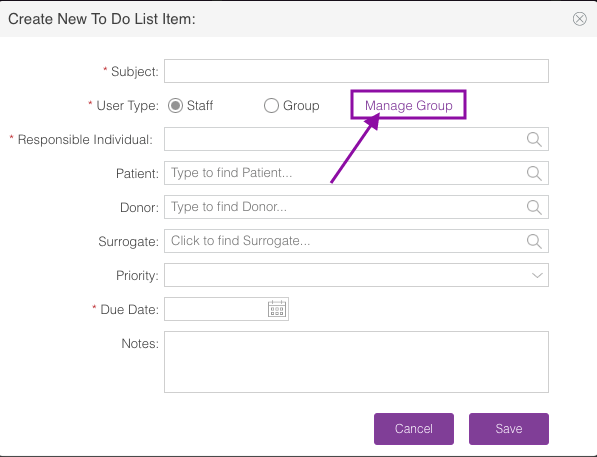
From within the To Do List Item window, click Manage Group.
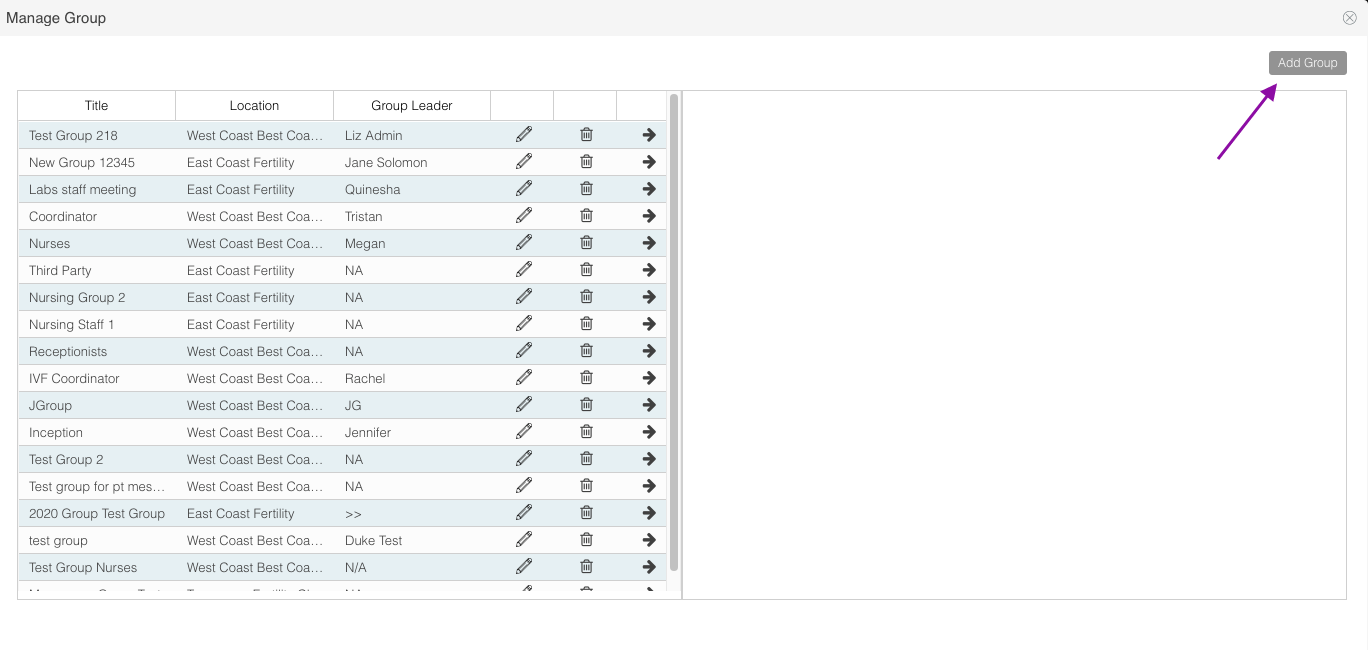
Click the Add Group button.
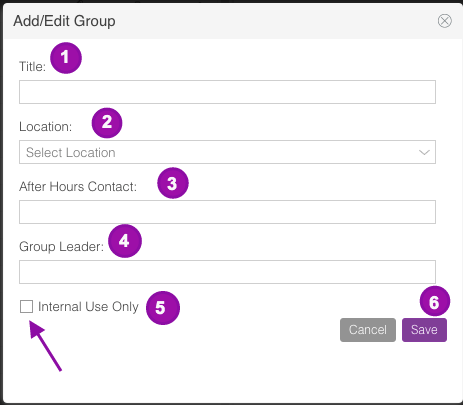
The Add/Edit Group window will pop up.
1. Title: Enter the name of the group
2. Click the dropdown and select the location.
3. After Hours Contact: This is a required field, if it doesn't apply to your practice please enter not applicable.
4. Group Leader: Enter the group leader's name.
5. Internal Use only: Mark the box icon for internal use only, if the box is unmarked patients will be able to send messages to the Group in the Messaging section of the EMR.
6. Click Save.
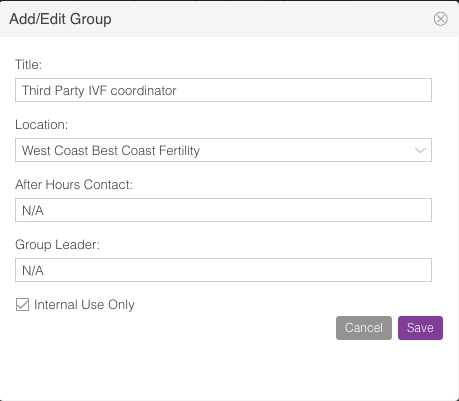
In the above example, we are creating a Third Party IVF coordinator group.
Click Ok.
The newly created Group will populate to the left hand corner of the screen.
Click the pencil icon to edit the group.
Click the trash can icon if you wish to delete the group.
Click the arrow icon to add members in the group.
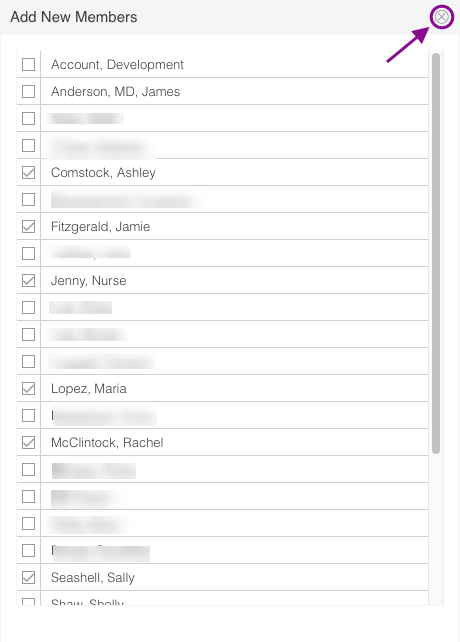
Select the name of the staff that you wish to add to the group by marking the box icon before their names. Then click the x icon.
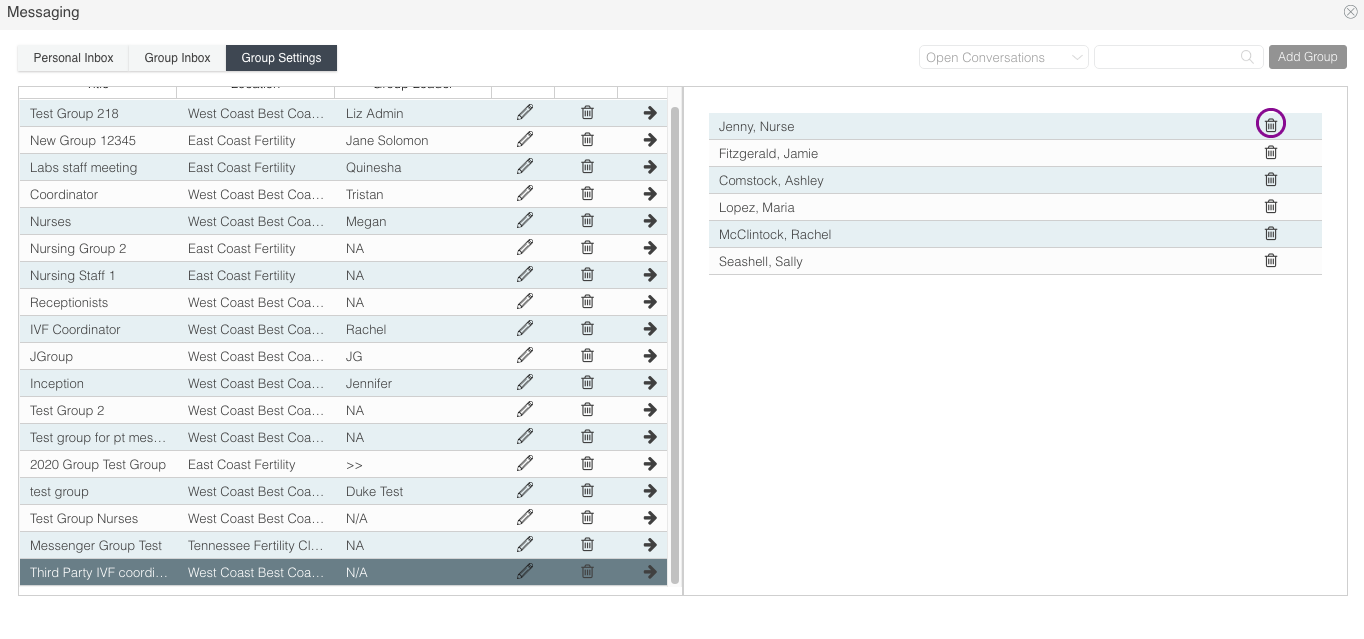
The added staff members will populate to the right hand side of the screen. Click the trash can icon if you wish to delete a staff member.
All groups that have been created will also be available for instant messaging within your practice. To learn more click here.
There are 3 ways to view your To Do Items
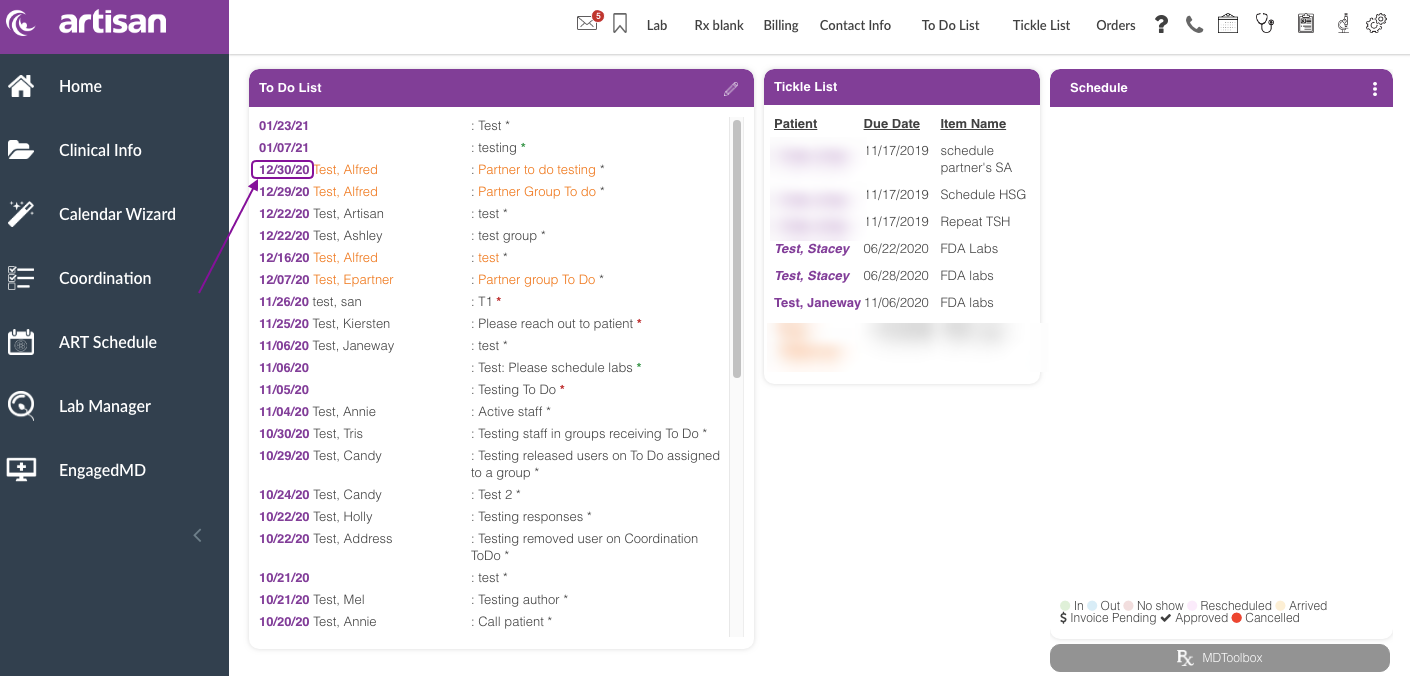
1. On your Home page, click on the date to open the To Do item. Patient To do's will be in Grey colored text while partner To Do's will be in an orange text.
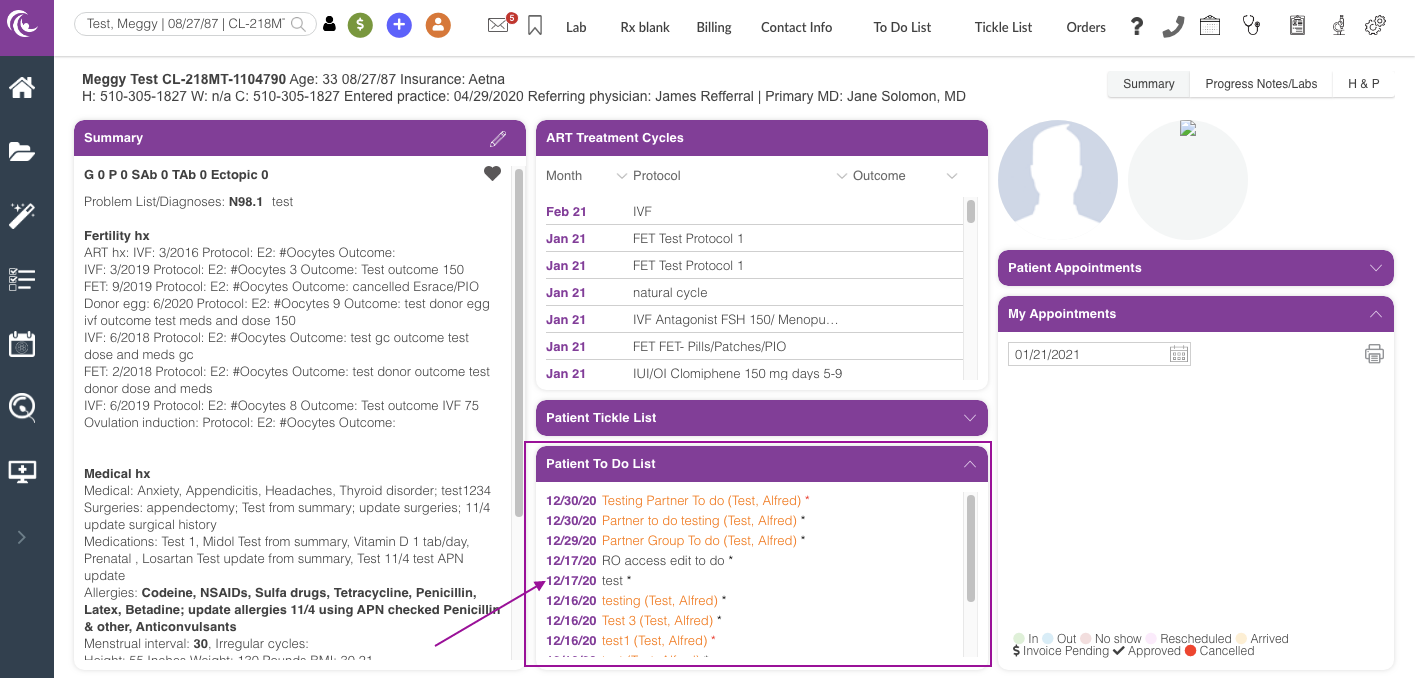
2. On the patient's chart summary page in the Patient To do List section. Click on the date to view the item.
3. On the Coordination Tools, in the To Do list tab section.

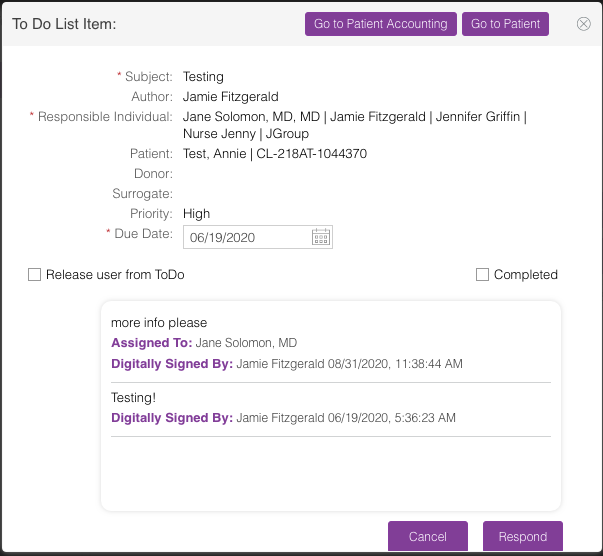
Once opened you will have a series of options of how to resolve the To Do.
1. Go To Patient Accounting: Click this button if you wish to view the patient's invoice summary in the Accounting Tools.
2. Go to Patient: Click this button if you wish you view the patient's chart.
3. Responsible Individual: This lists the user(s) that the To Do is assigned to.
Active Staff: This lists the users that have not released themselves from the To Do and
are receiving responses.
Released Users: This lists the users that have released themselves from the To Do.
4. Release user from ToDo: This applies to a Group ToDos. Marking the box icon will prevent the user from getting any updates on the task and it will fall off on the user's home page.
5. To mark the To Do item as complete, check the Completed box. This will remove the item from both your Home Page and the patient’s summary page
6. The To Do box also allows staff to exchange messages and follow the thread of the conversation. To add a note click Respond.
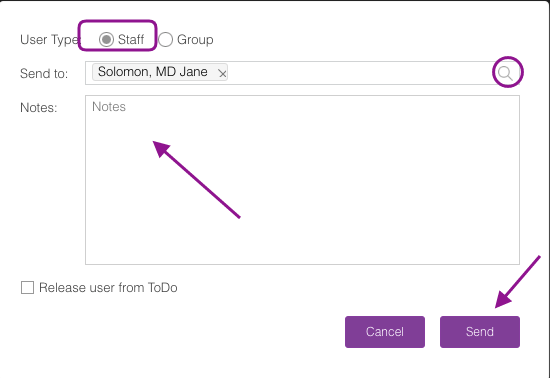
The above screen shot is an example of a single to do item.
Clicking Respond in a single to do item opens a dialog box that allows the user to direct the To Do item to another staff member or reply to the author of the item. Be sure to choose the staff member to receive the To Do by using the search tool. Enter the Notes. Then click Send
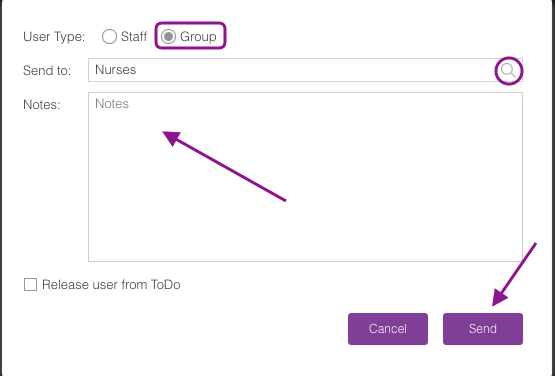
The above screen shot is an example of a group to do item.
In either of the above examples, you are able to click the box Release user from ToDo to have it fall off of your own home screen without completing the ToDo.
Clicking Respond in a group to do item opens a dialog box that allows the user to direct the To Do item to another group or reply to the group. Be sure to choose the staff member to receive the To Do by using the search tool. Enter the Notes. Then click Send

It will ask for your Digital Signature. Click the Verify button.
Please note, if you are the last remaining responsible individual left on a To Do, you will not be able to release yourself as there has to be at least one responsible individual on the To Do. You will either need to assign the To Do to another staff member or complete the To Do if nothing further is needed.
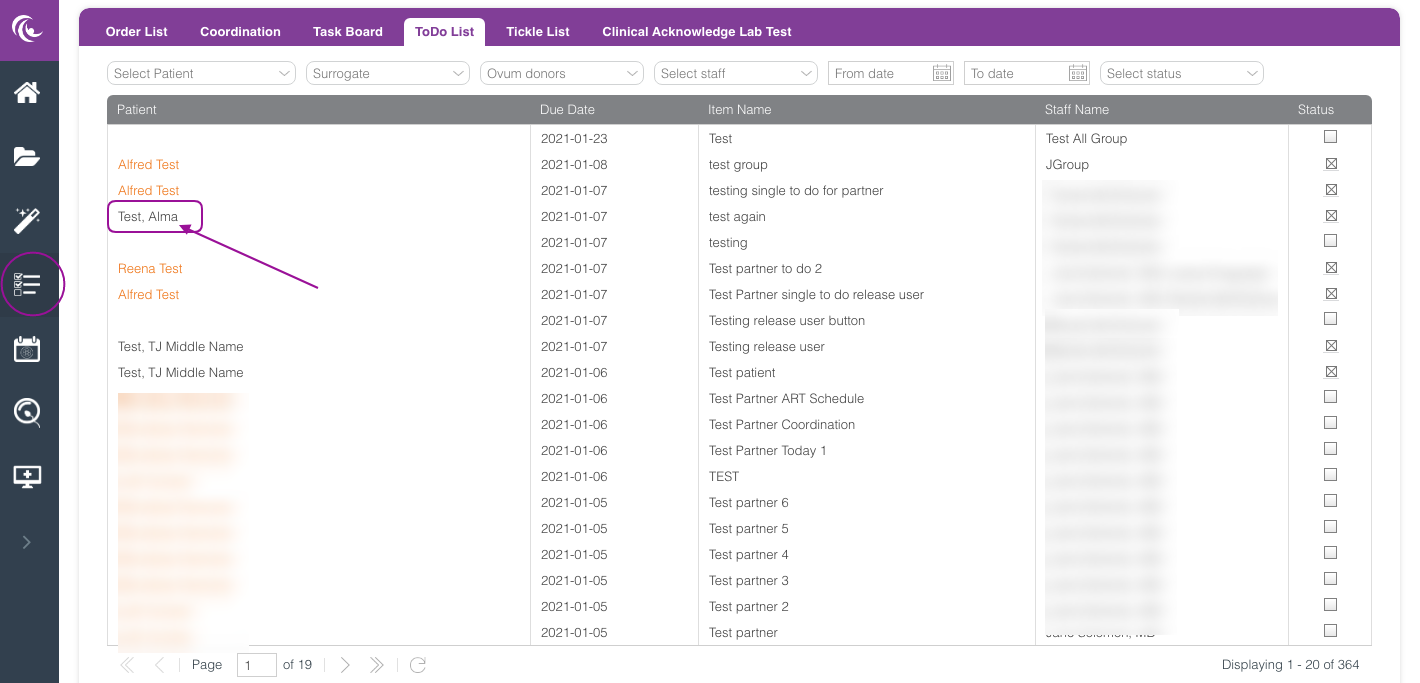
Reviewing all To Dos for the Practice
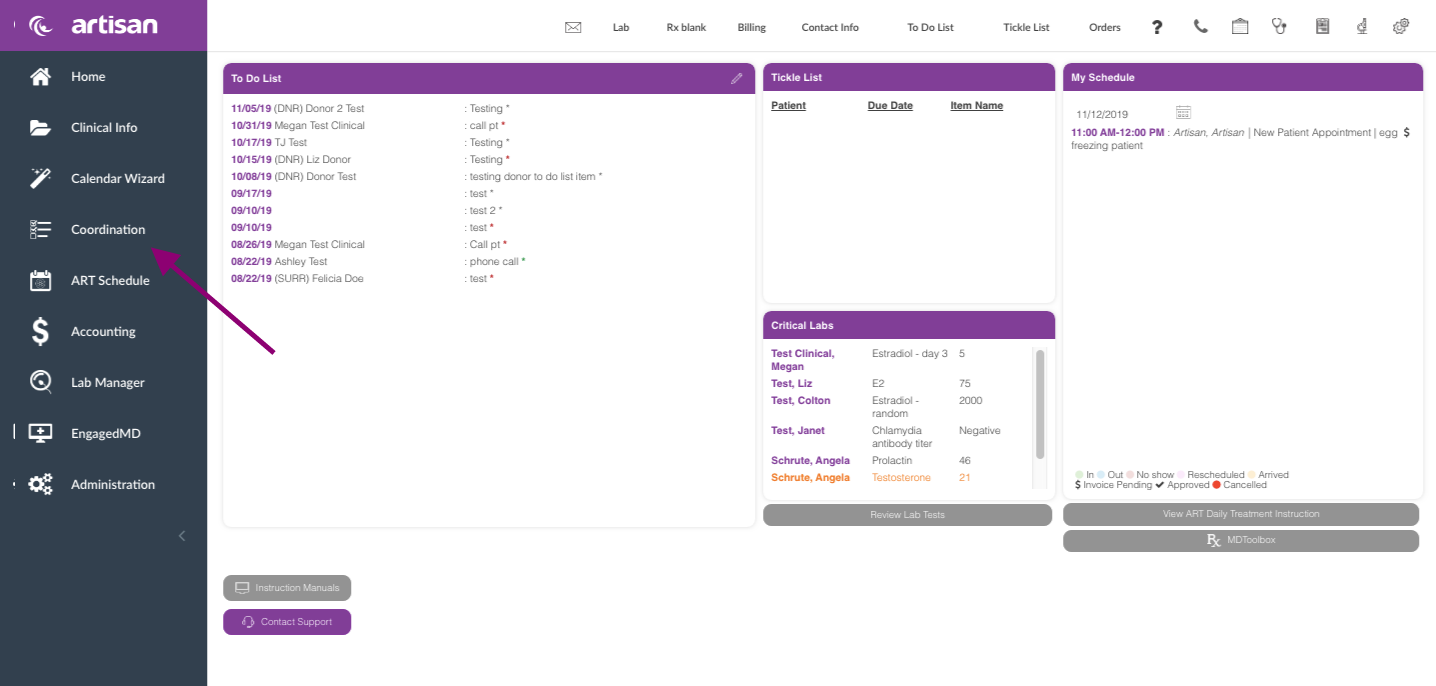
To see the full list of To Dos in the practice, click Coordination.

Select the To Do List Tab and use the search filters to view what you wish.
*In this example, we have filtered under the user "Fitzgerald, Jamie" to see all To Dos assigned to this user. The Status bar at the end shows what has and has not been completed, indicated by the X.
You are able to select and click on the To Do's that you would like to manage.
This window will pop up where you will have a series of options to resolve the To Do.
**All manuals are compliant with HIPPA regulations. No patient information has been released. All screenshots above were taken from a test clinic with fake patient information.
Artisan Support
Comments