The Appointments Calendar is used to schedule appointments and to display important resources. The calendar is integrated with your list of patients, partners, donors and surrogates. Users will also find a copy of their daily schedule on their Home Page.
Navigation

To access the Appointment Calendar, click the calendar icon.
Views of the Calendar
There are five calendar views in Artisan: Locations, Resources, Day, Week and Month. Each will allow you to see perspectives of the practice most appropriate to the view. Navigate to each by clicking on their titles.
Artisan users can customize their appointments calendar view. To learn more, please see Setting up the Calendar: Appointment Types, Resources and Appointment Templates manual.
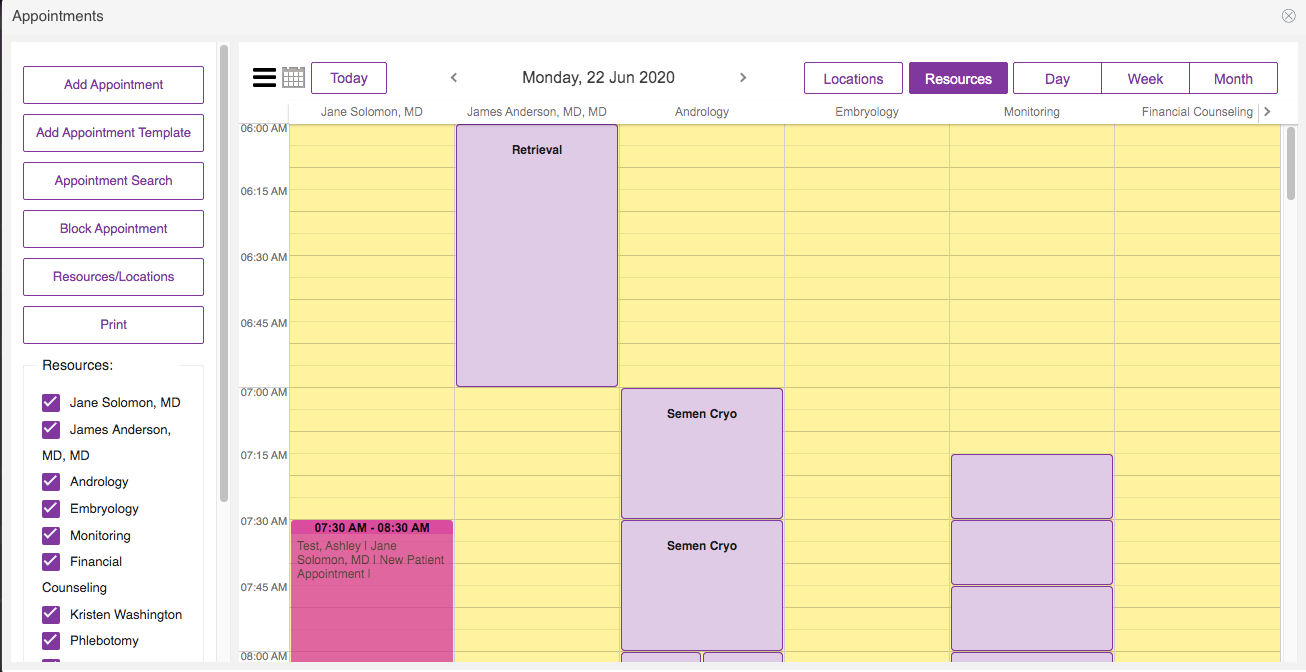
When clicking on the appointments calendar the Resource view will always be the default view. The purple boxes in the Resources view are examples of an appointment template. This view allows you to see every resource on a day at a glance.
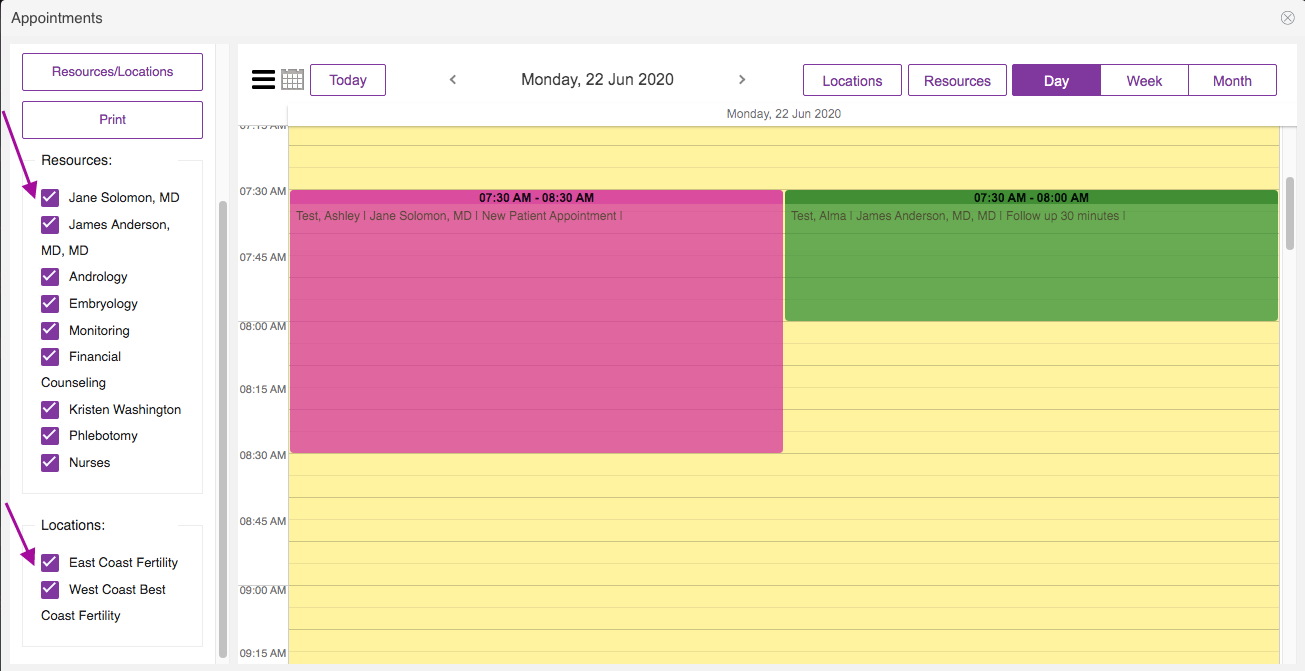
The Day View of the Appointment Calendar allows you to see an entire day at a glance. This will include scheduled appointments at every practice, for every resource on a given day. You may deselect resources and locations on the left-hand side (at the purple arrows) to exclude them from your view if you wish.
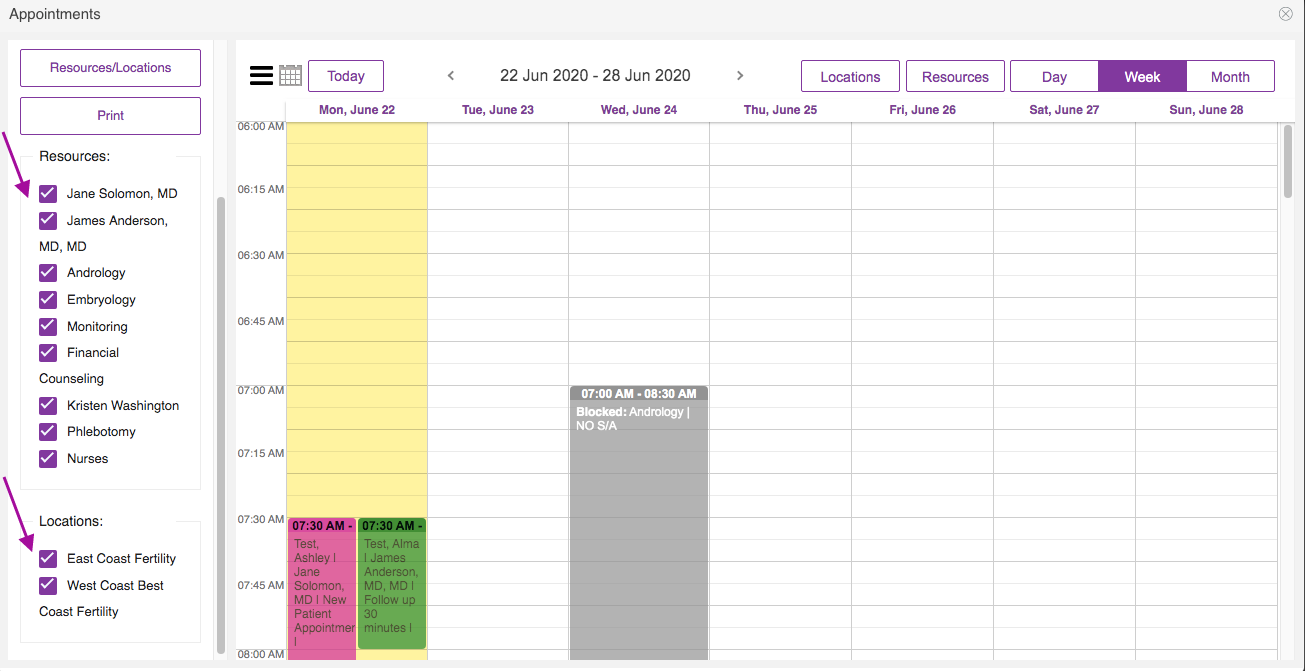
The Week View of the Appointment Calendar allows you to see an entire week at a glance. The yellow highlighted column indicates today's date. This will include scheduled appointments at every practice, for every resource in a given week. You may deselect resources and locations on the left-hand side (at the purple arrows) to exclude them from your view if you wish.
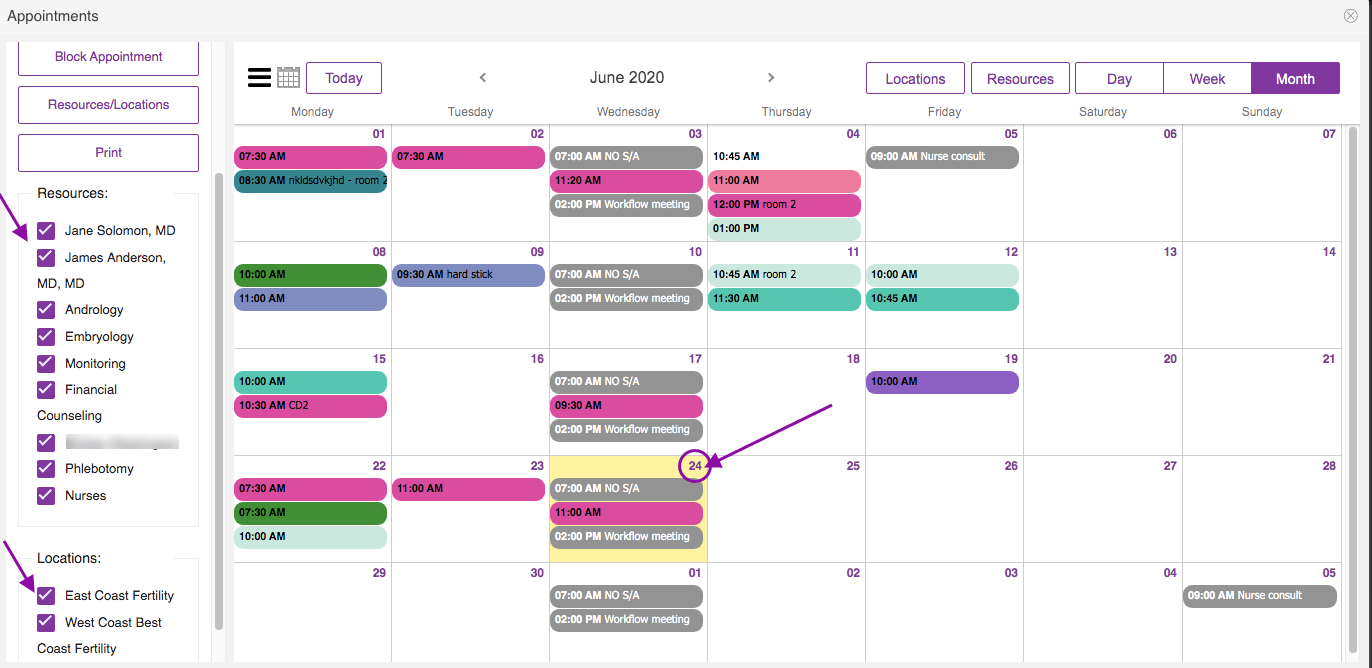
The Month View of the Appointment Calendar allows you to see an entire month at a glance. You may deselect resources and locations on the left-hand side (at the purple arrows) to exclude them from your view if you wish. The yellow box indicates today's date. Clicking on the date will bring you to the day view of the selected date.
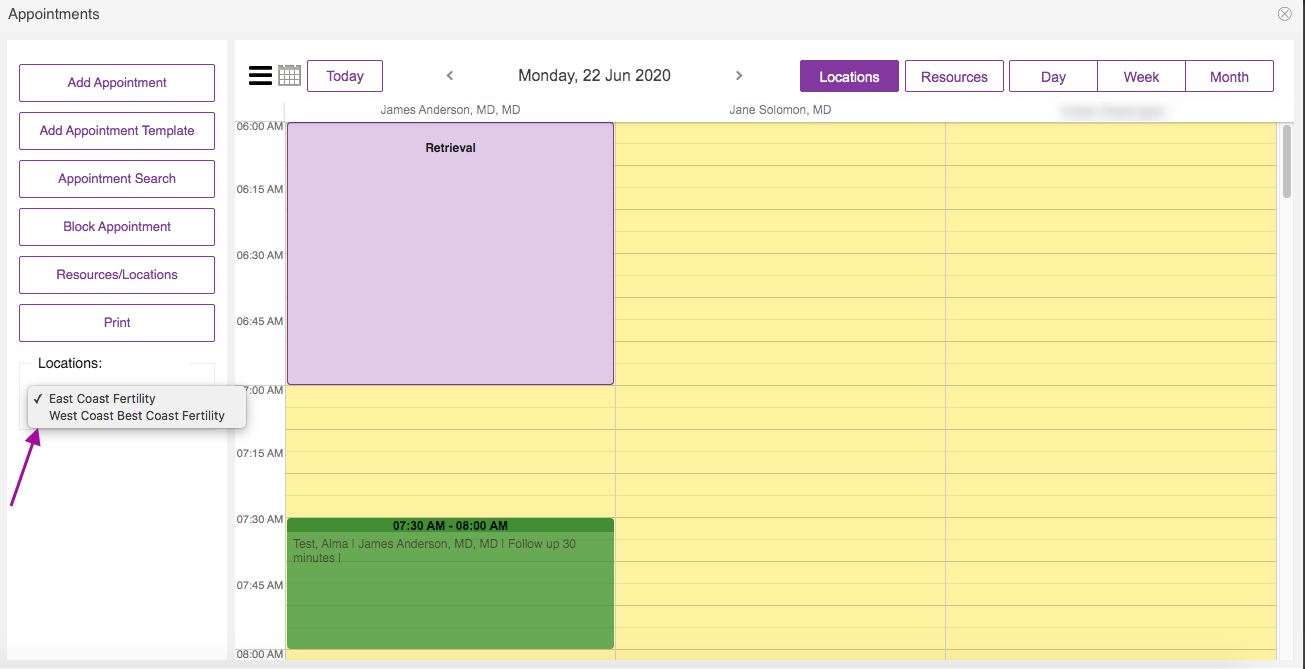
Locations allows you to see every location on a day at a glance. This view will show the resources for the selected location including all appointments on a particular day in each location. You may select from the different locations using the drop-down on the left-hand side (at the purple arrow).
Add Appointment
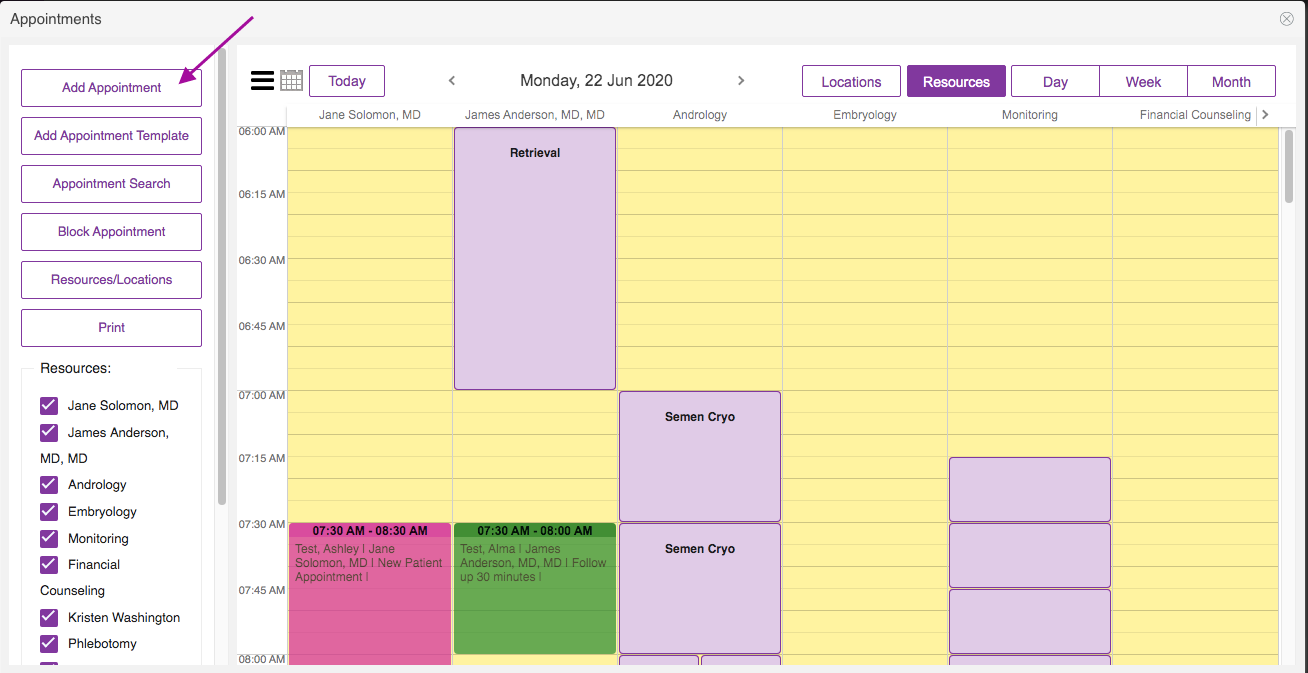
From any view, click the Add Appointment button.
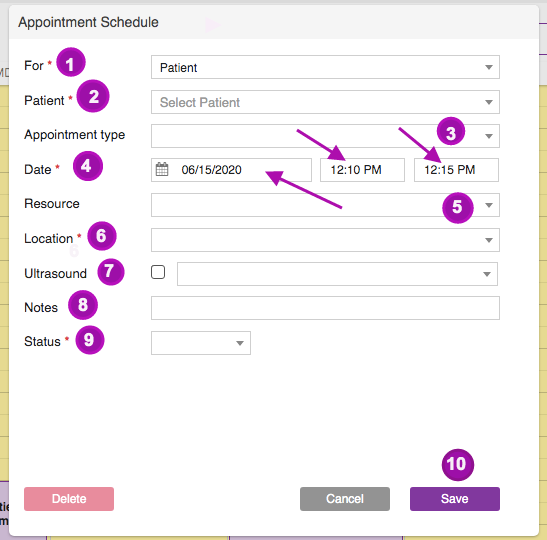
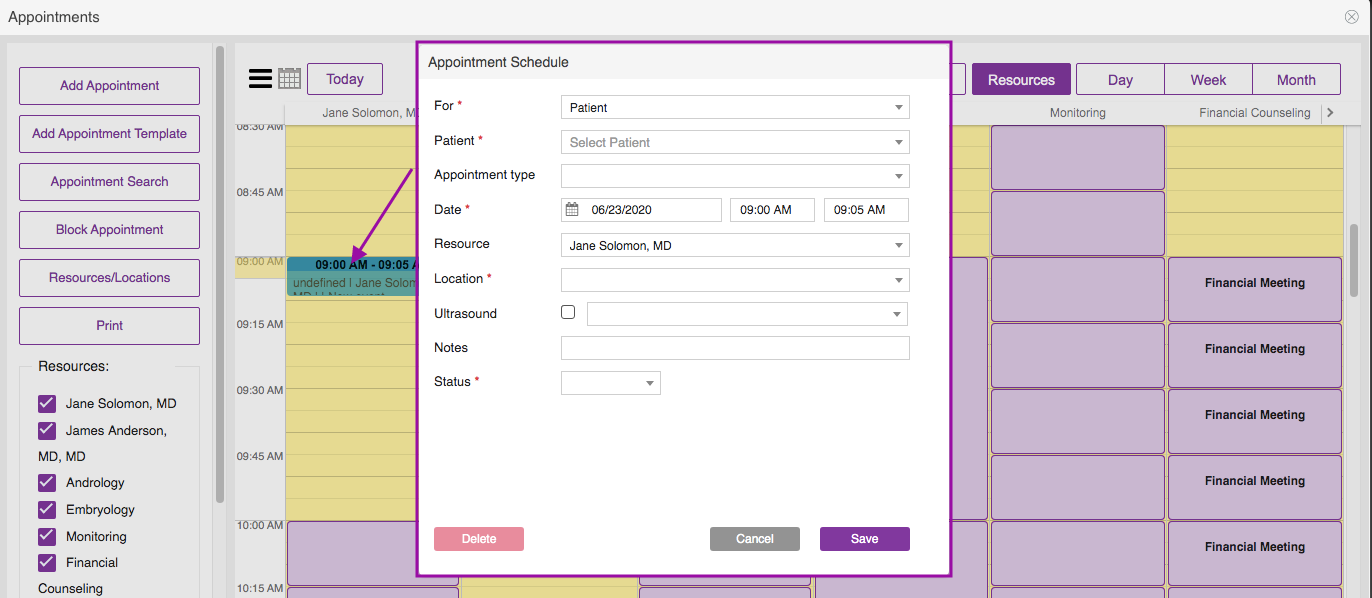
The Appointment Schedule Box dialog will pop up.
1. Click the dropdown icon to select who the appointment is for.
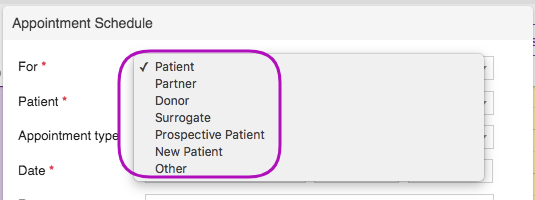
You will have 7 selections. Patient, Partner, Donor, Surrogate, Prospective Patient, New Patient and Other. Select the appropriate category. In the above example, we selected the Patient.
Click here to learn how to schedule New patients and Prospective patients.
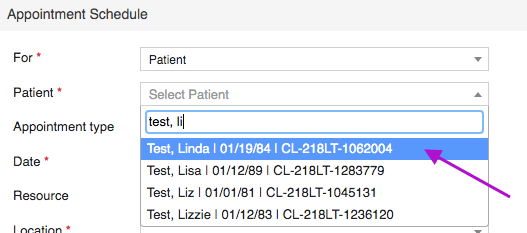
2. Enter the patient's last name first, then select the patient's name from the drop-down list.
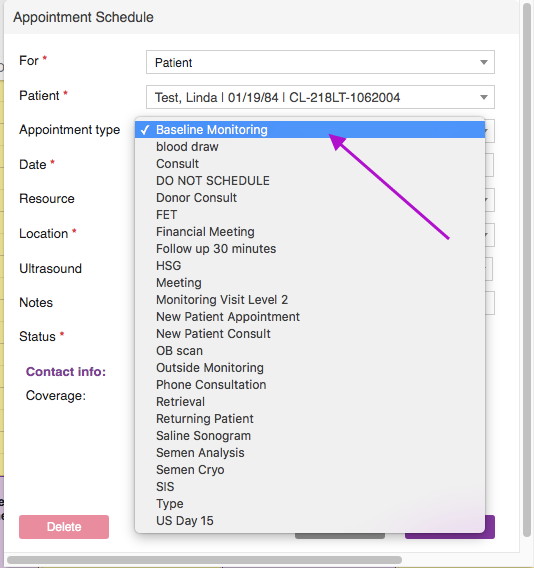
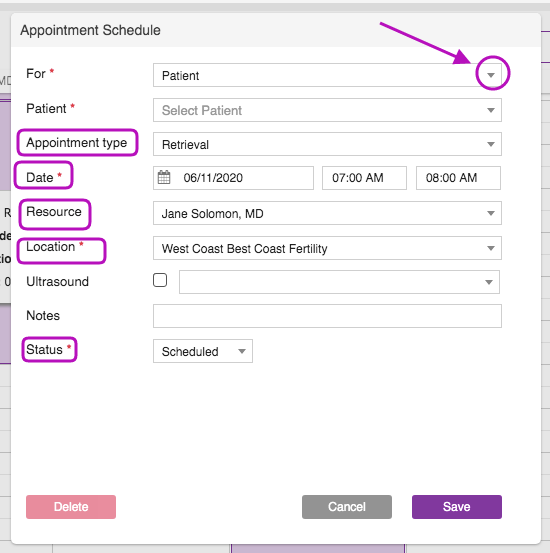
3. Click on the drop-down icon to select an appointment type. In this example, we selected "Baseline monitoring."
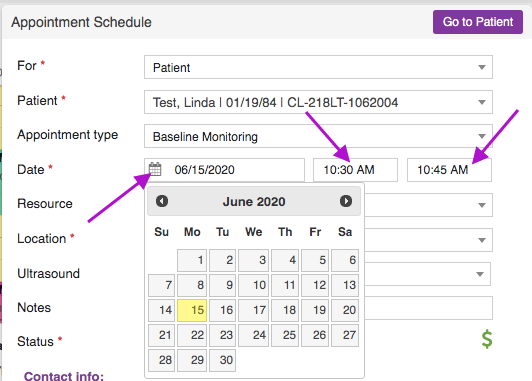
4. The date and time will auto-populate to the current date and time, but you are able to change this by clicking the calendar icon and clicking on the time.
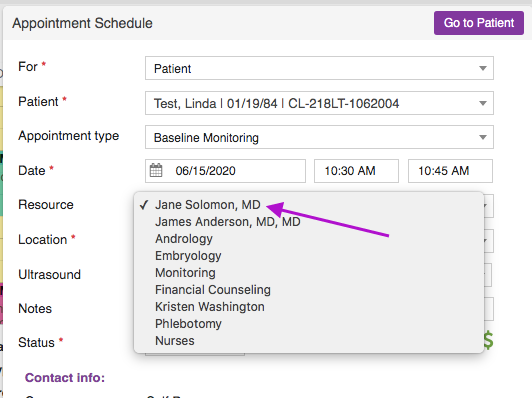
5. Click the drop-down icon to select a Resource.
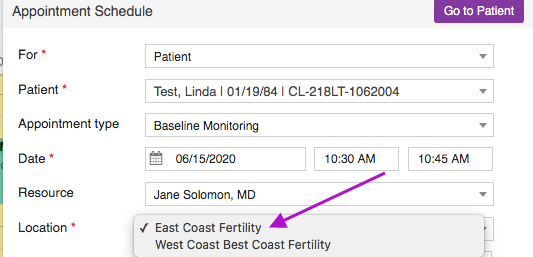
6. Select the location.

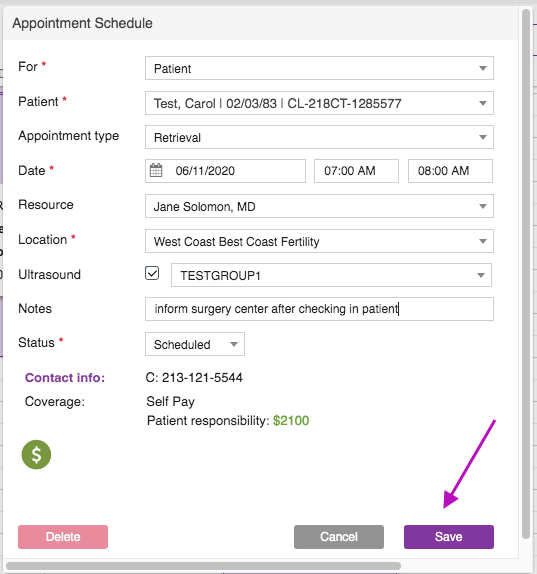
7. If your clinic is set up with an ultrasound integration and the appointment type requires an ultrasound, mark the box icon to send the patient's information to the ultrasound machine's worklist.

8. Enter any Notes regarding the appointment.
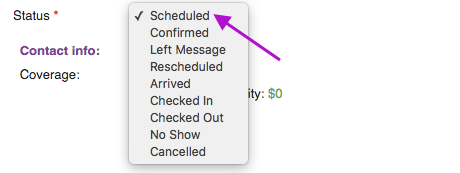
9. Select the Status of the appointment.
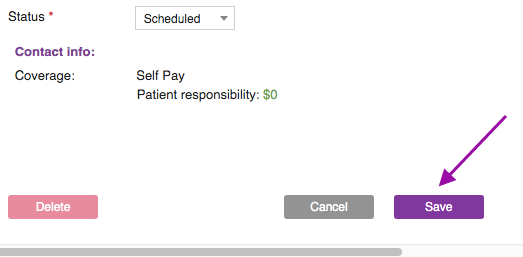
10. Click the Save button.
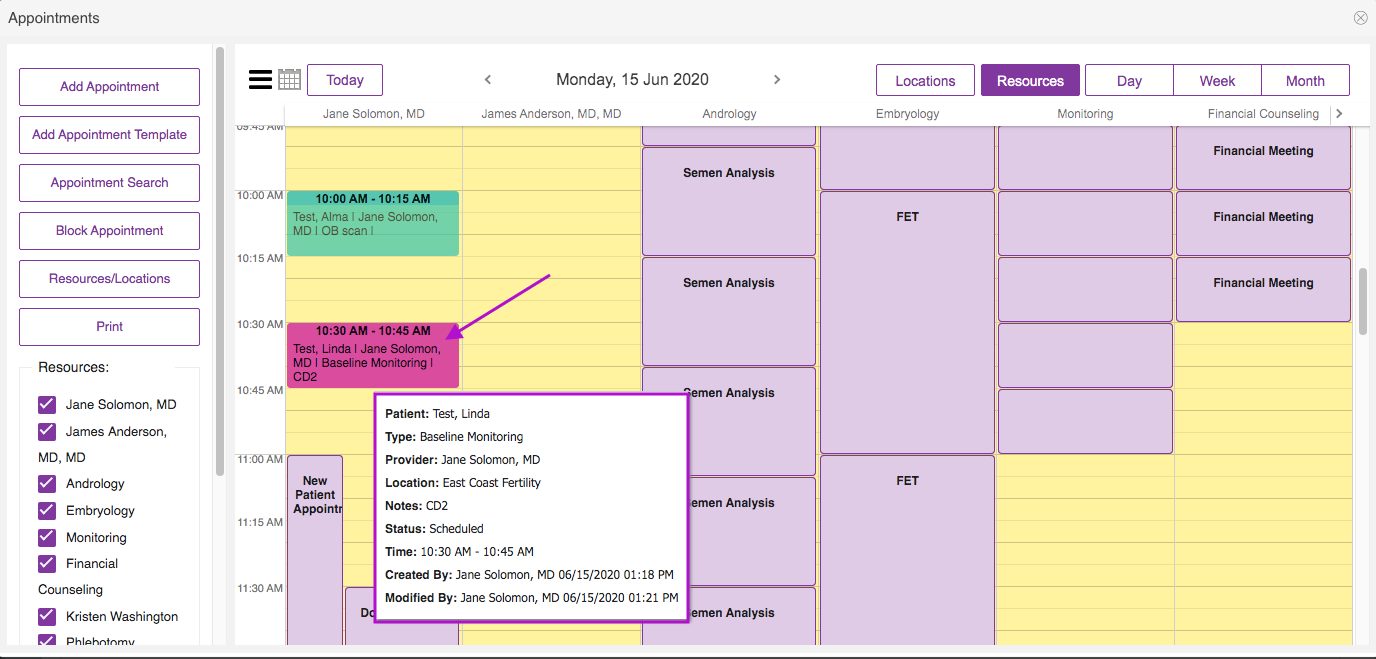
You have now created an appointment. Hovering over on the appointment will allow you to view the information of the scheduled appointment.
Another way to add an appointment is to double click on the time of your choice to bring up the Scheduler box in any appointments calendar view. The Appointment schedule dialog box will pop up.
All other steps of scheduling are the same, fill out the required fields and click the save button.
Appointment Template

Appointment templates can be created within the appointments calendar to easily schedule the patient's appointment. Click the appropriate template to create an appointment. In the above example, we are scheduling a retrieval appointment.

Click the Convert To Appointment button.
It will open up the Appointment Schedule dialog box. Click the drop-down icon to select the type of patient to schedule. Using an appointment template will automatically fill out the Appointment Type, Date, Resource, Location, and Status.
After filling out the required fields. Click the Save button.

You have now created a retrieval appointment using an appointment template. Hover over on the created appointment to view the information.
APPOINTMENT SEARCH
Creating appointment templates will allow you to search for an appointment type using the Appointment Search feature.
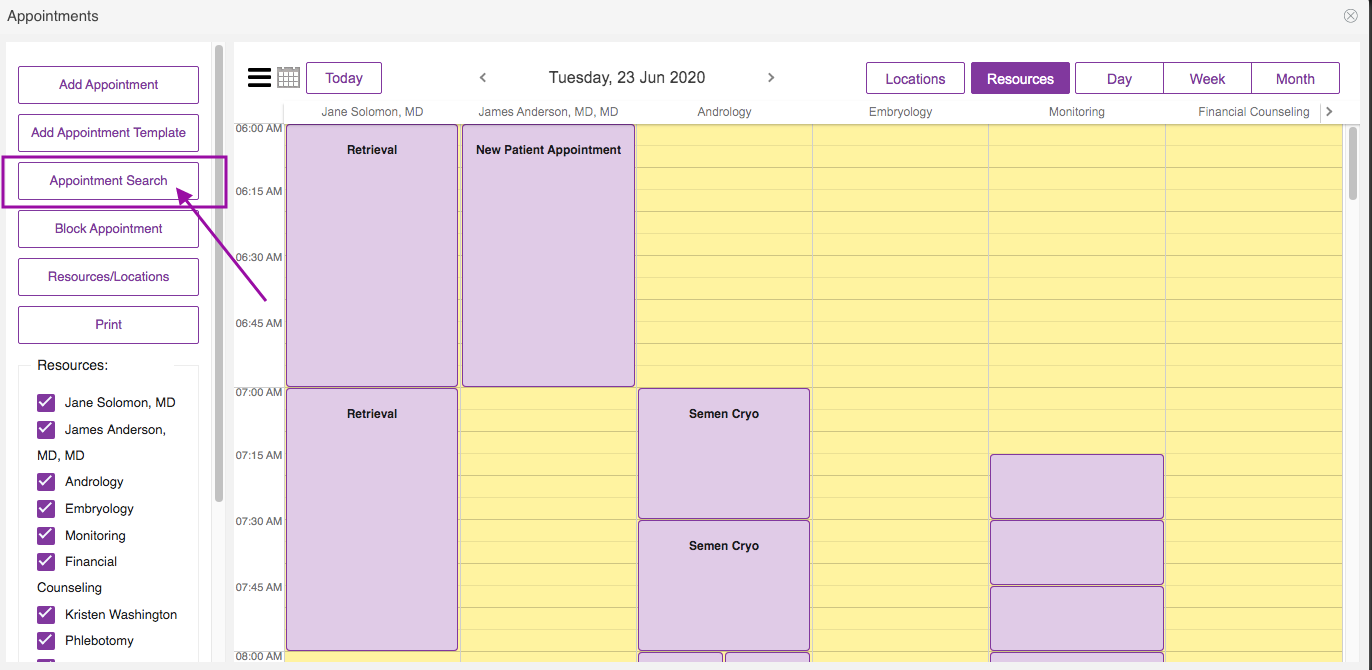
Click the Appointment Search button.
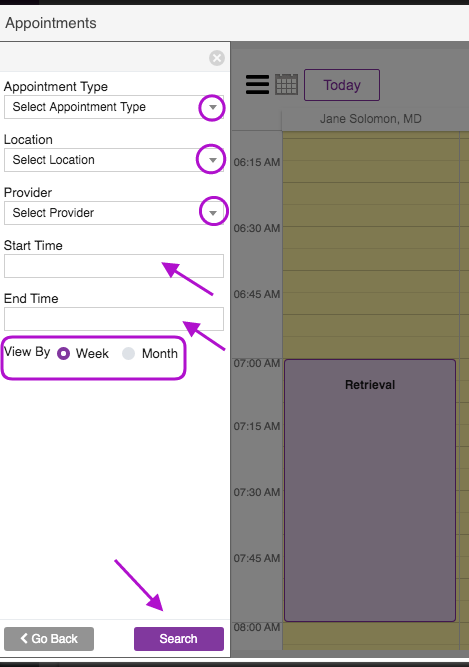
Fill out the necessary search fields by filtering appointment type, location, provider, start and end time, view by week or month, then click Save.
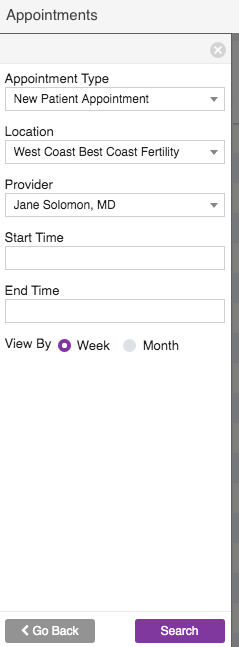
In the above example, we are searching for a New patient appointment type, specific location, provider, and week view.
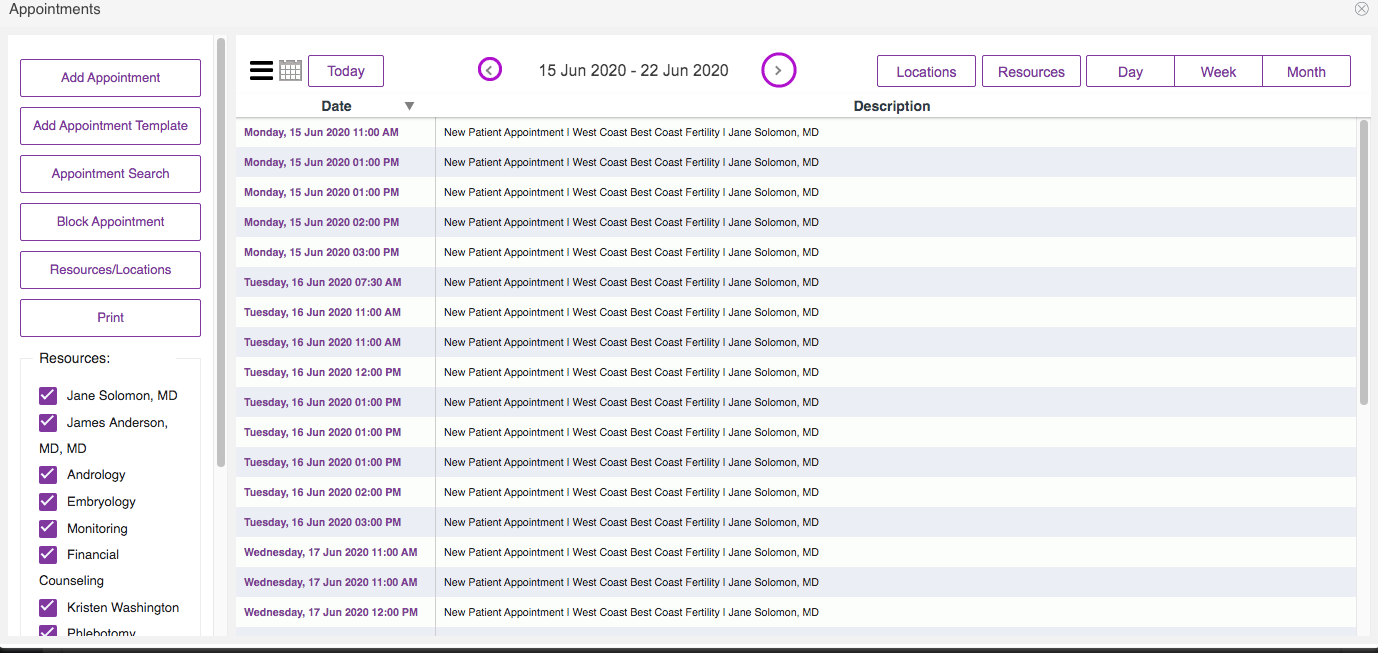
The system will search all of the available New Patient Appointment days and times within the week. You are able to toggle back and forth on different weeks by clicking on the arrows next to the dates.
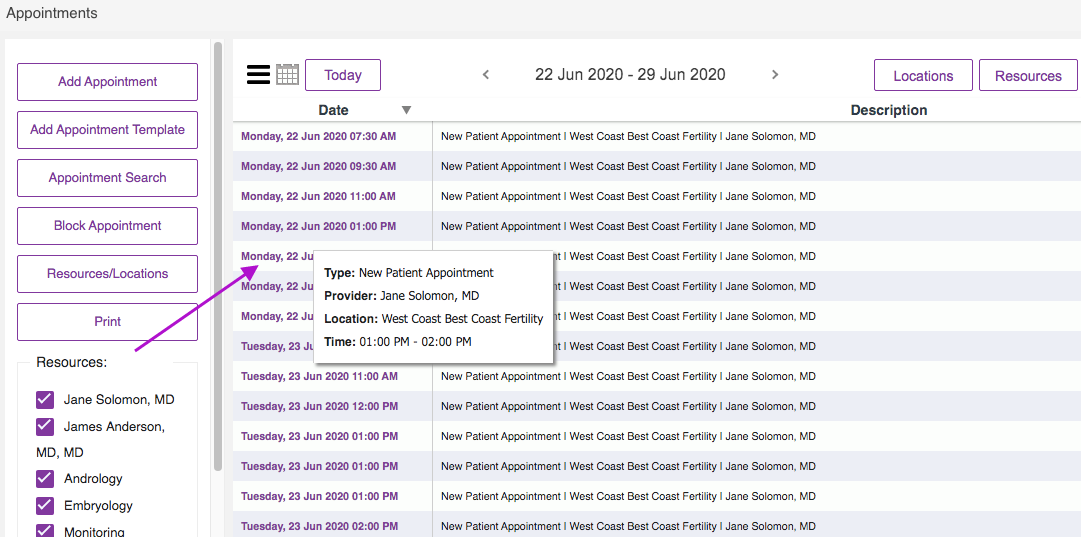
Once a date and time have been selected, to convert this to an appointment, click the date of the appointment.

Click Convert to Appointment.
All other steps of scheduling are the same as using an appointment template above.
Edit Appointments

From any view (Locations, Resource, Day, Week, Month) to edit an existing appointment click on the appointment, you wish to edit.

The appointment schedule screen will pop up and you are able to make the edits. When finished select Save to save the edits made.

If you wish to view the patient's chart, click on the Go to Patient tab. Click the Go to Patient Accounting button to view the patient's Invoice Summary in the Accounting tools.

In instances that you need to print the appointment schedule for that day, click the Print button.
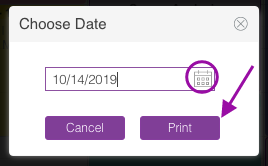
Select the date by clicking the calendar icon then click the Print button.

Click Print to print out all of the appointments scheduled in the appointments calendar for the entire practice.
**All manuals are compliant with HIPAA regulations. No patient information has been released. All screenshots above were taken from a test clinic with fake patient information.
Artisan Support
Comments