The Prospective Patient feature allows patients to enter their contact information, insurance details, and medical history online prior to their first visit. It functions by sending patients an email with a link to the Prospective Patient Portal. Patients may then enter demographic information and a summary of their past medical history. Office staff will import the patient's information on or before the patient's arrival at the office. Physicians and staff can also use the portal to review the patient's past medical history and enter pertinent findings into the new patient's History and Physical.
There are two ways to add a Prospective Patient to Artisan. The first and most common is to schedule a New Patient Appointment using the Appointments Calendar button. The second way is to directly add a Prospective Patient to the system.
Add a New Prospective Patient using the Appointments Calendar
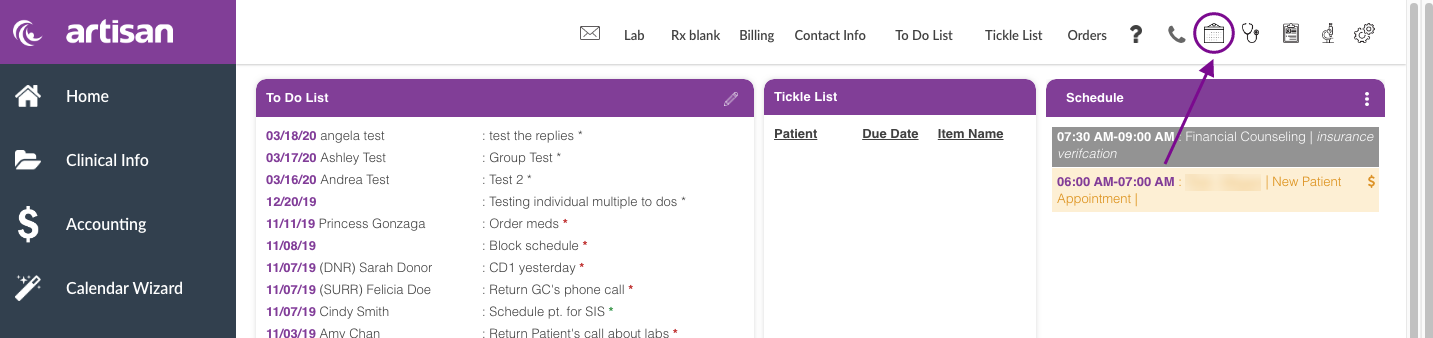
Click the Calendar icon on your quick tools.
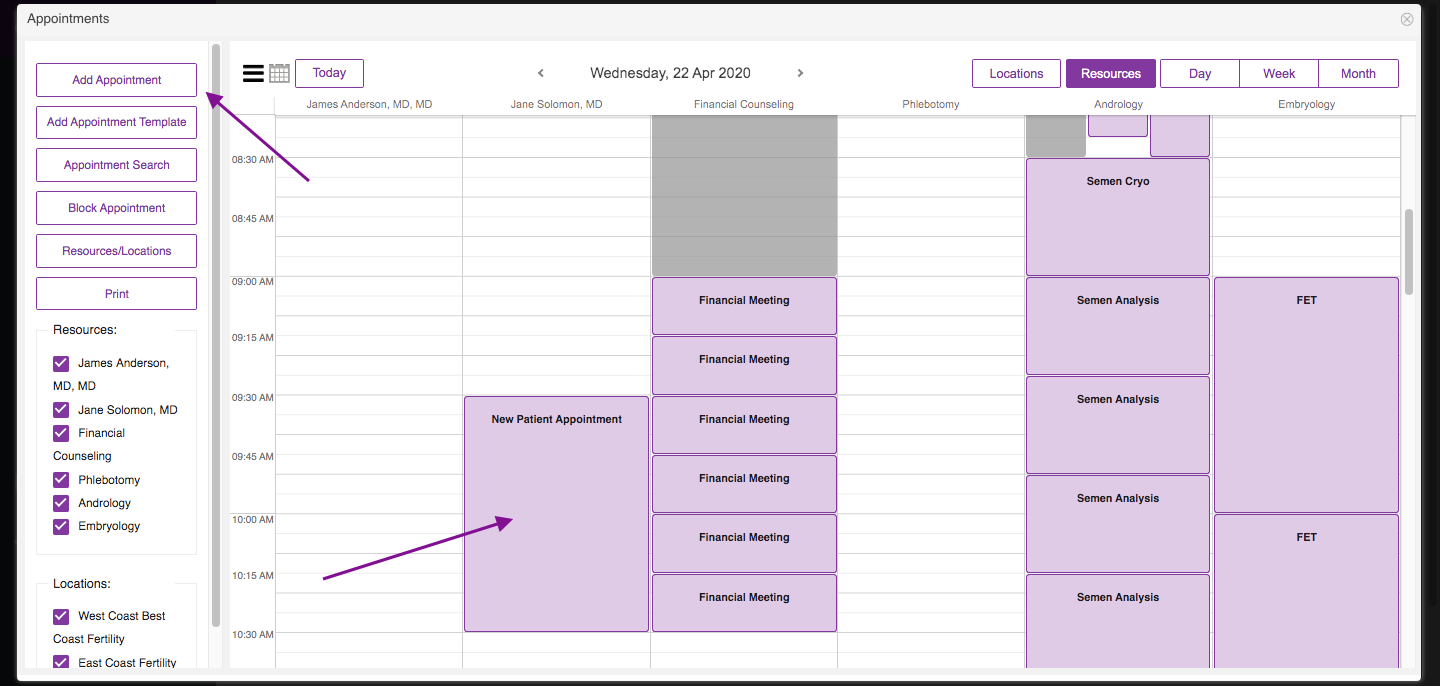
In this example, the patient is coming in for her New Patient Consultation on April 22, 2020.
Create an appointment by clicking on the appropriate template or click add appointment.
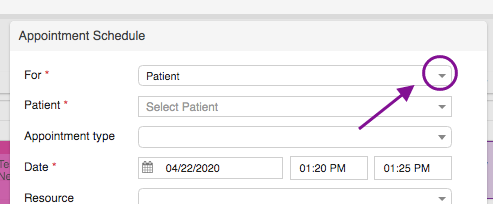
From the appointment schedule window, click the drop-down icon.
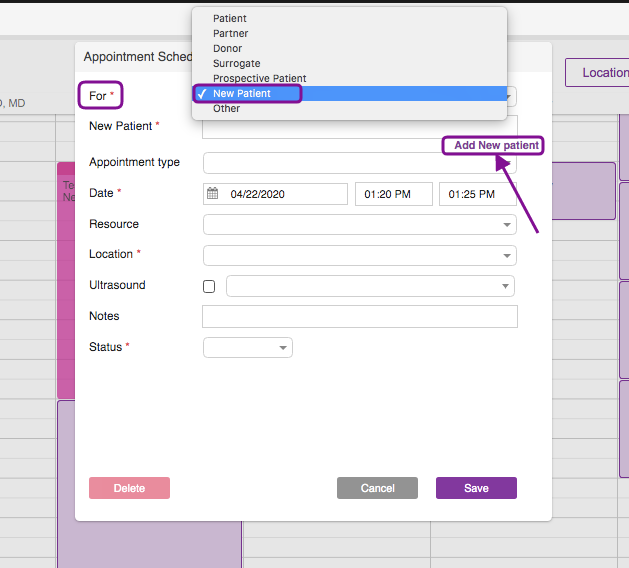
Select New patient then click Add New patient.
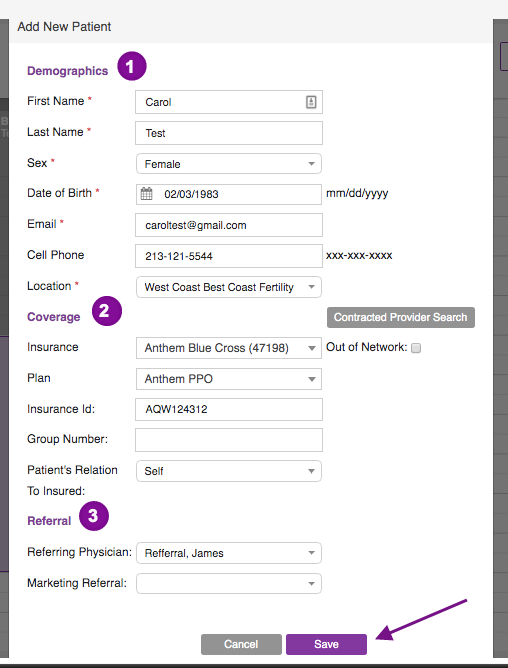
It will open up the Add New patient form to register the prospective patient.
1. Demographics - Required fields will have an asterisk next to the field name.
2. Coverage - Fill out the insurance information if this will be captured during the registration. If not, leave it blank.
3. Referral - Click the drop down icon to select a referring physician or marketing referral, if applicable.
Click Save.
The system will send a portal invitation email to the prospective patient where they can update and fill out the new patient form electronically.
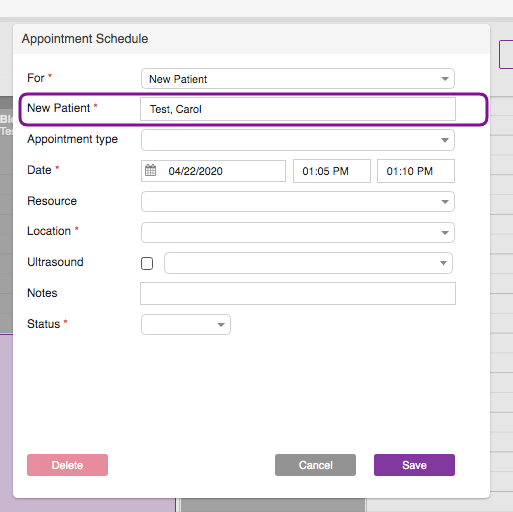
Once the prospective patient is registered in the system, you will be taken back to the Appointment Schedule window. Fill out the fields to create a new patient consultation for the prospective patient.

Once the appropriate fields have been filled out, click the save button.
A new patient consultation has been created.

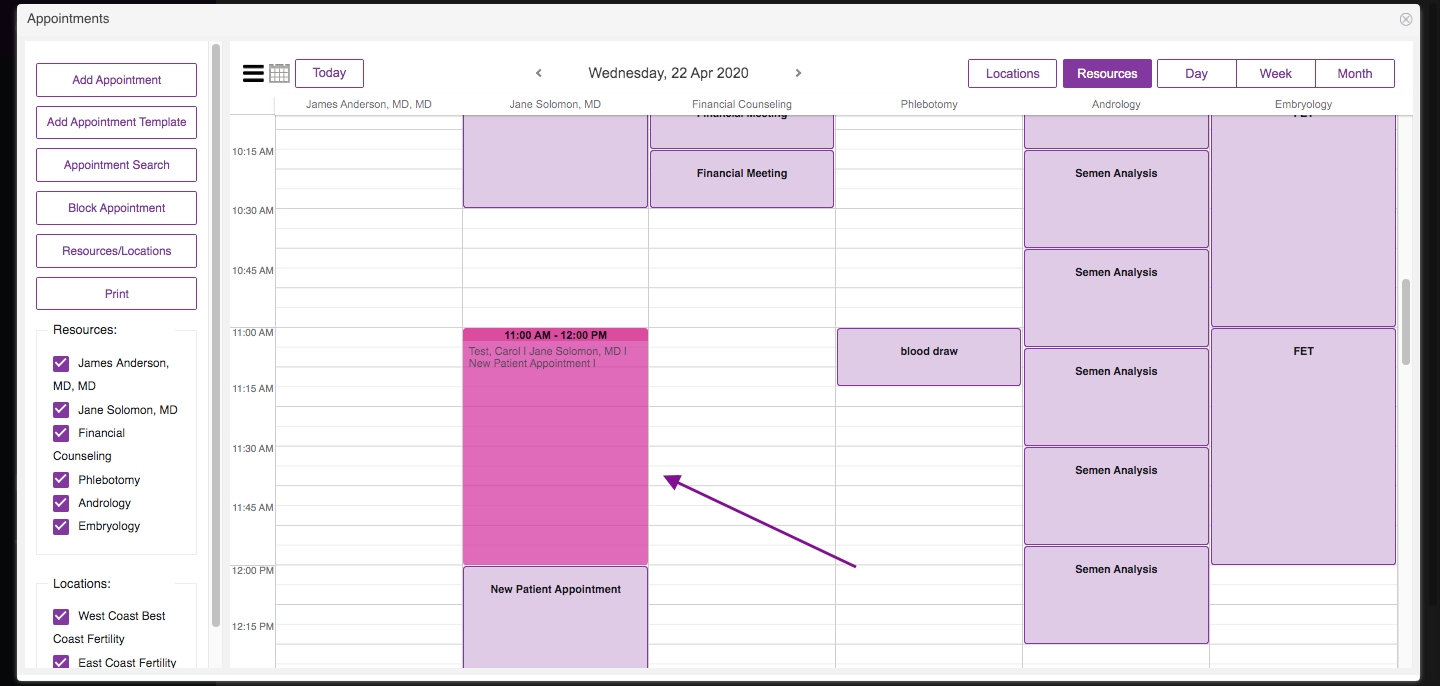
The Prospective Patient is then stored in the prospective patient portal, active patient tab with the scheduled appointment information.
Add a New Prospective Patient directly to the system
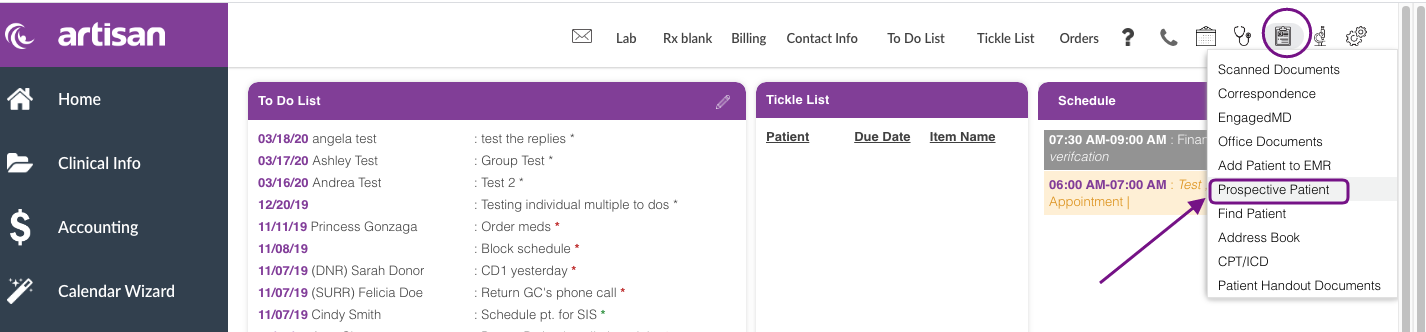
Under the Admin Tools click Prospective Patient and then Active Patient tab

Click the page icon to add a new Prospective Patient.
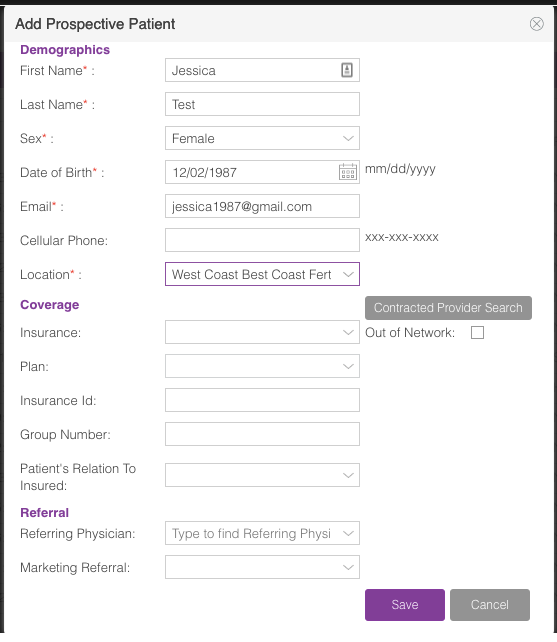
Fill in all of the required patient information.
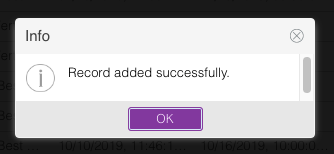
Click Save and Artisan will send an email to the patient with a link to the Prospective Patient Portal.
Click Ok.
The patient's email address MUST be entered so that Artisan can send an email to the prospective patient to set up the prospective patient portal and fill out their medical history.
You will now be able to view the newly registered prospective patient in the prospective portal active patients tab where you can manage and track the patient and partner's progress on filling out or updating their demographics, medical history, and their appointment time.

2. To delete a prospective patient click the trash can icon.
3. The page icon allows you to record notes regarding the Prospective Patient. Click the grey outlined page icon to create a note. The green-colored page icon indicates that notes have been added.
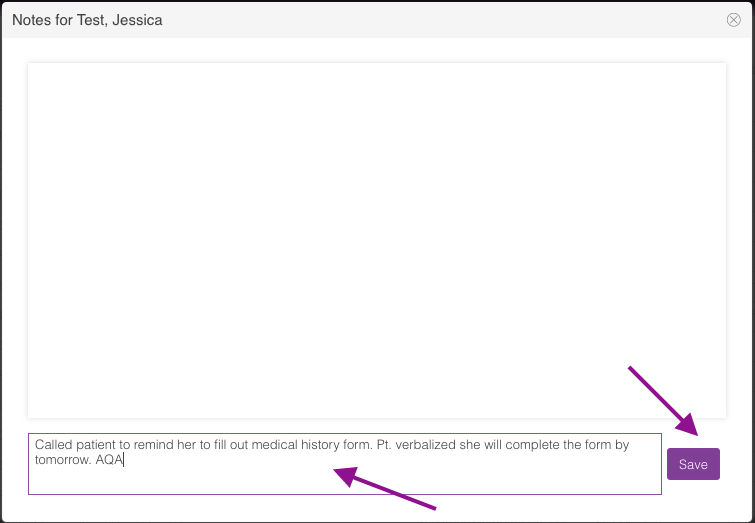
Enter notes inside the free text box then click save.
Click ok.

Enter multiple notes as needed.
While in the Active Patients tab, click on the prospective patient's name to view the prospective portal.
Within the Prospective Patient Portal you will have the following tabs:
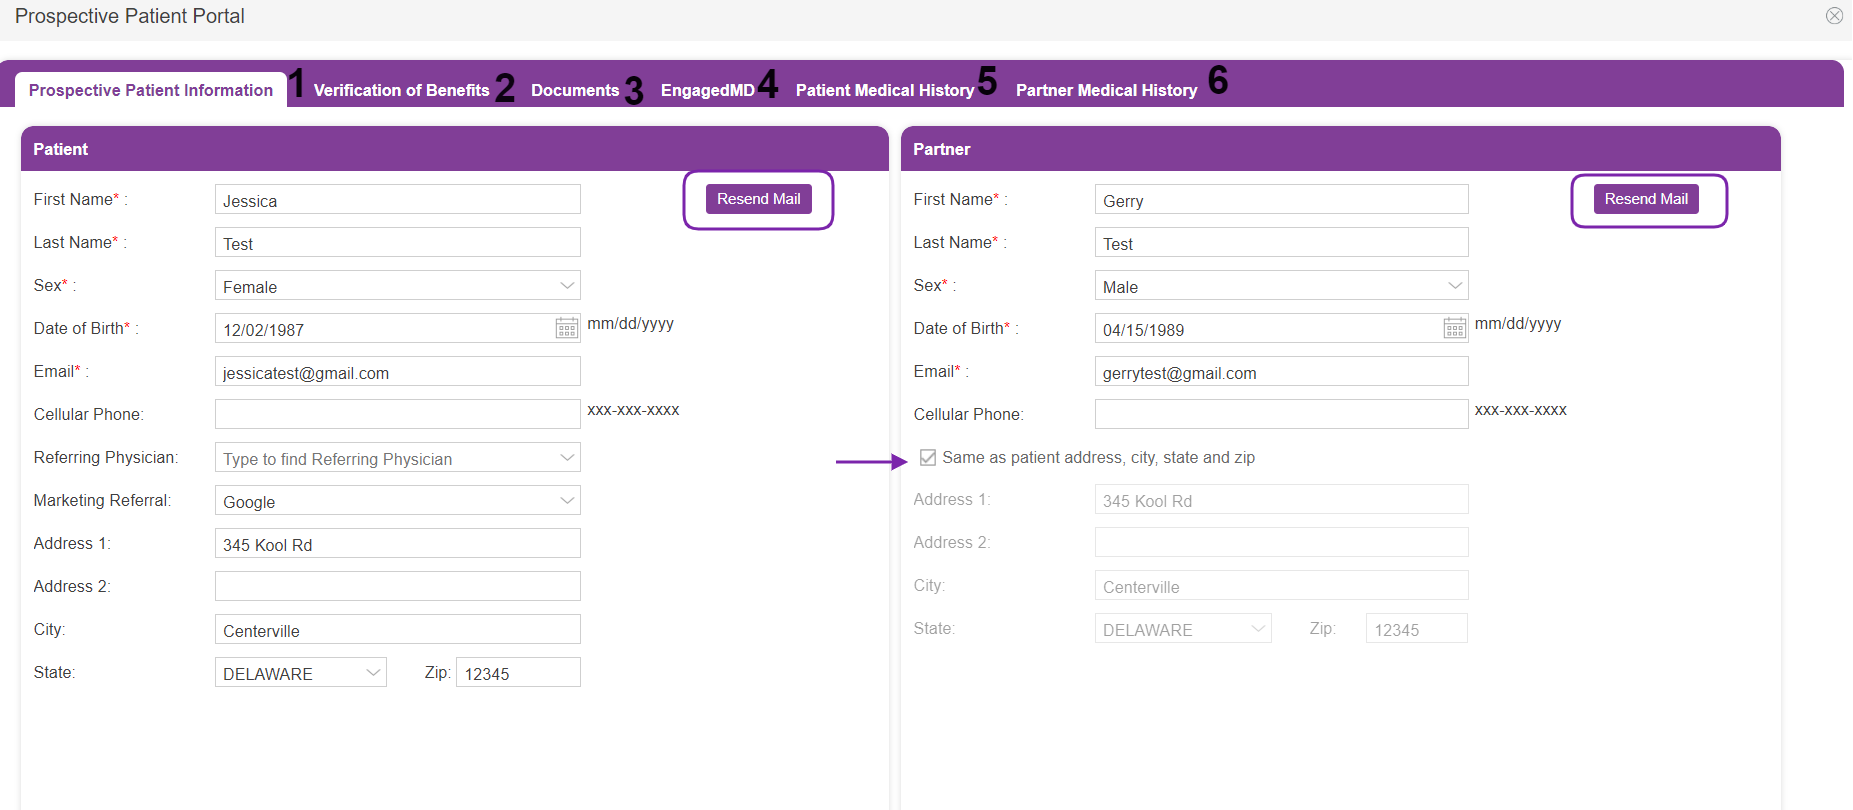
1. Prospective Patient information - displays patient and partner's (if applicable) basic information. This section will automatically update if this area has been updated within the patient's prospective portal.
In instances that the patient did not receive the portal invitation or the email was captured incorrectly during the registration, you have an option to resend the email invitation to their prospective portal.
Make sure that you have the correct email address then click the Resend Mail button.
If a patient has a partner, you have an option to manually add the partner's information to the right side of the screen and resend the portal invitation to the partner. If they have the same address you are able to click the box to autofill in the address on the partner.
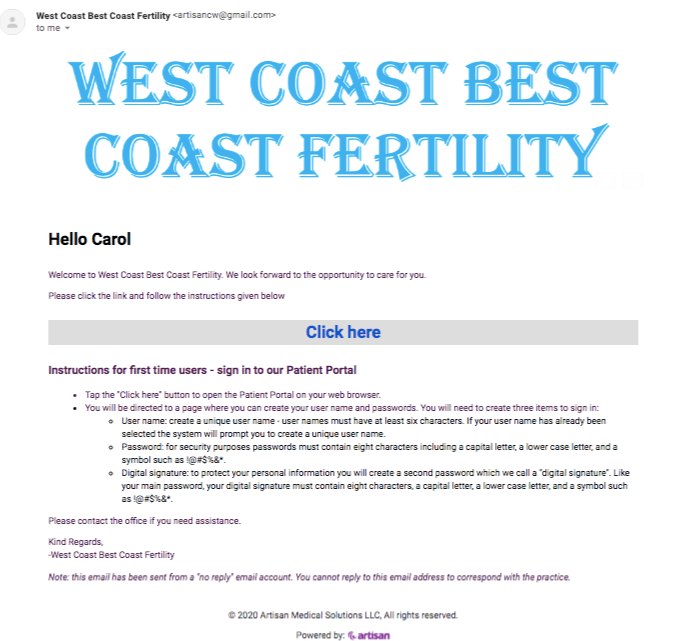
Here is an example of the email generated by the system to the patient.
See Prospective Portal manual to learn more.
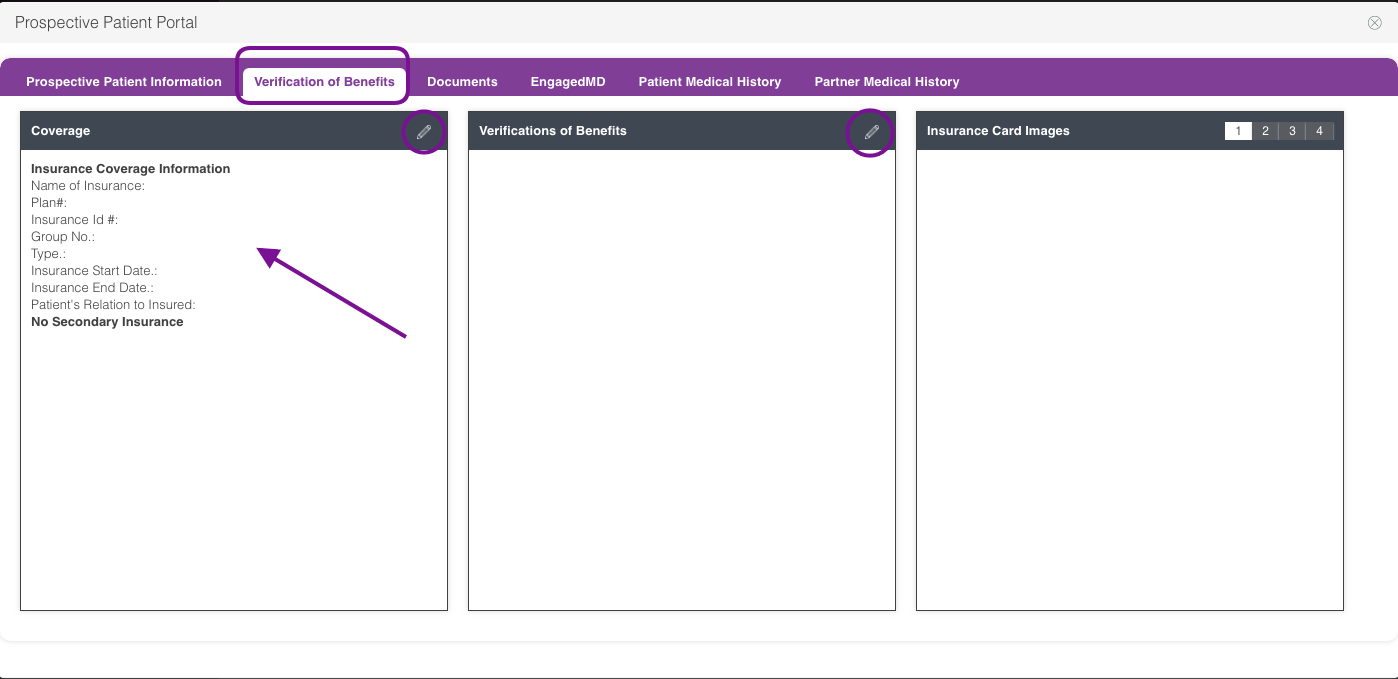
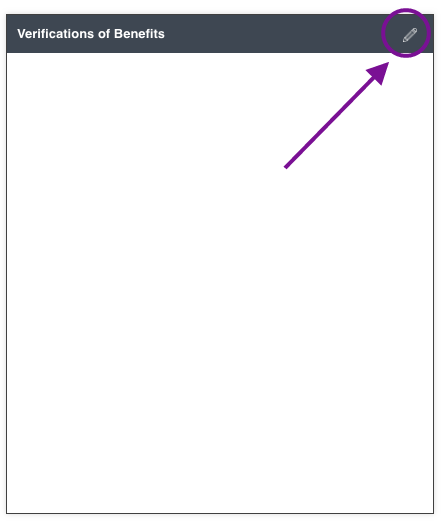
2. Verification of Benefits - displays patient's insurance information. There are 3 columns in this section:
- Coverage - Click the pencil icon to manually add the insurance information.
- Verification of Benefits - Click the Pencil icon to verify patient's benefits.
- Insurance Card Images - Prospective Patients have the ability to upload their insurance card images and information through their prospective portal and the information will automatically populate in this section.
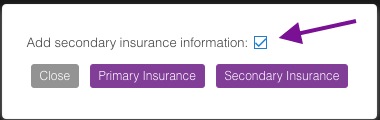
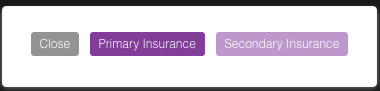
To add the insurance information, click on the pencil icon for Coverage and click the Primary insurance button. If the patient has a secondary insurance, you may also enter that information by clicking the box pictured above and then clicking the Secondary Insurance button. Select the appropriate insurance information that you wish to update.
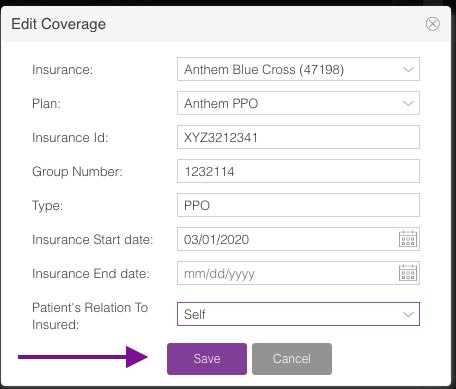
Fill out the applicable fields and then click Save.
Click the pencil icon to verify the patient's benefits.
Select the type of insurance to be verified. The insurance must be entered in Coverage before you are able to select it to be verified. In this example, Primary Insurance information has been entered but Secondary Insurance has not.
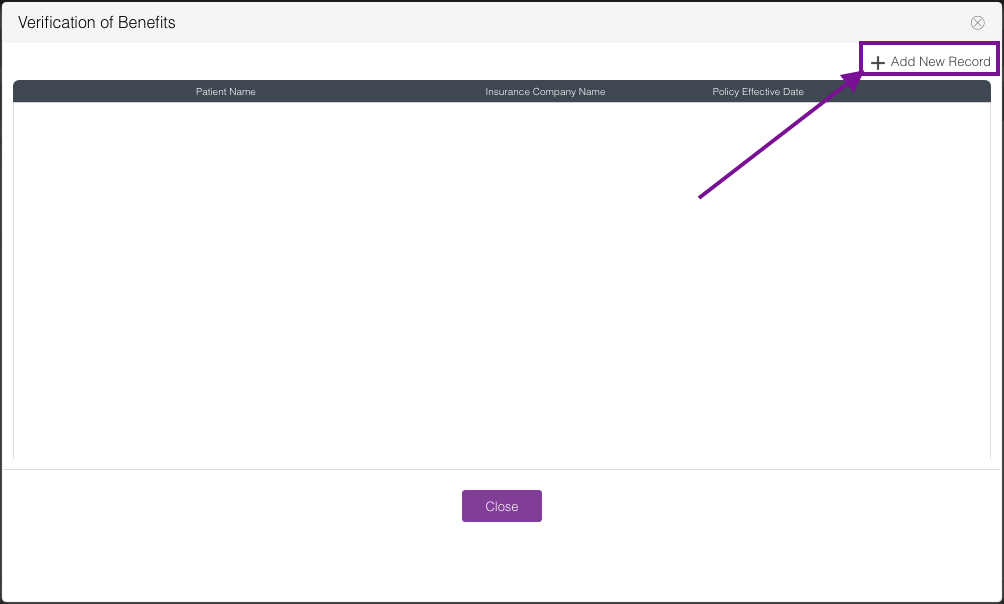
Click +Add New Record
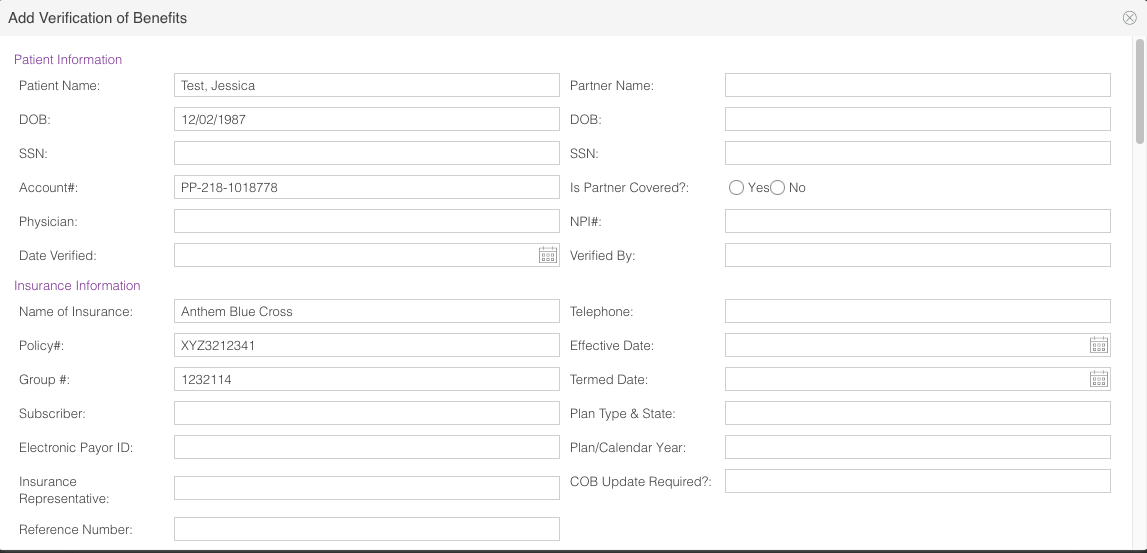
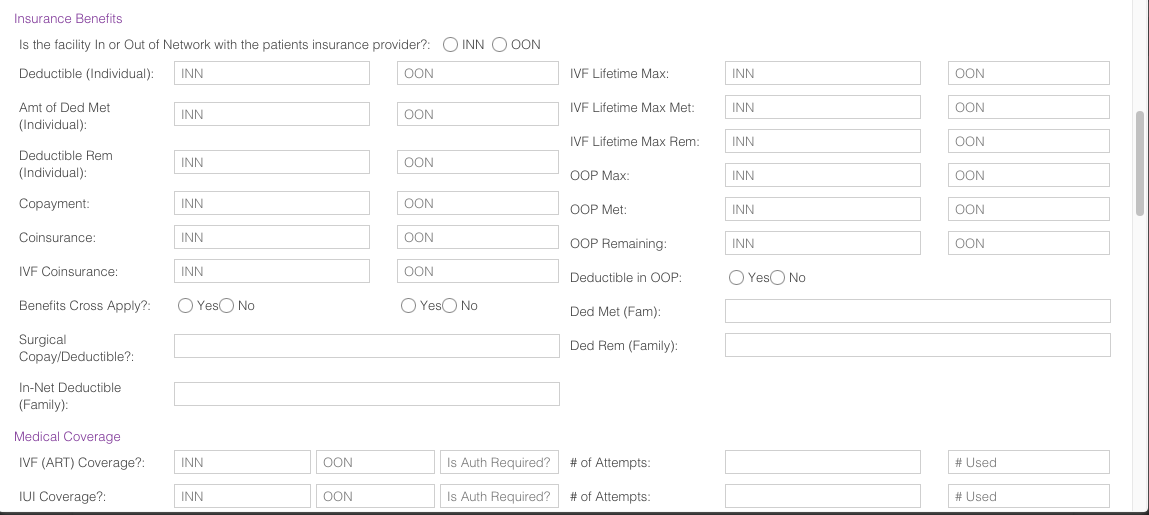
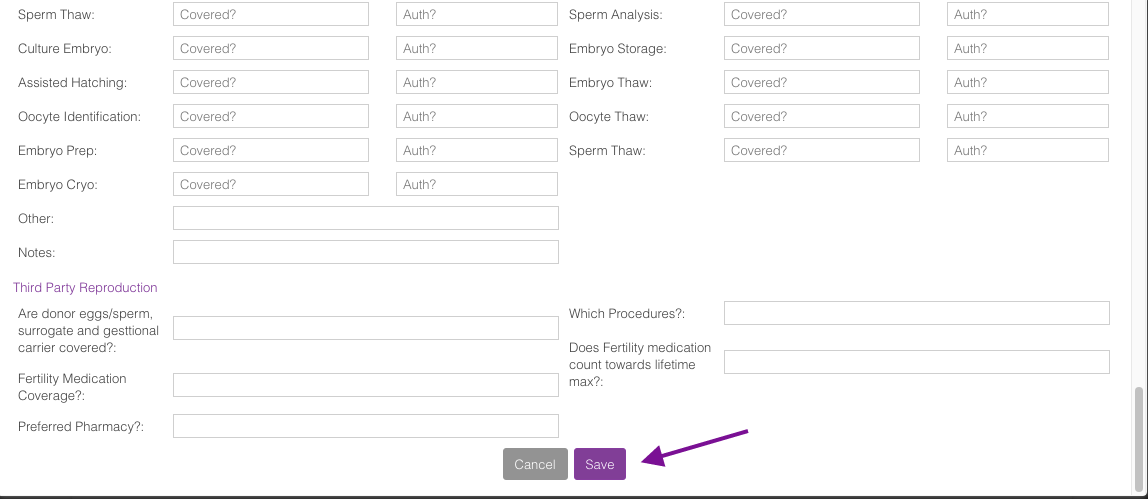
Fill out the verification form and then click Save.
To edit the verification form click the pencil icon. Click the printer icon to print the form and click the trash can icon to delete.
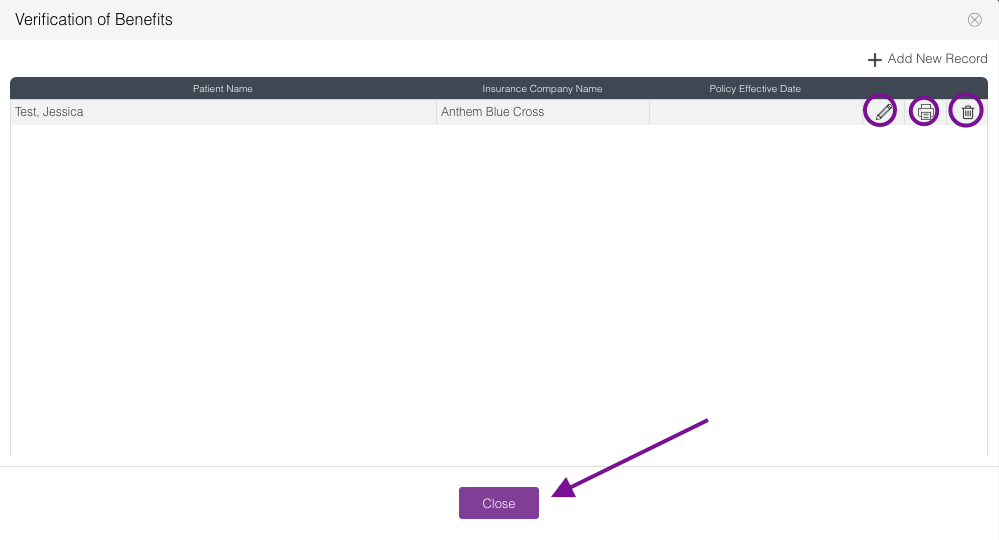
Click the close button to go back to the verification of benefits portal.
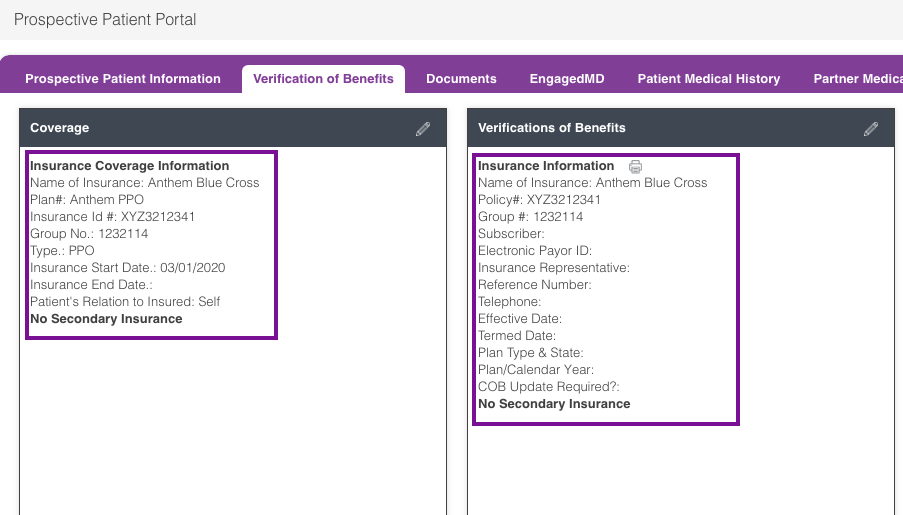
The prospective patient's insurance coverage and verification of benefits information will now appear on the prospective patient portal.
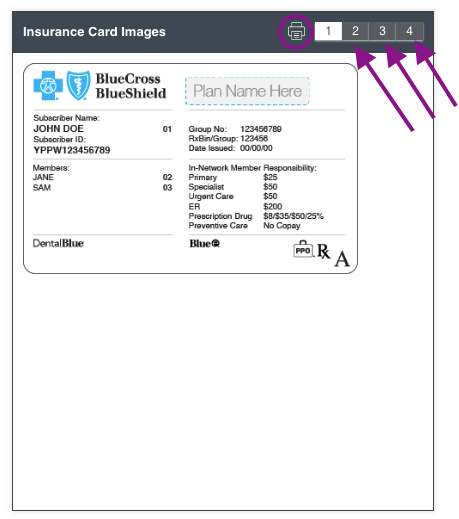
Here is an example of the Insurance card images column view once the prospective patient uploaded the information. You can click through the numbers to pull up the different images that the patient had uploaded, if applicable. Click the printer icon if you wish to print the images.
3. Documents - displays documents that have been uploaded by the prospective patient or uploaded to the prospective patient portal.
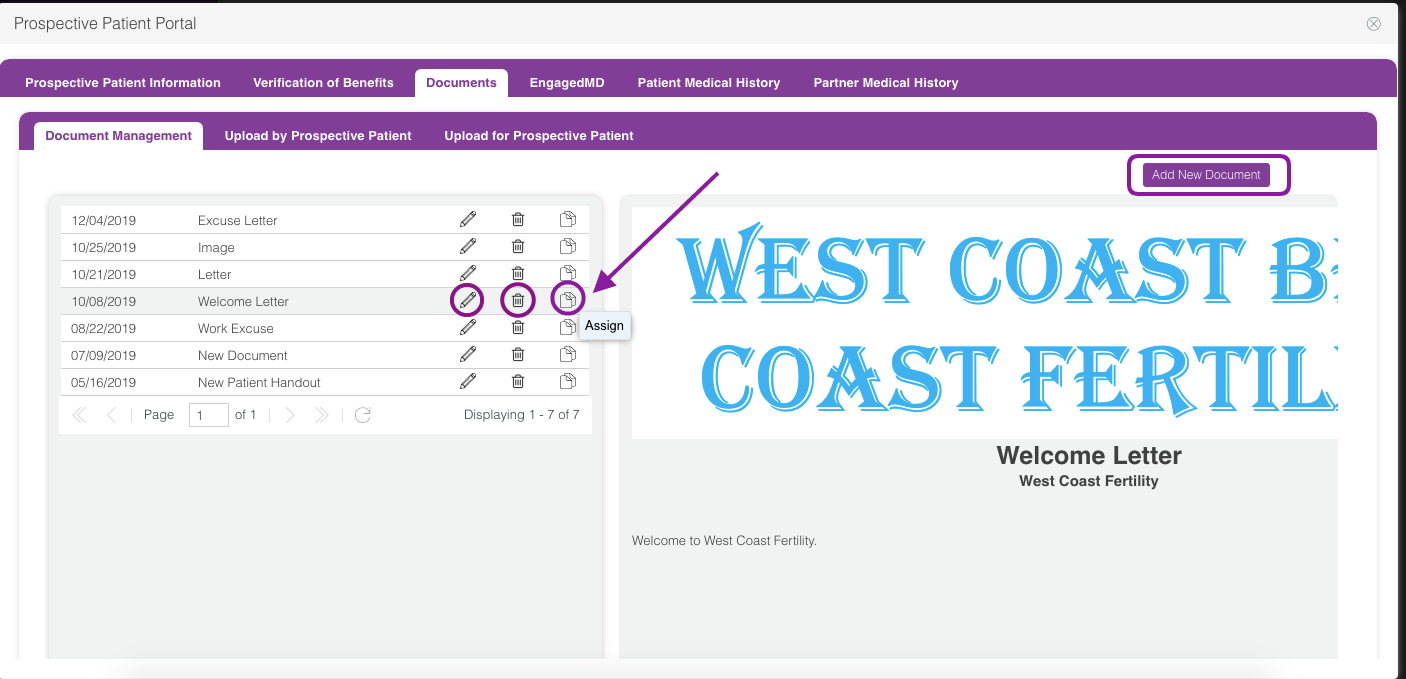
The Document Management tab allows you to send a document to the prospective patient portal. For example, a welcome letter. These documents are customizable by clicking the Add New Document button. See Patient Handouts to learn more.
Optional: You are able to edit by clicking the pencil icon and delete the document by clicking the trash can icon for the changes to appear clinic wide.
Click the Assign icon to send a document to the prospective patient portal.
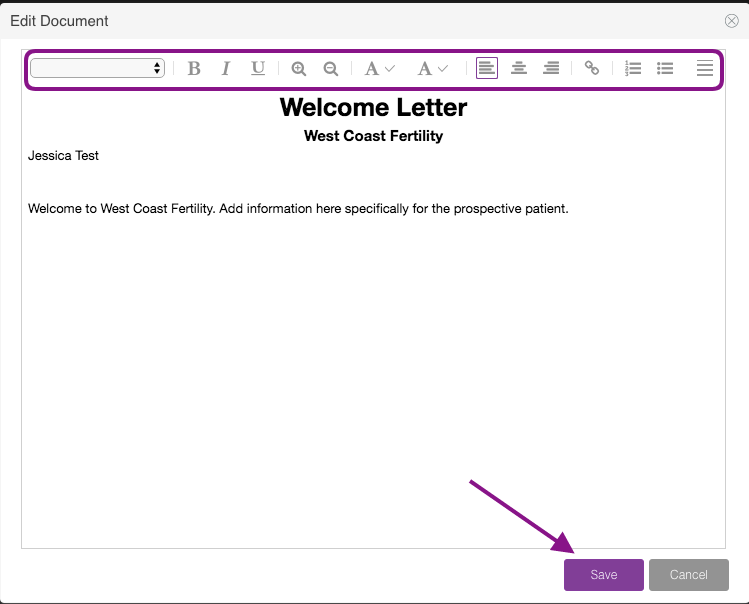
It will allow you to edit the document specifically for the patient. Use the different format options above as needed then click the save button.
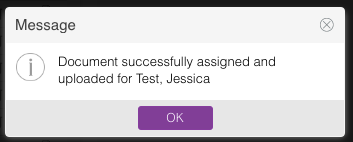
Click Ok.
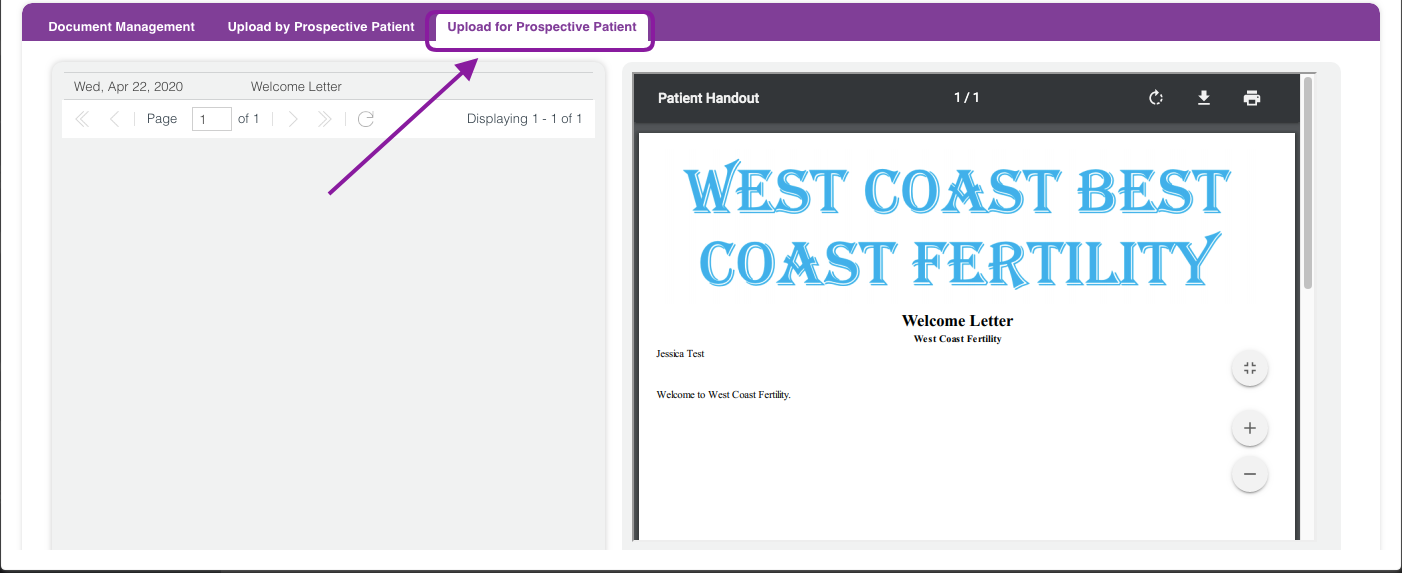
The assigned document will be recorded under the Upload for Prospective Patient tab. The patient will also be able to view this document in their prospective patient portal.
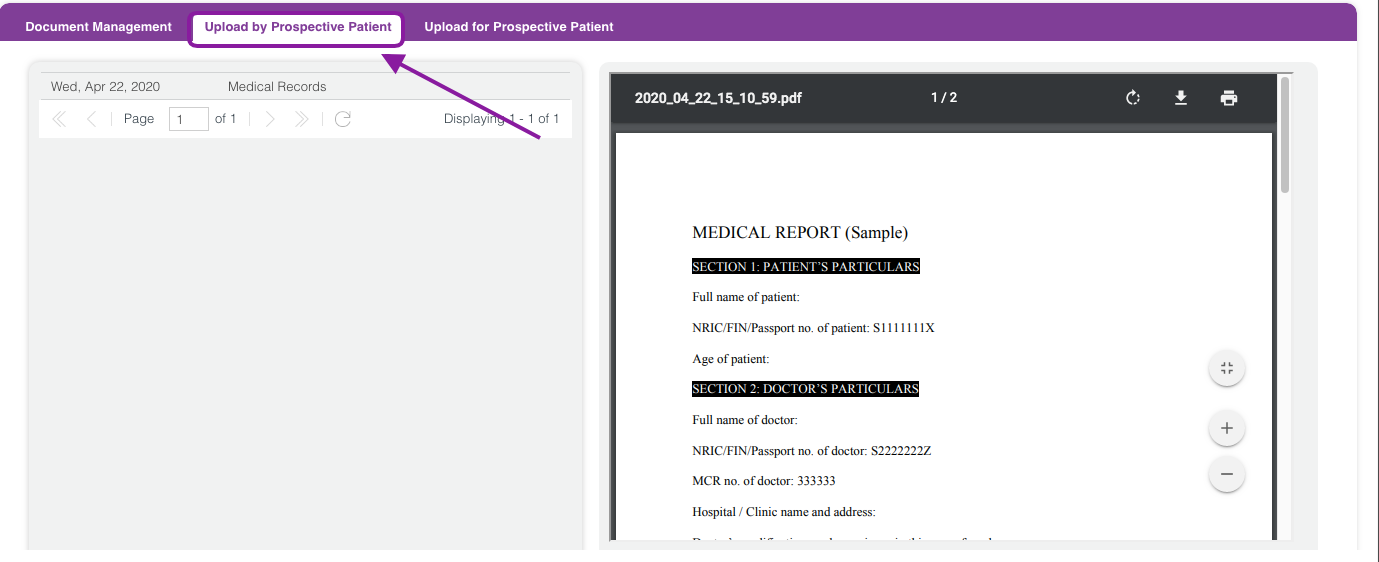
In this example, the prospective patient uploaded a medical records document.
Prospective patients can upload documents using their prospective patient portal and it will populate under the Upload by Prospective Patient tab.
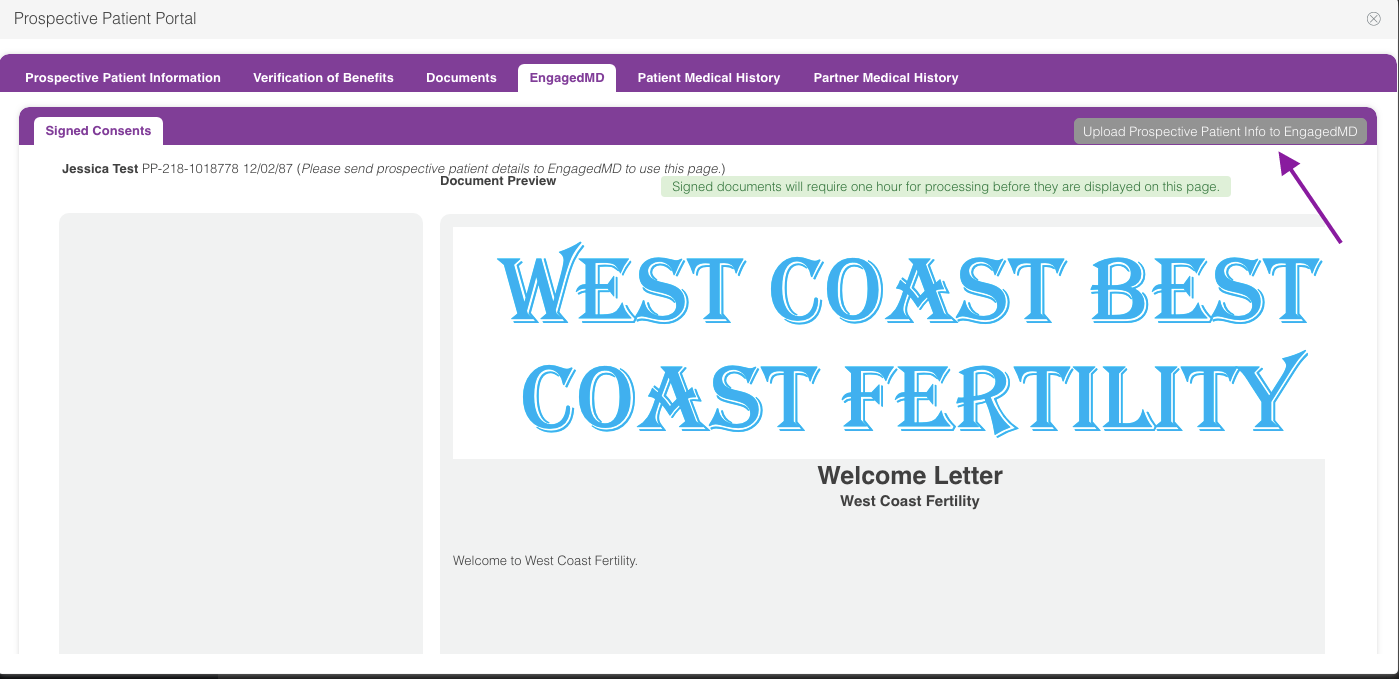
4. Engaged MD is an integration where it enables the practice to send and receive electronic consents for e-signature with educational modules.
Click Update Prospective Patient Info to EngageMD tab.
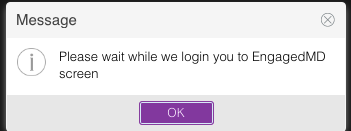
Click Ok.
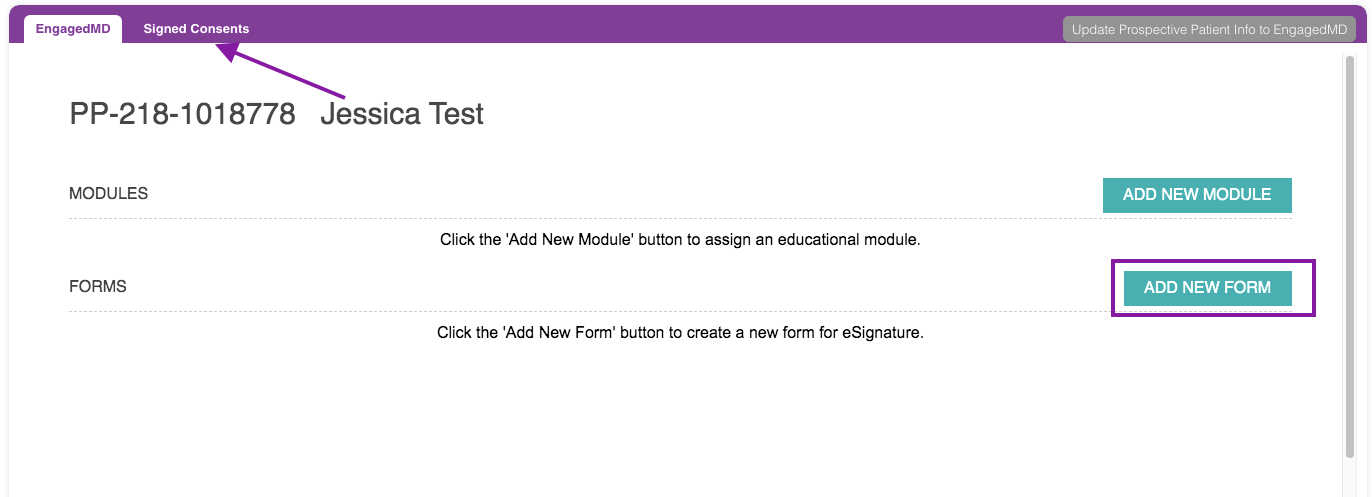
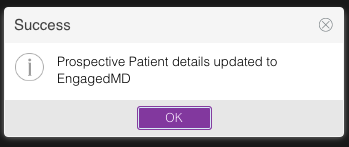
Once the patient is uploaded to EngagedMD, there will be an EngagedMD tab. From this screen, you are able to add a new form and view signed consents.
Click here for more information.
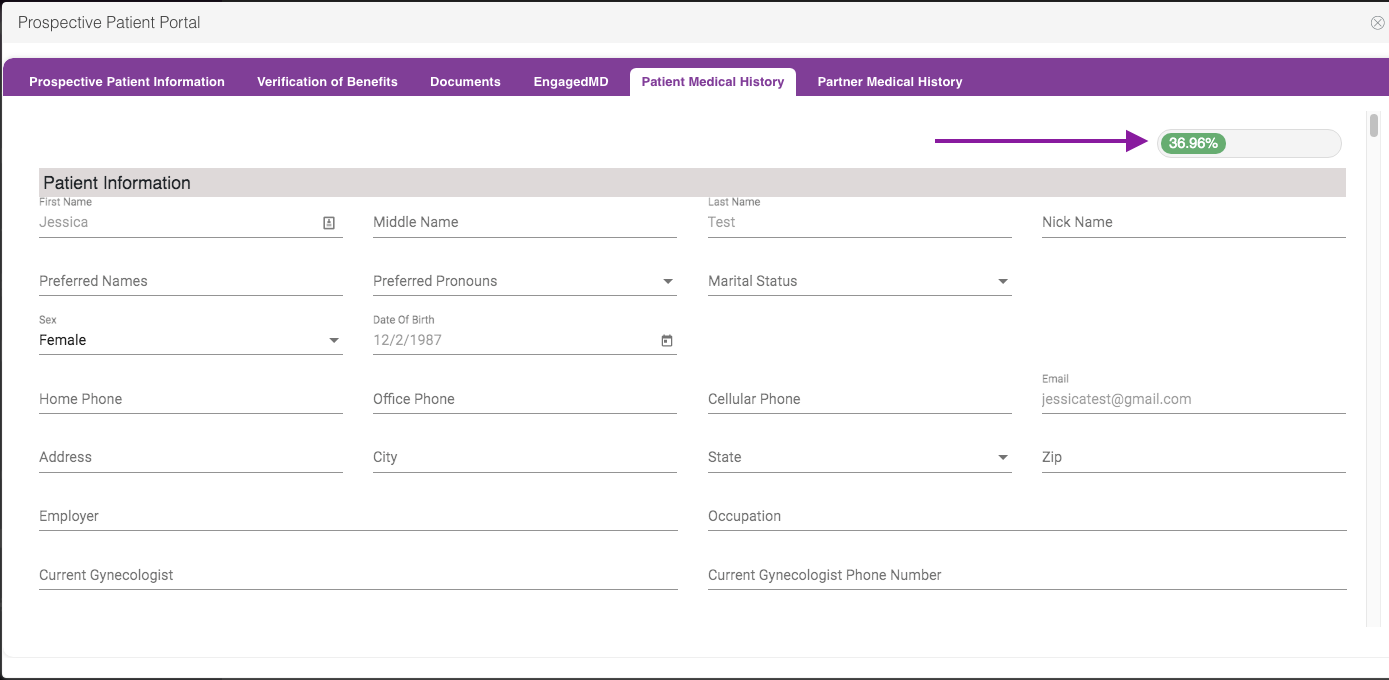
5. Patient Medical History - displays the prospective patient medical history form.
It allows the practice to track the patient's progress in completing their new patient form. The percentage of information in the upper right-hand corner will automatically update as prospective patients fill out the form in their prospective portal.
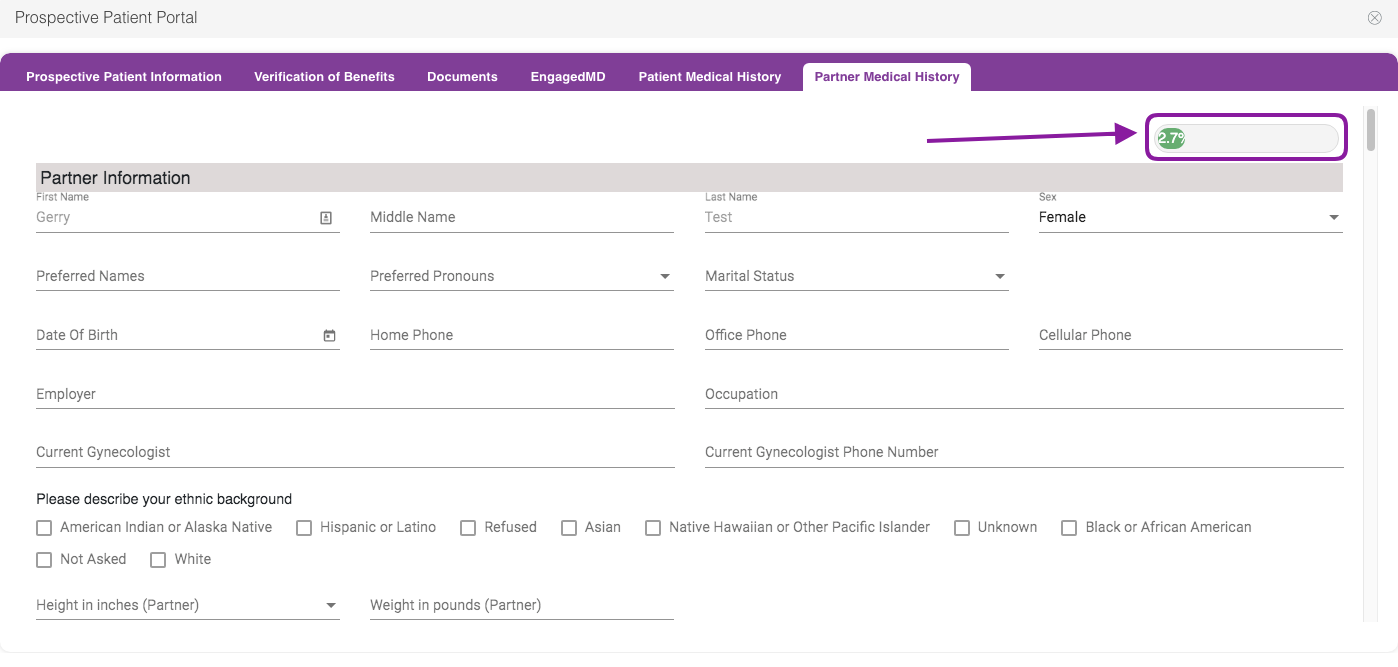
6. Partner Medical History - displays the partner's medical history form and tracks the partner's history form completion.
Archiving/ Restoring a Prospective Patient
In the case that a prospective patient becomes inactive for a length of time, you have the ability to archive the patient. This will not delete the patient from the prospective patient database, and you will be able to restore the patient in case they decide to continue the process of becoming a new patient.
To archive, a patient, begin in the active patients tab of the Prospective patient portal.

Check one, or multiple patients you wish to move into Archived patients. Then click Archive.

This confirmation window will pop up. Click Yes to proceed.

You will now be able to view the newly archived prospective patient in the prospective portal archived patients tab.

To restore, a patient, begin in the archived patients tab of the Prospective patient portal.
Check one, or multiple patients you wish to move into active patients. Then click Restore.

This confirmation window will pop up. Click Yes to proceed.

You will now be able to view the newly restored prospective patient in the prospective portal active patients tab.

Importing a Prospective Patient into Artisan/Creating a New Chart

When the patient arrives for his/her first appointment, or your practice wishes to create a chart by importing a new patient, click the Import button from the Active Patients tab. If a patient has been archived, you must restore the patient prior to being able to import the patient.

This confirmation window will pop up. Click Yes to proceed.
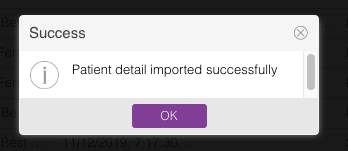
The message above indicates that the patient is no longer Prospective and now has a chart in Artisan. Click Ok.
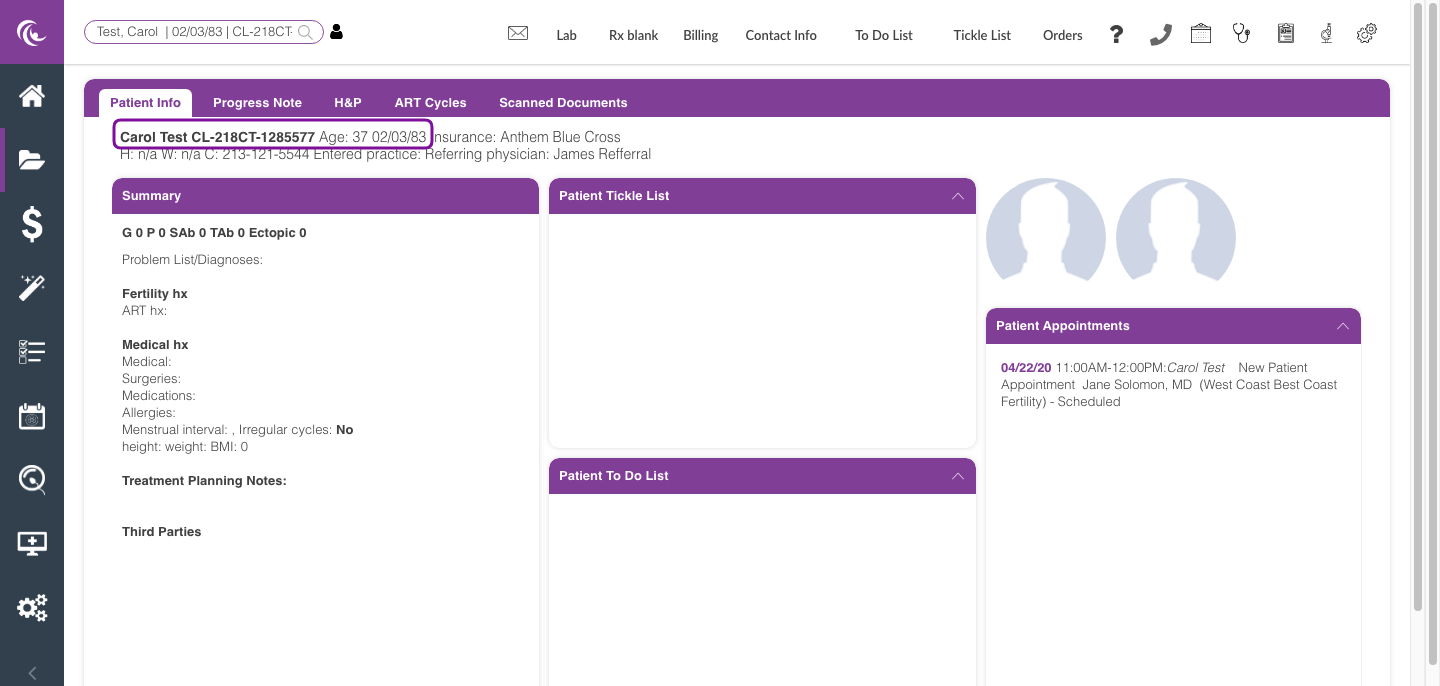
The patient will now have a live chart within the EMR. The patient's and partner's medical history will flow to the H&P section. Any documents sent or received by the patient will flow to the scanned document section. The insurance, insurance verification, and notes will flow to Accounting.
**All manuals are compliant with HIPAA regulations. No patient information has been released. All screenshots above were taken from a test clinic with fake patient information.
Artisan Support
Comments