Introduction
The Insurance Info tab is used to manage insurance coverage for patients and partners in conjunction with insurance billing.
Navigation
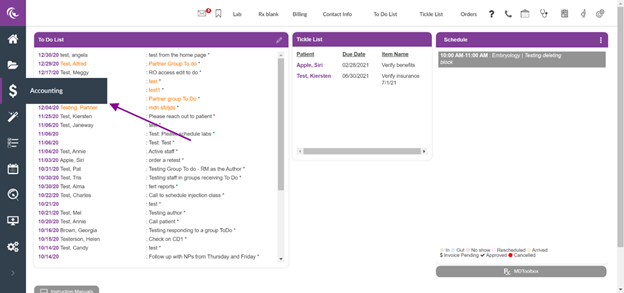
Click on Accounting ($ icon) to access the billing section of a patient's medical record.
Navigate to the Patient tab.
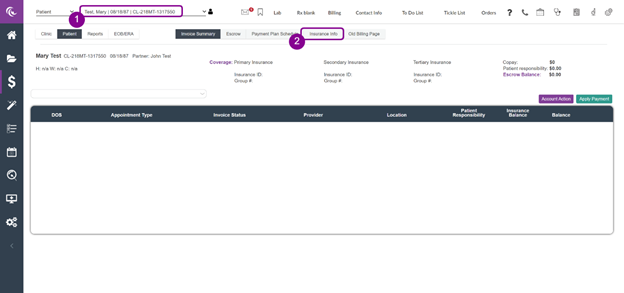
1. Search for the patient in the search bar (Last Name, First Name)
2. Click on the Insurance Info tab.
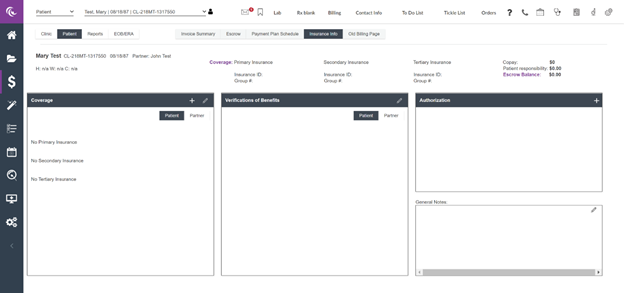
The insurance info screen will open. Within this view you can enter insurance information, verify insurance benefits, add authorizations, and enter general notes.
Entering a Patient's Insurance Information
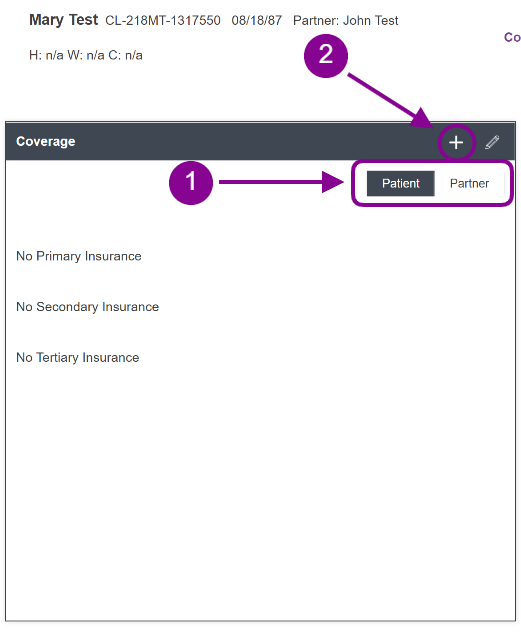
- Select Patient or Partner.
- Click on the (+) plus sign to add an insurance.
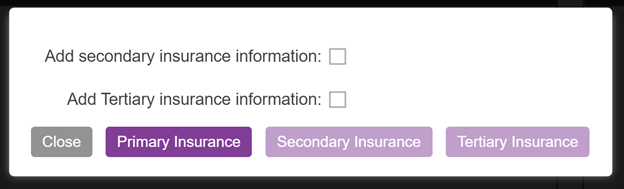
Click on Primary Insurance to enter the insurance. If the patient has secondary insurance and tertiary insurance, in some instances, click on the boxes and refer to Adding Secondary Insurances below.
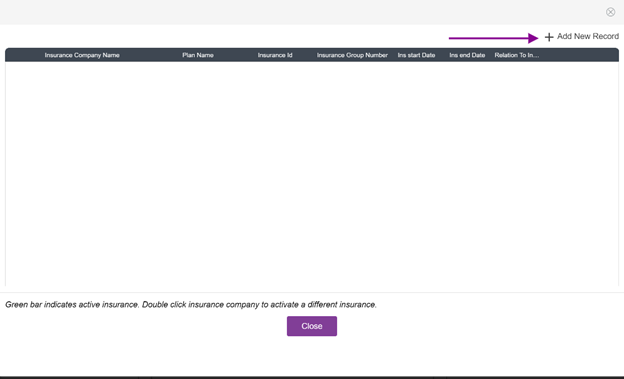
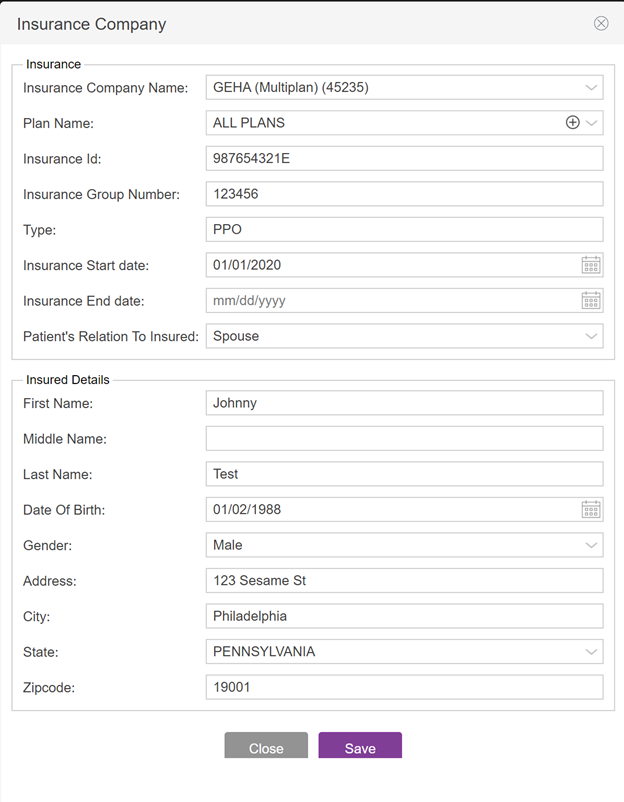
The Insurance Info window will open up. Click + Add New Record to add new insurance information.
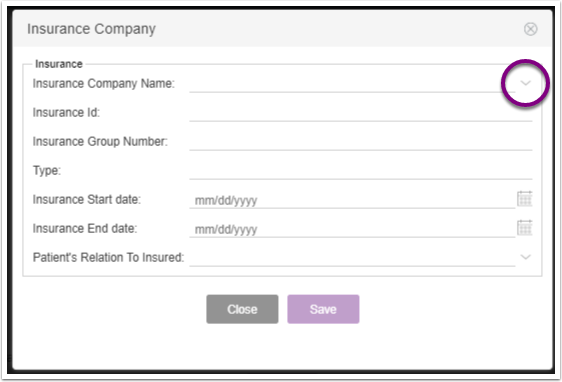
The insurance information can now be added. Click on the pull down menu for the Insurance Company Name to display a list of your common insurance companies.
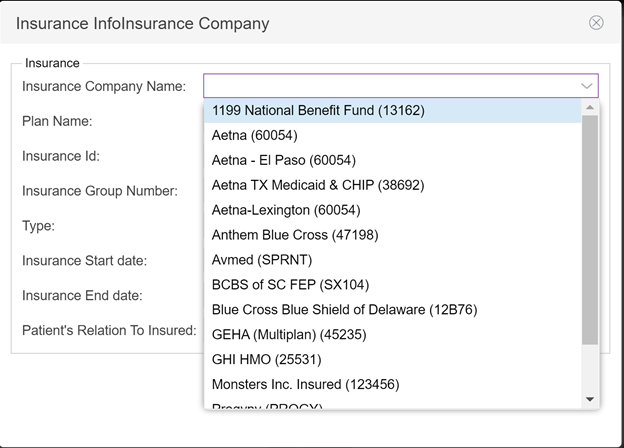
Choose the appropriate Insurance Company Name from the pull down list.
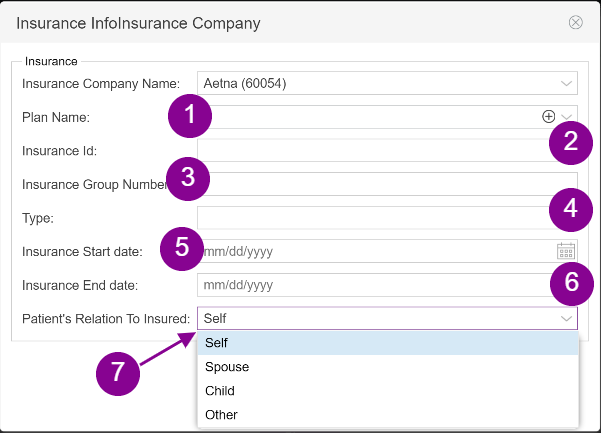
Complete the remaining information:
- Plan Name
- Insurance Id
- Insurance Group Number
- Type
- Insurance Start date
- Insurance End date
- Patient's Relation to Insured (Use the pull down menu to select Self, Spouse, Child or Other).
The start and end dates are to help you keep track of when insurances are valid. The active insurance will not switch automatically based on these dates.
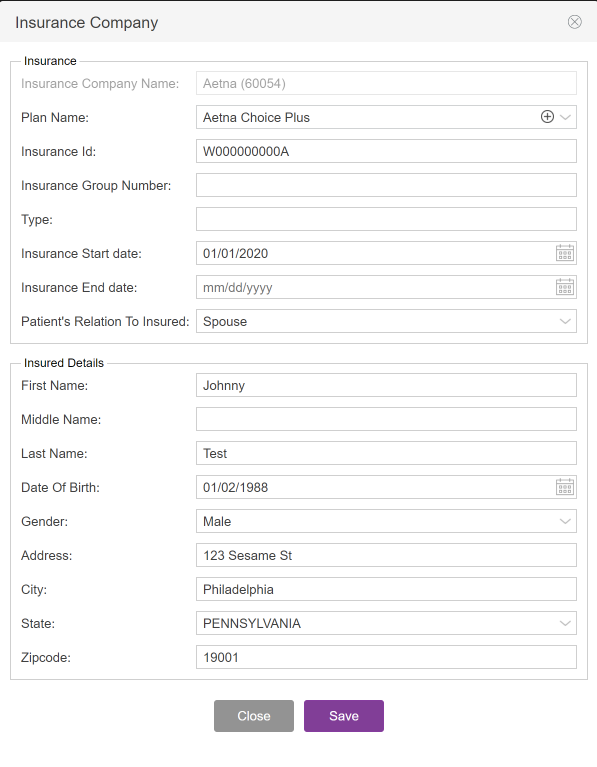
If any patient relation other than self is selected, you will be prompted to add the additional Insured Details. Note: If Spouse is selected, it will auto populate the information that is filled in the contact info.
Click Save to close the Insurance Company screen.
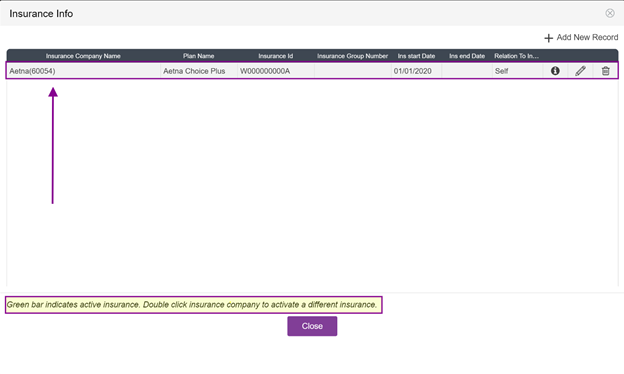
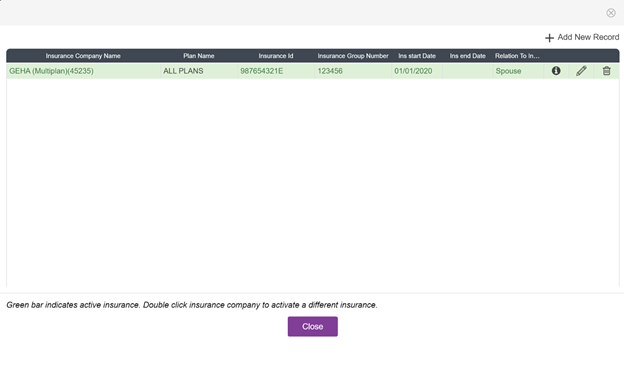
You must double-click on the insurance company to activate the insurance.
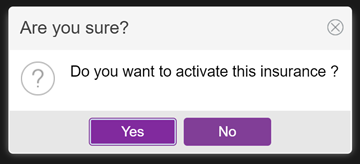
The above box will appear to confirm that you want to activate this insurance.

The active insurance will now be highlighted in green.
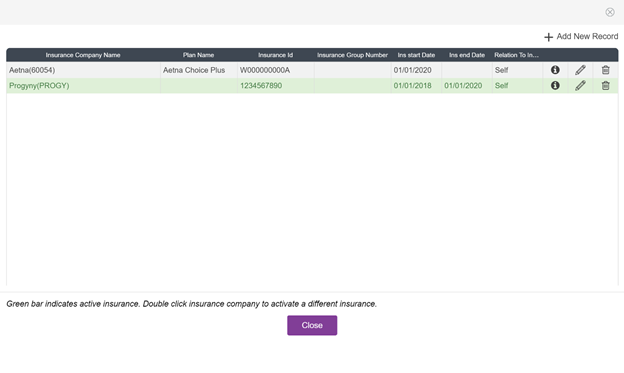
If you add new insurance information, you will want to keep the prior insurance information but you need to make sure that you double click on the new insurance company to designate that as the active insurance.
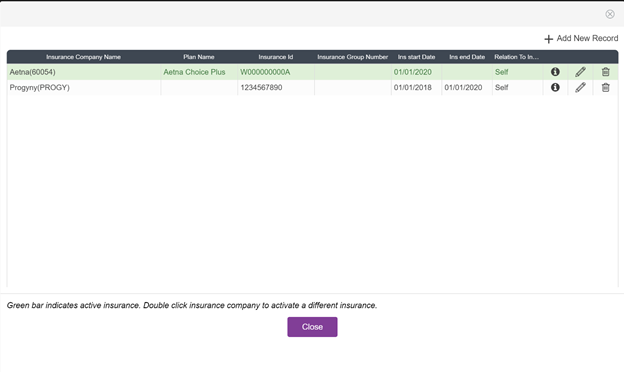
In this example, the newly added insurance, Aetna, is now highlighted in green, indicating that it is the active insurance.
You can activate and deactivate insurance companies as necessary, if you will still be utilizing prior insurance information to process/edit claims, etc.
Adding Secondary (and Tertiary) Insurance
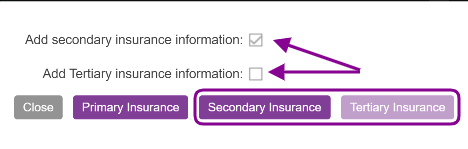
Add secondary information the same way the primary insurance is entered, when the pop-up box appears, click on the Add Secondary Insurance Information checkbox and you will now have the ability to select the Secondary Insurance box. To add tertiary insurance, follow the same steps for secondary insurance.

Click on + Add New Record.
Enter the secondary insurance information and click Save to exit out of this screen.
Don't forget to double-click on the insurance to make it active.
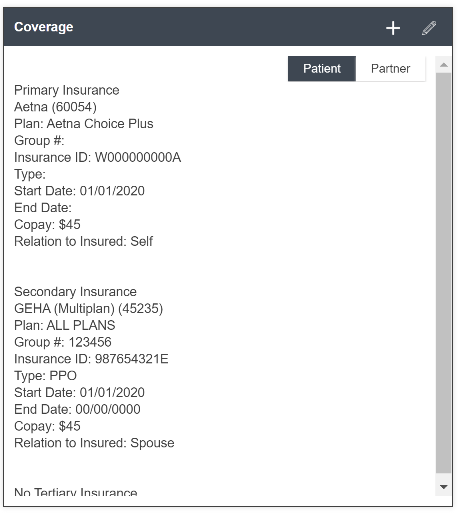
The completed Insurance Info screen showing both the primary and the secondary insurance information.
Adding an Insurance Company to the List of Payers
If the patient's insurer is not listed you may use the Insurance payer addresses Manage Payers feature found in EMR Settings to add an insurance company to the list. Learn how to manage payers here. This step is very important if you are using or planning on using our Change Healthcare billing integration. Fill in the rest of the information as necessary. The Manage Payers button will only be available in an integrated system.
Verification of Patient or Partner Insurance Benefits
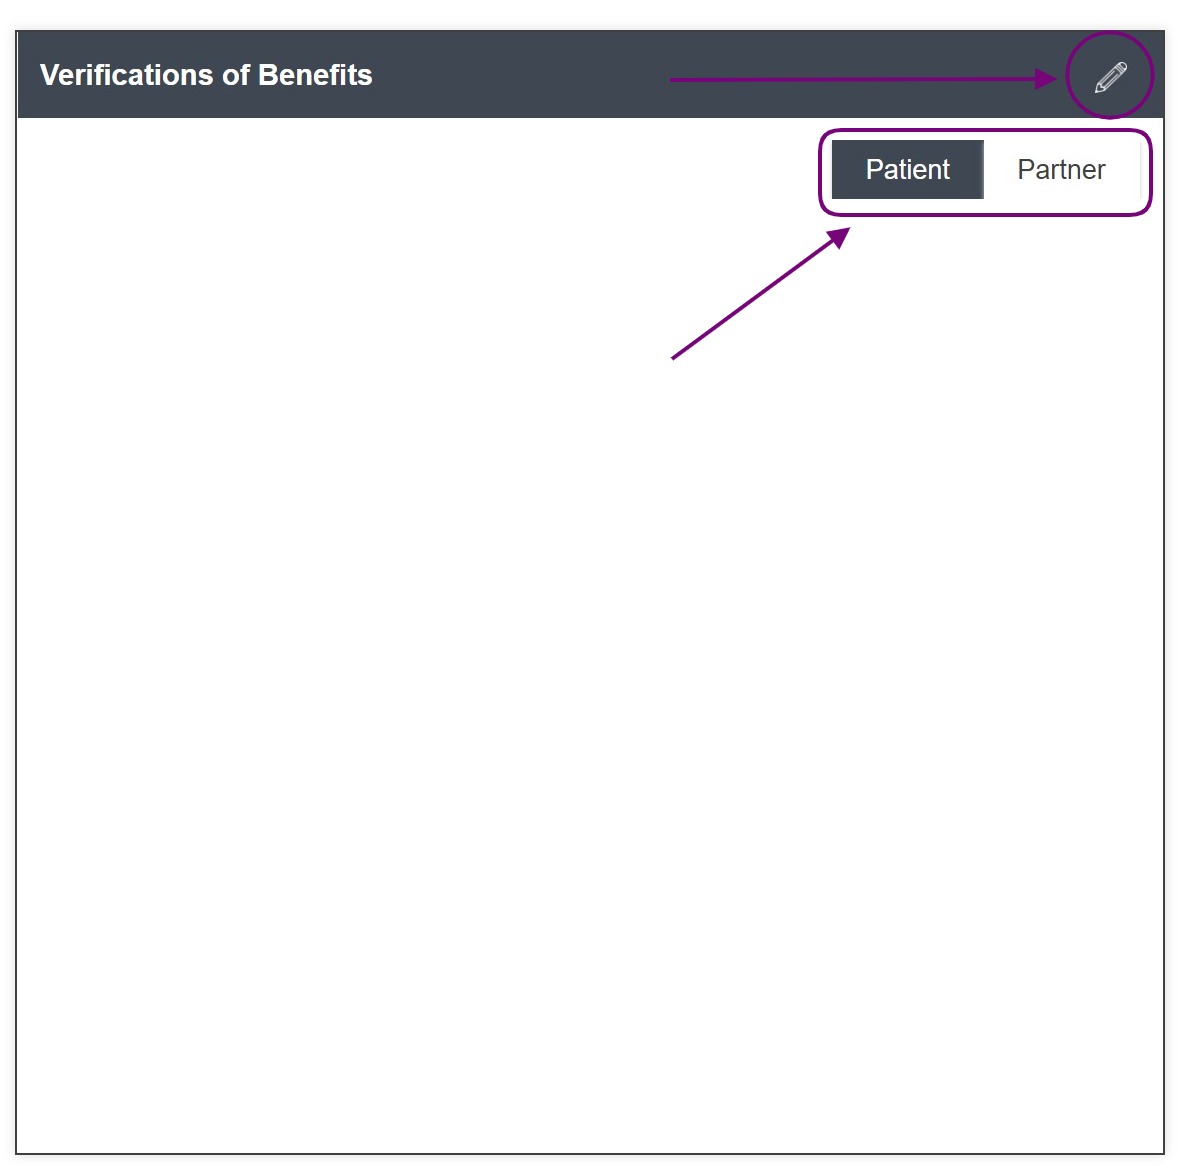
Click the pencil icon to verify the patient benefits. If selecting a partner, click on the partner box and then click the pencil icon.

Select the type of insurance to be verified. The insurance must be entered in Coverage before you are able to select it to be verified. In this example, Primary Insurance information has been entered but Secondary Insurance and Tertiary insurance has not.
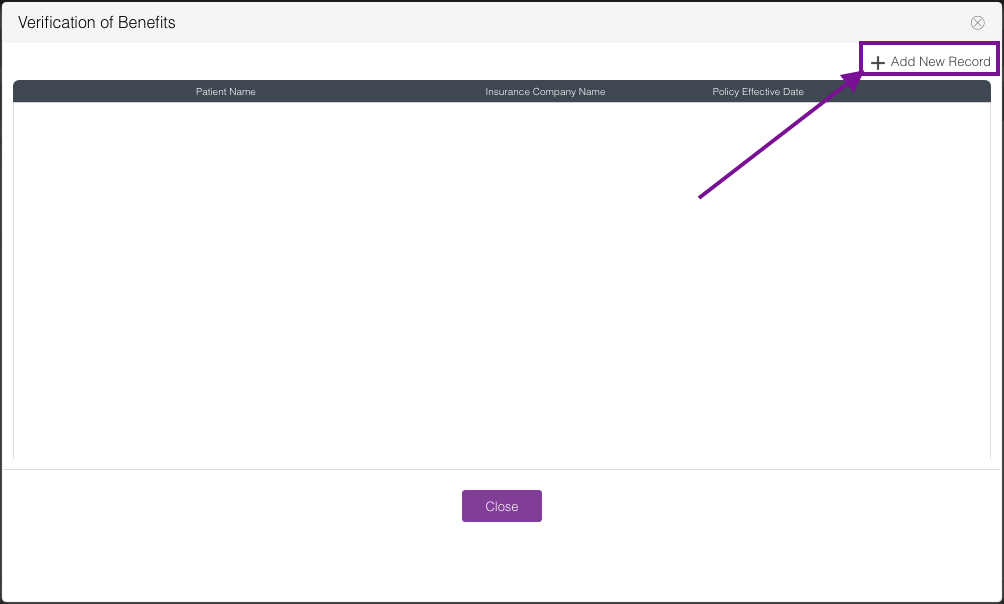
Click +Add New Record
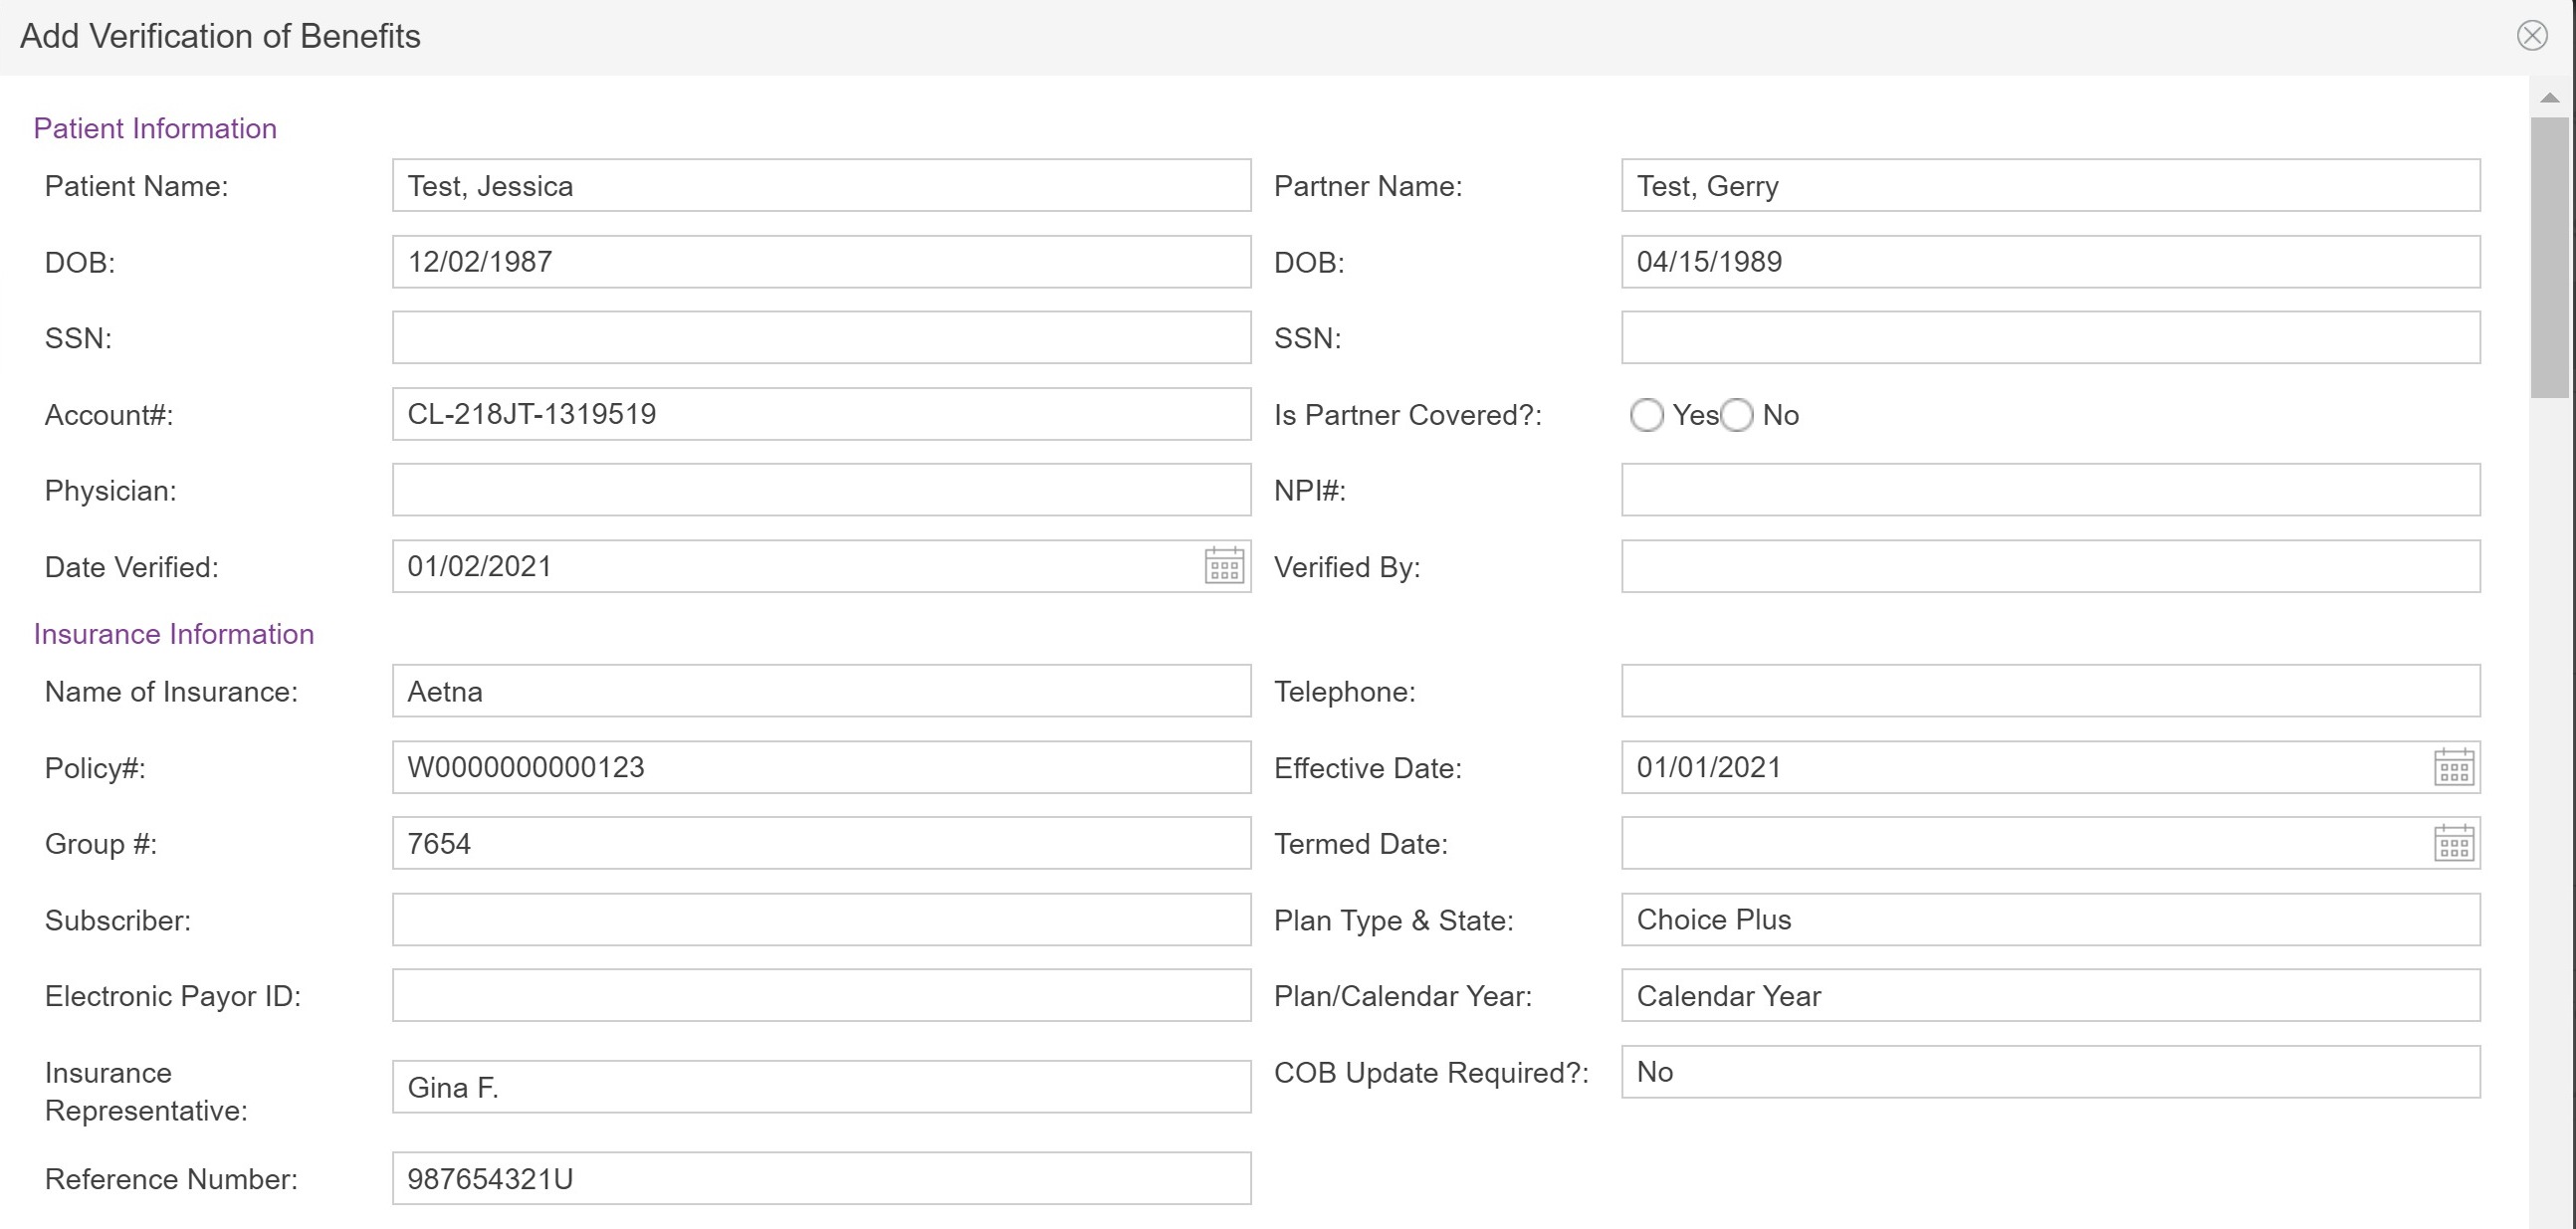
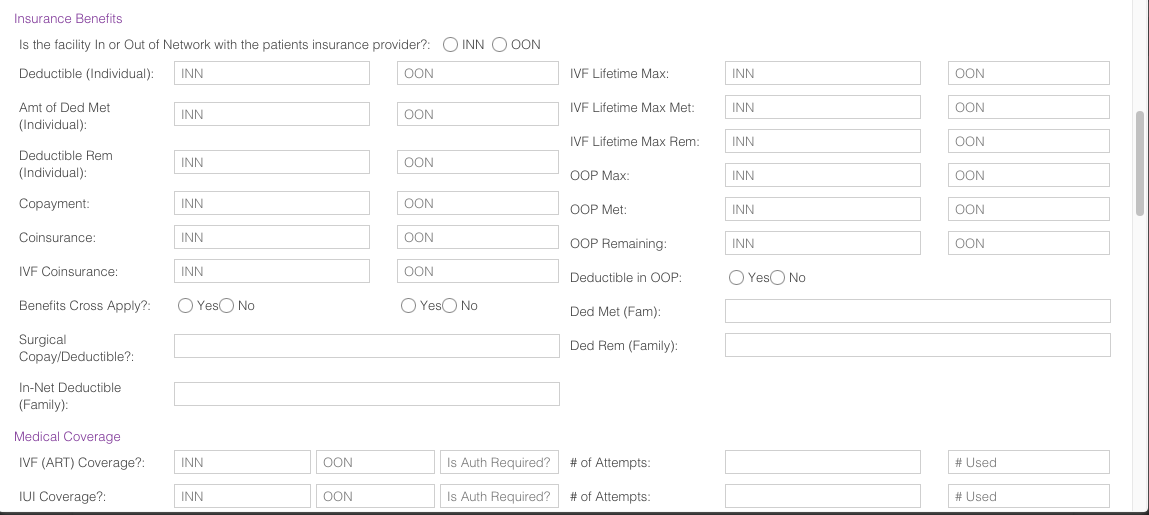
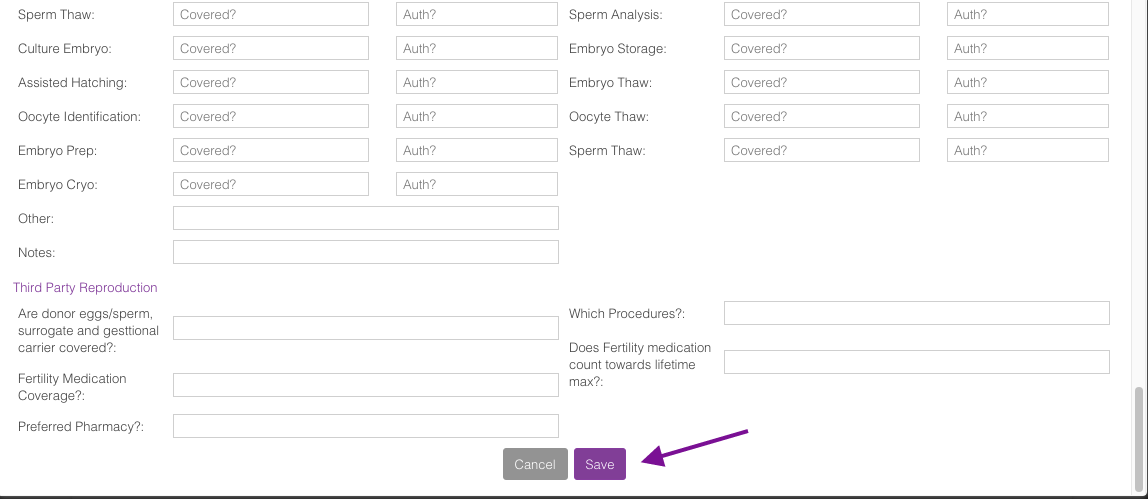
The patient or partner's demographic and insurance information will autofill on the form. Fill out the verification form and then click Save.
To edit the verification form click the pencil icon.
Click the printer icon to print the form.
Click the trash can icon to delete.
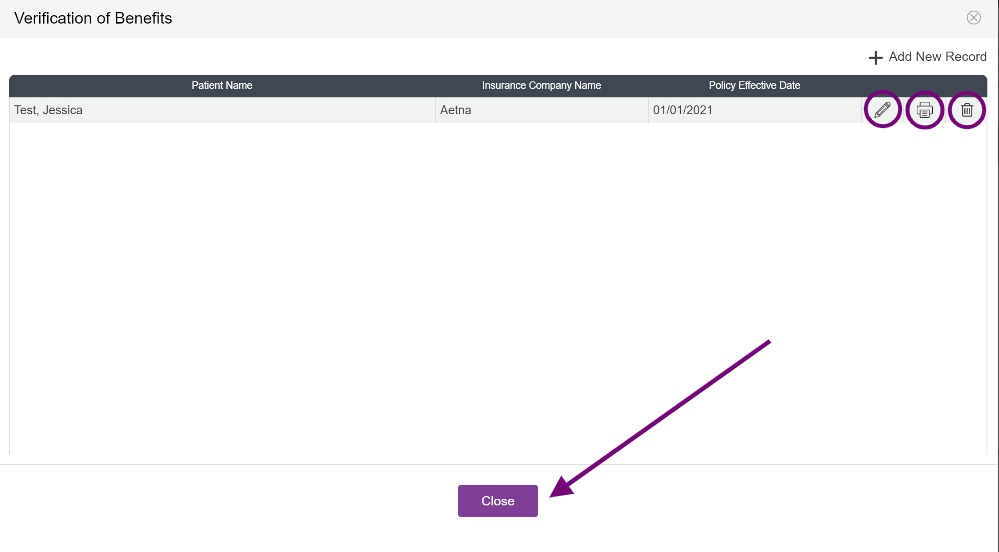
Click the close button to return to the Insurance Info tab.
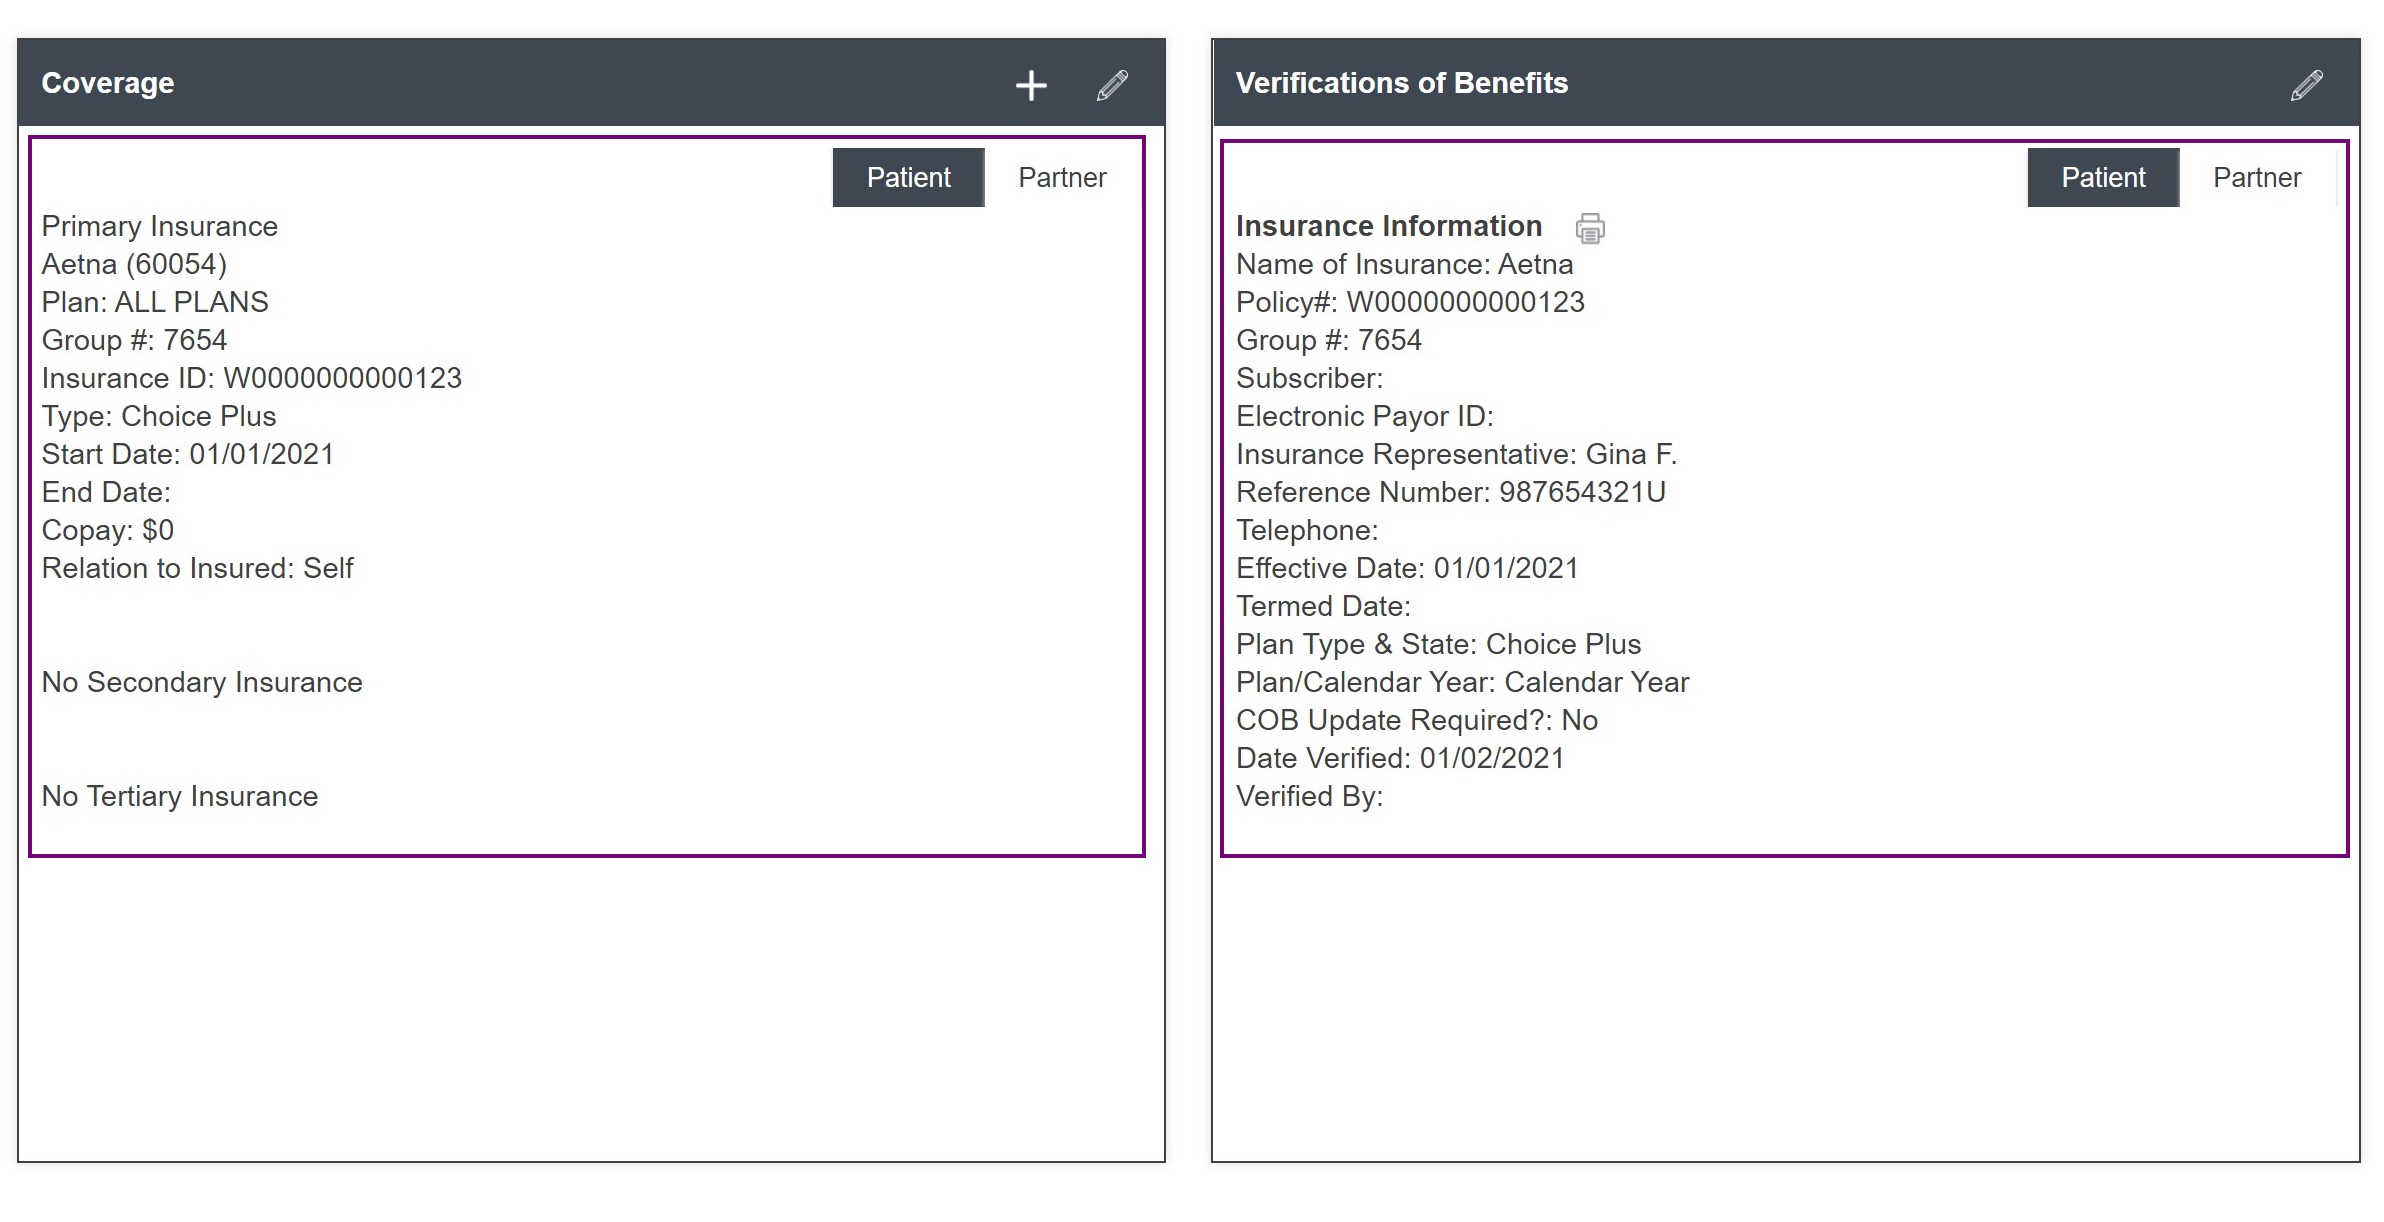
The patient's insurance coverage and verification of benefits information will now appear in the Coverage and Verification of Benefits boxes.
Authorizations
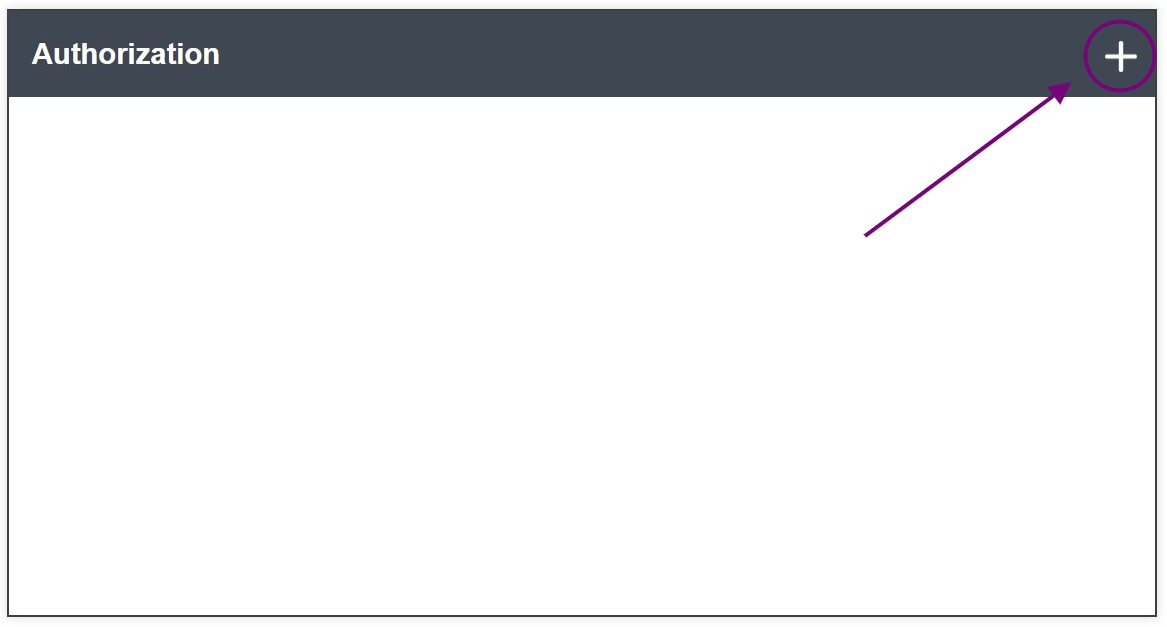
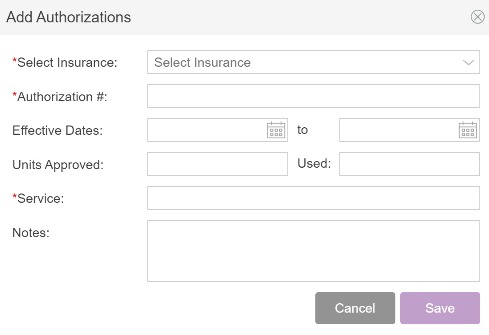
The above dialogue box will appear.
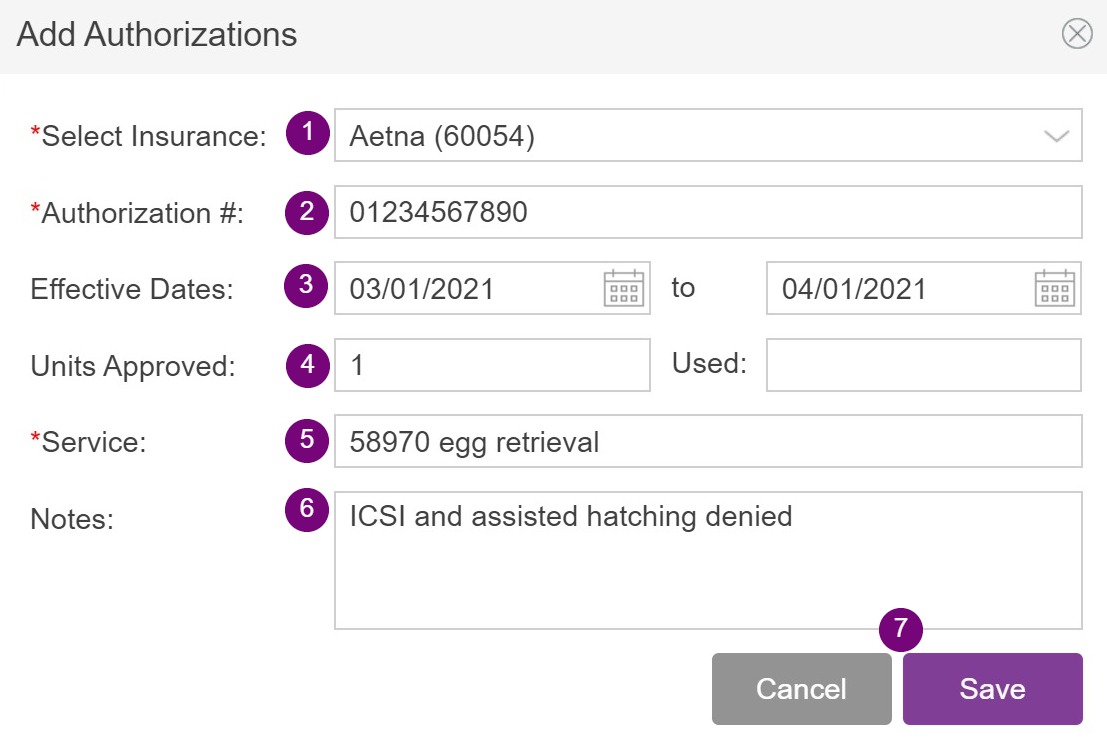
- Select Insurance: select the insurance from the dropdown. Only insurances listed under the Coverage area will display.
- Authorization #: enter the authorization number from the insurance company.
- Effective Dates: enter the date range from the authorization.
- Units Approved: in the first box, enter the number of units approved. Units Used will auto-update after the authorization is attached to the invoice.
- Service: enter the details of the authorization and what services are approved. This information should be clear so you know the correct authorization to use when attaching the authorization to the invoice.
- Notes: enter any important information regarding this authorization. This is a free-text field.
- Click Save.
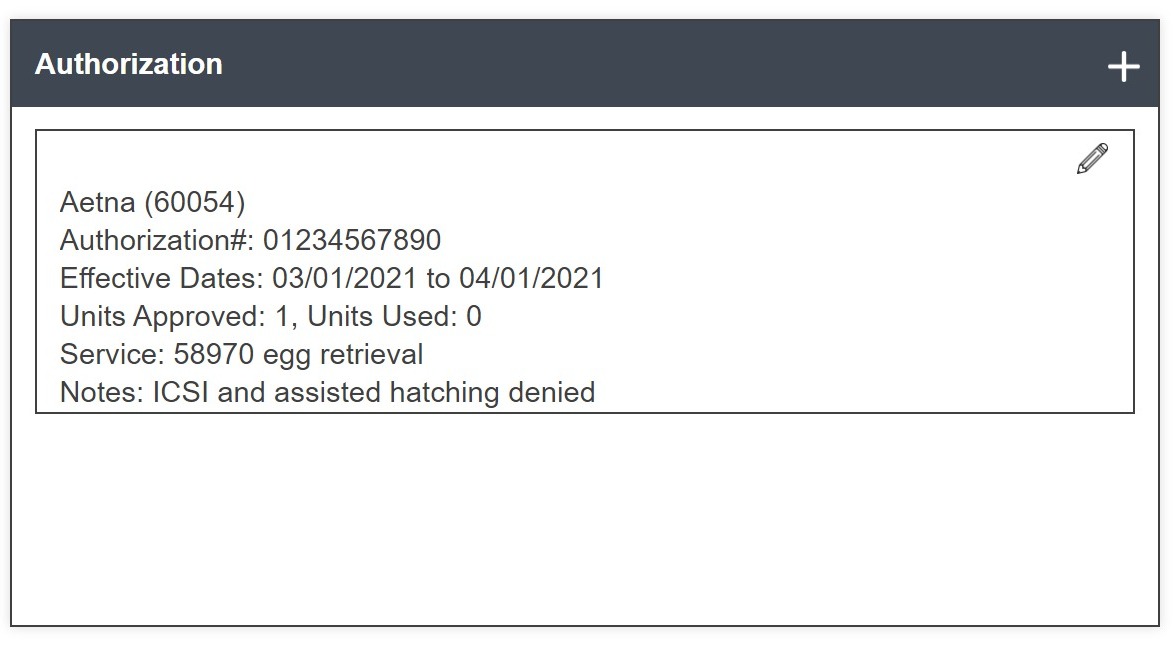
After entering in the details of the authorization and saving, they will display in the authorizations box.
General Notes
It is important to note that notes entered in general notes are only seen by users with access to the Accounting tab. These notes are strictly internal and will not be seen by patients. Any notes created when a patient was in the prospective portal will flow to the general notes once the prospective patient is imported as an existing patient.
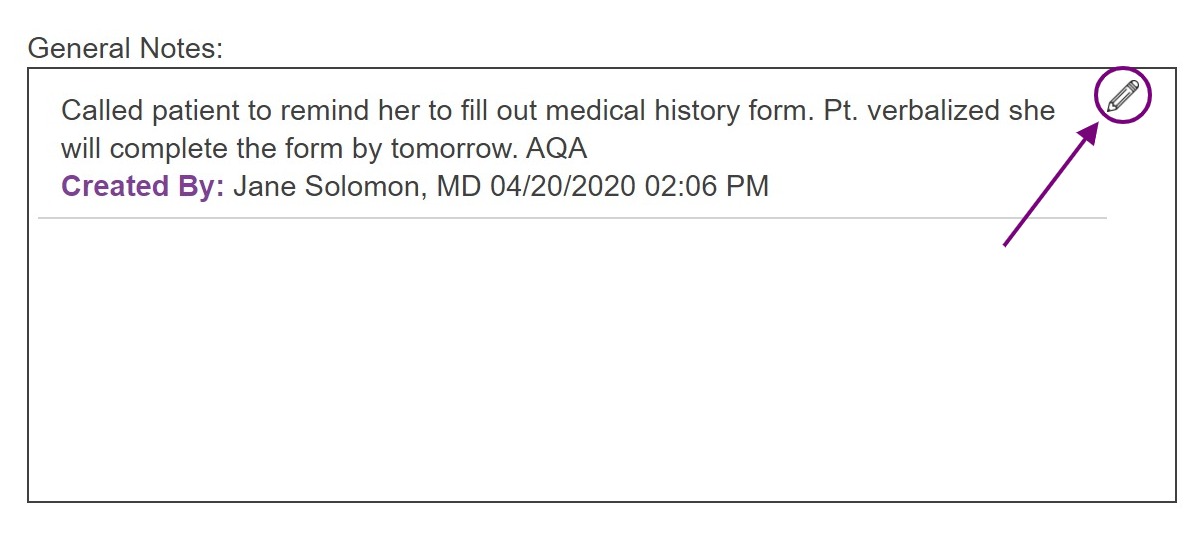
To create a new general note, click on the edit pencil icon.
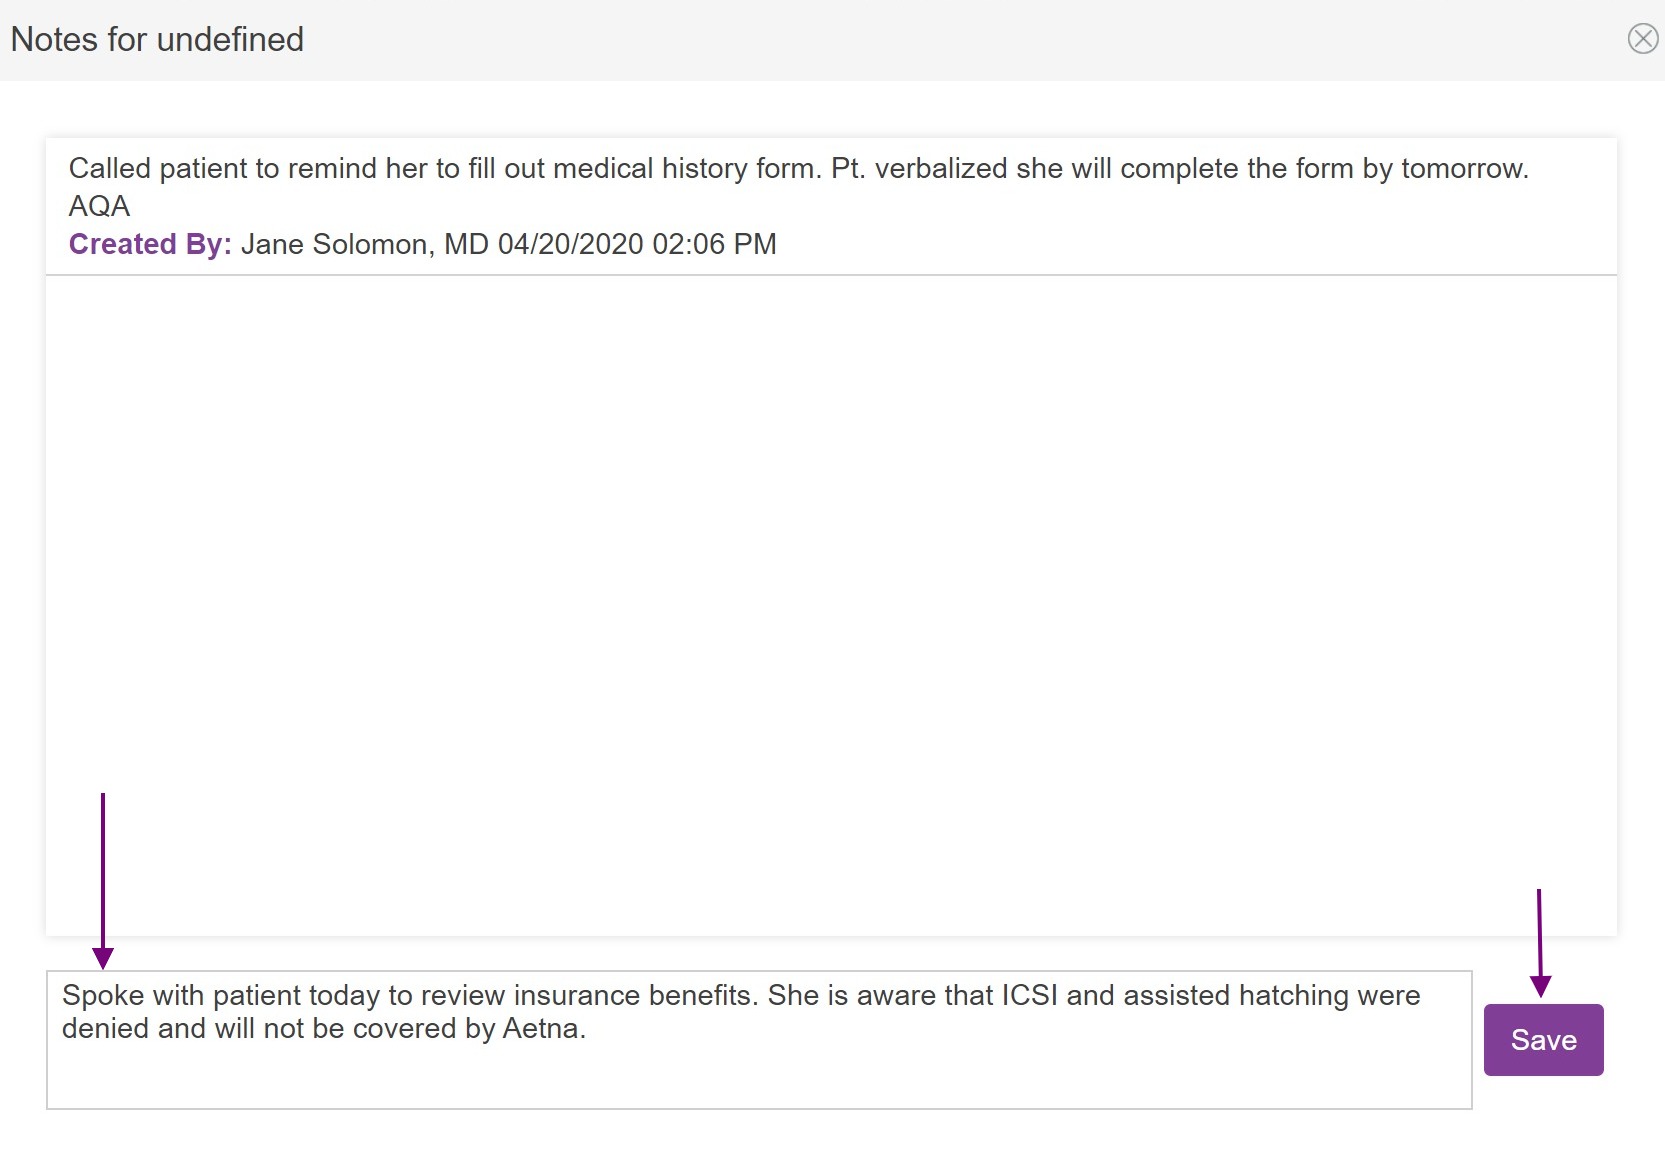
Any notes previously entered by other users will display with the user's name and date/time stamp.
To enter a new note, click inside the box at the bottom of the screen and type the note. Click Save to commit the note.
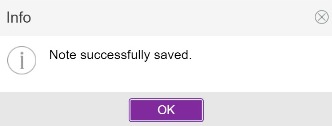
You will receive the above message indicating that your note was saved successfully.
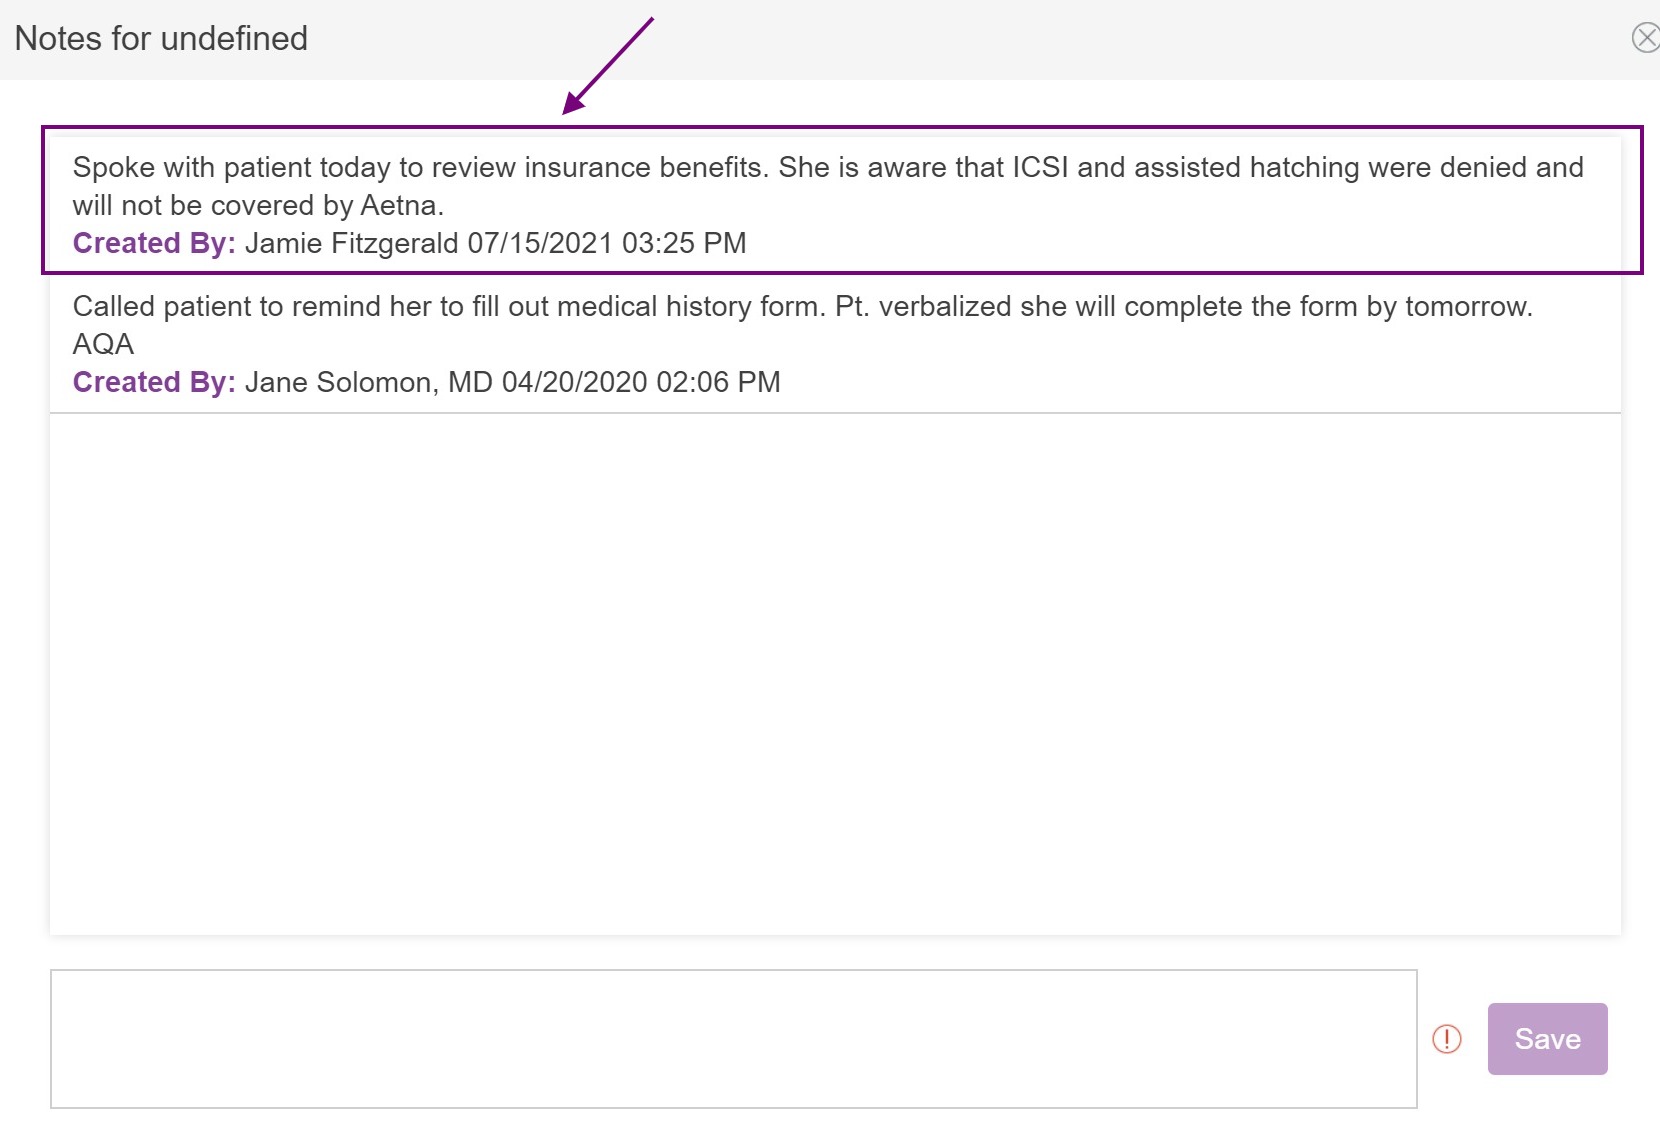
The new message is now listed at the top of the screen. To enter another note, click in the text box and save.
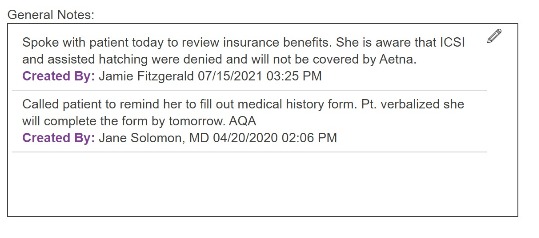
All notes entered will be displayed by date, newest to oldest, in the General Notes box in the Insurance Info tab.
**All manuals are compliant with HIPPA regulations. No patient information has been released. All screenshots above were taken from a test clinic with fake patient information.
Heather Yatsko
Comments