Introduction
Prospective Invoice is a way to auto-generate anticipated charges for patients who have been scheduled for specific appointment types, but have not actually been seen for their appointment yet.
Navigation

Click on the Accounting tab to enter the billing section of Artisan.

There are two areas dedicated to managing Prospective Invoices. The Prospective Invoice tab acts as a management hub where all prospective invoices can be monitored and worked; this hub includes all prospective invoices past, present, and future and will remain in this list even after conversion. The Prospective Invoice snapshot is a convenient worklist that shows invoices still in prospective status and not converted up to the current date. Once they have been converted from prospective invoice status, they will drop off of this list and onto the New Invoice worklist.

Prospective invoices may be filtered by:
- Who the invoice is for - all types or patient, partner, donor, or surrogate
- Resource
- Location
- Provider
- Appointment Status
- Date of service range
- Sort by either last name ascending or descending
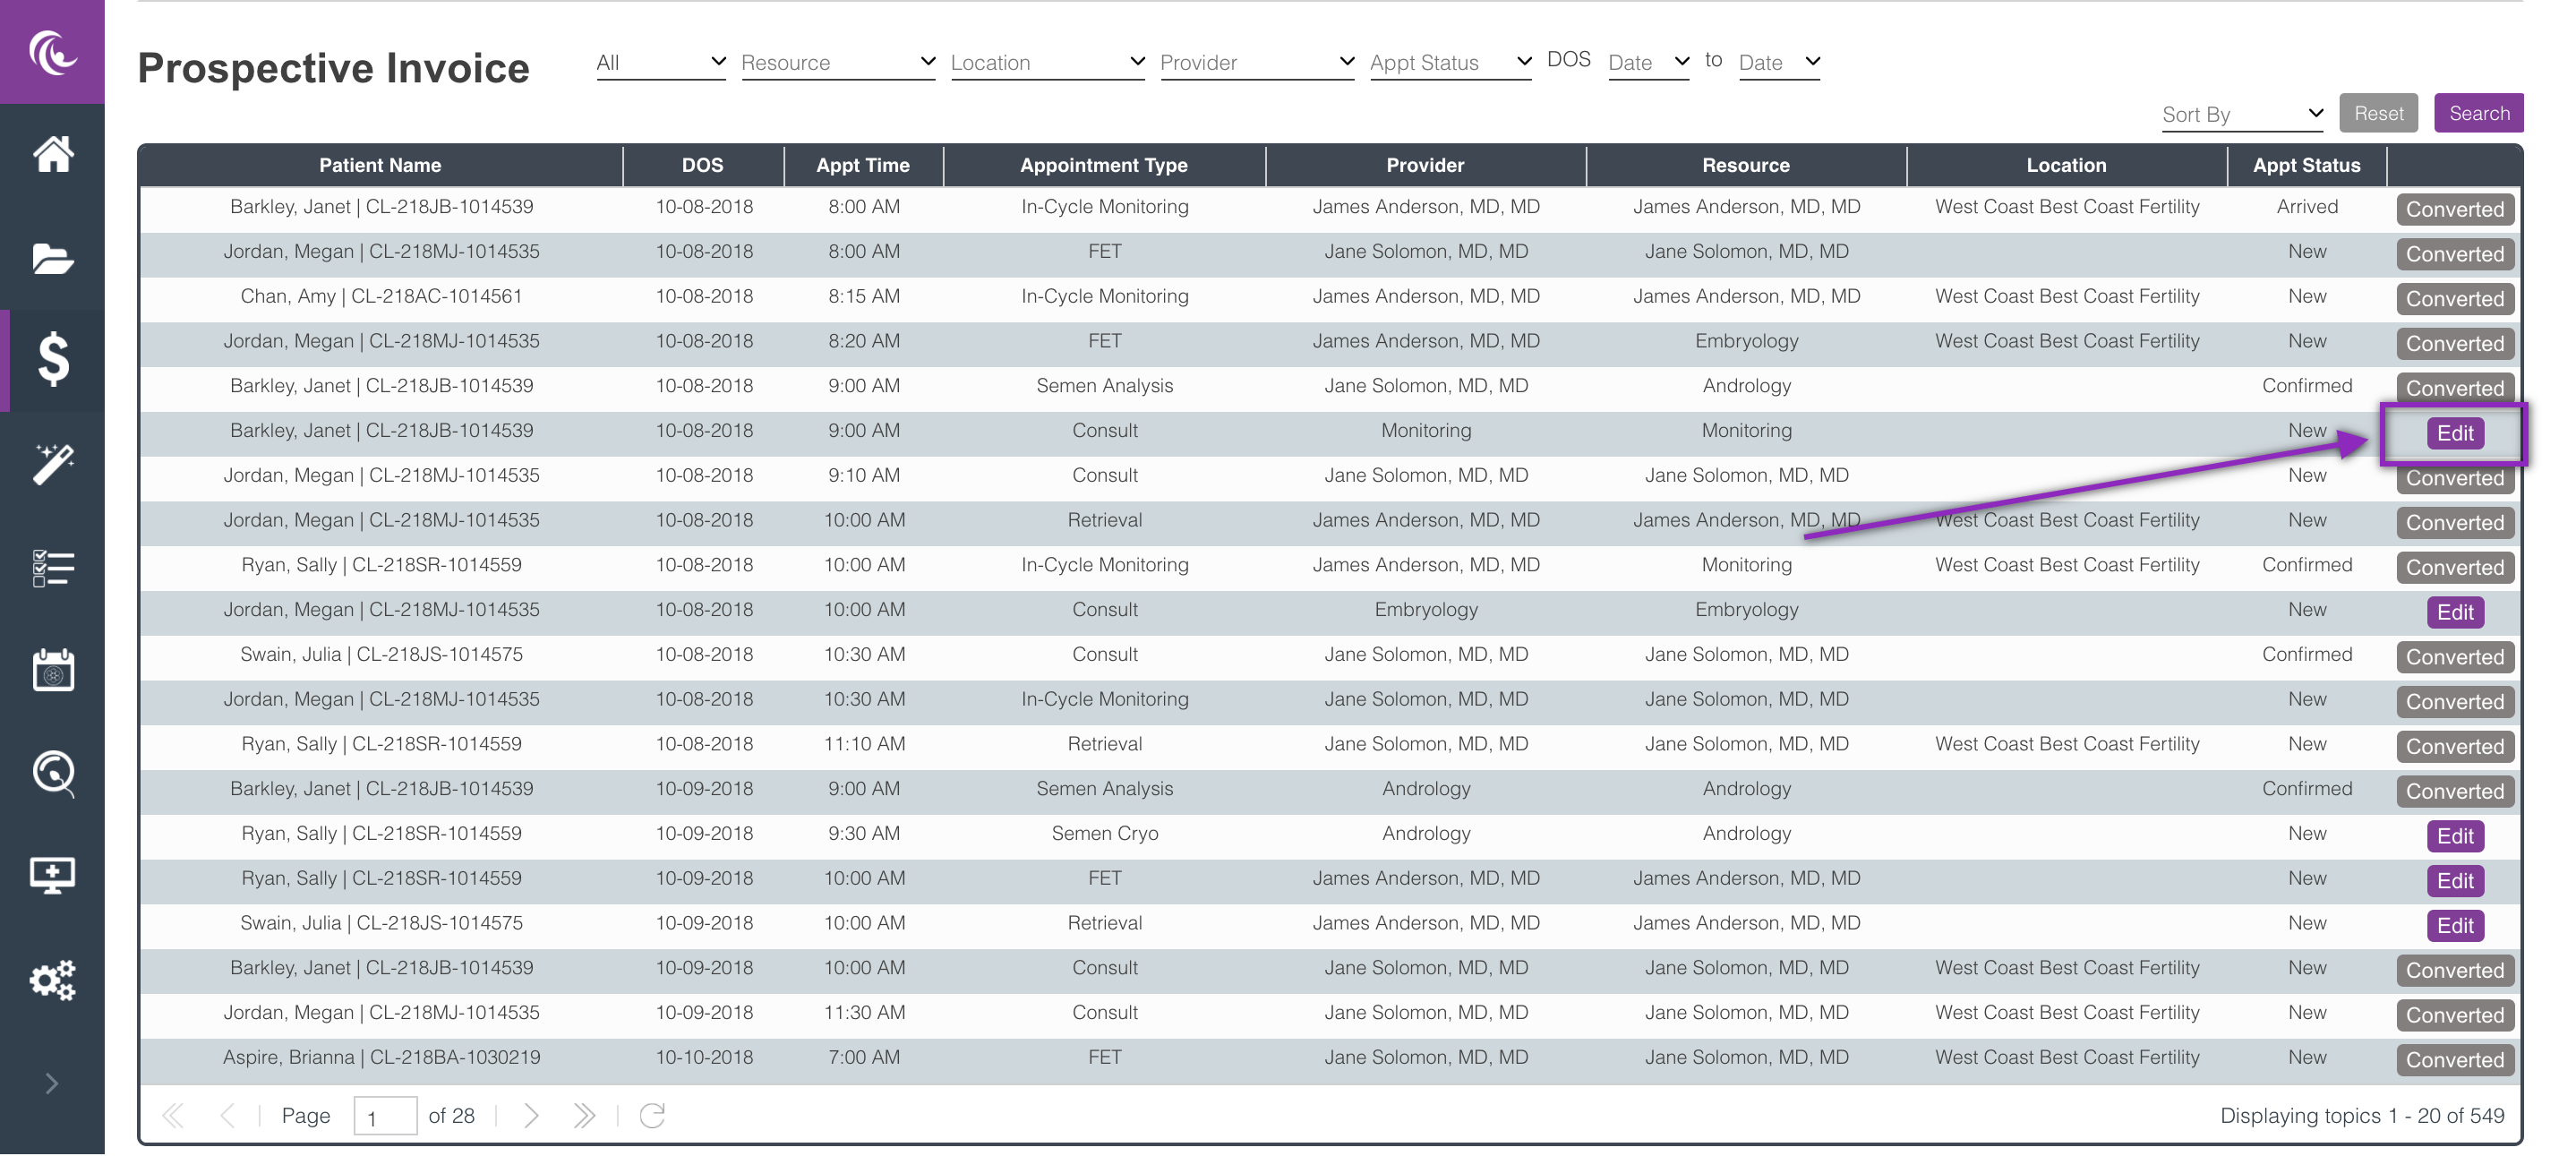
Click on the Edit button corresponding to the invoice that you would like to open. All converted prospective invoices will show the gray Converted status in place of the edit option.
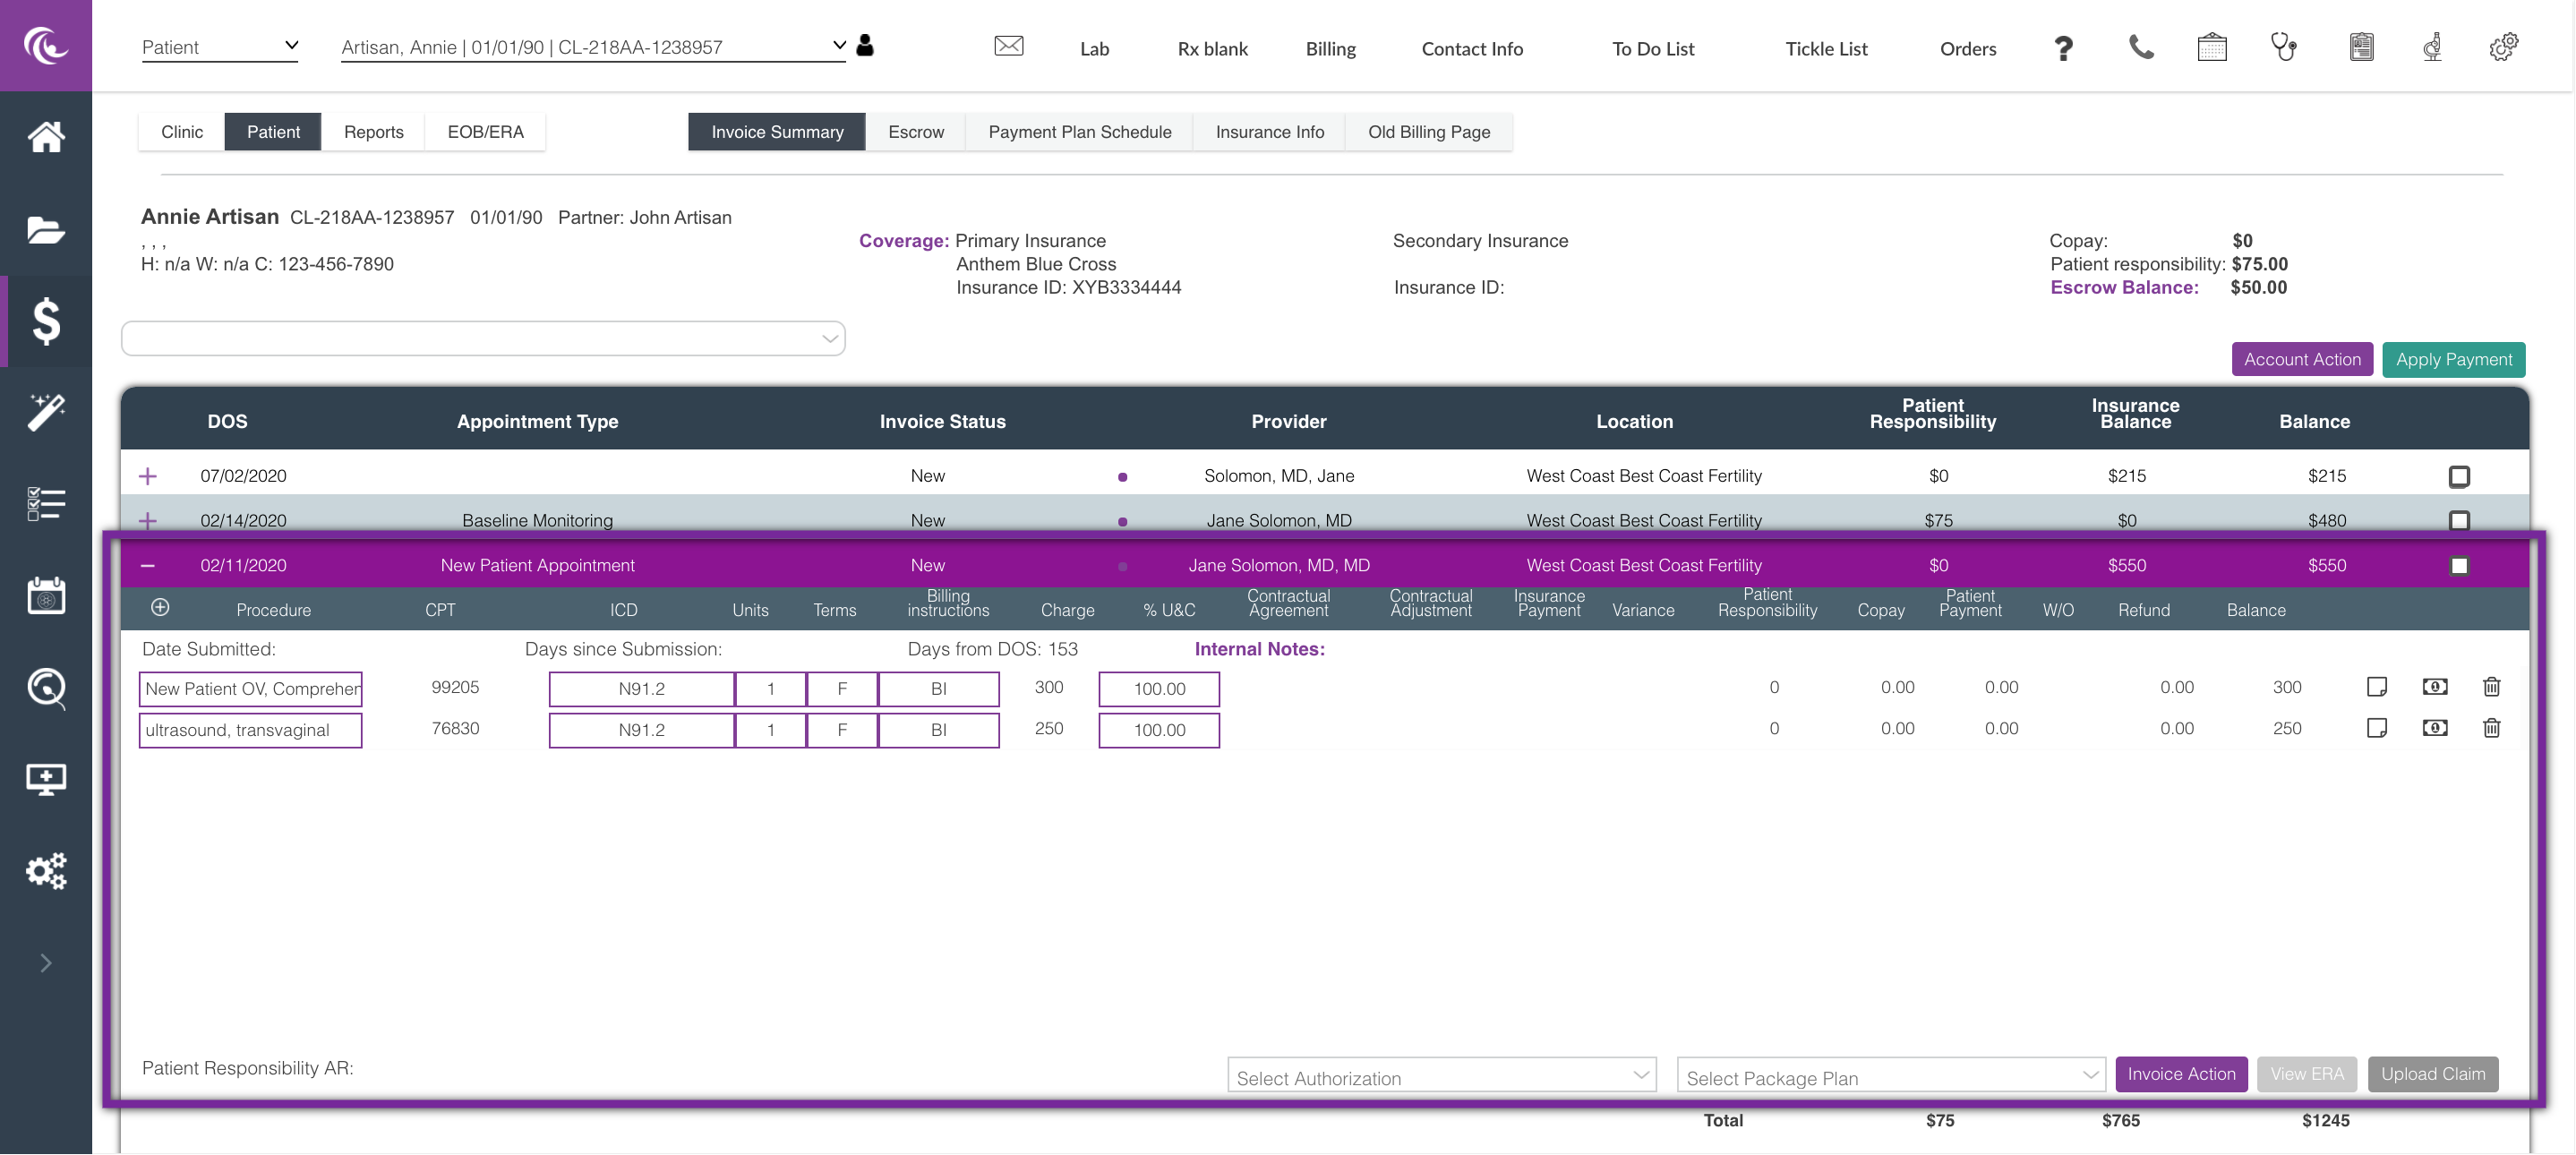
Completing a Prospective Invoice
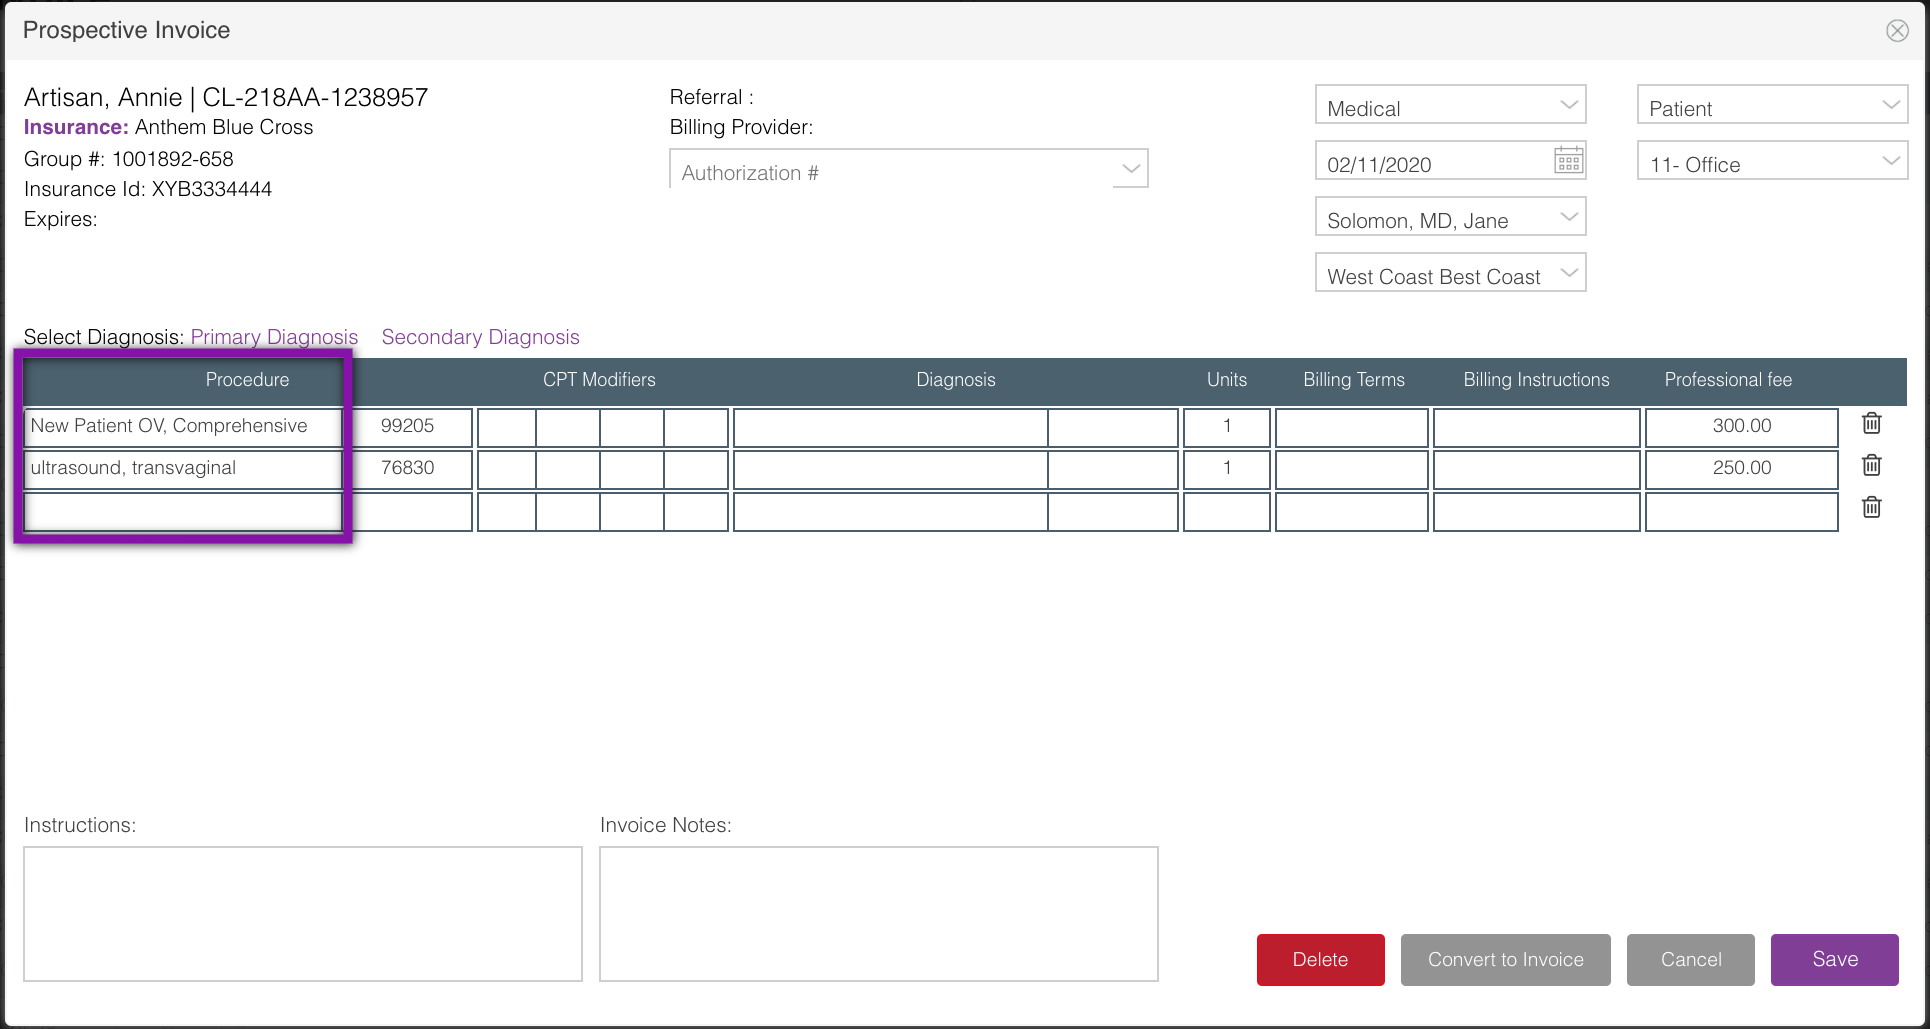
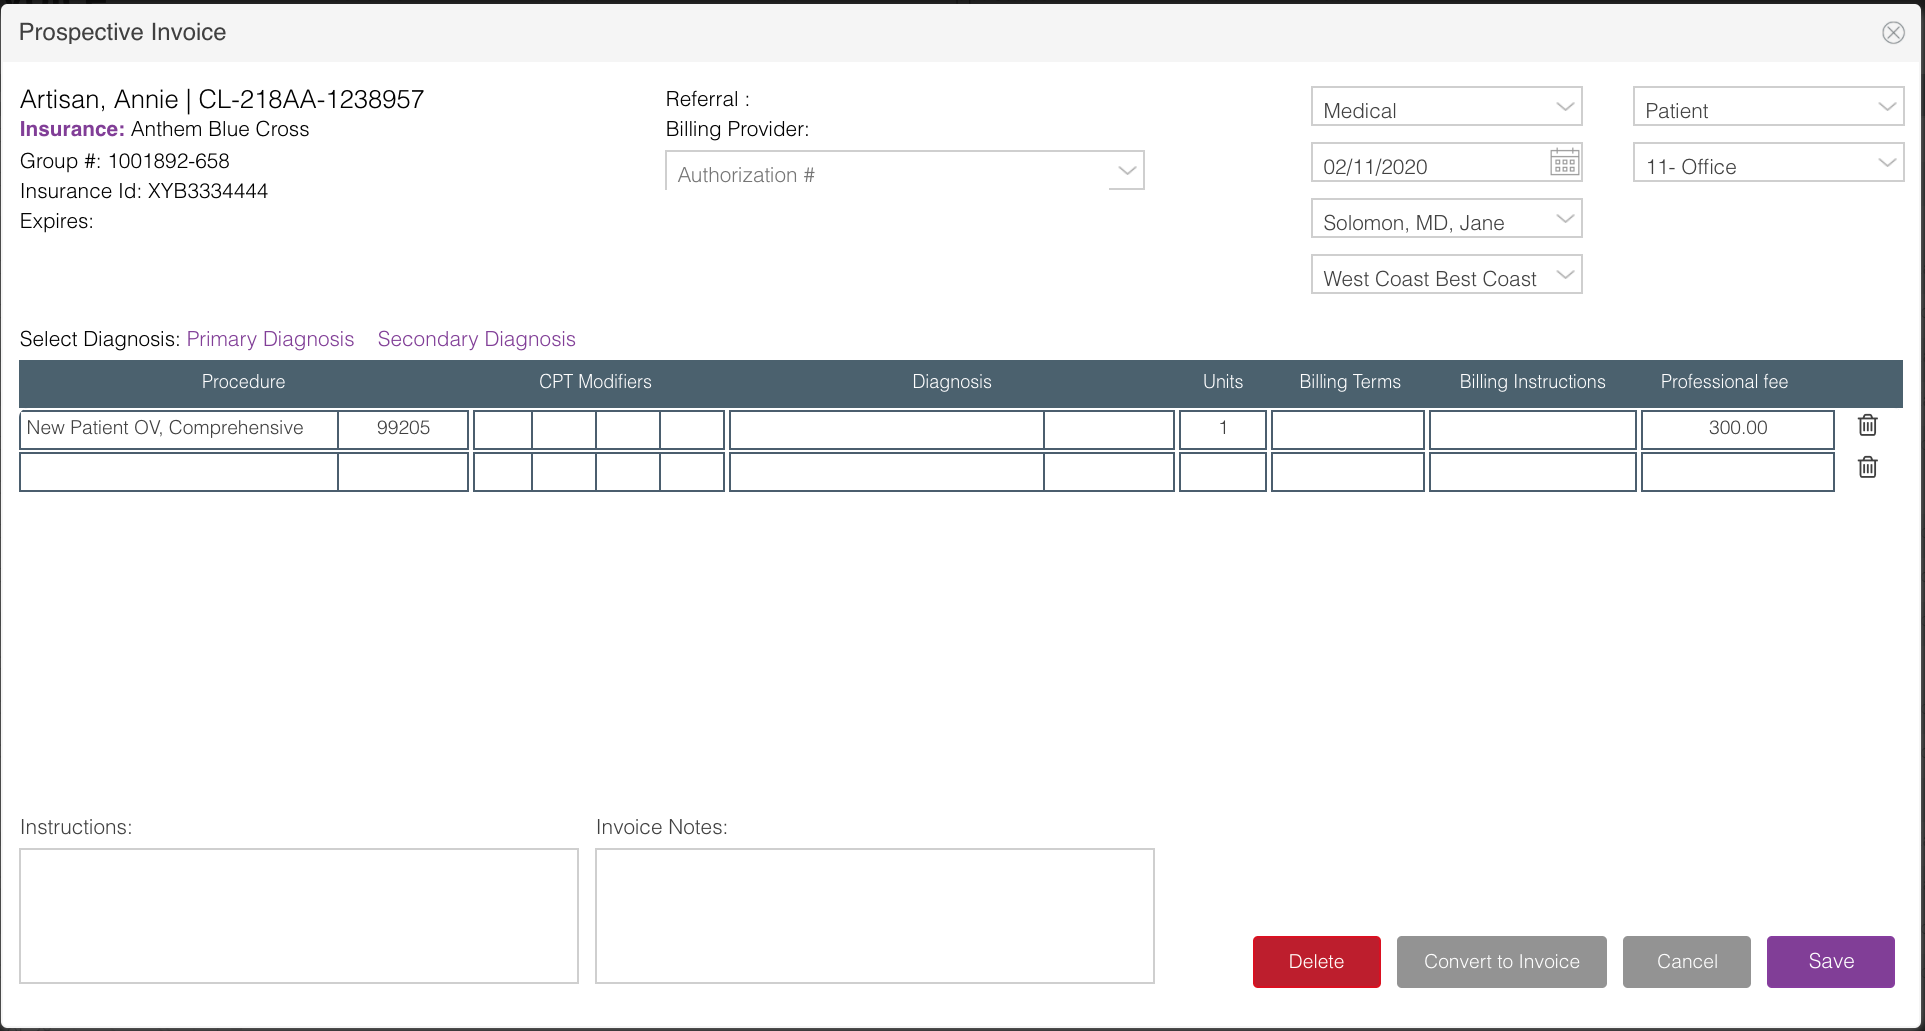
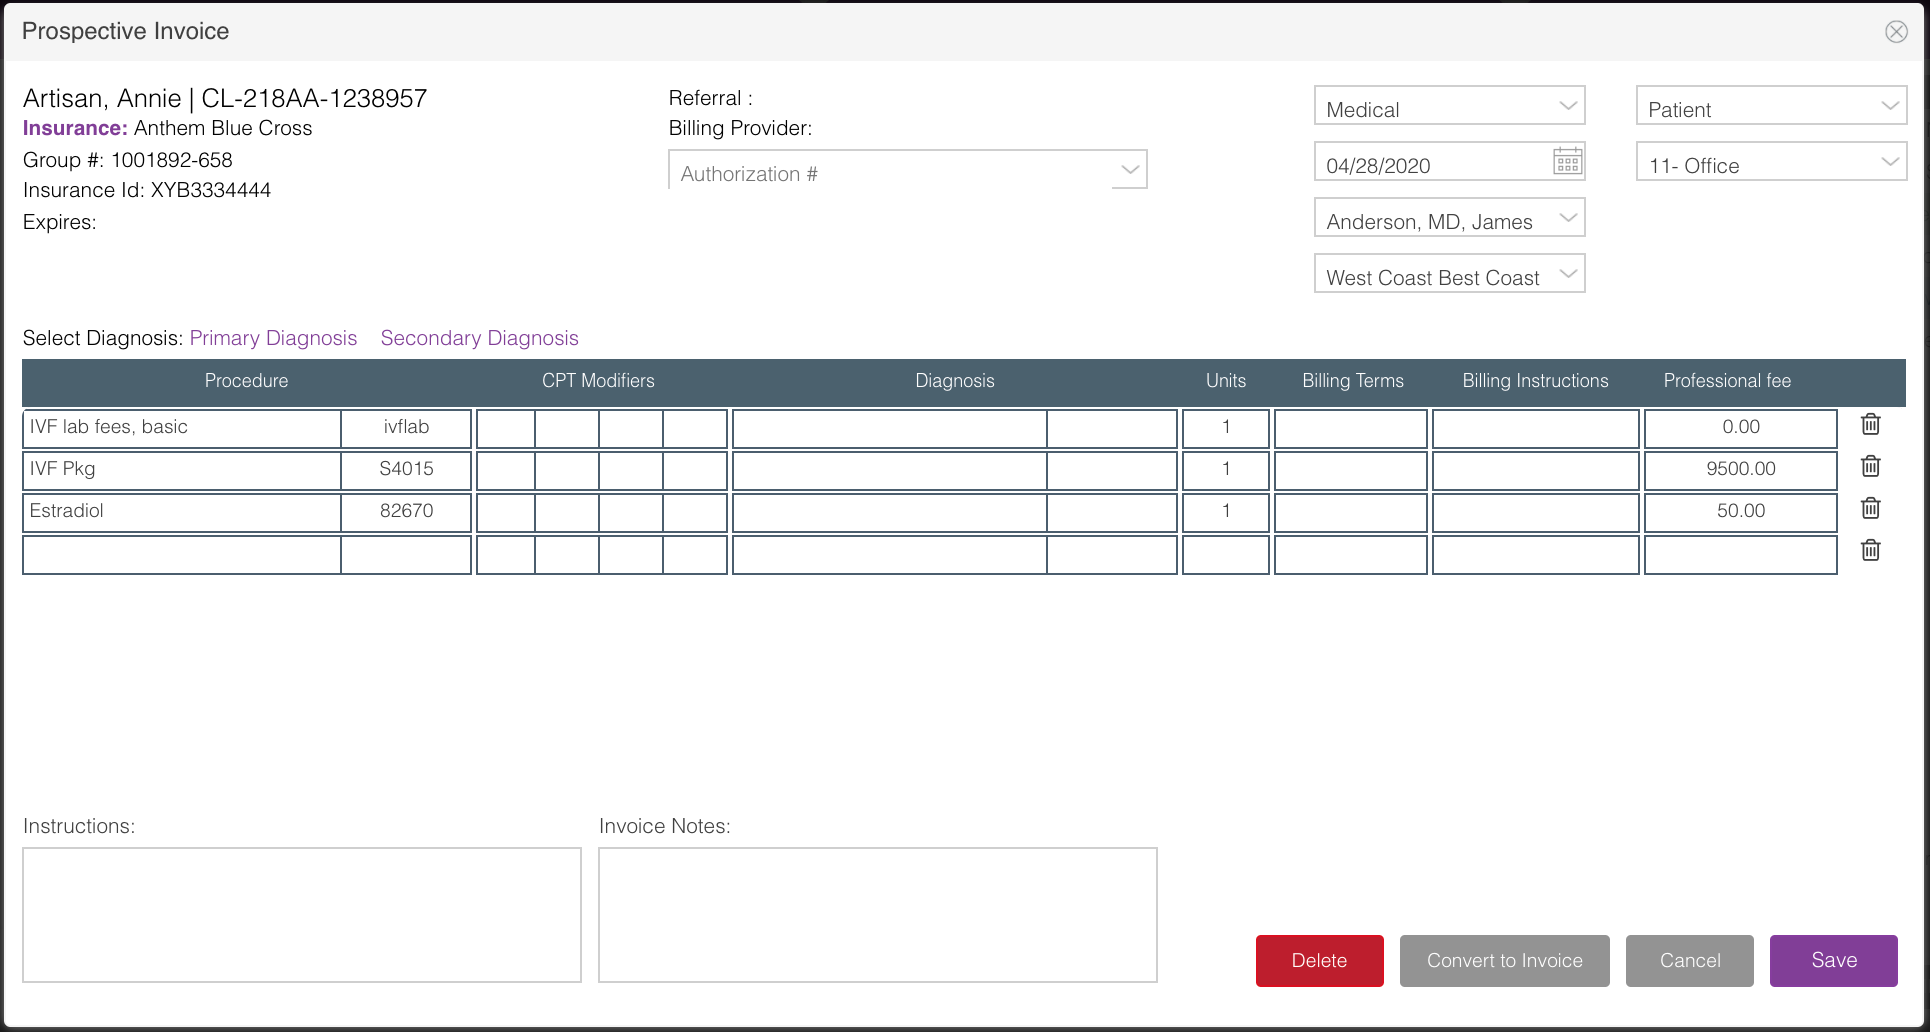
The Prospective Invoice screen will open and display the Procedures/CPT codes already associated with this specific appointment type. To learn more about managing CPT codes associated with appointment types, click here.
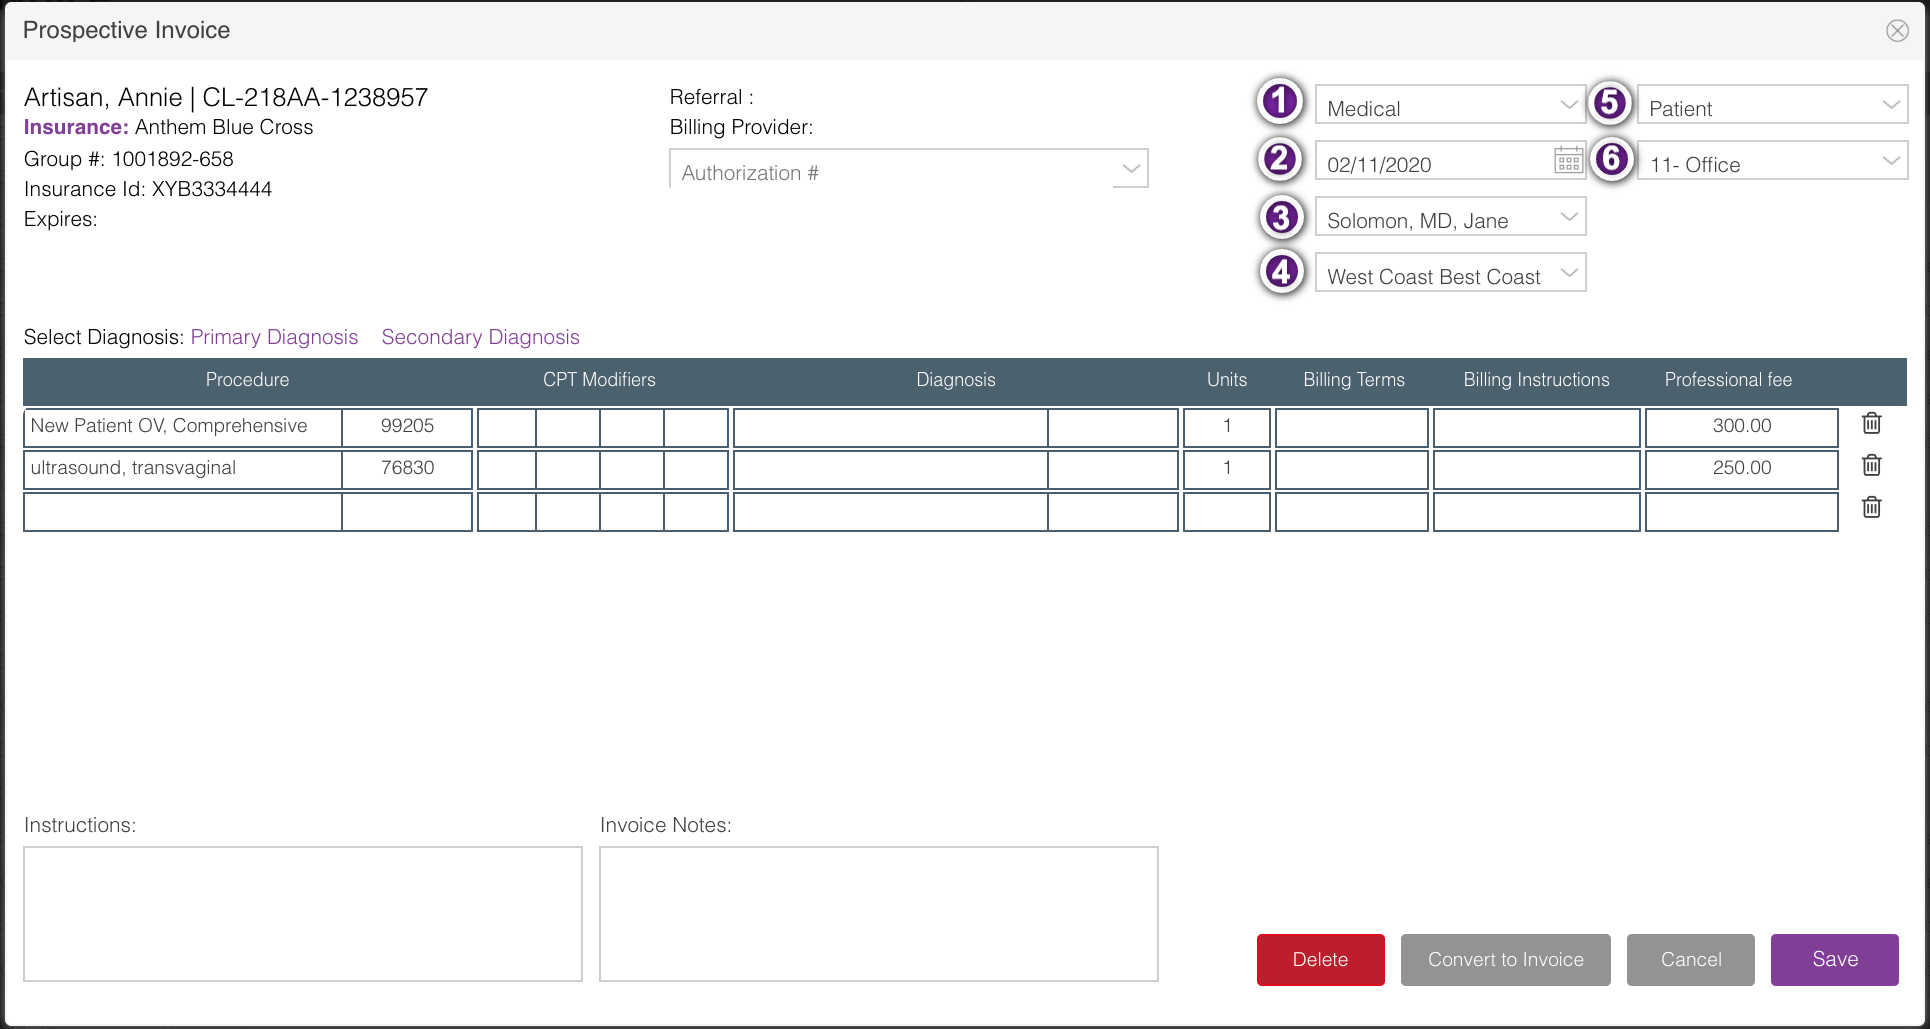
The following items can be adjusted on the prospective invoice:
- Claim type - Medical or Surgical (defaults to Medical)
- Date of Service
- Provider
- Location
- Invoice for - patient or partner (defaults to Patient)
- Place of Service type (defaults to 11 - Office)
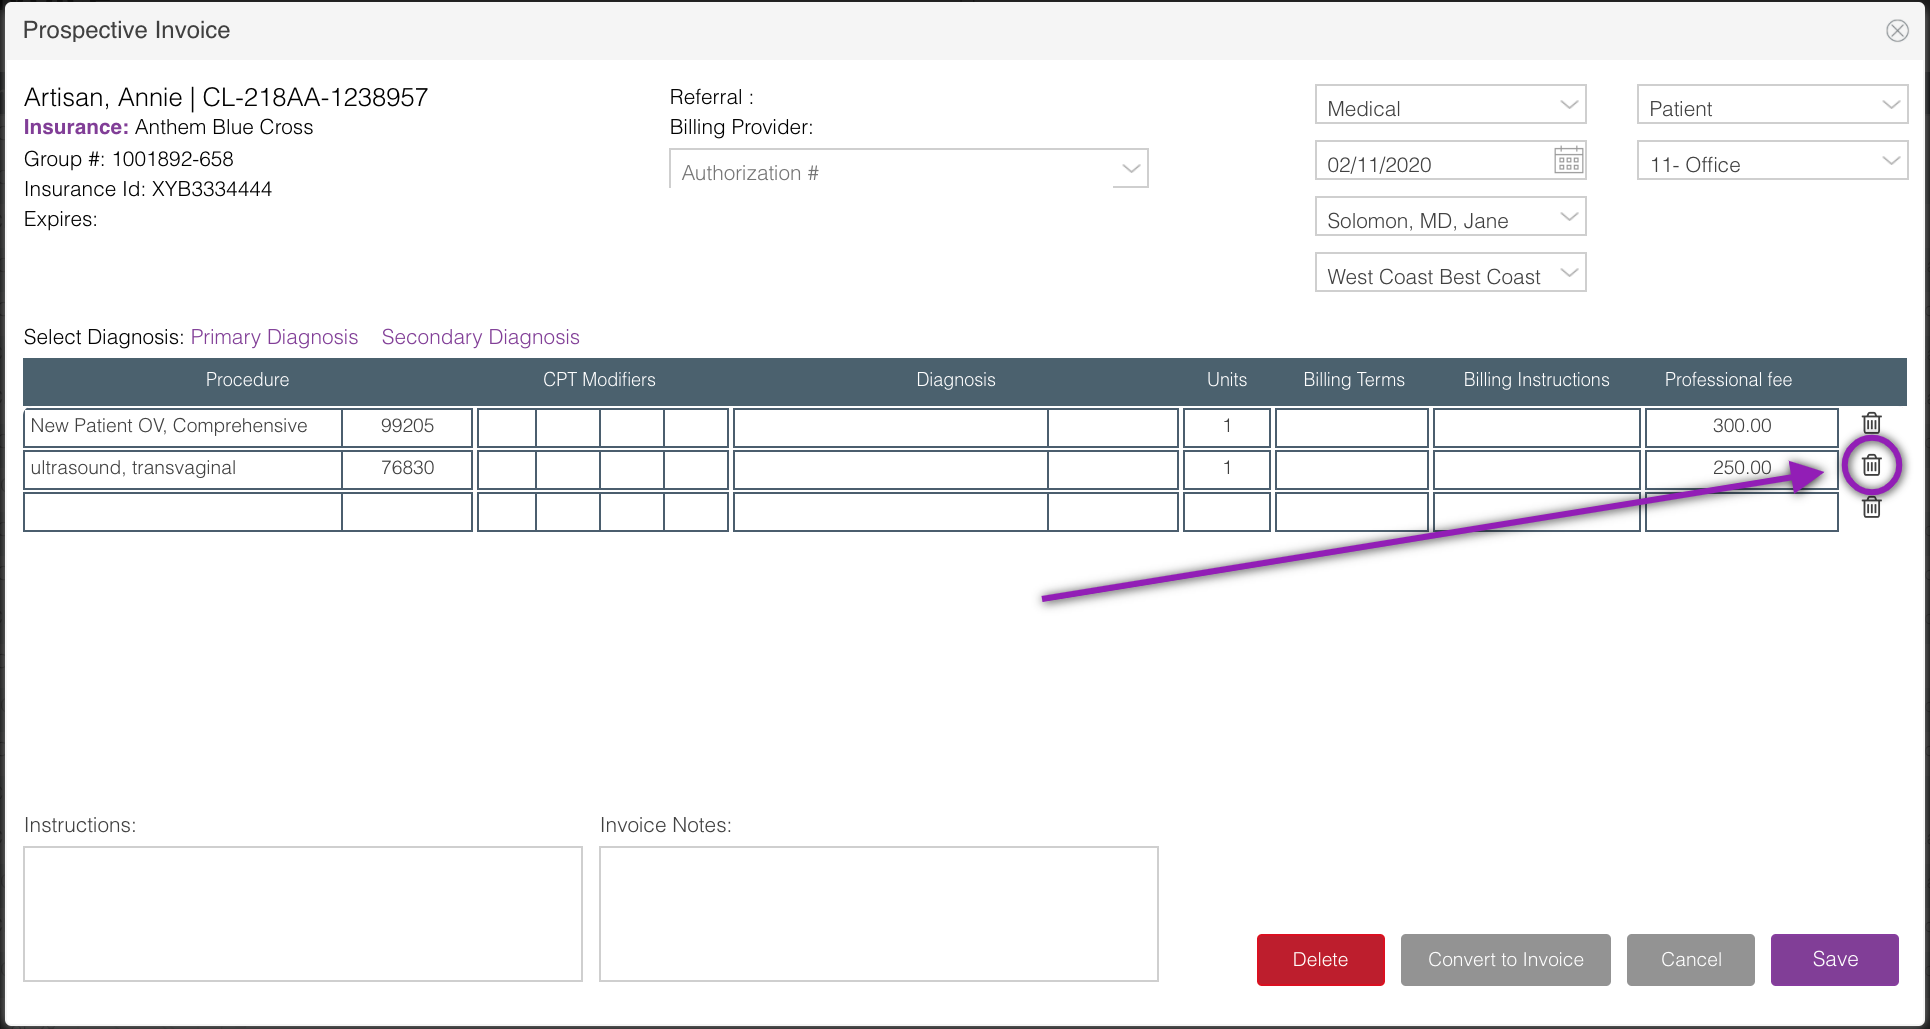
Charges can be deleted by clicking the trash can icon corresponding to the appropriate line item.

A warning will pop up to confirm that you are sure that you want to delete this item as you will not be able to reverse this action. Select Yes to continue.
The line item has now been deleted.
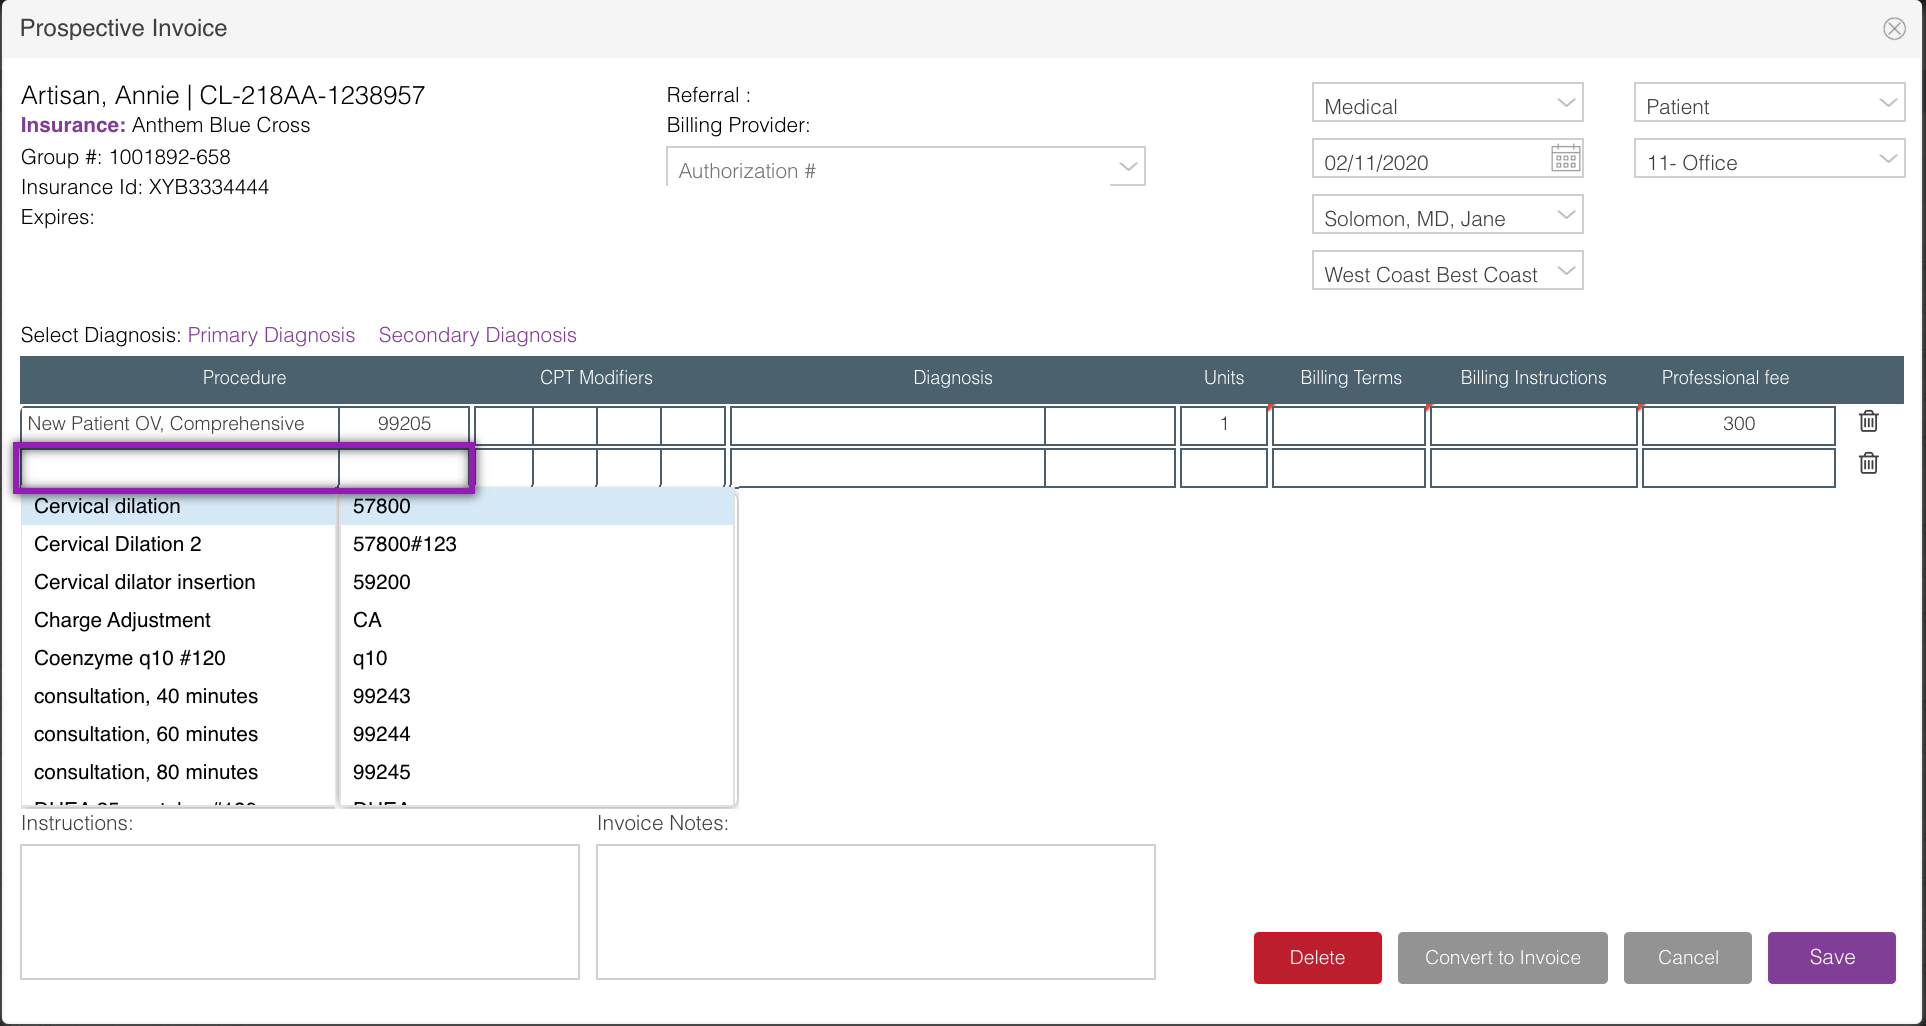
Procedures can be added to the invoice by clicking on the next procedure line and typing in a procedure code description or CPT code.
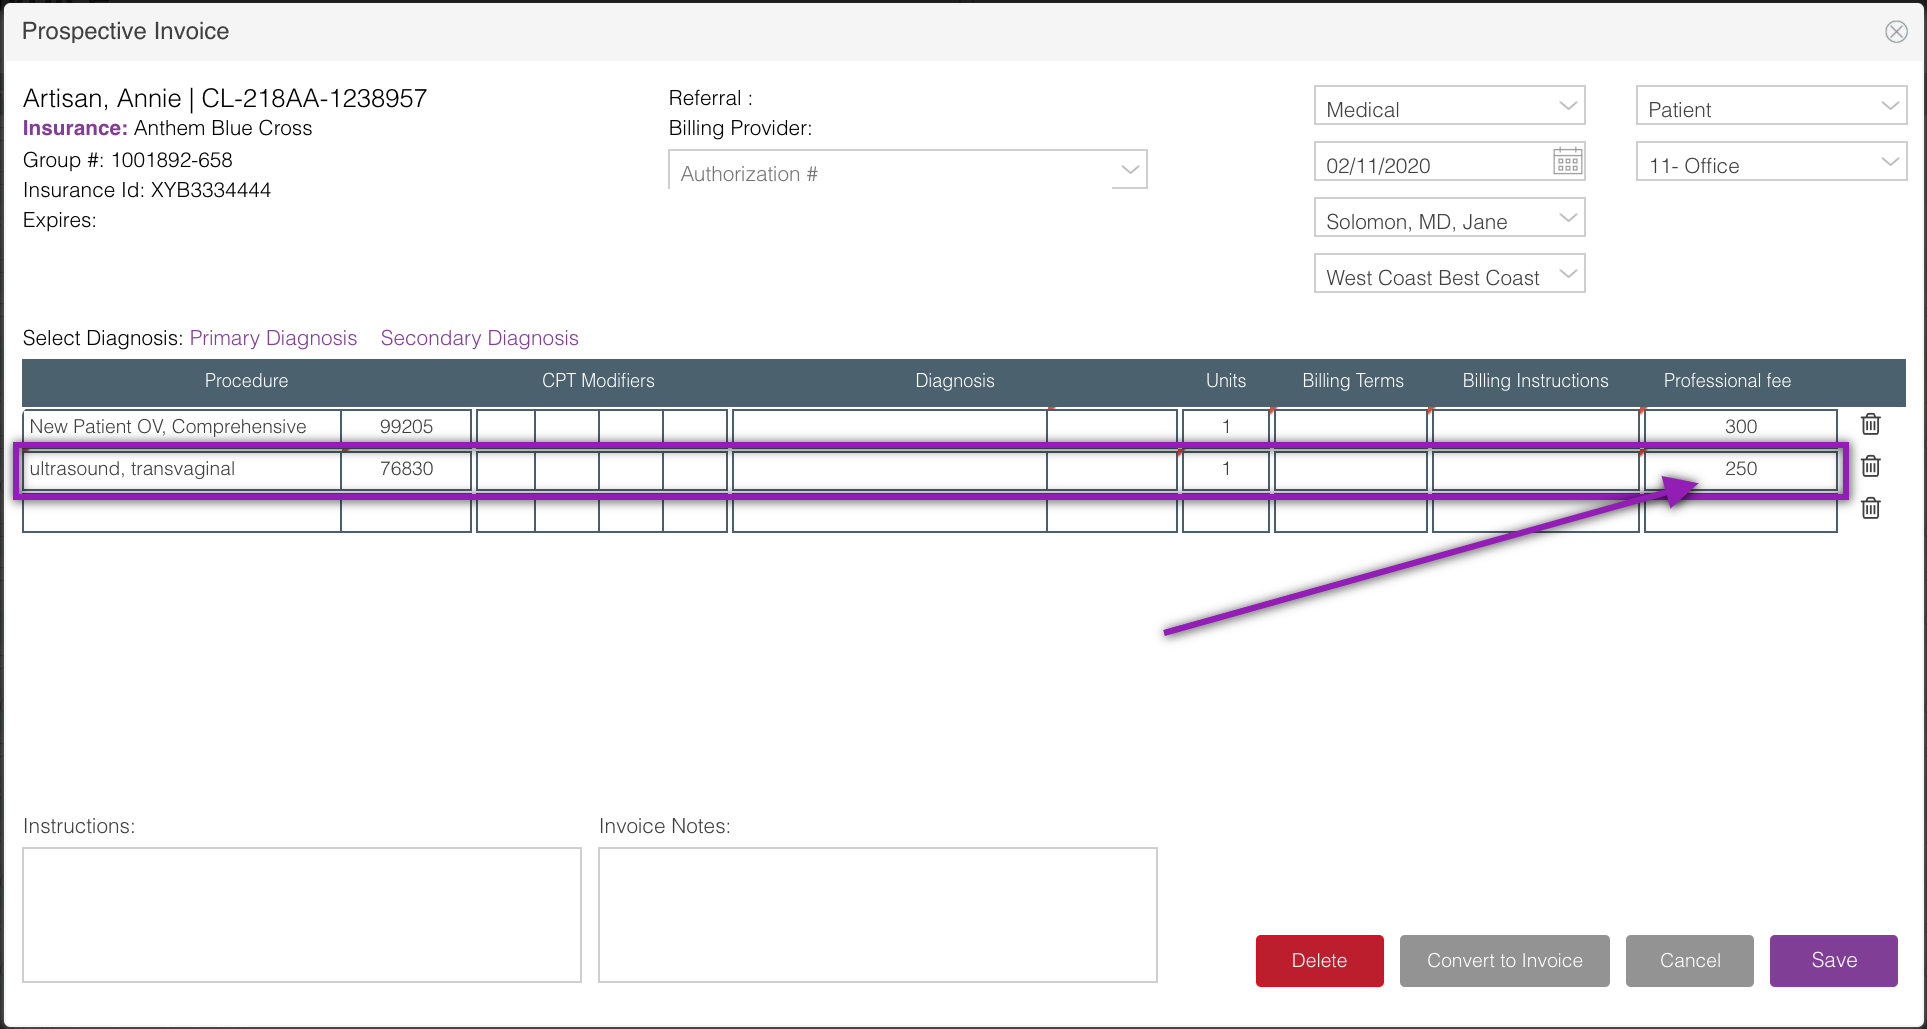
The professional fee associated with this procedure will automatically populate.
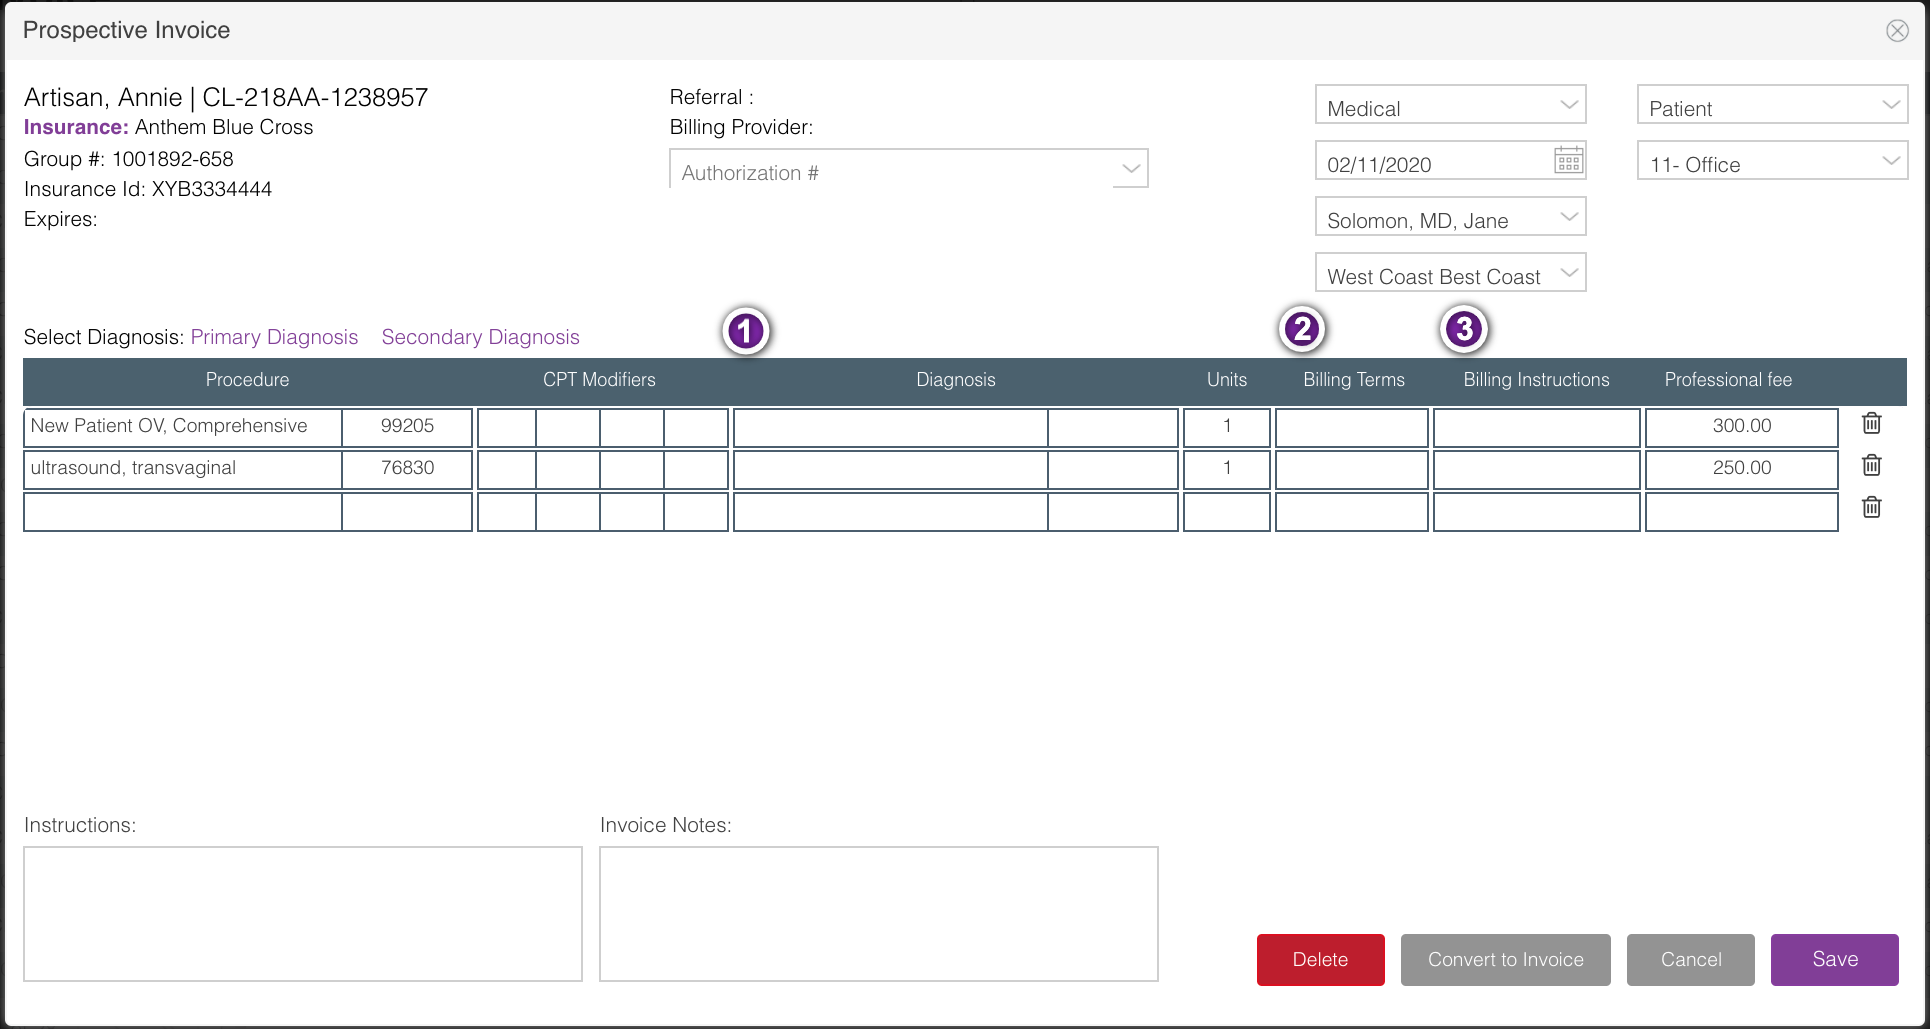
Enter the following for each line item:
1. Diagnosis by description or ICD-10 code
2. Billing Terms: Fee for Service (F), Package Plan (Pkg), or No Charge (N/C)
3. Billing Instructions: Use the drop down menu to select if this will be billed to Patient, Insurance, etc.
-
Selecting Diagnoses
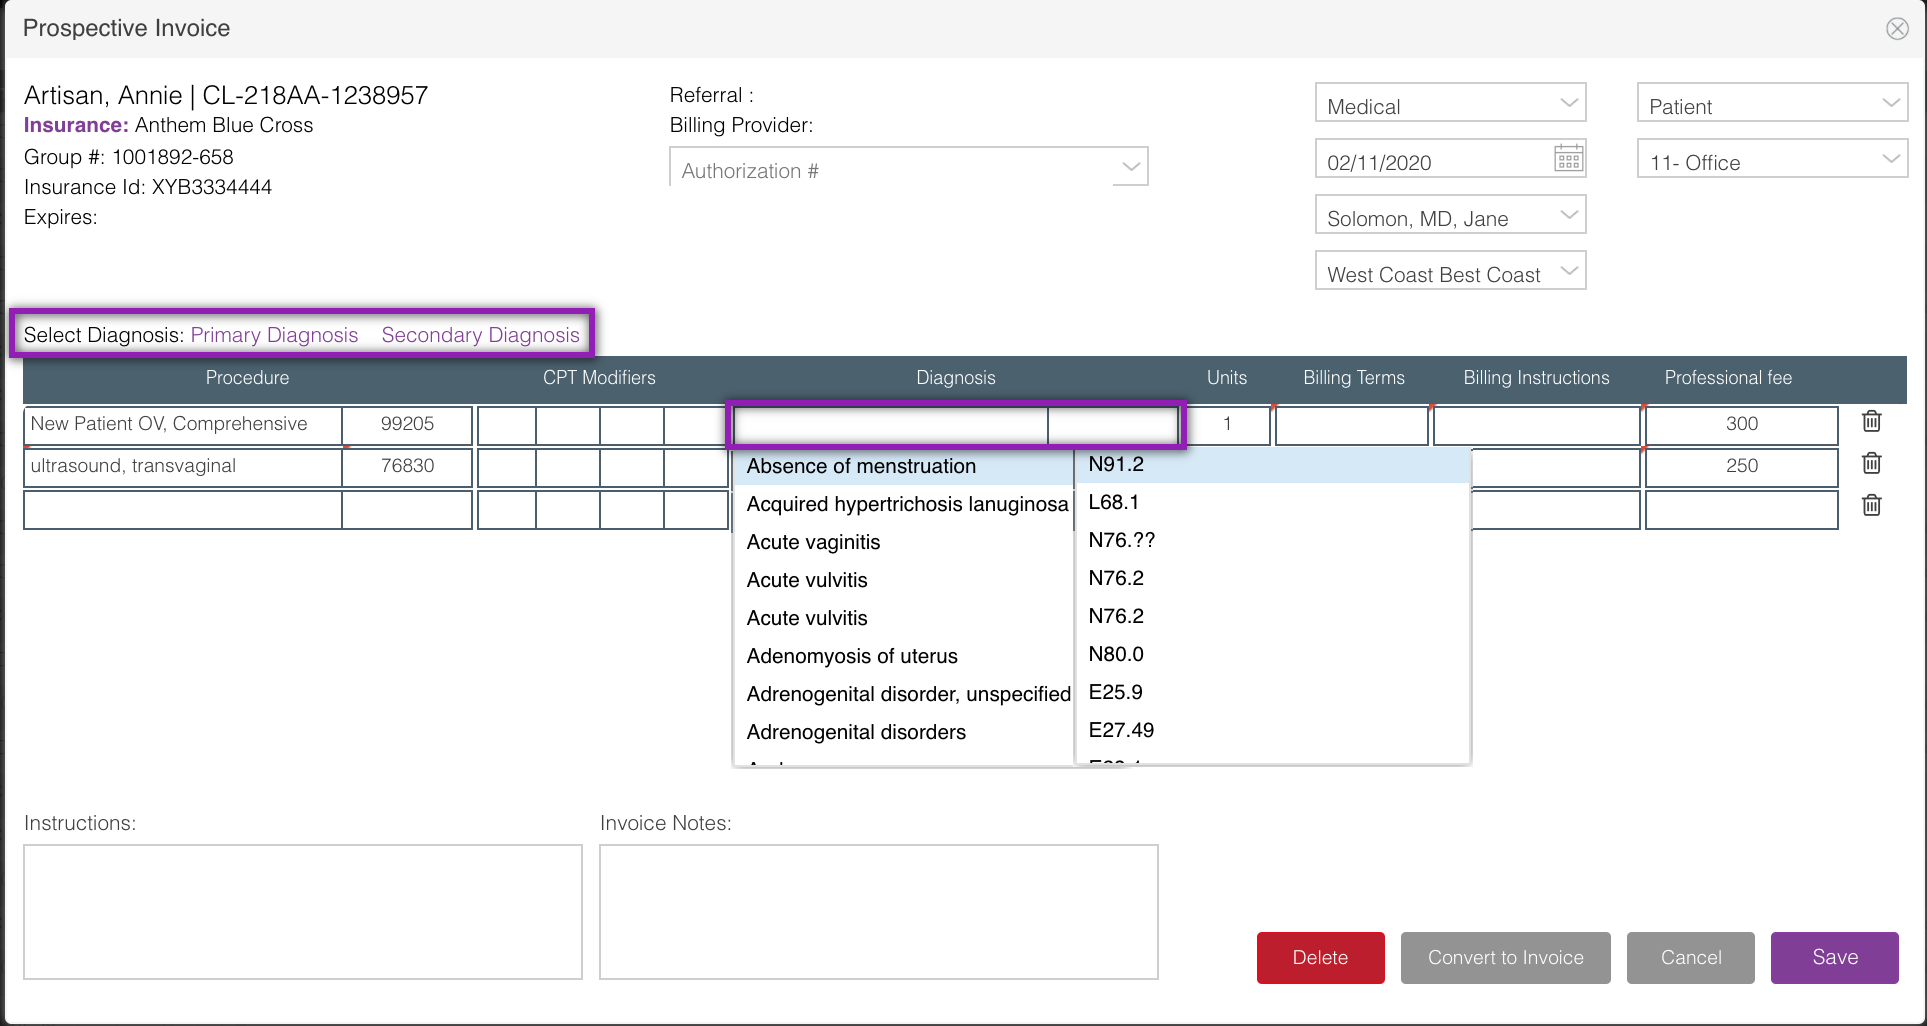
You may select the Diagnosis from previous diagnoses that have been assigned in the Primary/Secondary Diagnosis hyperlinks or from the pull down lists by description or ICD-10 codes. If you wish to add new secondary diagnoses, head over to our article to learn more about How to Enter Multiple ICD Codes.
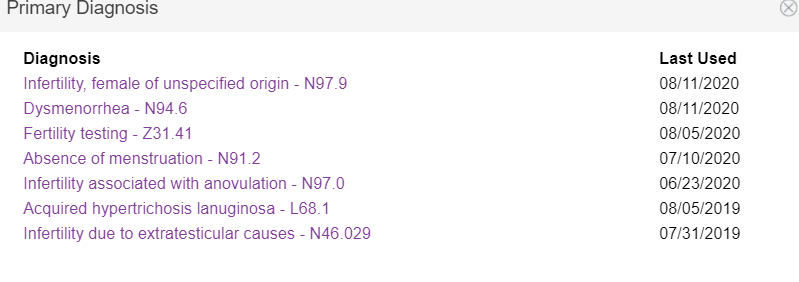
When clicking on the hyperlink it will pull up all previous diagnoses used and the date of the last used. Click on the name of the one for this invoice to auto-populate to all line items.
-
Billing Terms
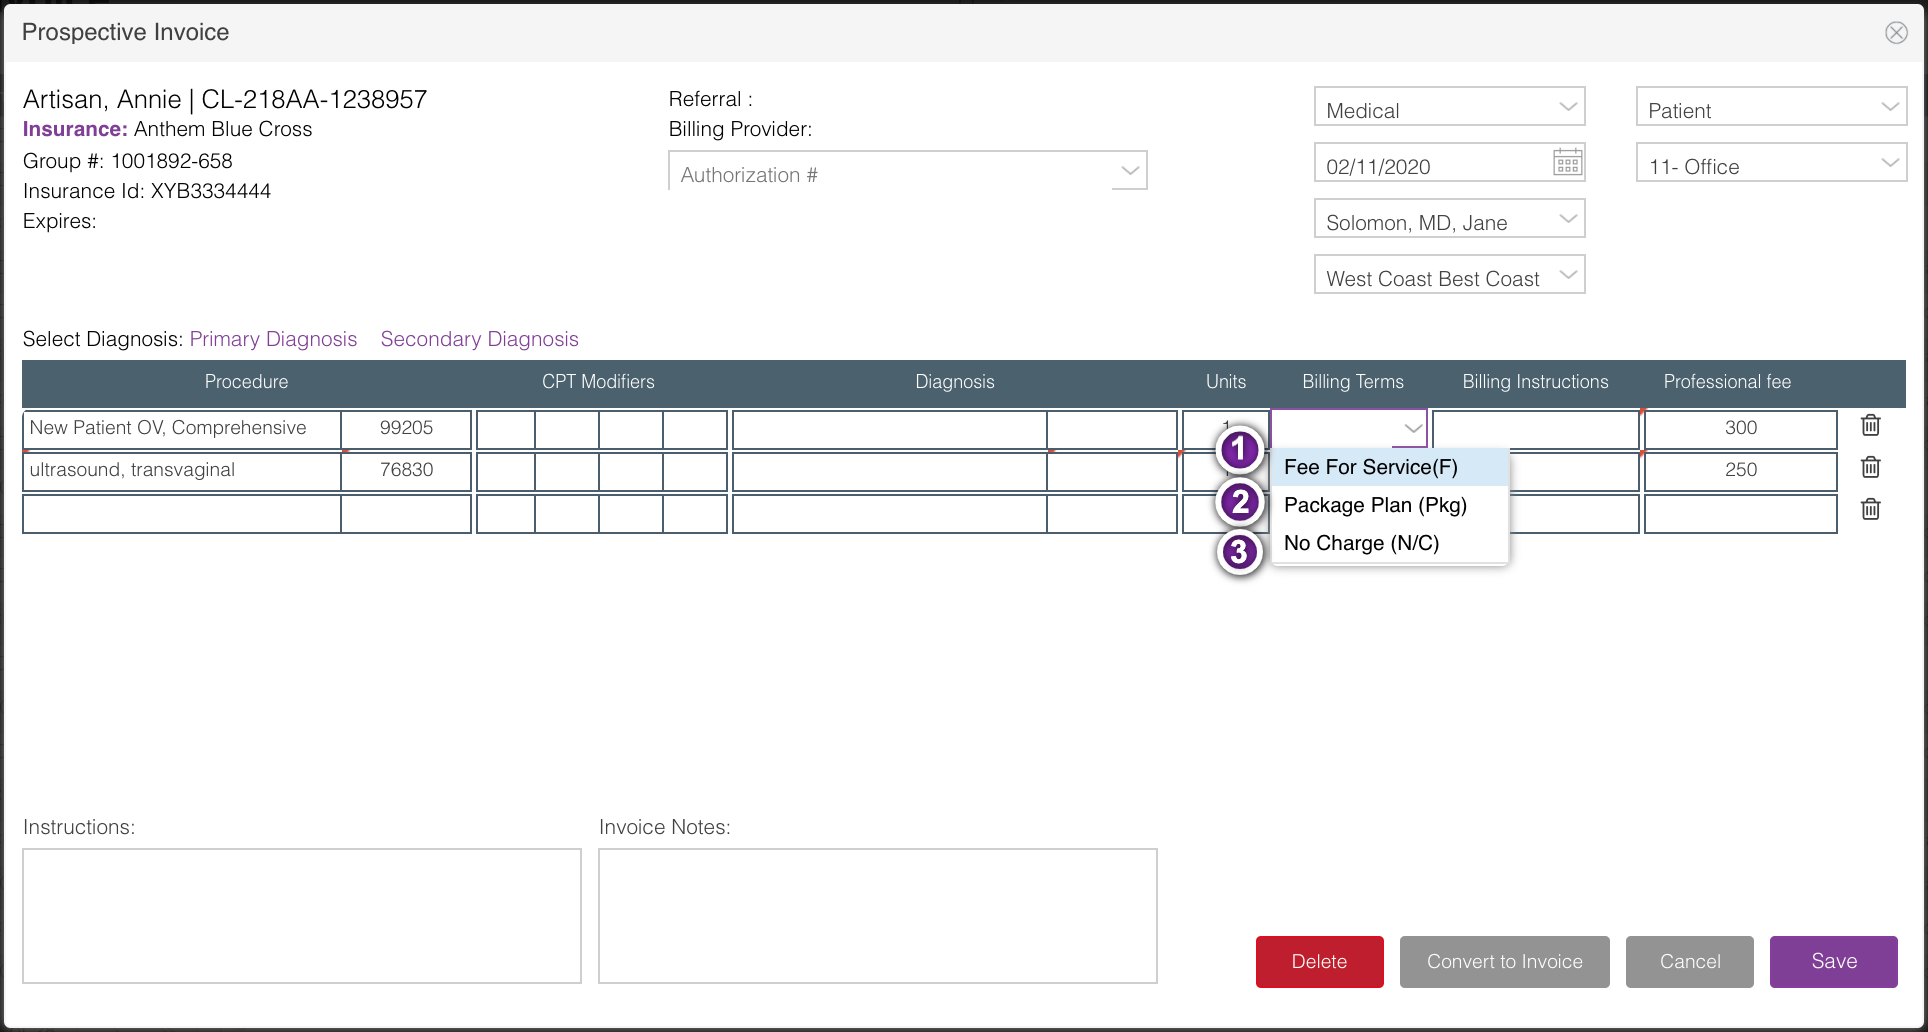
Terms selected will label and determine the actions against the charges of the service line. Users may select from three options:
• Fee for Service (F) - this is the office's standard fee for that CPT code.
• Package Plan (Pkg) - selecting this term will associate the line item with a package plan recorded in the patient's escrow of their financial chart. Based on how the package plan is set up, the charges will either zero out or move money over from that package plan to satisfy the balance.
• No charge (N/C) - this term will automatically zero out the charges of the service line; if selected, billing instructions are not necessary to select.
-
Billing Instructions
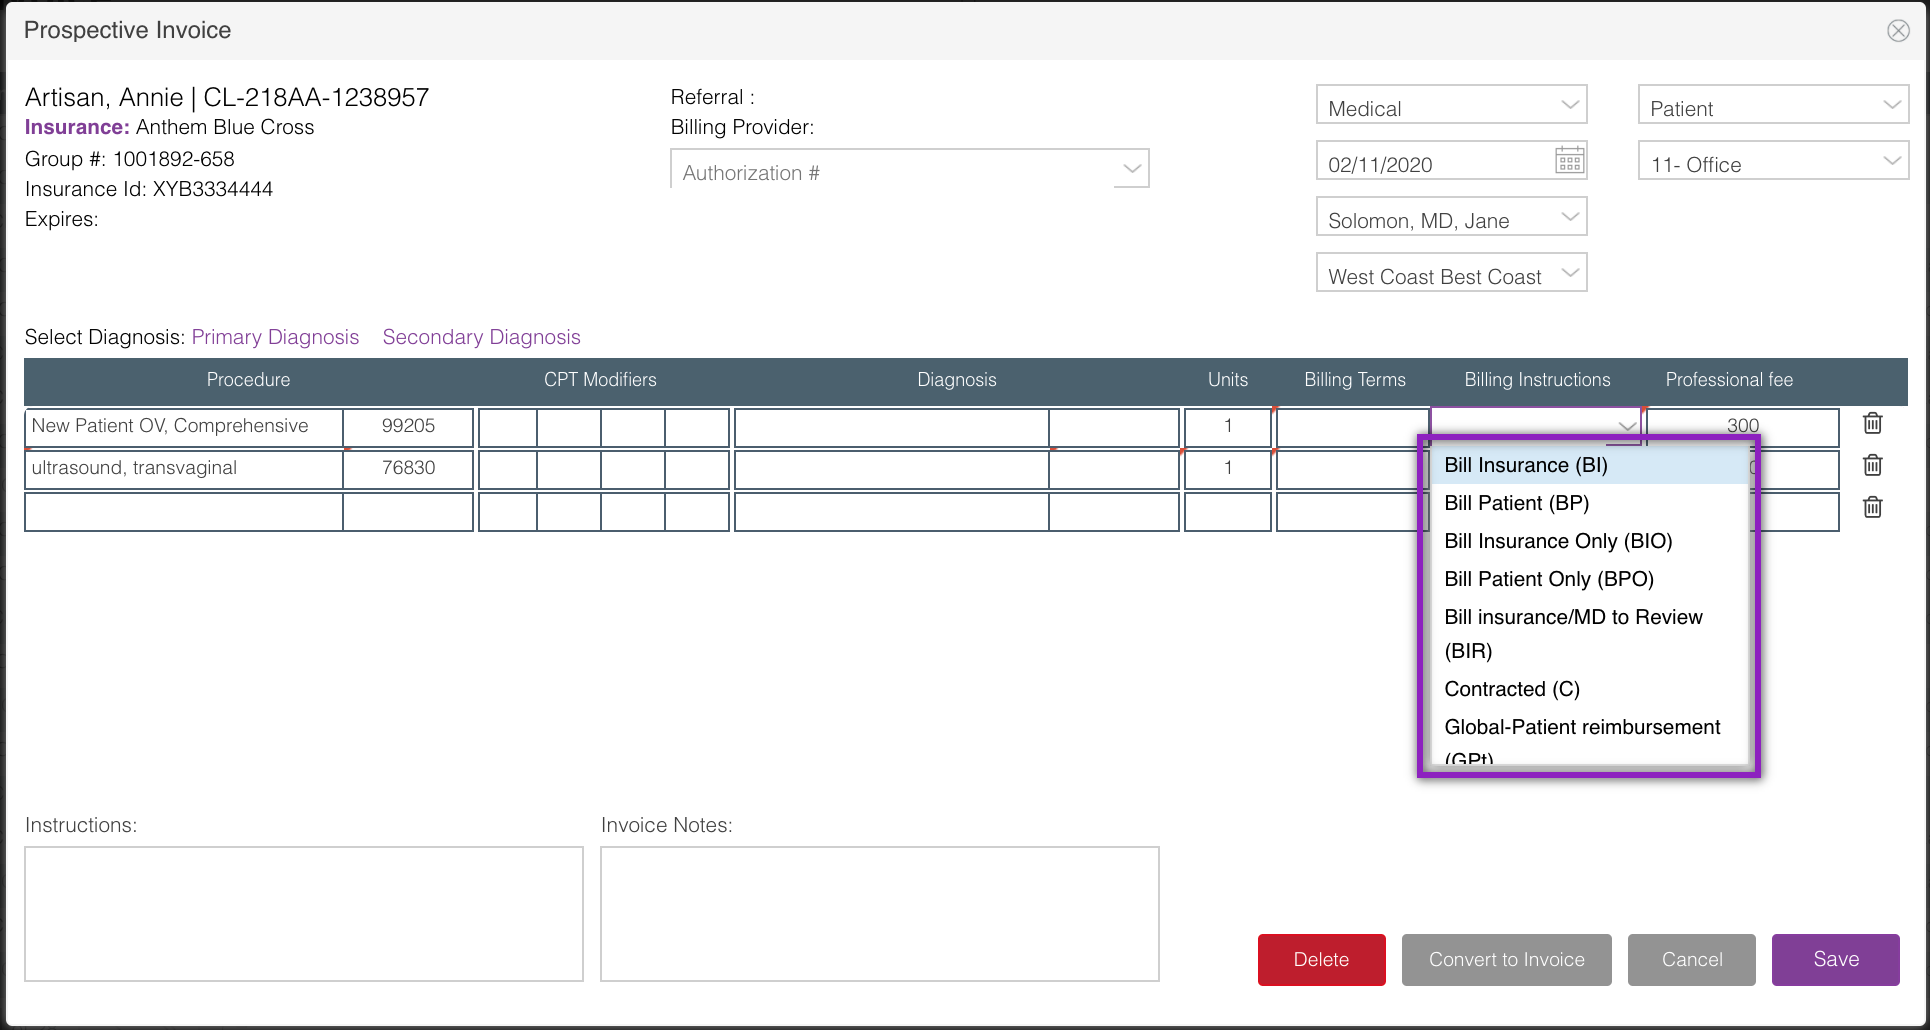
This field directs the office staff regarding the party (patient vs. insurance) that is responsible for the charge and provides instruction as to how the billing should be handled.
In conjunction with billing terms selected (see above):
• BI: bill insurance
• BP: bill patient
• BIO: bill insurance only - this is used when you wish to write off copays or any other portion of the charge that is not covered by insurance.
• BPO: bill patient only - do not submit a charge to insurance.
• BIR: "bill insurance and I will review" - instructs the billing office to bill the patient's insurance and review the EOB with the physician for disposition of any residual balance. This may be used if the physician wants the option of writing off a portion of a charge after it has been paid by the insurer.
• C: contracted insurance - used for patients that have contracted insurance. Instructs the system to bill for copays only for that service on the encounter date.
In conjunction with Package Service Plan (Pkg) billing terms:
Patients that have prepaid for a global service may be billed with one of two options:
• GPt: "Global, bill for patient recovery" - instructs the office to create an invoice for the patient to submit to their carrier for reimbursement.
• GPR: "Global, bill for practice recovery" - in some instances the patient's insurance will have reimbursed the patient with funds that equal her cash global payment to the practice. GPR instructs the billing department to bill the patient's insurance for practice recovery.
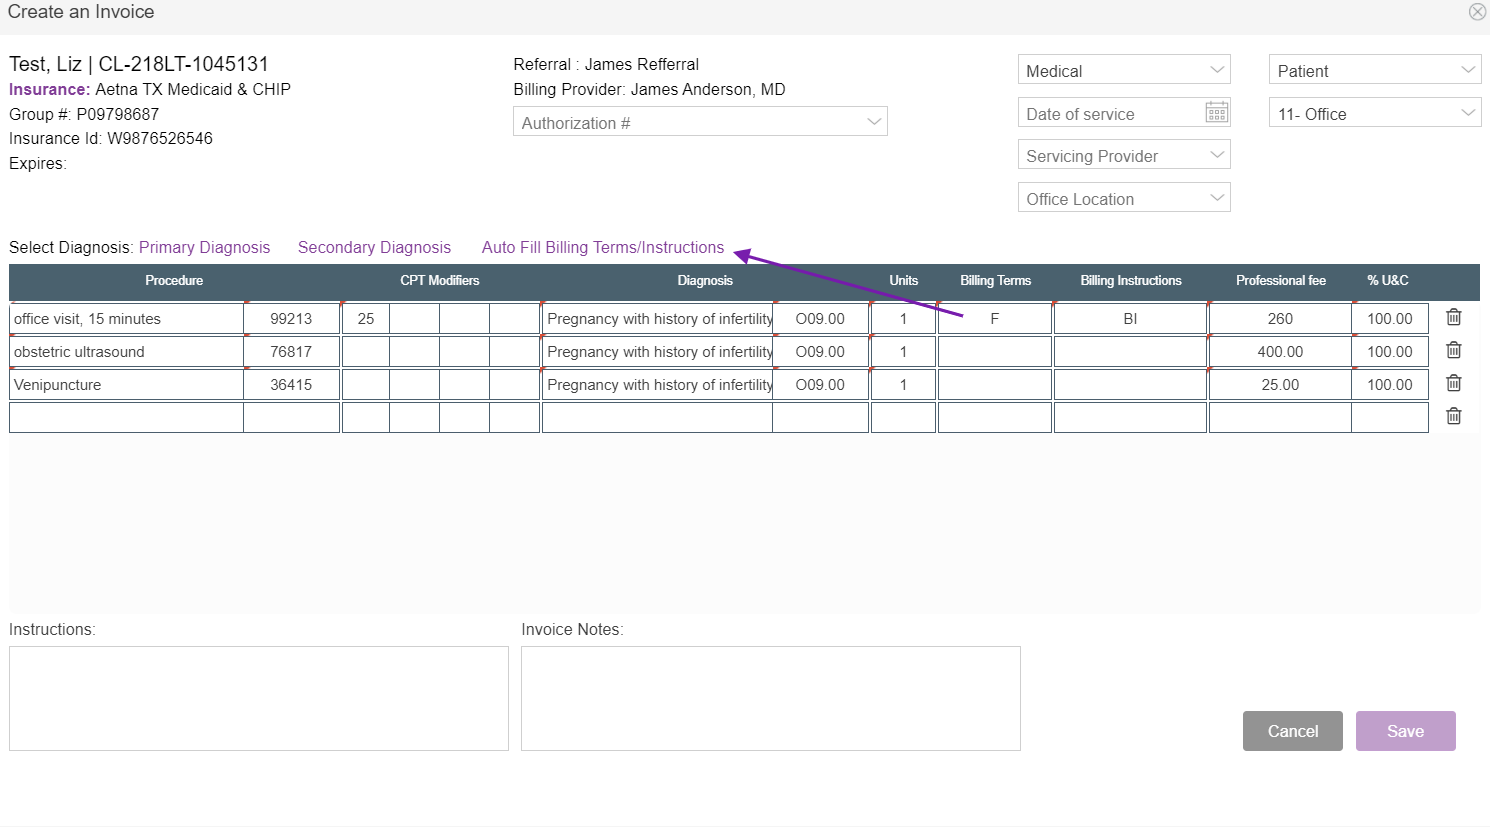
Once you have filled in your first line item with the Billing Term and Billing Instructions click on the AutoFill Billing Terms/Instructions for the system to fill in the rest of the line items. You are able to override them if necessary.
Instructions and Invoice Notes
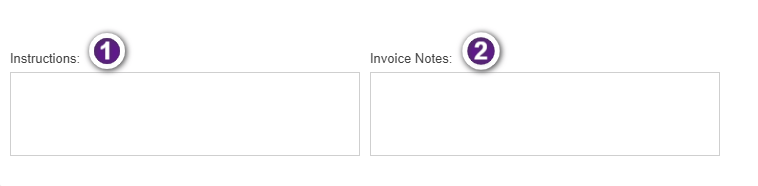
- If you wish to leave any visit-specific instructions for the billing team, please enter them here.
- You may enter claim notes here; these notes will also carry over and stay with the invoice post-creation.
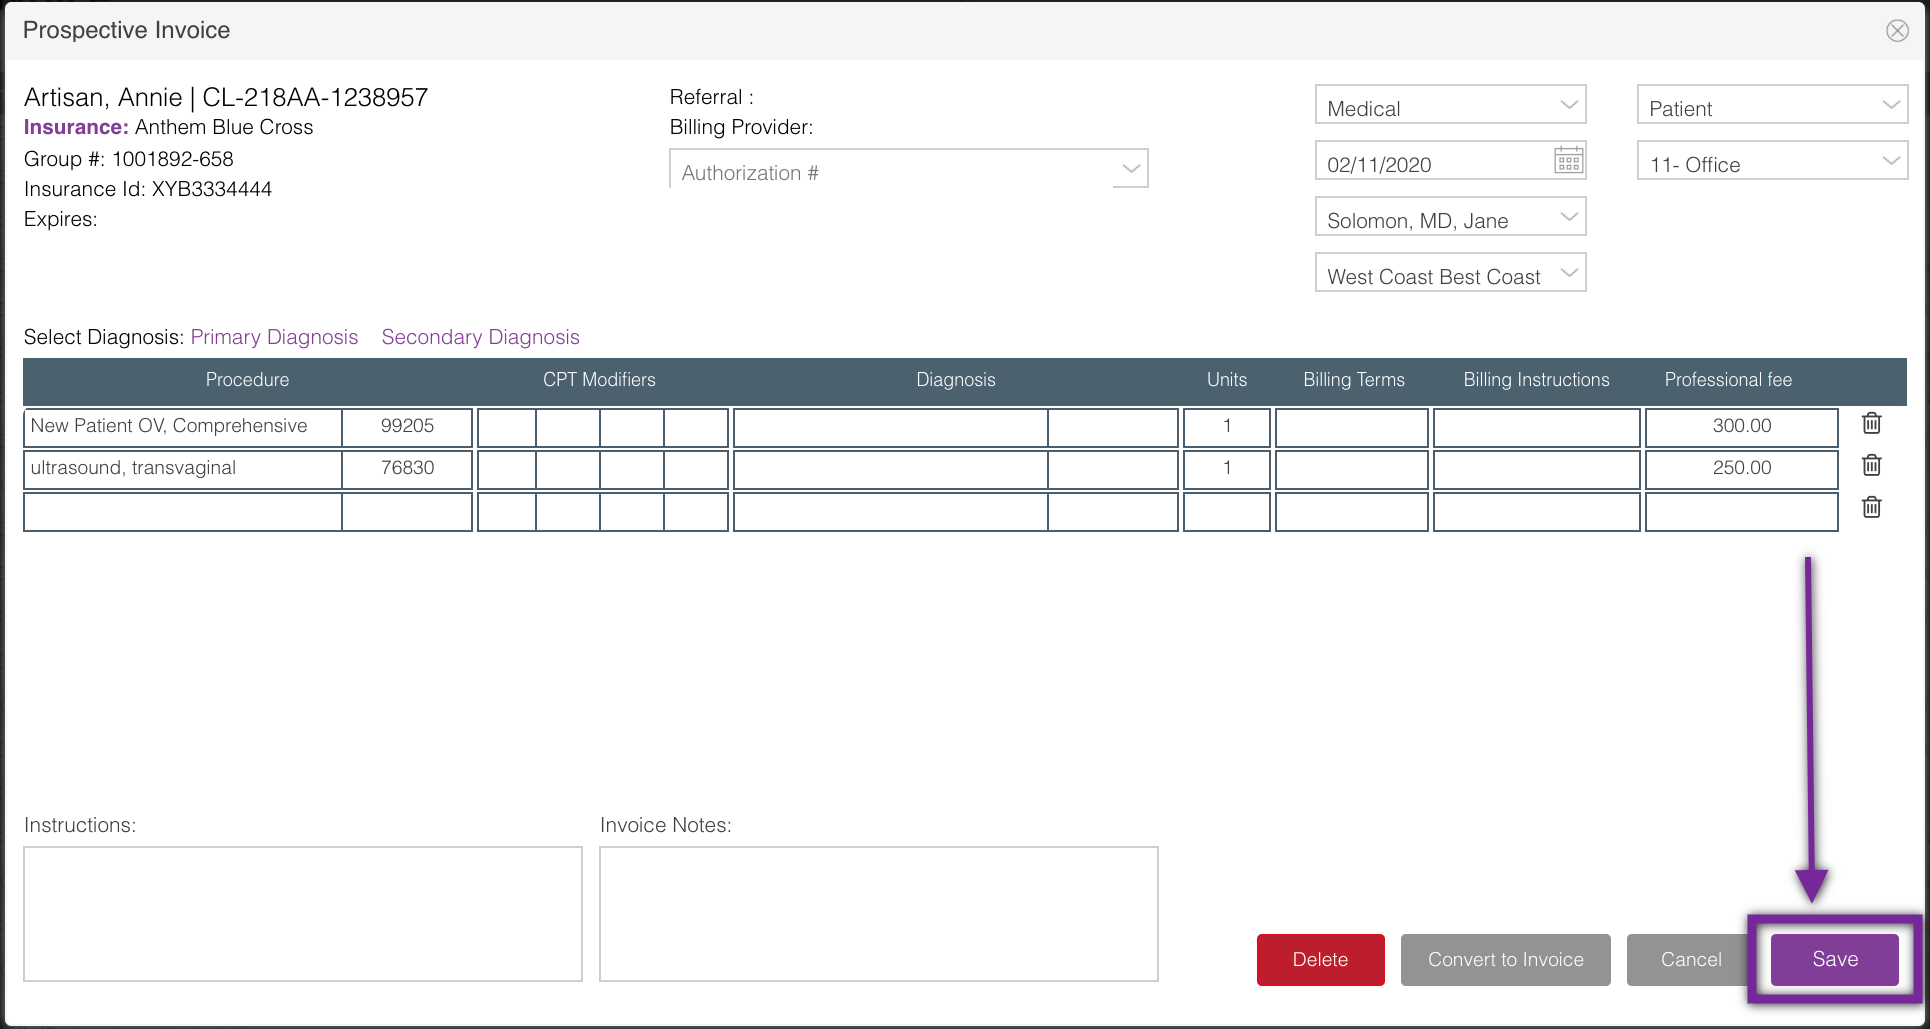
Converting, Saving, or Deleting
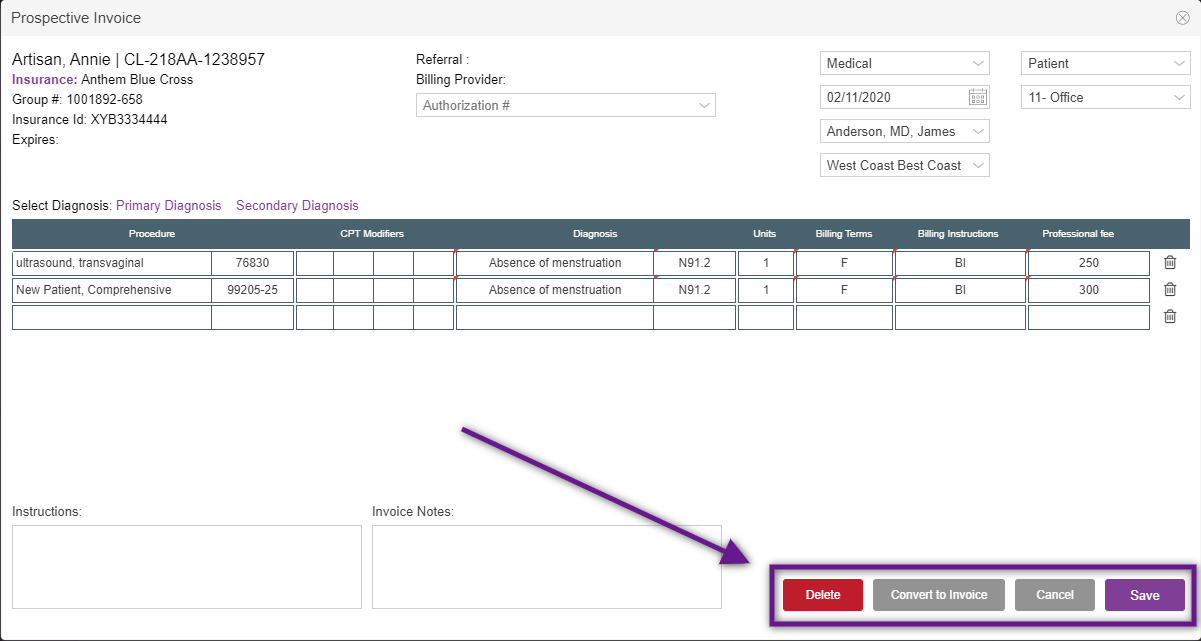
Once you are done editing the Prospective Invoice, you can select Convert to Invoice or Save. Examples of all are shown below:
Converting to Invoice (creating a superbill)
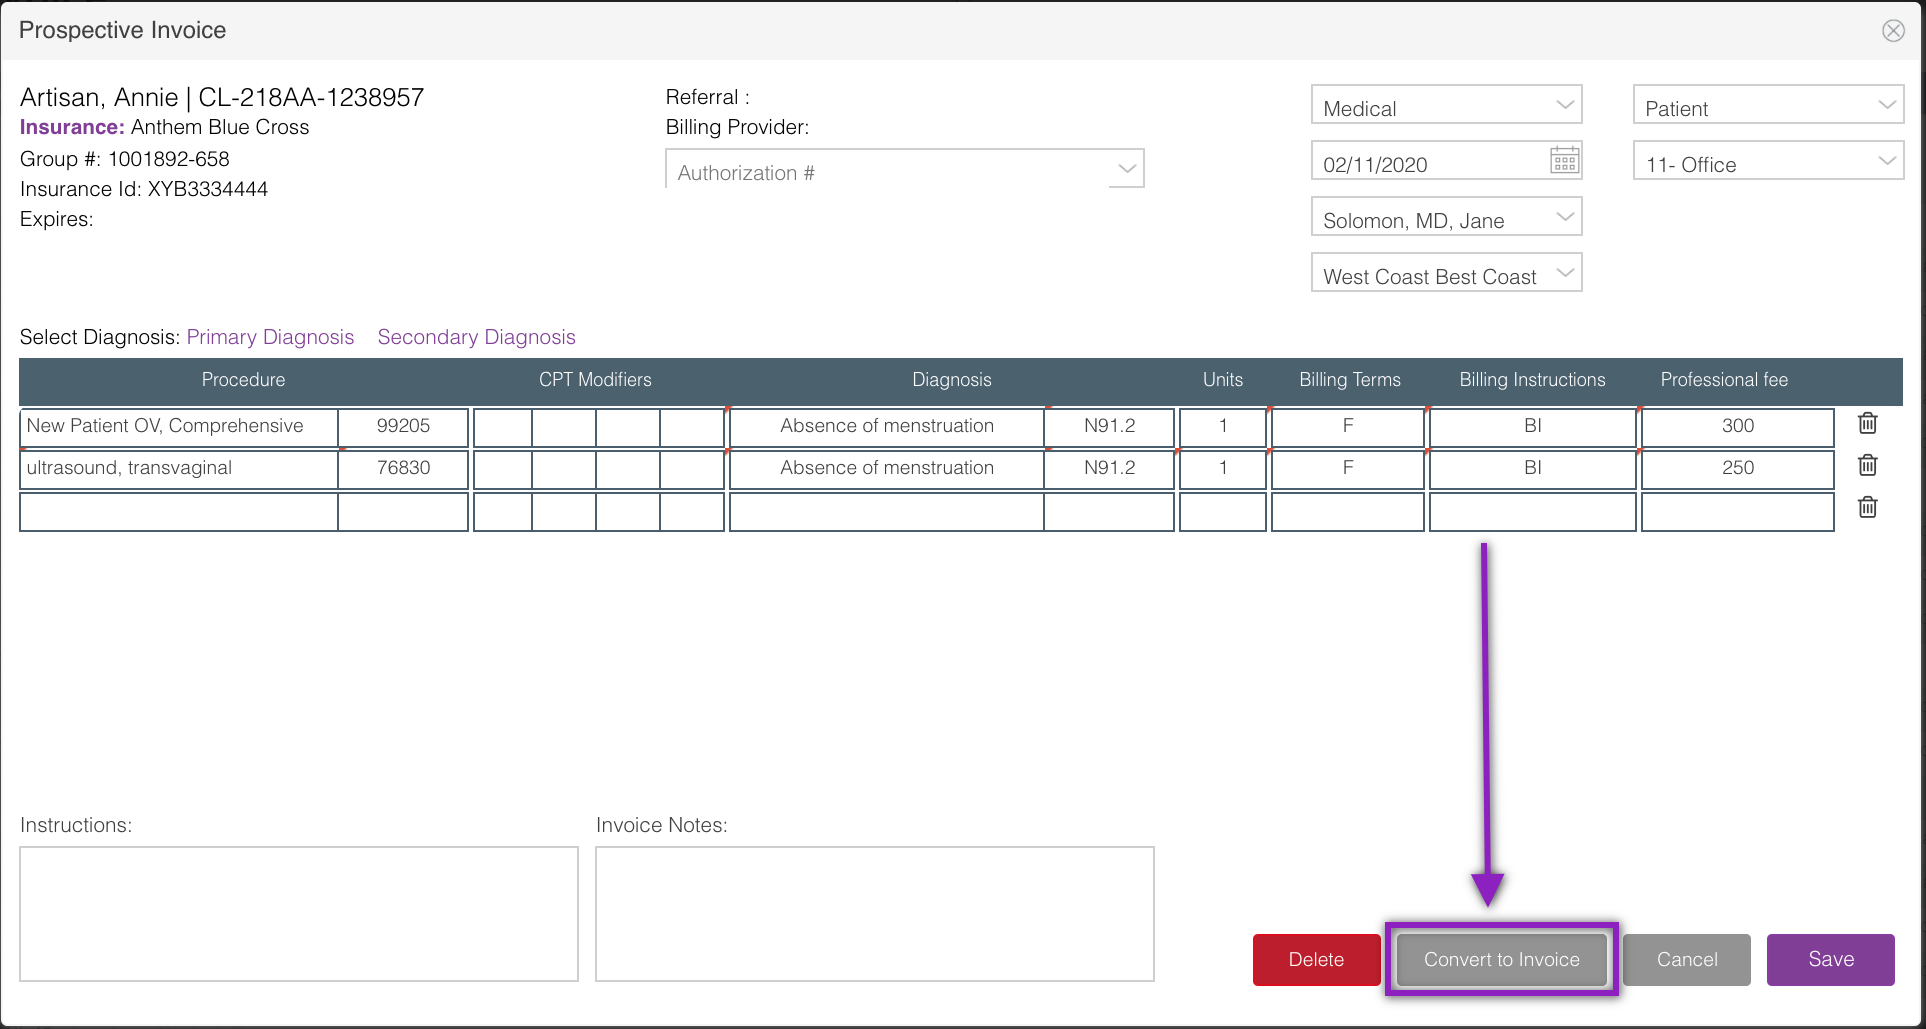

When you select Convert to Invoice, the invoice will be created and will open up in a separate window and can be easily printed

The Prospective invoice has now been converted to an actual invoice in the patient's accounting section of their record.
The invoice has now been created for that particular date of service (DOS).
Updating and Saving a Prospective Invoice (not converting to a superbill)
You may choose to Save the changes you've made to the prospective invoice rather than convert to a invoice/superbill. This may be done for example, if you are working the prospective invoice in anticipation of the patient arriving for their future appointment and do not wish to create the invoice yet.

Deleting a Prospective Invoice
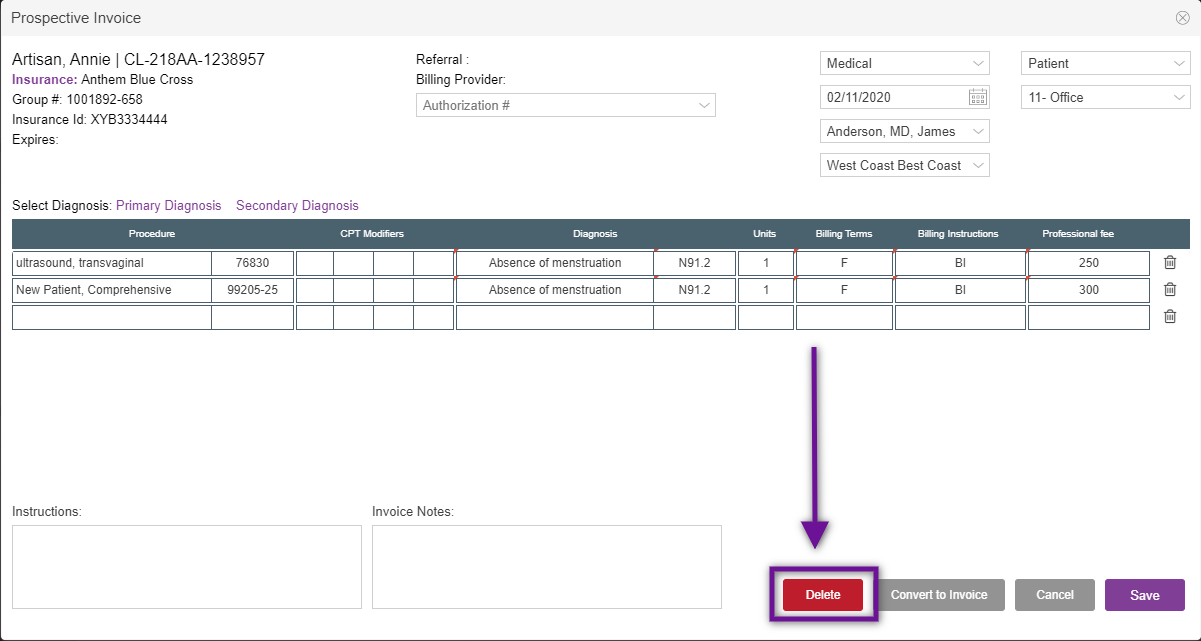
You may delete a prospective invoice in the event of appointment status changes (no show, cancel, reschedule, etc) or if there are duplicate charges created.
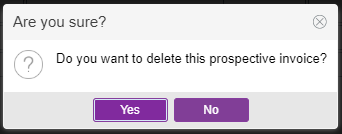
A warning will pop up to confirm that you are sure that you want to delete this invoice as you will not be able to reverse this action. Select Yes to continue.
Accessing Prospective Invoice from the Homepage and Appointment Calendar
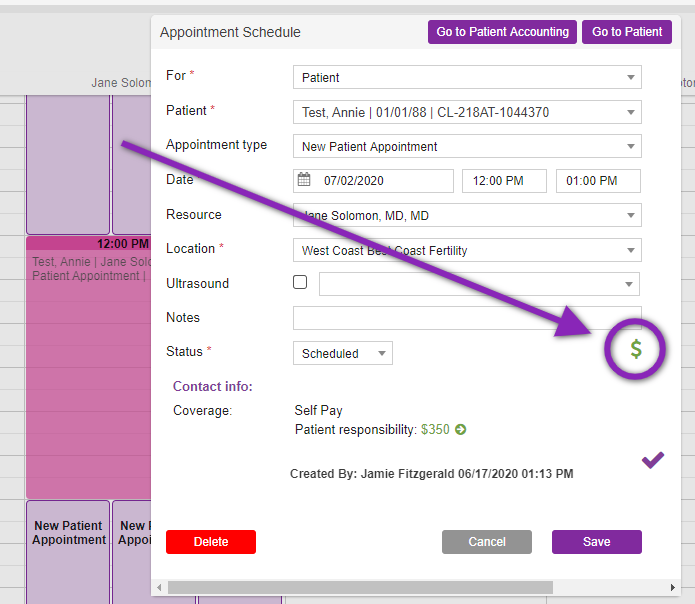
The Prospective Invoice may be accessed through the schedule panel on a user's Homepage or in the Appointment Details screen in Appointment Calendar by clicking on the $ sign icon.

From the homepage, the Schedule panel will show which appointments have prospective invoices and the status of them which are explained in the legend at the bottom of the panel. Statuses are as follows:
- $ - Invoice Pending
- - Converted (or "Approved") Invoices
- Blank - means the appointment type does not have charges associated and no prospective invoice has been generated
The Prospective Invoice screen will open and the invoice can be prepared as described above.
**All manuals are compliant with HIPPA regulations. No patient information has been released. All screenshots above were taken from a test clinic with fake patient information.
Artisan Support
Comments