Within the Appointment Calendar, there are nine different statuses available to track the progress of an appointment from the moment a patient schedules until they check out. From Arrival to Checked Out, the changes will be tracked and available for use with our analytic tools.
Scheduled
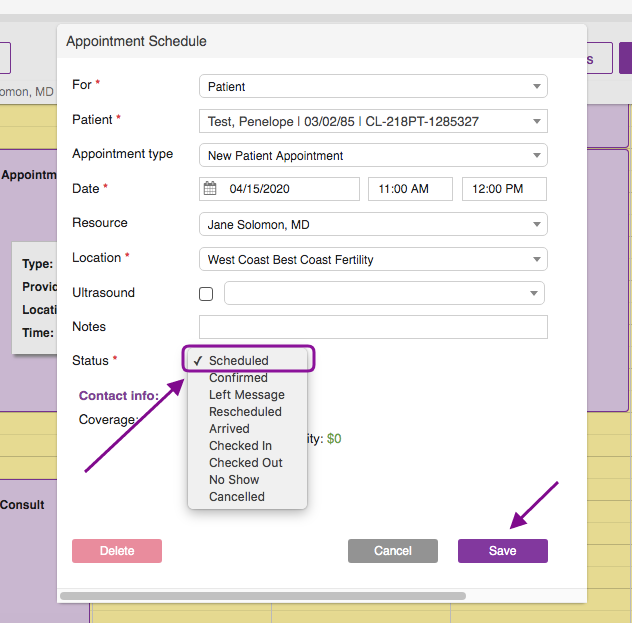
Scheduled -Use this status when initially scheduling an appointment. Click Save.
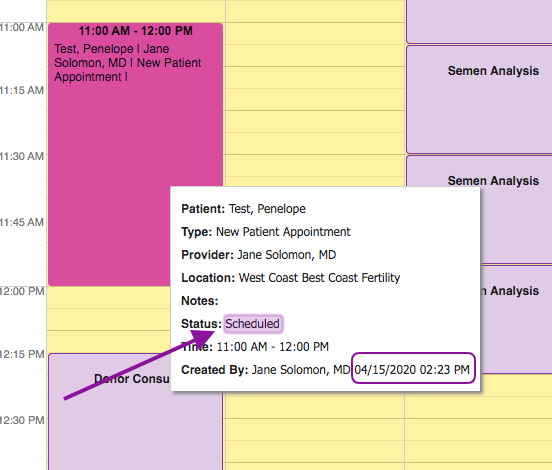
If you hover over the calendar on the schedule you will see the status of the appointment displayed. Please note the initial time stamp of the appointment (time is circled).
Confirmed
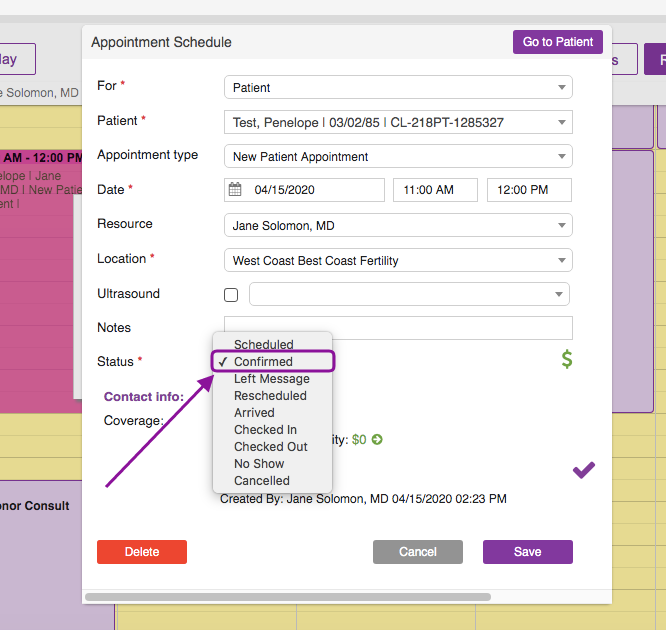
Confirmed - Use this status when the appointment is confirmed prior to the scheduled time.
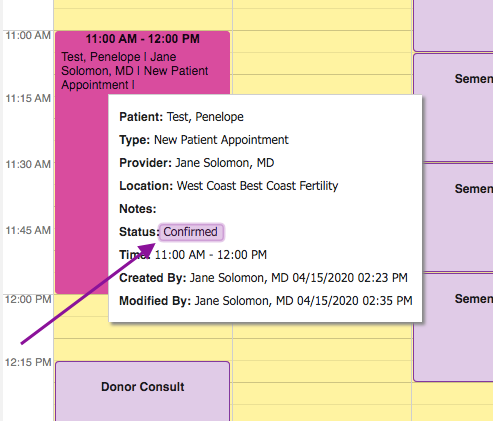
If you hover over the calendar on the schedule you will see the status of the appointment displayed.
Left Message
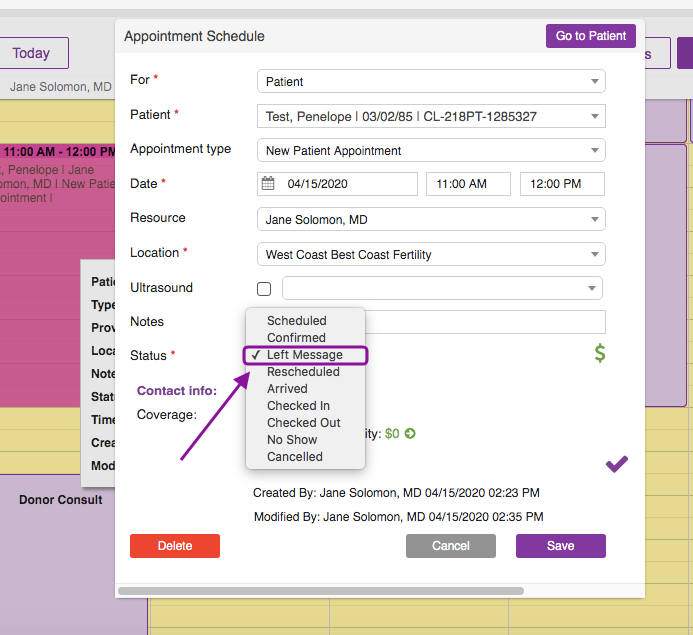
Left Message - Use this status if the appointment has not been confirmed, but a message has been left for the patient in an attempt to confirm the appointment

If you hover over the calendar on the schedule you will see the status of the appointment displayed.
Cancelled
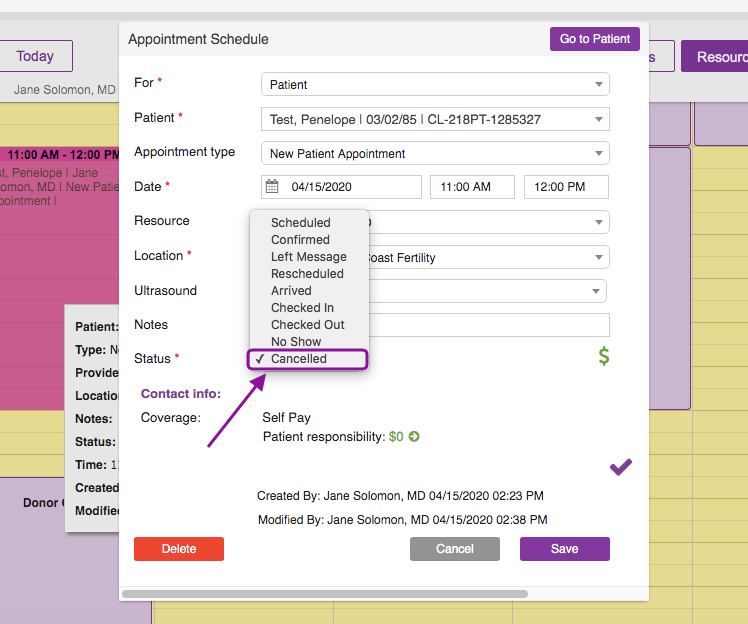
Cancelled - Use this status when a patient cancels an appointment, but does not reschedule. Do not delete the appointment, as it is important to track cancellations. The appointment will not delete off the calendar.

The initials "CNL" will appear in the upper right hand corner of the appointment on the calendar.
If you hover over the calendar on the schedule, you will see the status of the appointment displayed.
Status Changes and Practice Notifications
For the following statuses, each user will be notified by color changes on the Schedule on their Homepage. This will allow everyone in the practice to track the patient on the day of the appointment.
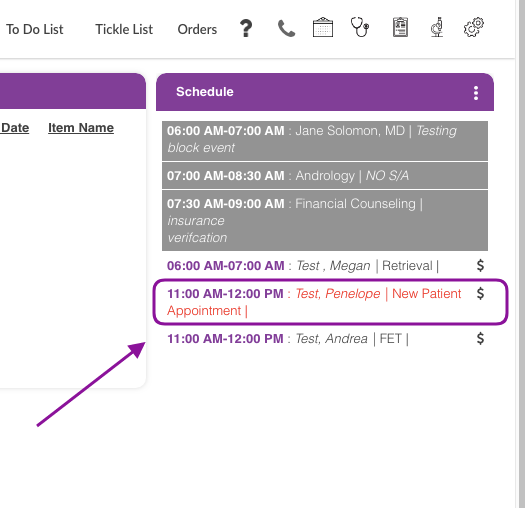
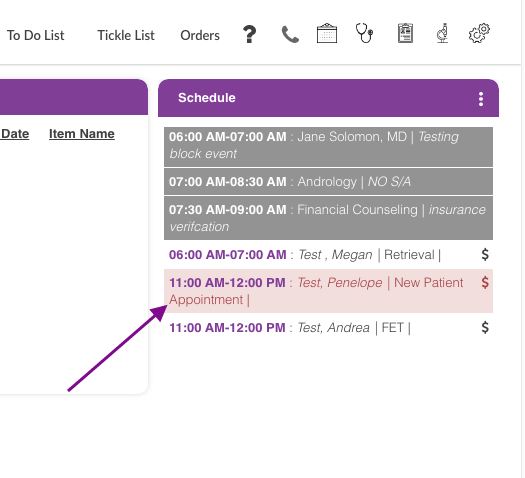
On every user's home page the cancelled appointment will appear in red text.
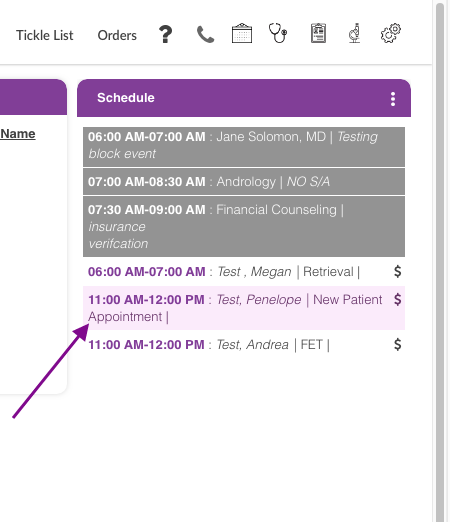
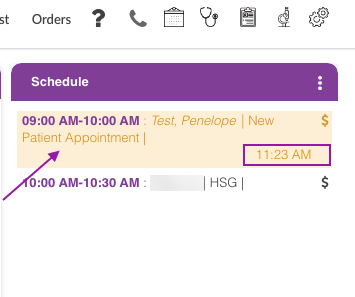
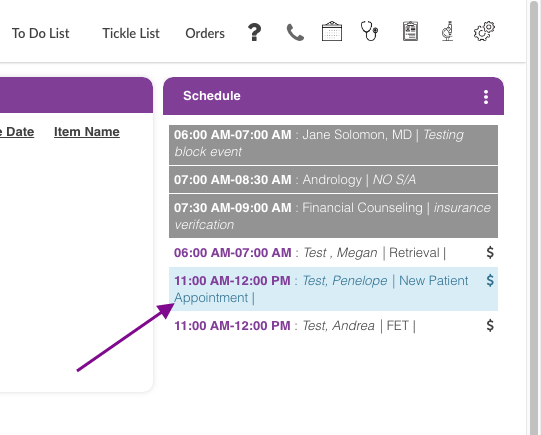
You are also able to change the appointment status on your Home page.
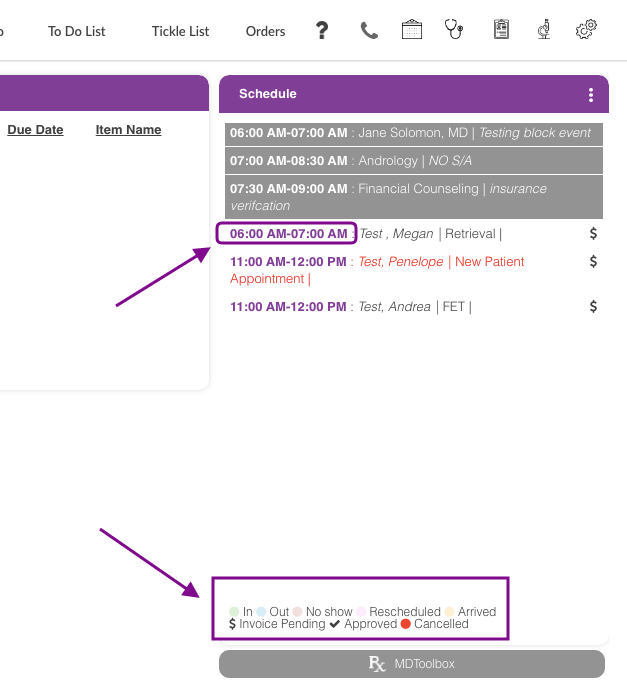
Select the appointment time that you wish to change the status. A reference guide of the different color status is also available on your home page.

After selecting the appointment time from the Schedule section on your home page,click on the Status to pull up this window where you can select the appropriate status then click Save.
Rescheduled

Rescheduled - Use this status if a patient cancels this appoint and reschedules for another appointment. This allows the appointment to be tracked as a part of the patient's record. This will keep the appointment on the schedule, but another may be scheduled at the same time.
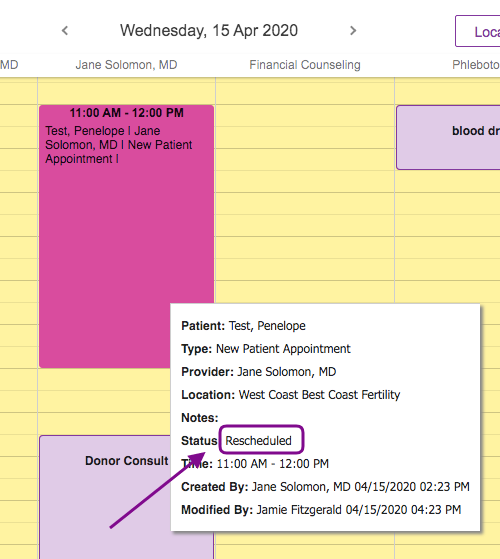
If you hover over the calendar on the schedule, you will see the status of the appointment displayed.
On every user's home page, the appointment will appear highlighted in light purple to signify the change in status.
Arrived
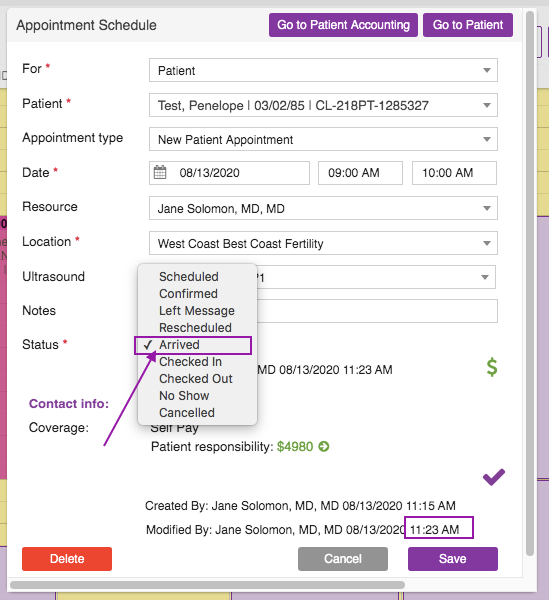
Arrived - Use this status when a patient arrives at the practice checks into the front office.
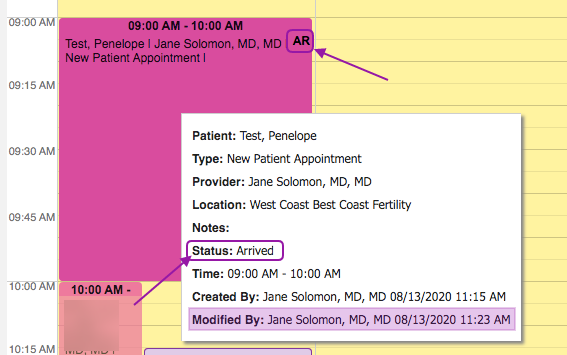
The initials AR will appear in the upper right hand corner when you hover over the appointment in the calendar.
If you hover over the calendar on the schedule, you will see the status of the appointment displayed who created and modified the appointment with time-stamped of when the status changed to arrived.
On every user's home page the appointment will appear highlighted in orange to signify the change in status with the arrived time. This change is time stamped in Artisan to allow the practice to track the time from arrival until the patient is brought back to begin treatment, through the Checked In status.
Checked In
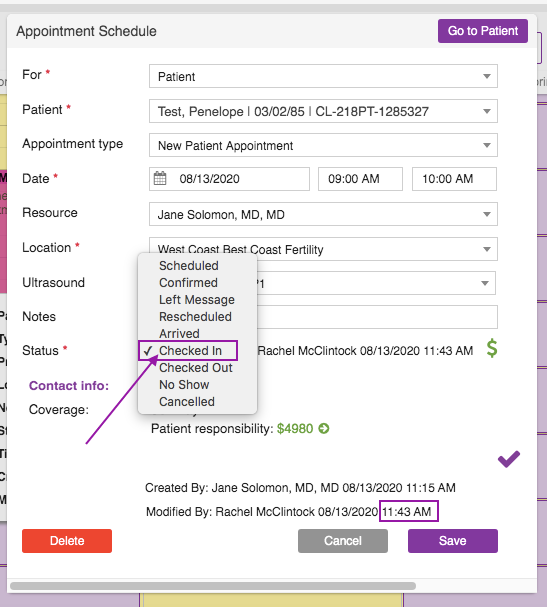
Checked in - Use this status when the patient is brought back and roomed for treatment.
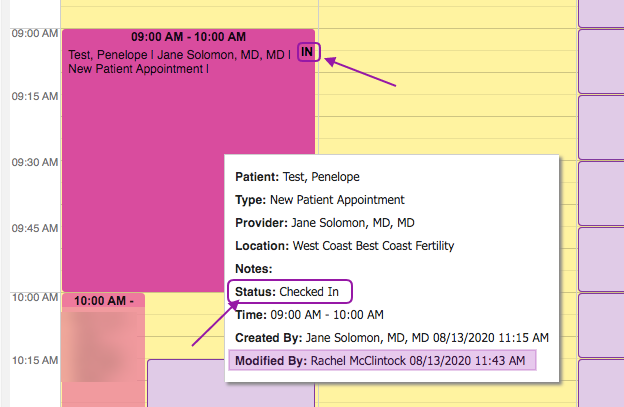
The word IN will appear in the upper right hand corner of the appointment on the calendar.
If you hover over the calendar on the schedule, you will see the status of the appointment displayed who created and modified the appointment with time-stamped.
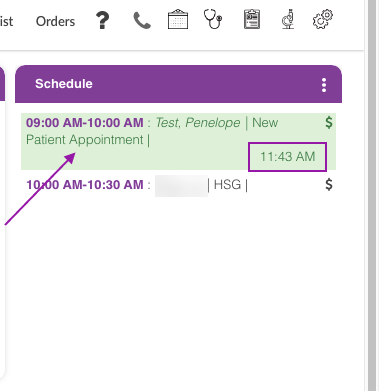
On every user's home page the appointment will appear highlighted in green to signify the change in status with the checked in time. This change is time-stamped in Artisan to allow the practice to track the time the patient spends in treatment, through the Check Out status.
Checked Out

Checked Out - Use this status when the patient is finished with treatment for that day and is checked out.
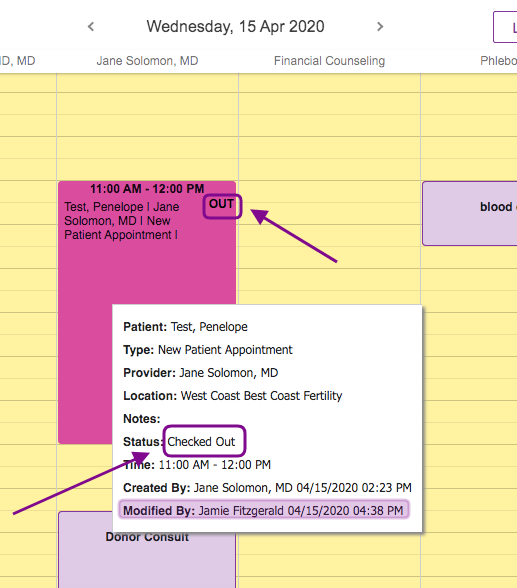
The word OUT will appear in the upper right hand corner of the appointment on the calendar.
If you hover over the calendar on the schedule, you will see the status of the appointment displayed.
On every user's home page the appointment will appear highlighted in blue to signify the change in status.
No Show
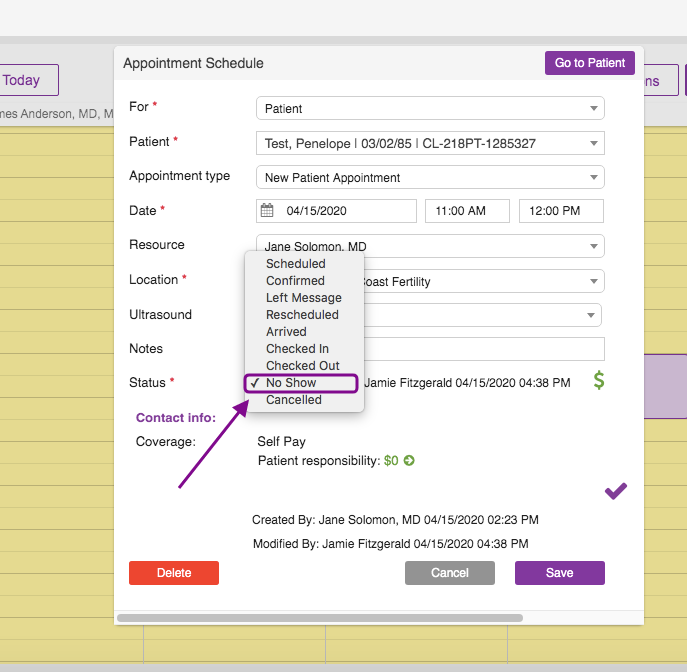
No Show - Use this if a patient does not show for the appointment. The practice will be able to track the percentage of "no show" in the analytical reporting.
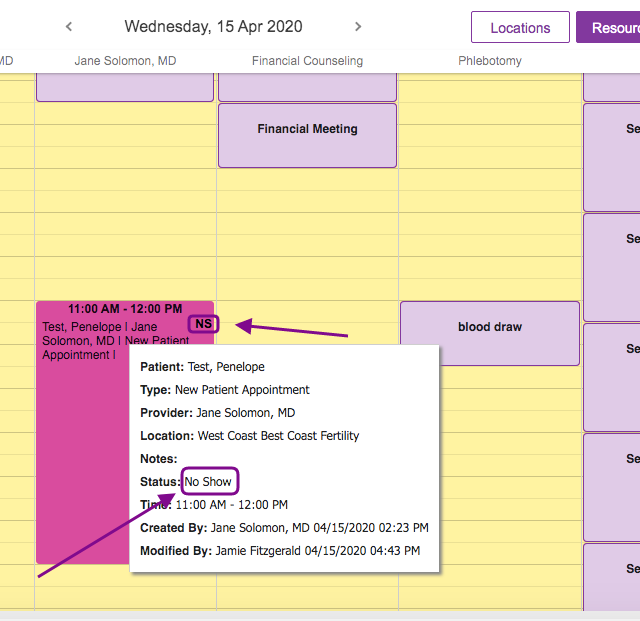
The initials NS will appear in the upper right hand corner of the appointment on the calendar.
If you hover over the appointment on the schedule, you will see the status of the appointment displayed.
On every user's home page the appointment will appear highlighted in red to signify the change in status.
**All manuals are compliant with HIPPA regulations. No patient information has been released. All screenshots above were taken from a test clinic with fake patient information.
Artisan Support
Comments