The Appointment Calendar can be structured to meet the needs of your individual practice. The self-service appointment tool will allow prospective patients to schedule an appointment in an available appointment slot. This will also add them to your practices prospective patient database as well.

Customizing your self-service appointment tool:
There are several ways in which the self-service appointment tool can be customized for the needs of your individual practice.
Navigation
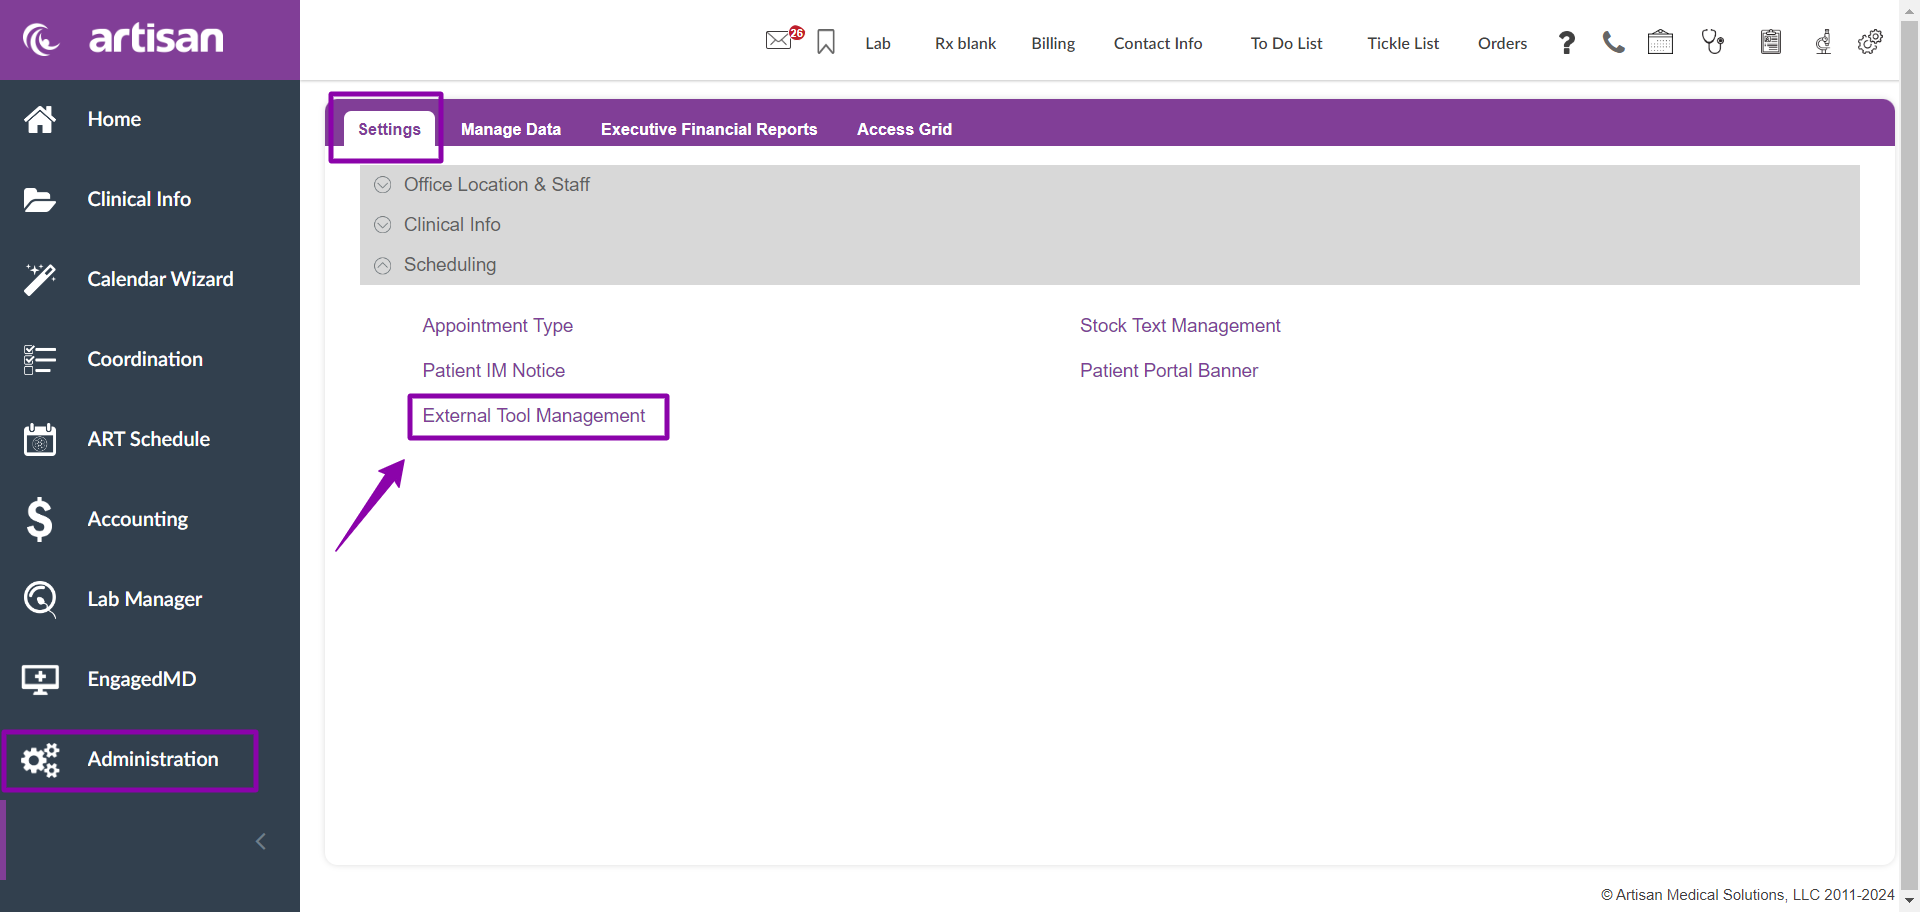
To navigate to set up the self-service appointment tool , click the Administration panel, select Settings, open the Scheduling dropdown , and select External Tool Management.
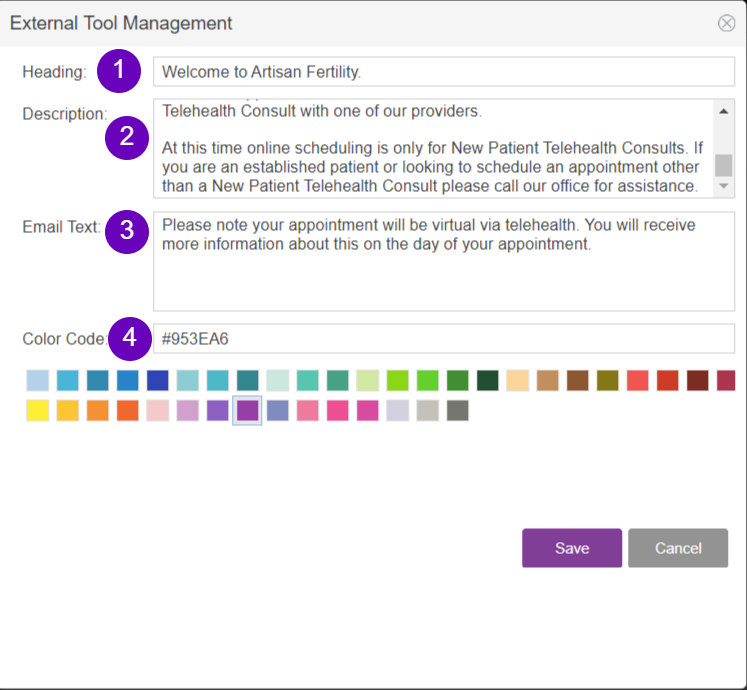
The following fields can be adjusted to customize and theme the tool to your clinics needs and preferences.
1. Heading: The heading will display at the top of the self-service appointment tool in larger bold text.
2. Description: The description will display below the heading.
3. Email Text: Provide any important details to patients on the confirmation email sent when a patient is successful in scheduling an appointment from the self-service tool.
4. Color Code: Theme your self-service appointment tool by selecting a color for the text of the tool.
Setting up Appointment types and Templates for the self-service appointment tool:
Appointment types/ Appointment templates and Resources must be set up appropriately in order for the appointment slots to show on the self-service appointment tool.
Appointment Types
For help on creating appointment types and templates see Setting up the Calendar: Appointment Types, Resources and Appointment Templates
Once an appointment type is created, you are able to enable these appointment types to display on the self-service appointment tool.
Navigation
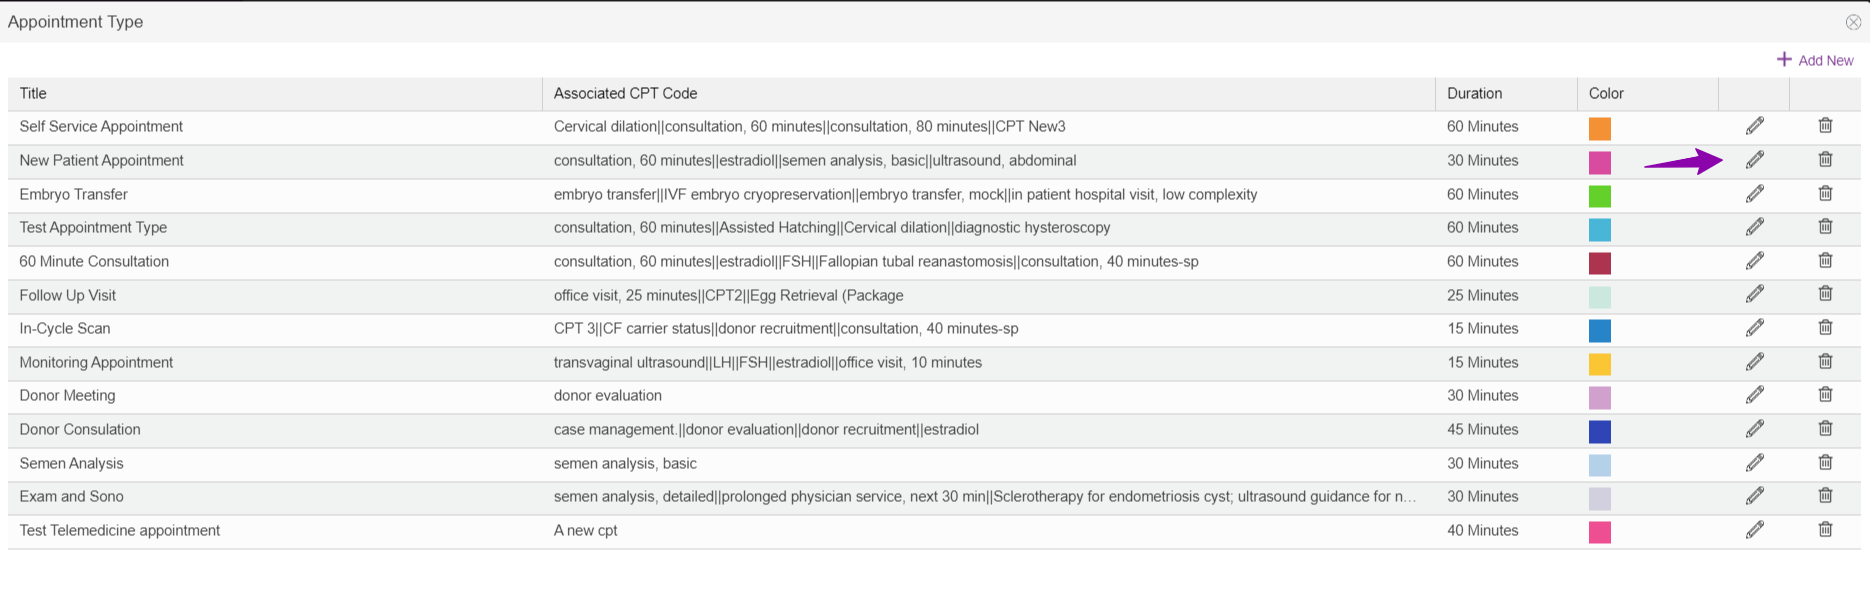
Edit the desired appointment type from the appointment type library by selecting the pencil icon next to the appointment type.
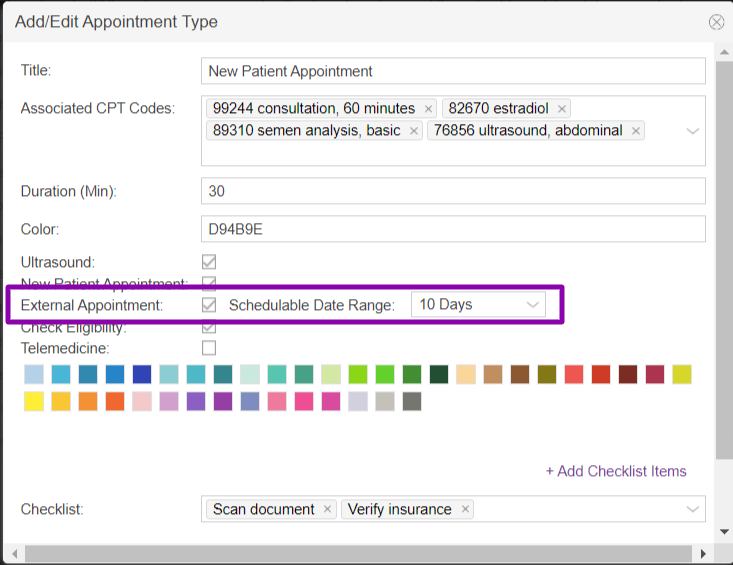
To enable the appointment type to display on the self-service tool:
1. Select the checkbox for External Appointment
2. Select the desired schedulable date range. This will be the number of days from todays current date in which the appointment can be booked by the patient. Example: If your practice would only like to allow a patient to be able to book an appointment 10 days from now or later than select 10 days.
3. Save your changes.
NOTE: Any appointment template slots, that are enabled, within the schedulable date range, not blocked or already booked will appear on the self-service appointment tool.
Setting up Resources/Locations for the self-service appointment tool:
Resources and Locations must be set up appropriately in order for the appointment slots to show on the self-service appointment tool.
For help on creating resources and locations see Setting up the Calendar: Appointment Types, Resources and Appointment Templates and Understanding the Concept of Office Locations.
Enable a Office Location to appear of the Self-Service Appointment Tool
Once a office locations are created, you are able to enable these locations to display on the self-service appointment tool.
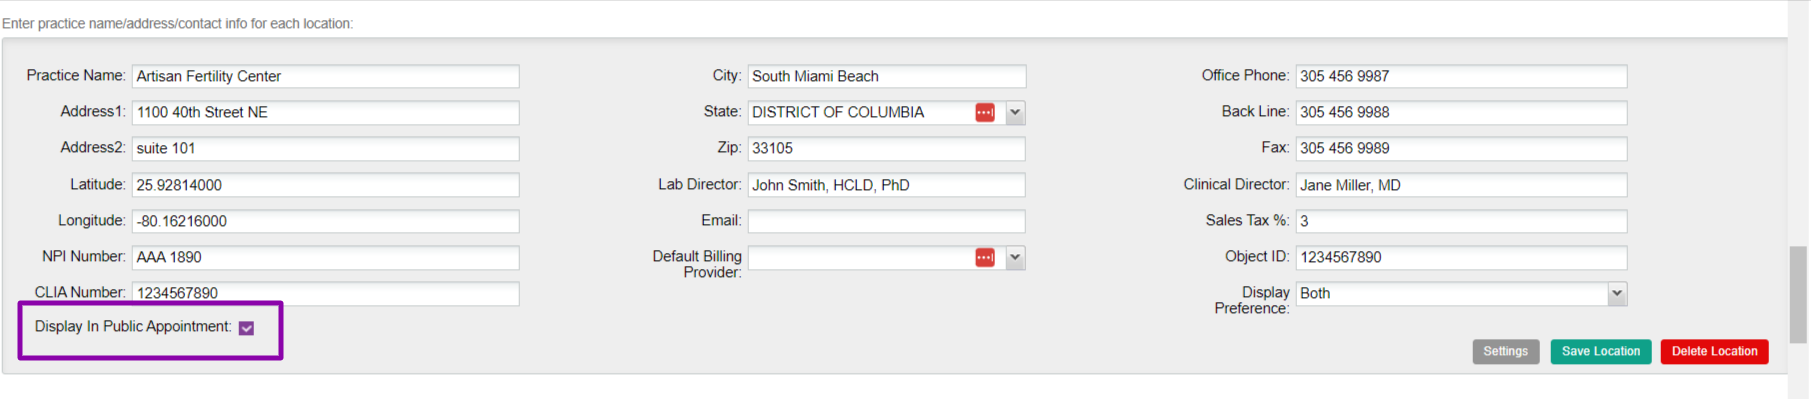
To enable the office location to display on the self-service tool:
1. Select the checkbox for Display in Public Appointment
2. Select Save Location.
Enable a Resource to appear of the Self-Service Appointment Tool
Once a resource is created, you are able to enable these resources to display on the self-service appointment tool.
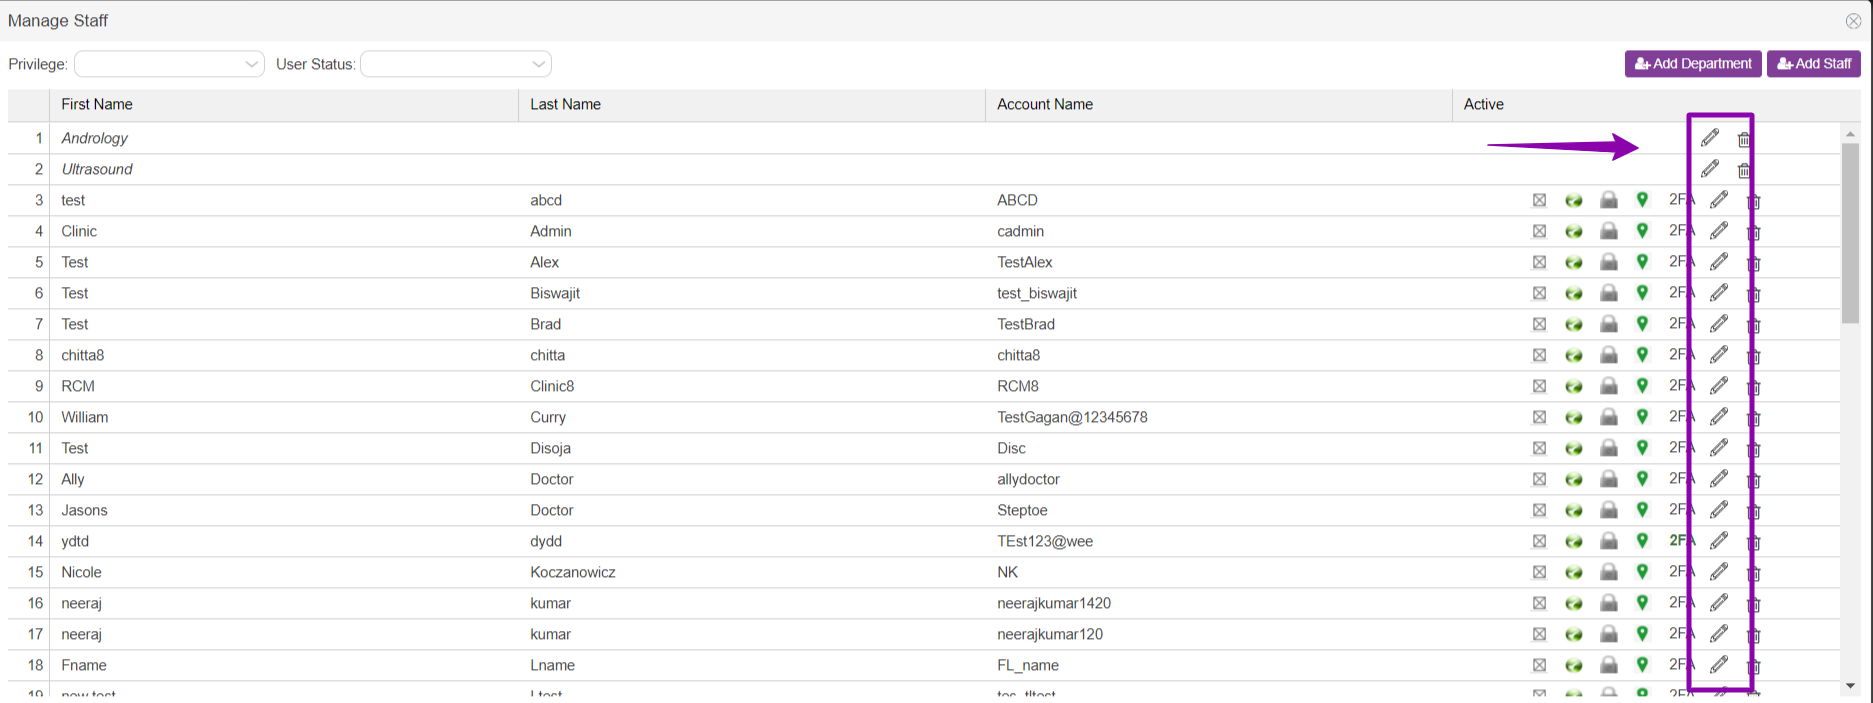
To enable a resource to appear on the self-service tool: Select the pencil icon to edit the desired resource.
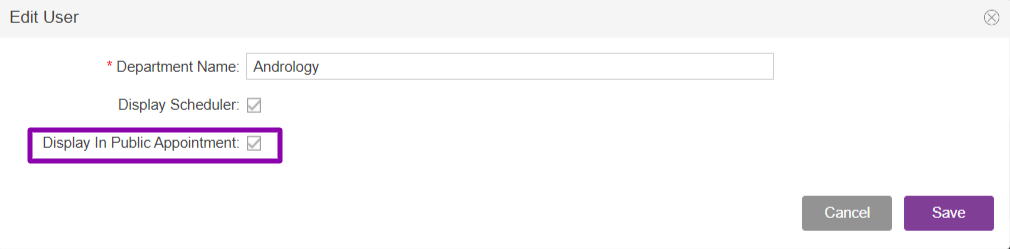
For Departments:
1. Select the Display In Public Appointment checkbox.
2. Select Save to save your changes.
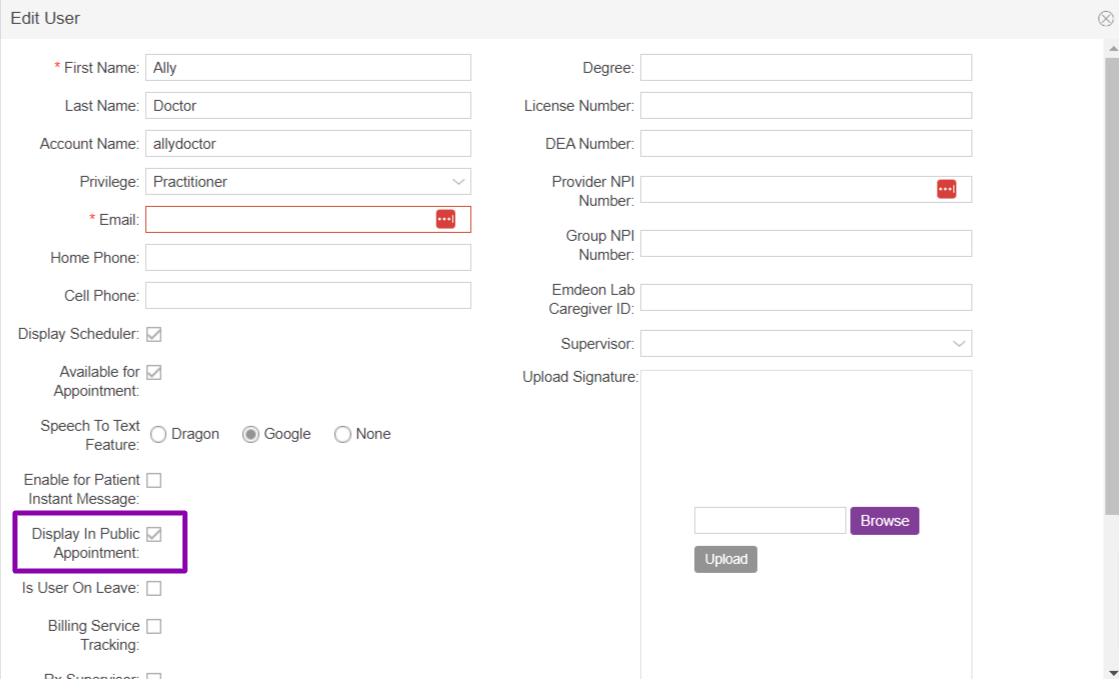
For staff accounts:
1. Select the Display In Public Appointment checkbox.
2. Select Save to save your changes.
Using the self-service appointment tool:
Once customization and setup is complete, patients will be able to schedule their own appointments using the tool. The self-service appointment tool will allow prospective patients to schedule an appointment in an available appointment slot. This will also add them to your practices prospective patient database as well.

Patients will be able to view available slots utilizing the filters for date, provider, and location as needed. Once an appointment slot is selected, the patient will enter their information to schedule the appointment.
NOTE: Any appointment template slots, that are enabled, within the schedulable date range, not blocked or already booked will appear on the self-service appointment tool.
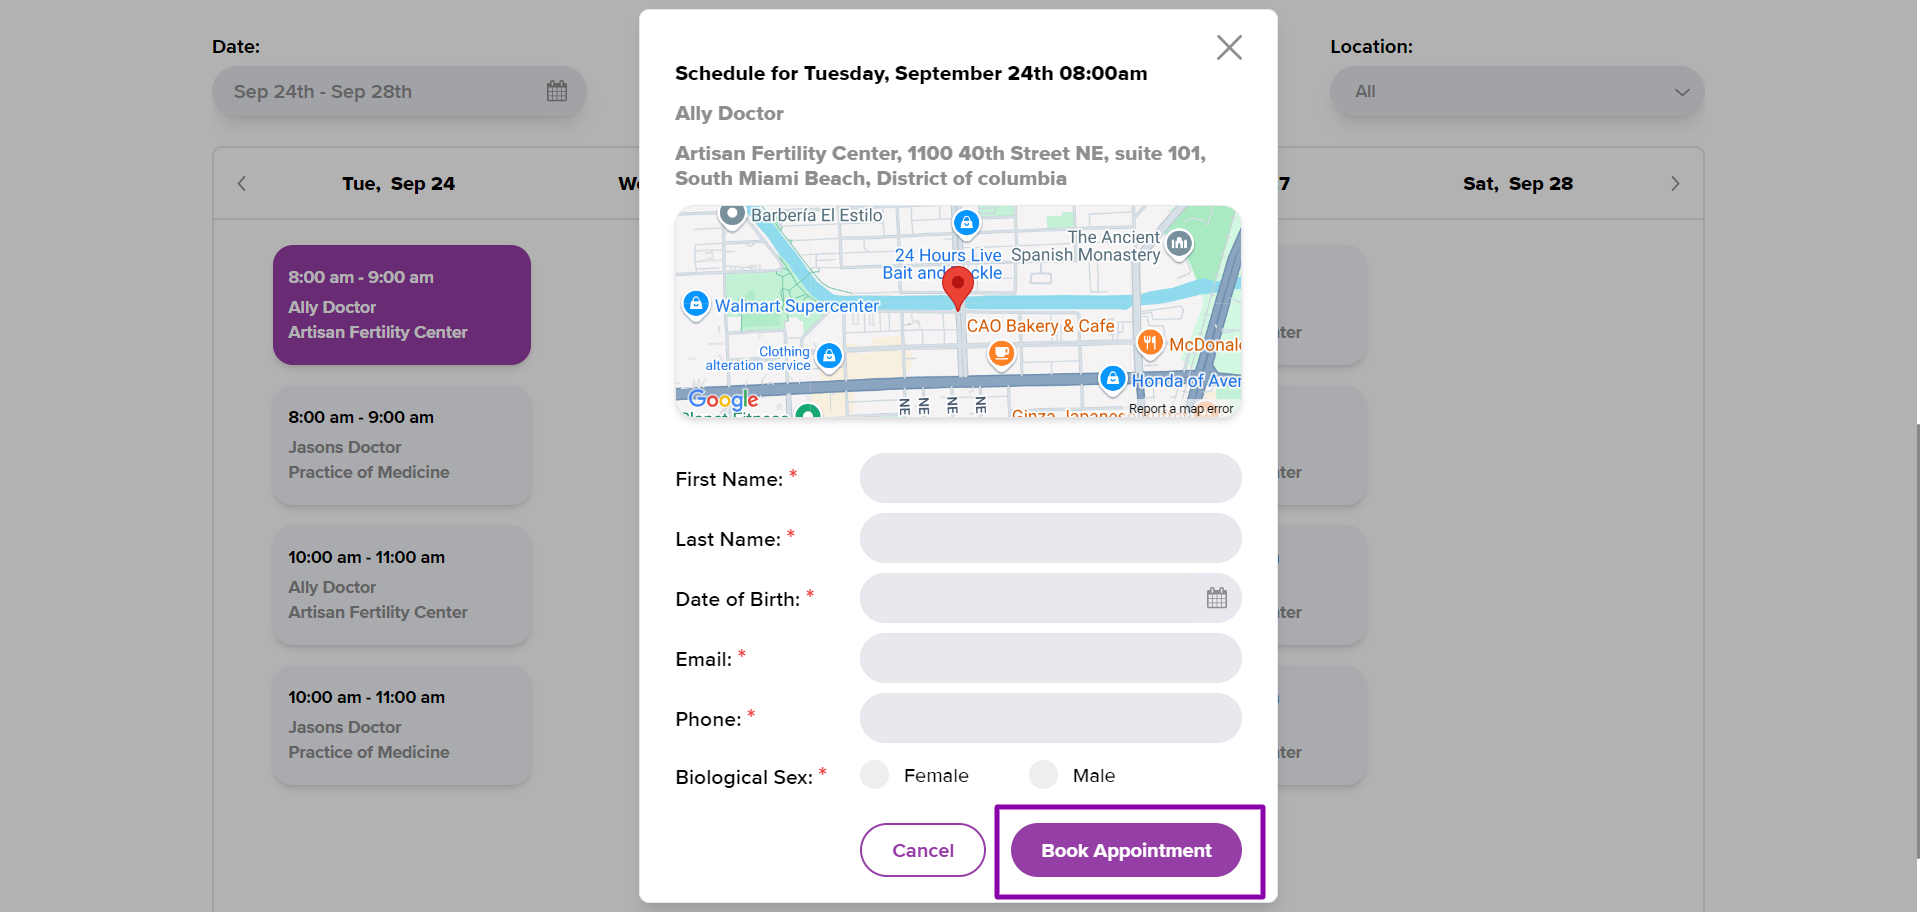
After selecting an available appointment slot the patient will be required to enter the following information , and select Book Appointment to complete the appointment scheduling.
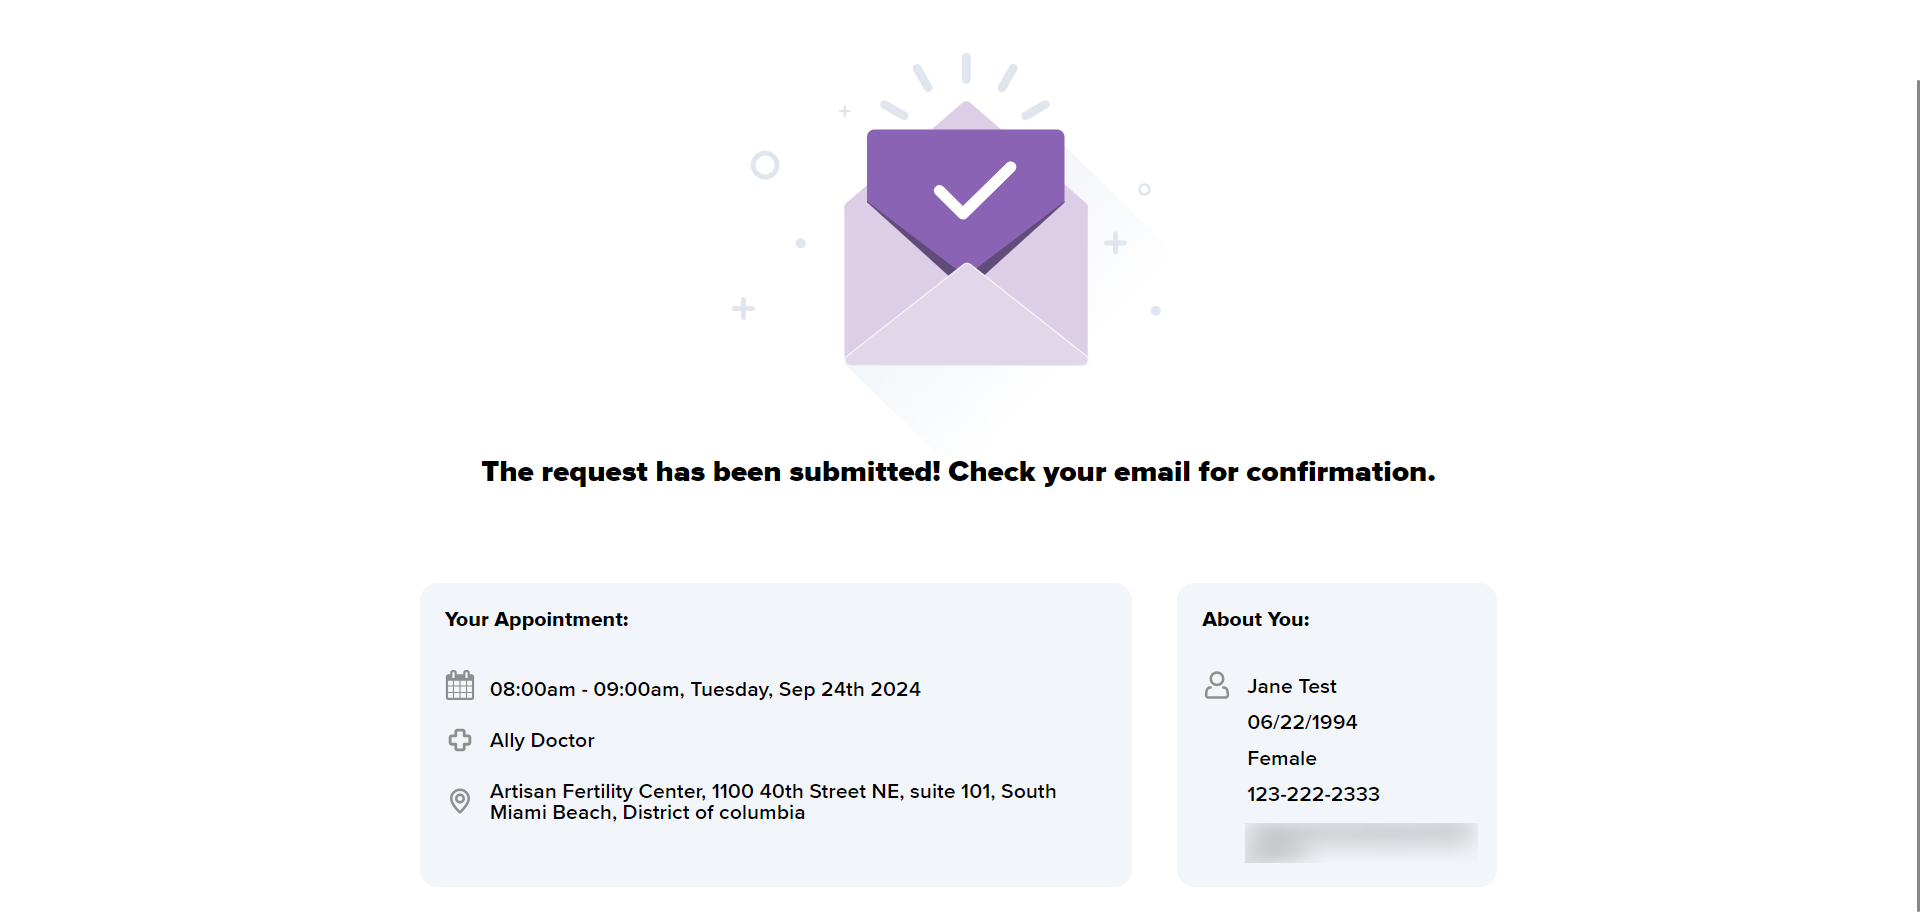
Upon successful completion of booking an appointment slot, the patient will receive a confirmation page. If there are any errors, and error popup will appear.
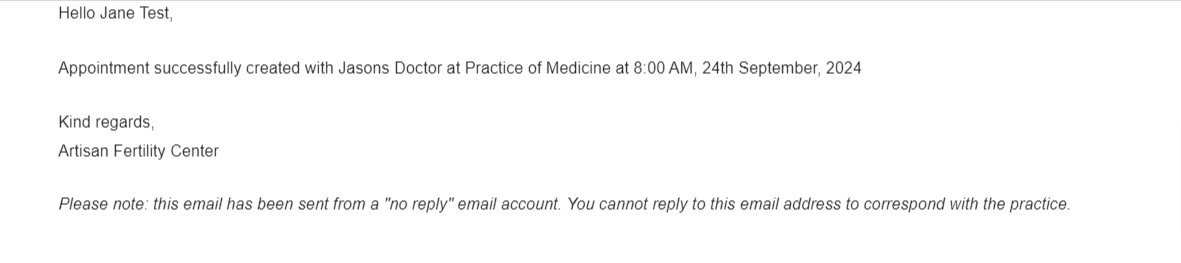
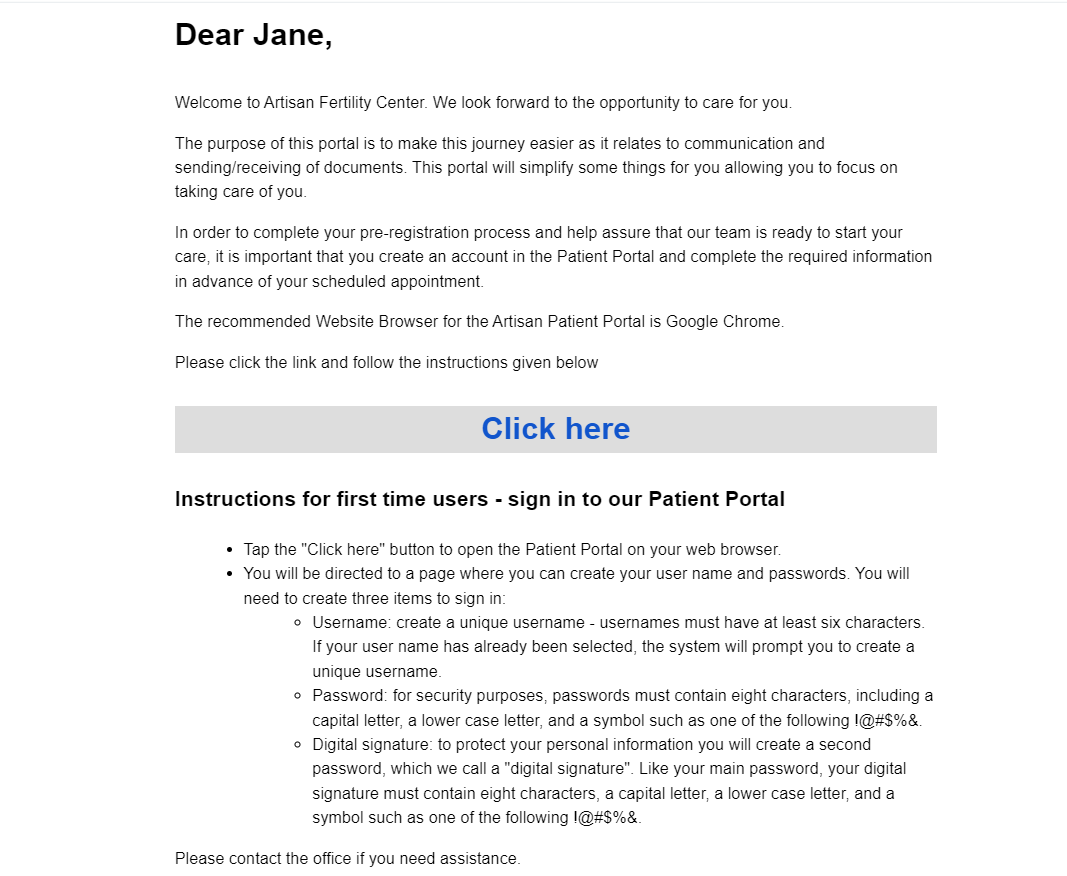
The patient will receive two emails upon successful booking of an appointment using the self-service appointment tool.
1. Confirmation email: This email is customizable for your practice needs.
2. Patient Portal Registration email: This email will provide the patient with a link to register for the prospective patient portal.
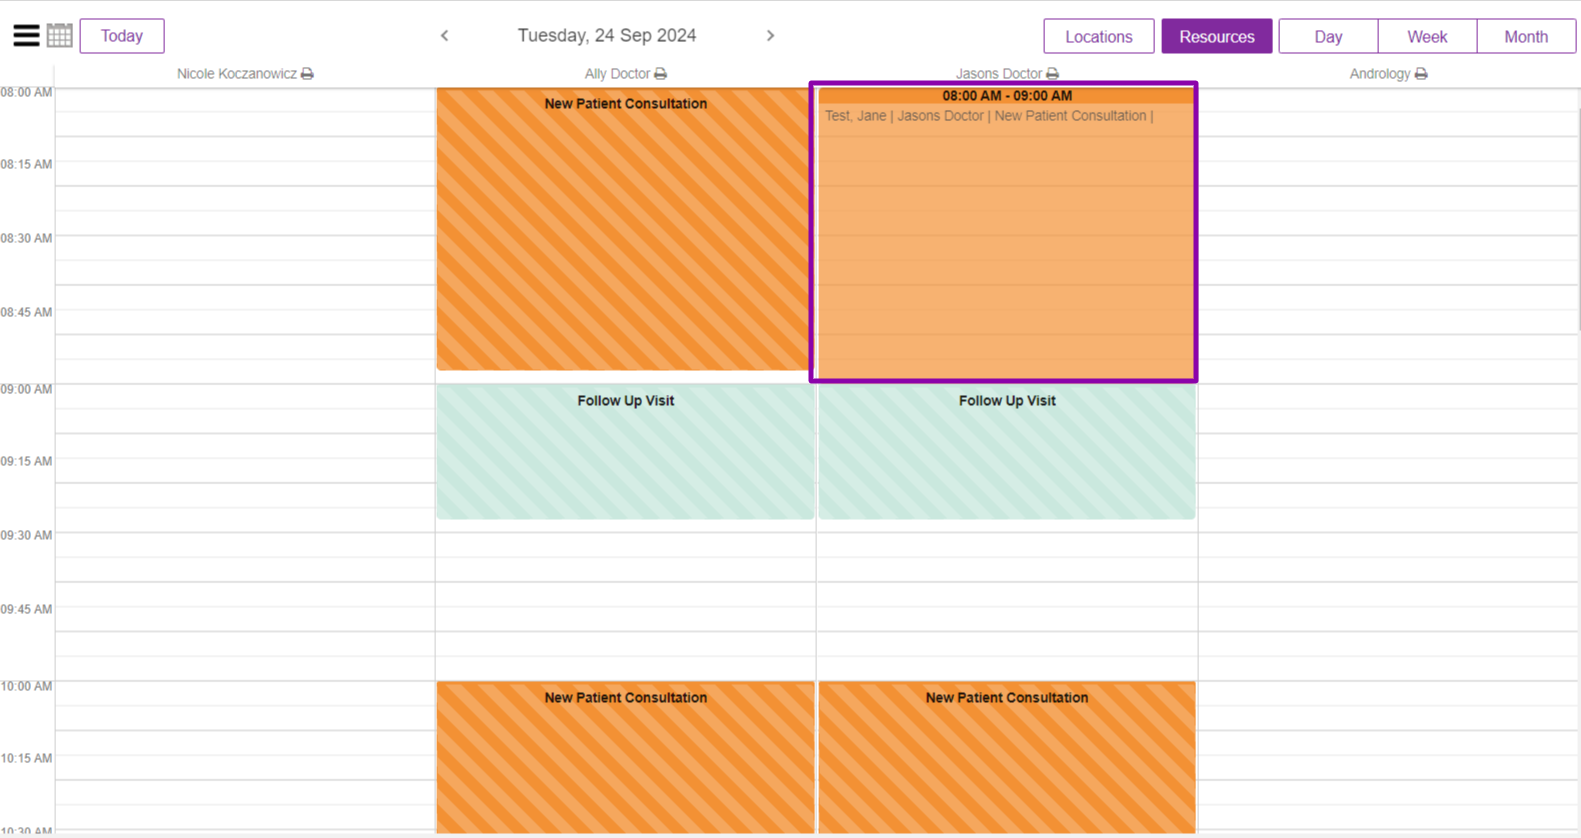
On the clinic side, once the patient is successful in booking an appointment with the self-service appointment tool:
1. The patient will be scheduled on the appointment calendar in the appointment template slot that the patient has selected on the self-service appointment tool.
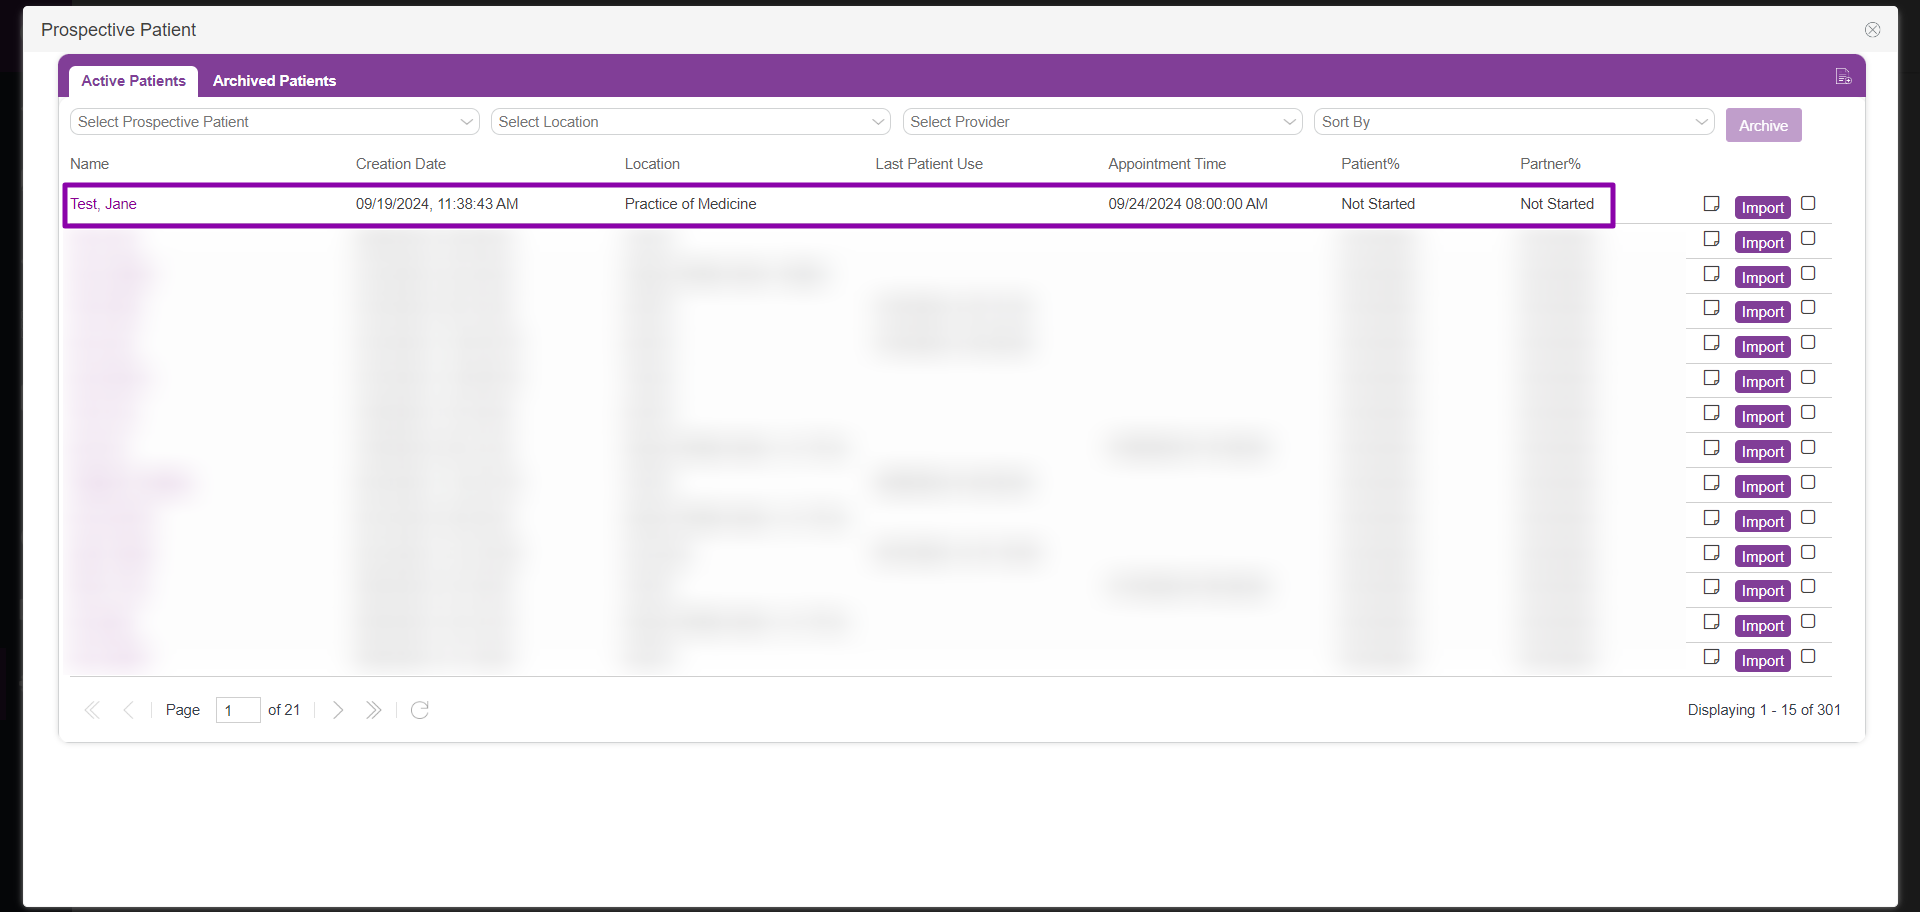
2. The patient will be added to the prospective patient database. For more information on prospective patients see How to Add a Prospective Patient.
**All manuals are compliant with HIPPA regulations. No patient information has been released. All screenshots above were taken from a test clinic with fake patient information.
Megan Berenis
Comments