The ART Treatment Estimate is the area in Artisan where you will be able to create ART Treatment estimates for patients.
Navigation:
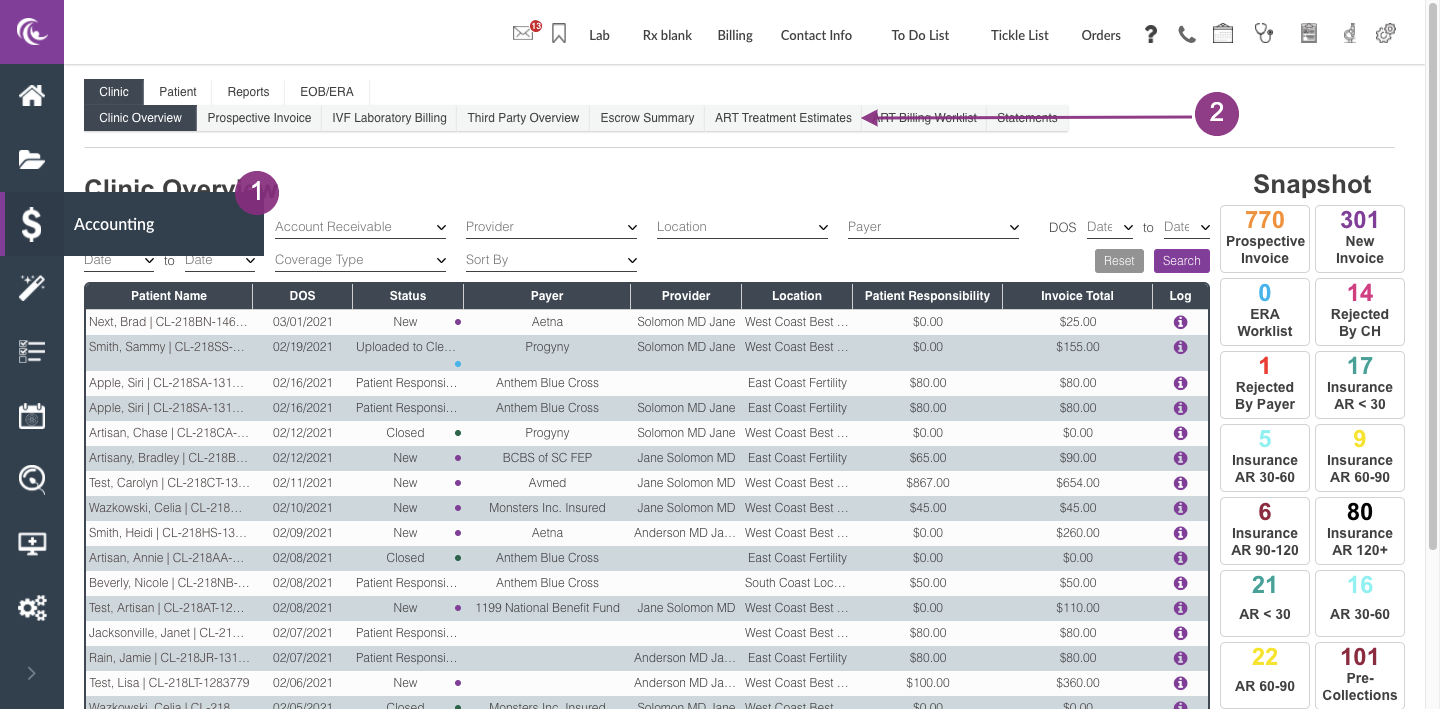
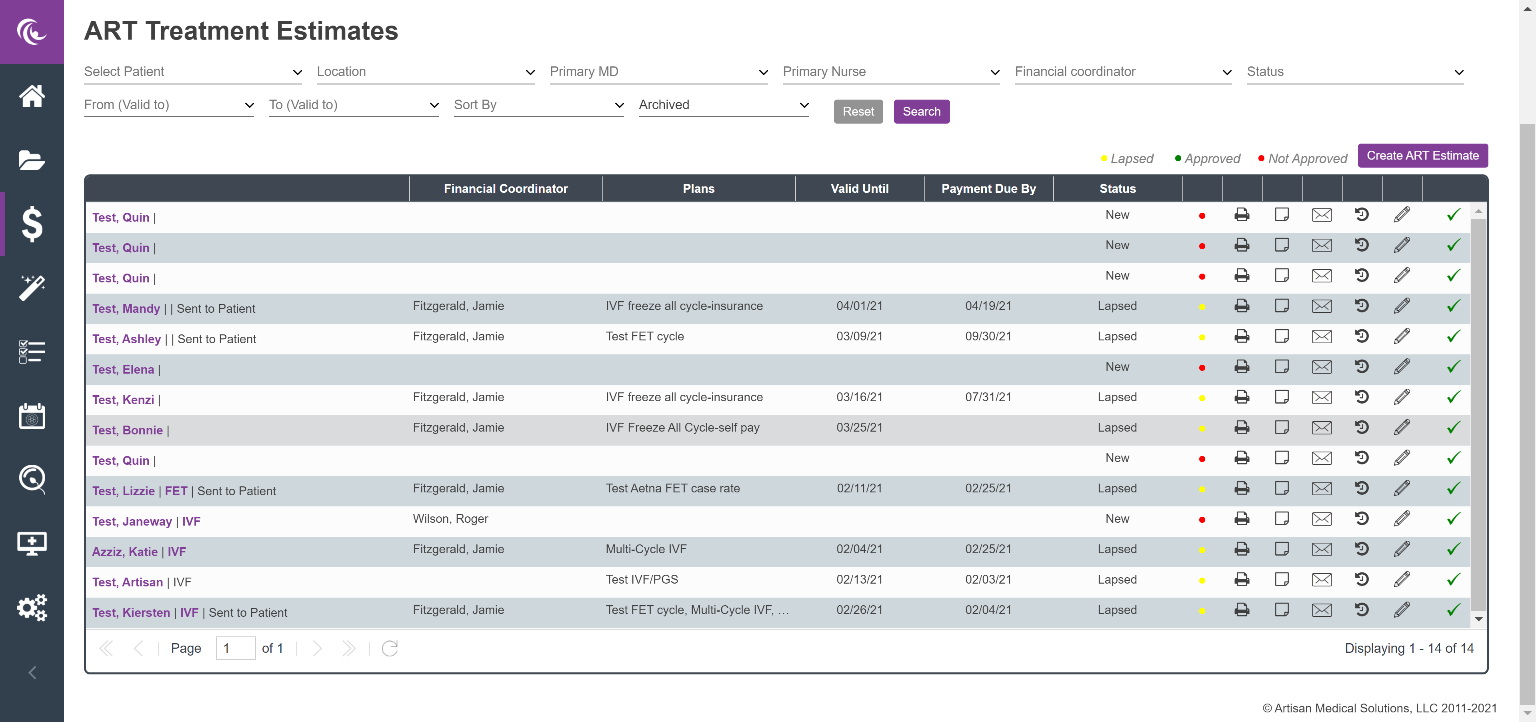
You can access the ART Treatment estimates by clicking on the Accounting Tab and then navigating to ART Treatment Estimates in the Clinic Overview Screen. This brings you to the ART Treatment Estimate screen below.
The ART Treatment Estimate page allows you to view patients who currently have treatment estimates whether for an active ART cycle or an estimate prior to a treatment plan being established.
**This list is mirrored for the clinical staff as it is meant to be a communication tool between the nursing and financial teams.
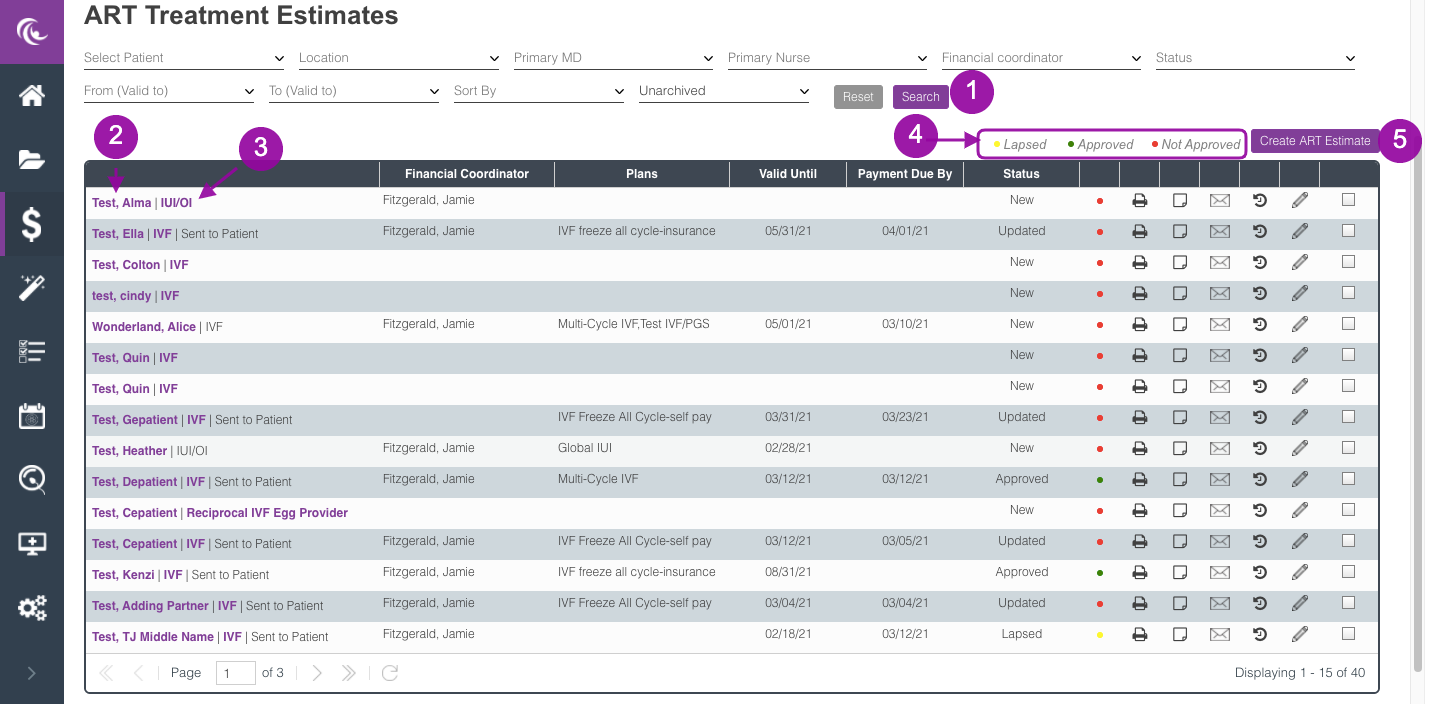
- You have the ability to sort and filter your view by using these fields. See section on Sort and Filter Views below.
- Clicking on the patient's name will hyperlink you to the patient's Invoice Summary.
- Clicking on the treatment plan (IUI, IVF, etc) will hyperlink you to Treatment Planning for the patient's cycle. See the manual on Cycle coordination for Navigation of cycles.
- The statuses of Lapsed, Approved, and Not Approved are color-coded in yellow, green, and red, respectively.
- The Create ART Estimate button will allow you to create a new estimate for a patient who does not have a treatment plan assigned to them yet. Refer below to Creating ART Treatment Estimates for further information.

- Financial Coordinator: If a financial coordinator is assigned to this estimate, it will reflect here. If this area is blank, use the drop-down box to select the financial coordinator from the list.
Note: selecting a financial coordinator from this area, will populate the Financial Coordinator field in Contact Info and within the actual estimate.
- Plans: this area reflects the financial programs listed on the selected estimate.
- Valid Until: the estimate is considered Active through this date. After this date, the status will change to Lapsed.
- Payment Due By: the payment due date for the financial program fee or insurance deposit.
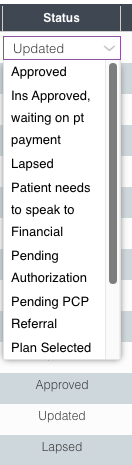
- Status: this column easily communicates to the Financial team on what steps need to be taken for financial clearance. The Approved status will reflect a green dot, a Lapsed status will reflect a yellow dot, and all other statuses will reflect as a red dot. Use the drop-down box to change the statuses. To add or edit statuses, please refer to the Expense Estimator Template Setup manual.
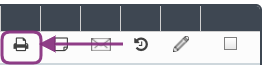
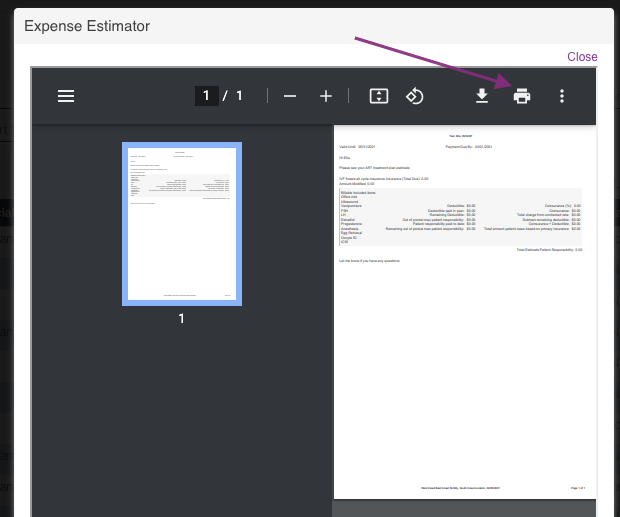
Print Icon: Click the print icon if desiring to print off the expense estimate.
Notes
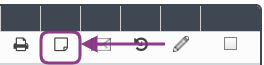
Notes Icon: click on the Notes icon to add any internal notes to the selected estimate.
-
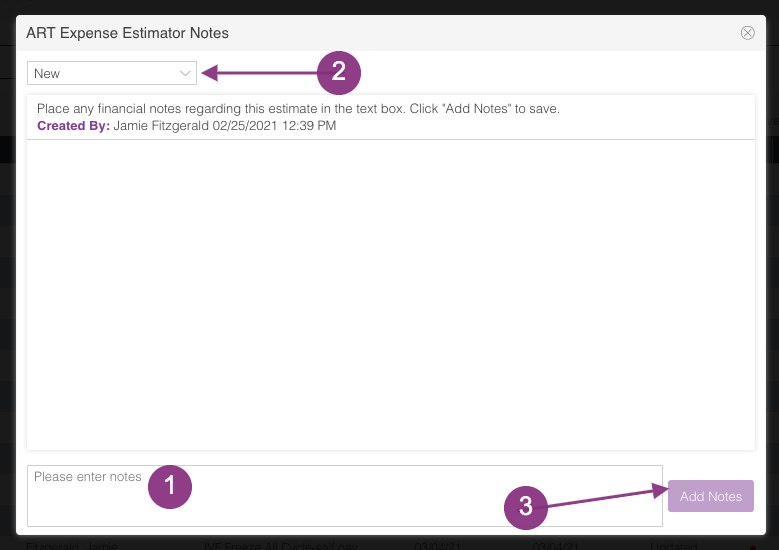
This is a free text field to enter any notes.
-
The status can be updated using the drop-down box inside the note section.
-
Click Add Notes to save the note.
Notes are meant to be a communication tool between the nursing and financial teams.
Messaging
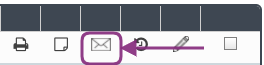
Envelope Icon: clicking on this icon will allow you to access the instant message feature for this estimate.
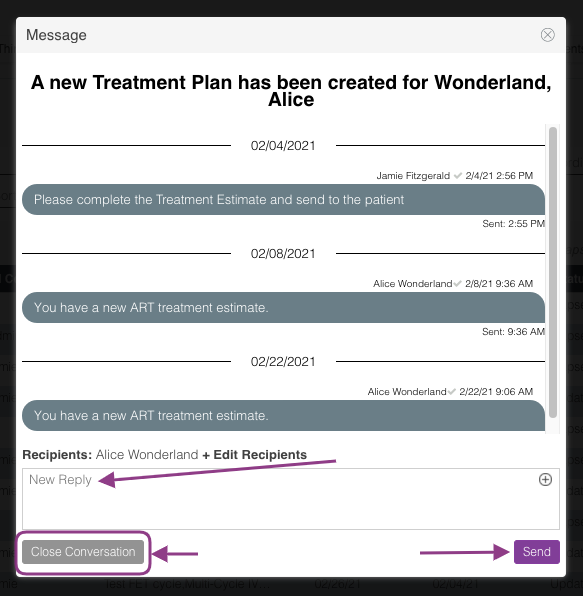
The above window will appear. Any messages sent to or received from the patient will show here. Type a new message in the free text box field. Then click the Send button.
Close Conversation: This allows a user to end the messaging thread. To end a conversation, click the Close Conversation button.
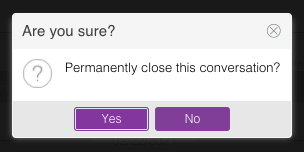
A confirmation window will pop up. Click Yes button to confirm the action.
Activity Log
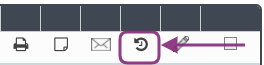
Log History Icon: clicking on this icon will display the activity history for the selected estimate.
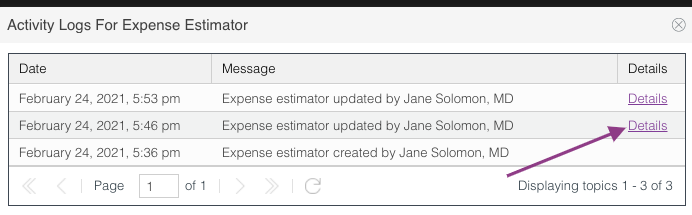
The list of any updates is listed. Click on details for an expanded view of the updates.
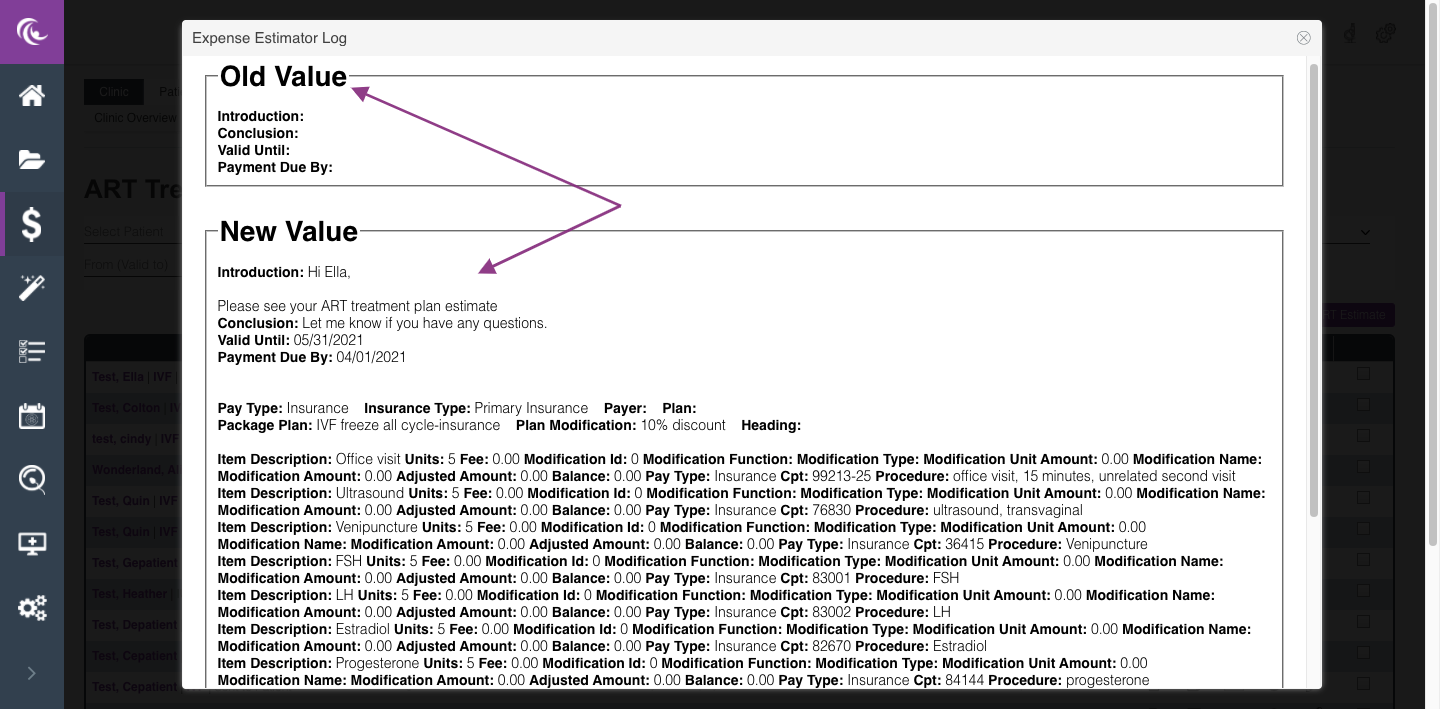
The above window will appear. The Old Value will reflect the original information entered into the estimator. The New Value will show all edits and changes to the estimator.
New Patient Statuses
The nursing team will create a treatment plan in Coordination that is sent to the patient.
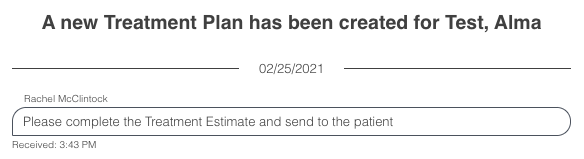
The financial coordinator is notified by instant message that a new treatment plan has been established by the clinical team.
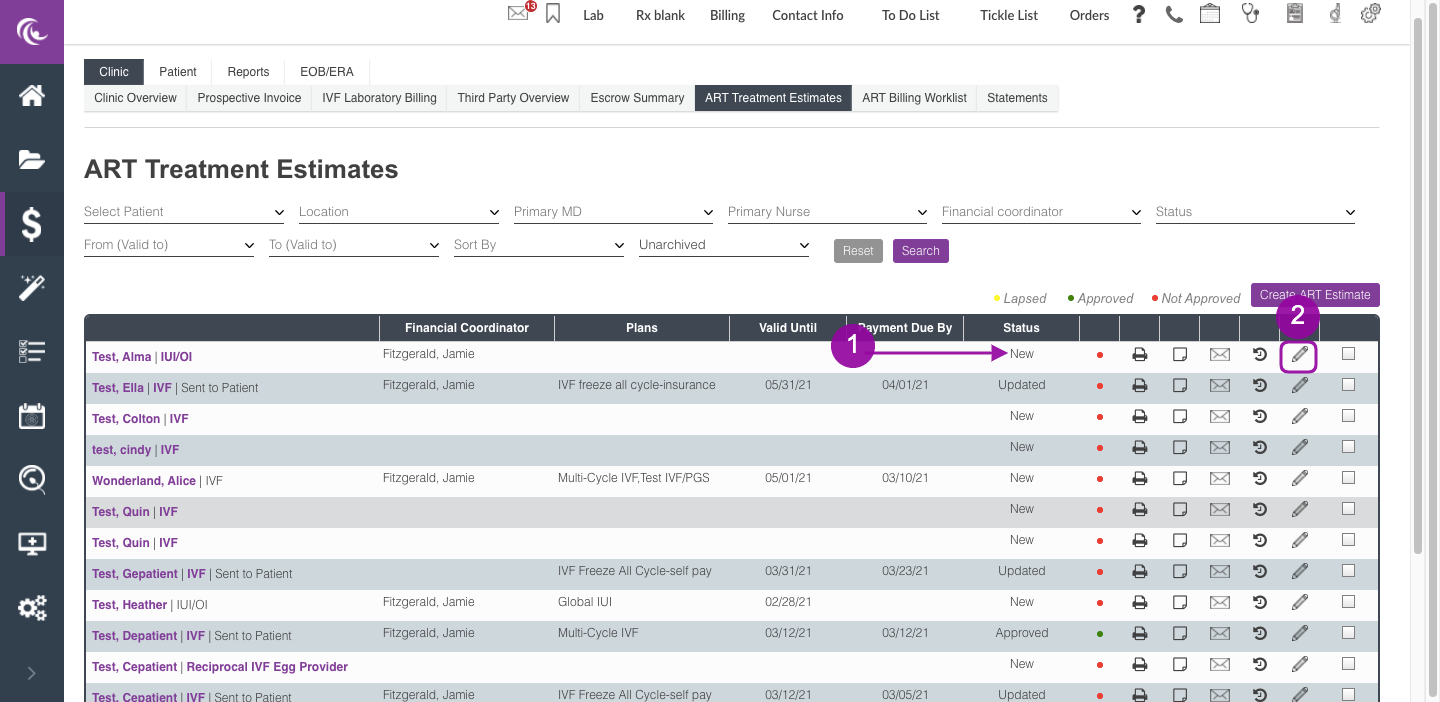
- The patient is reflected in the ART Treatment Estimate screen and will reflect a status of New.
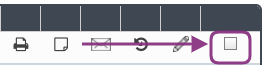
- Click the pencil icon to Edit the treatment estimate. This will open the ART Cycle Treatment Expense Estimator. See Editing a Treatment Estimate below for further information.
Archiving Estimates

A confirmation window will pop up. Click Yes to confirm or No to cancel.
The estimate will fall off of the list of active estimates.

To view archived estimates, click on the filter and toggle from Unarchived to Archived, then click Search.
A view of the archived estimates is shown above.
Sort and Filter Views
There are several ways to customize your view using the sort and filter features.

The ART Treatment Estimate tab will automatically default to the Unarchived view. To view Archived estimates, click the drop-down box and click Search.
Patient Name Search
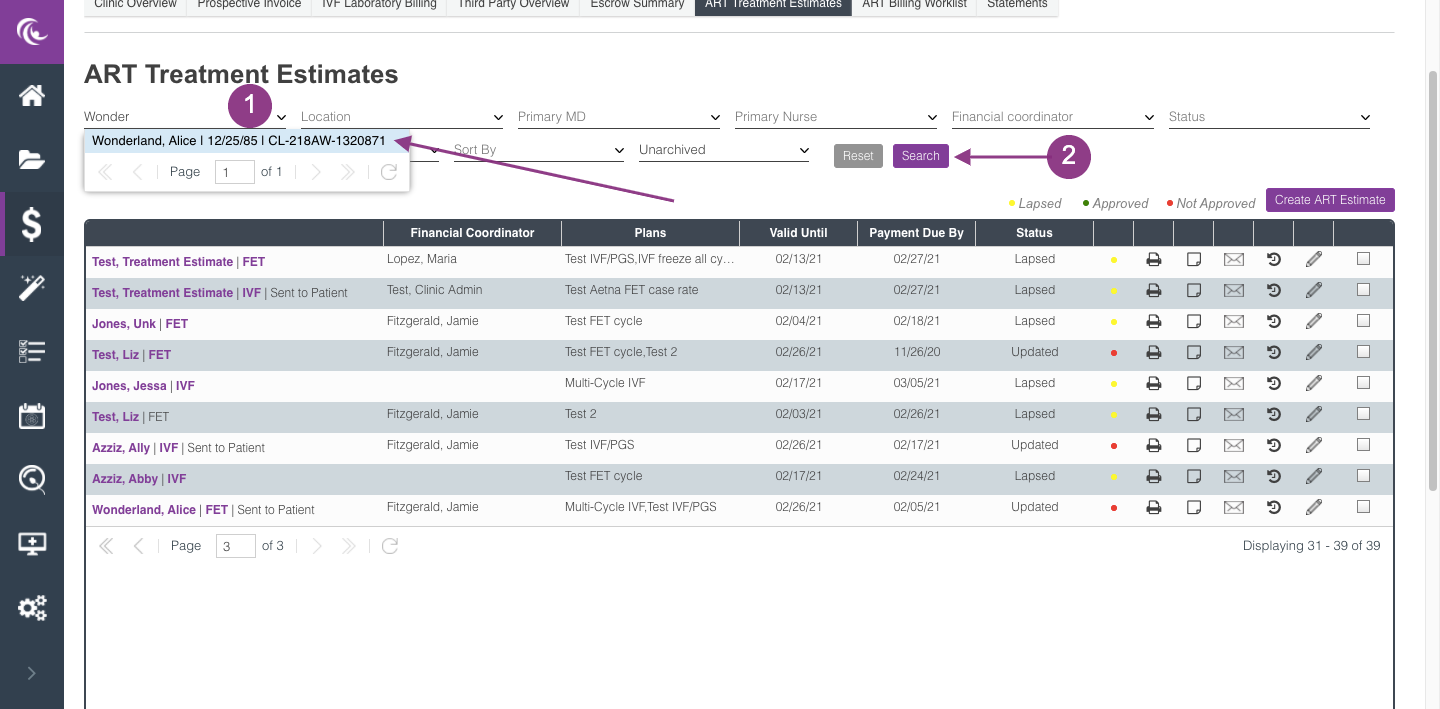
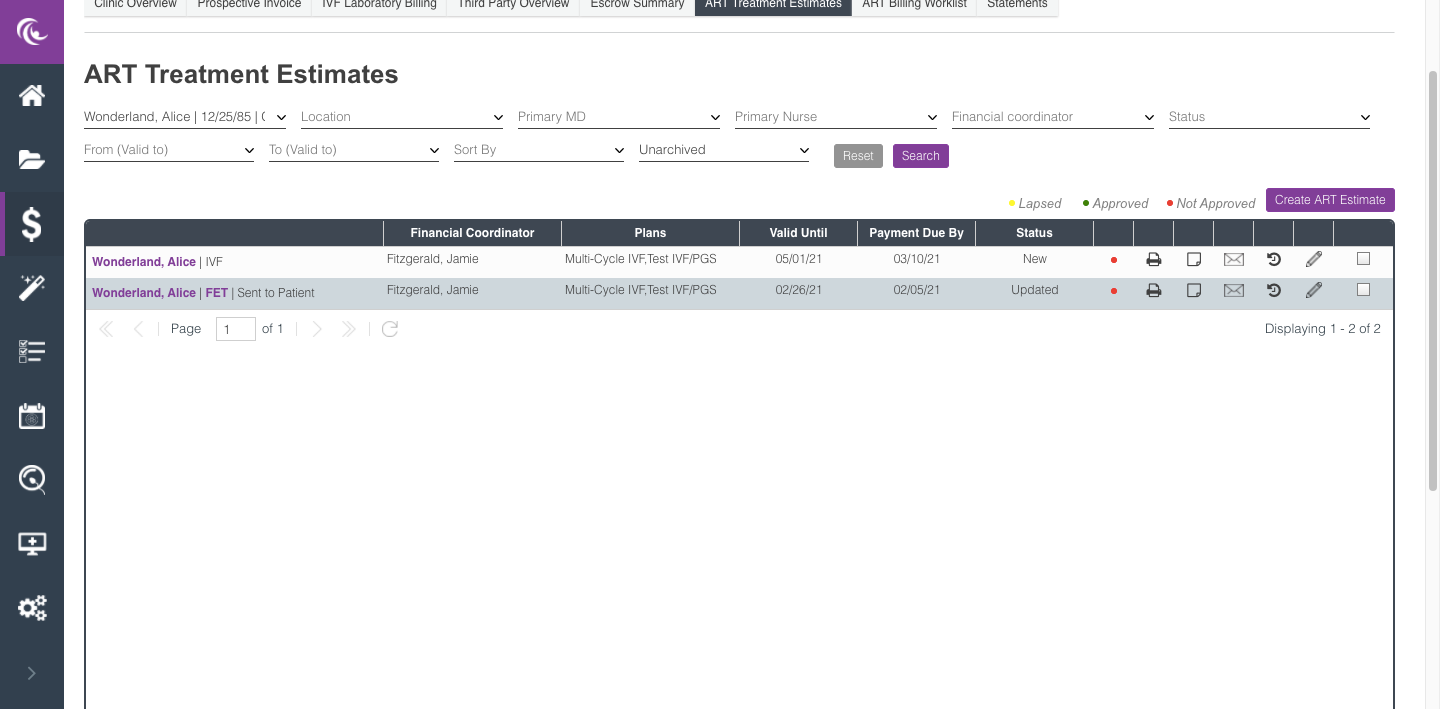
Only the estimates for that selected patient will show in the view.
There is also the ability to filter by Location, Primary MD, Primary Nurse, Financial Counselor, Status, and Valid Date Ranges.
You can narrow your search by selecting multiple fields before clicking Search.
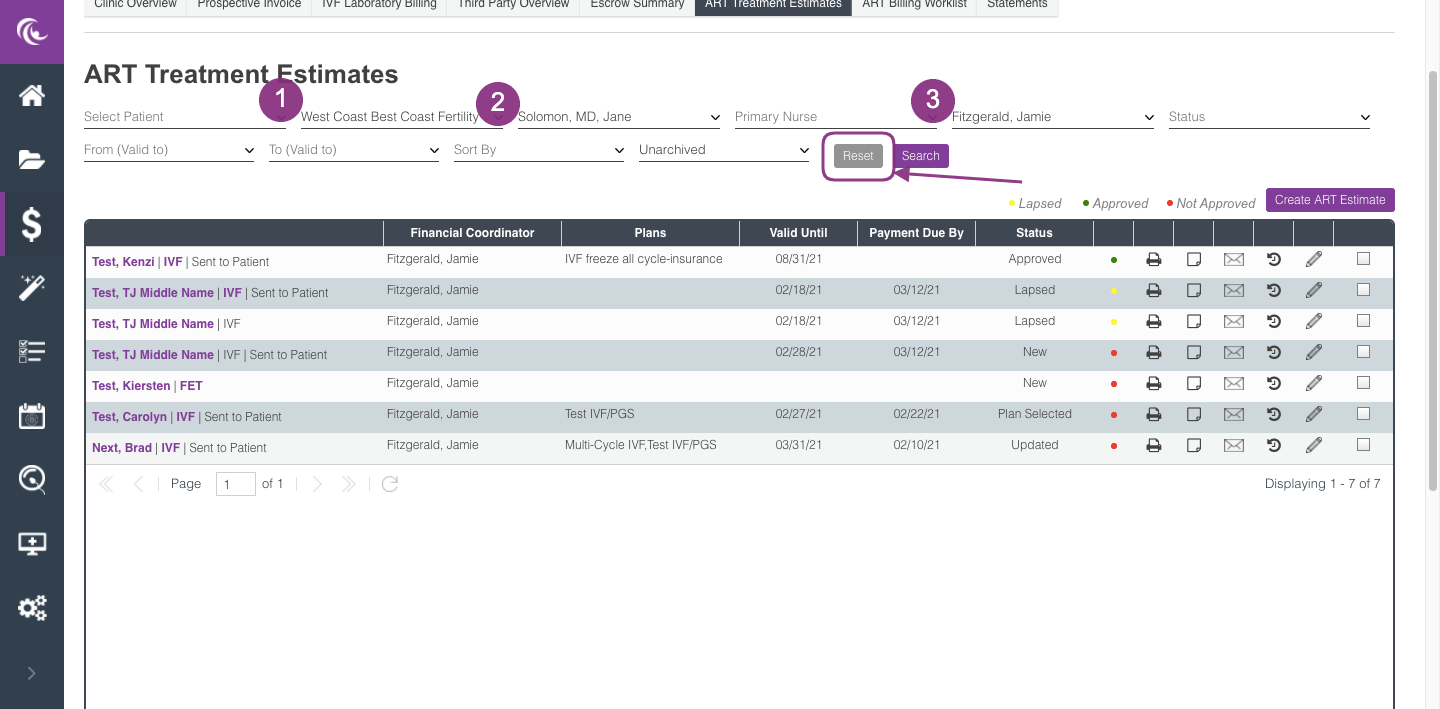
In this example, we filtered by 1. Location, 2. Primary MD, and 3. Financial Counselor.
To reset the search parameters, click Reset.

You can also sort by Name or Financial Counselor. Click Search.
The sort and filter tools can be used in conjunction with one another.
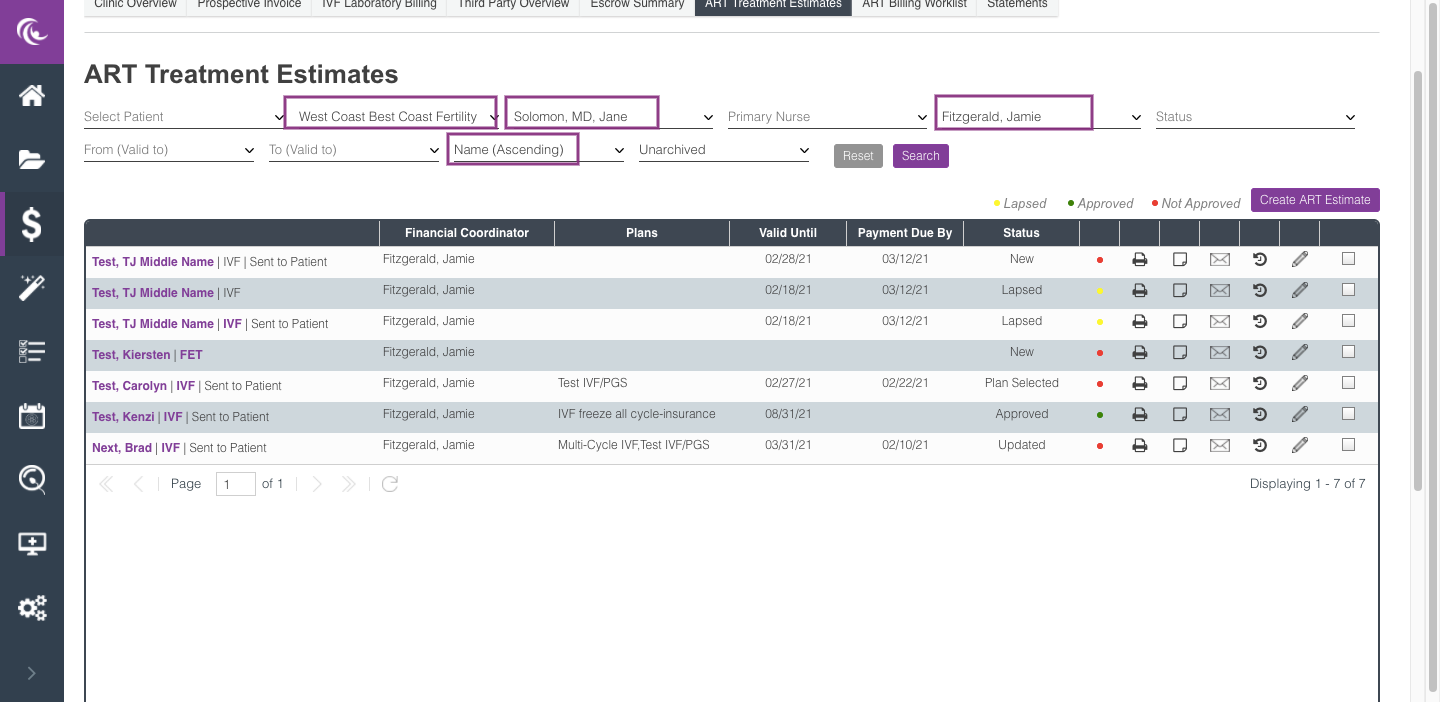
In this example, we filtered by 1. Location, 2. Primary MD, and 3. Financial Counselor and sorted by Name (Ascending).
Create ART Estimate
To create a new ART estimate that is not attached to an already existing cycle, click on Create ART Estimate in the top right-hand corner. The below pop-up will appear.
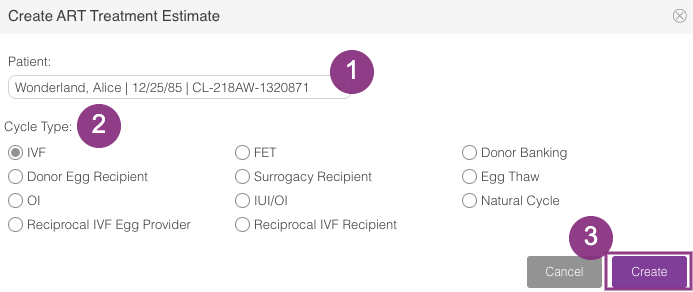
- Enter the patient's name, last name first.
- Select the type of cycle for this estimate.
- Click Create.
- The ART Treatment Expense Estimator will pop-up as shown below.
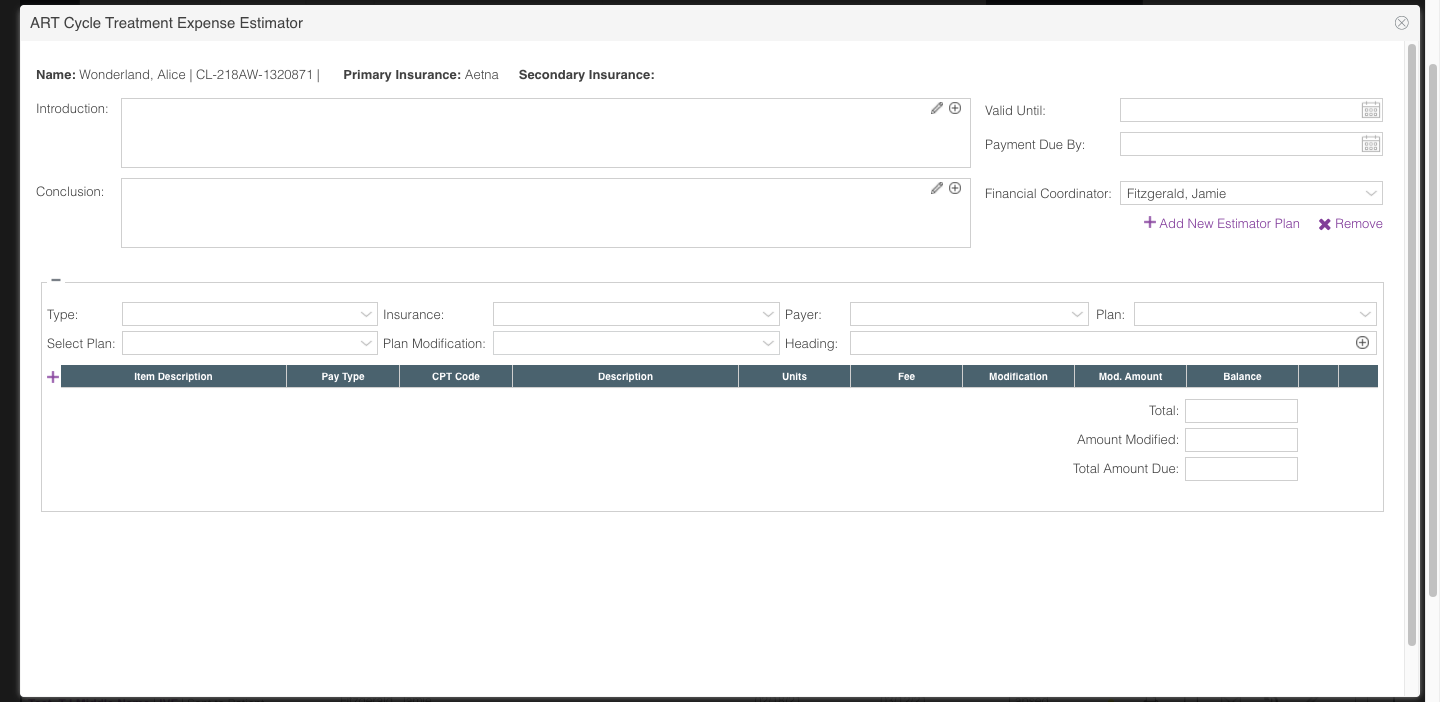
Editing a Treatment Estimate
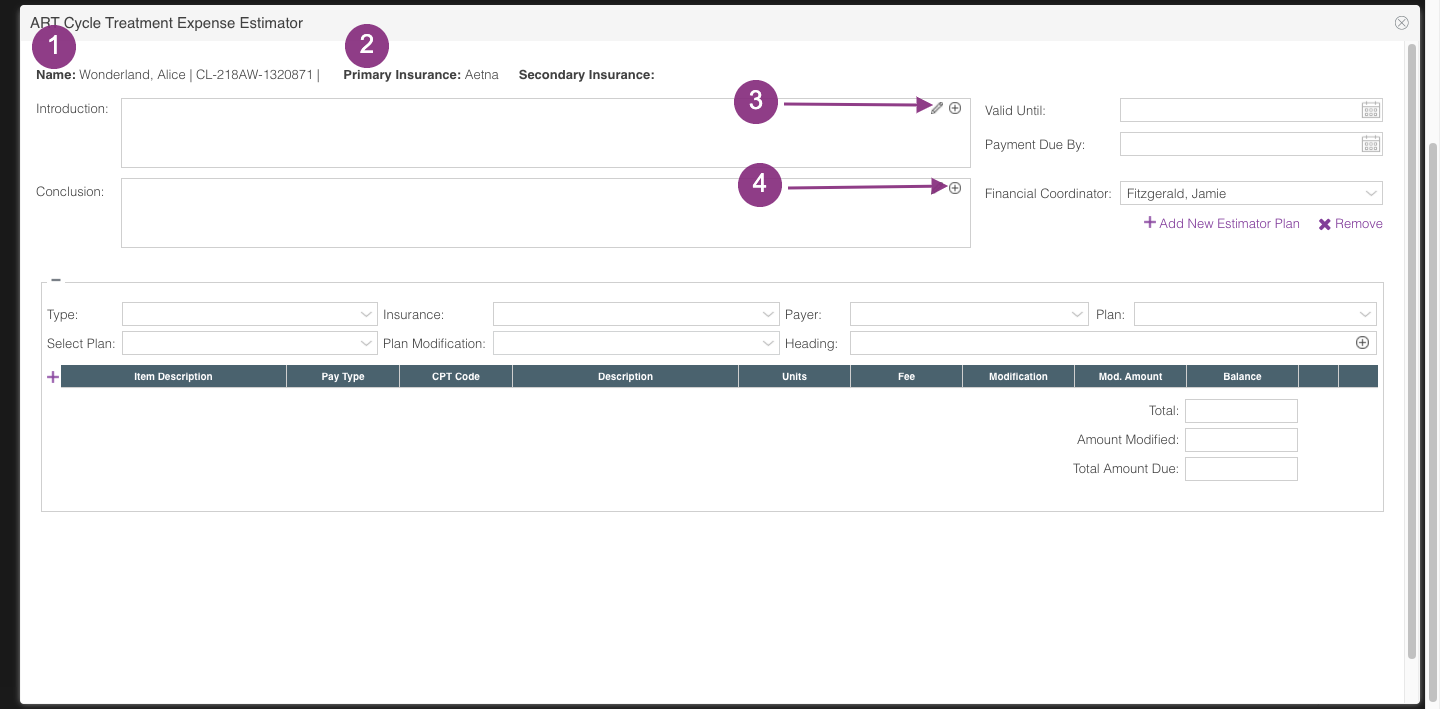
- The patient's Name and Chart Number appear in the upper left-hand corner.
- Primary and Secondary Insurance is listed.
- Click on the pencil icon to add text to the Introduction and Conclusion [see Add an Introduction or Conclusion for further information].
- Click the (+) icon to insert stock text (refer to the instruction on Stock Text below].
Add an Introduction or Conclusion
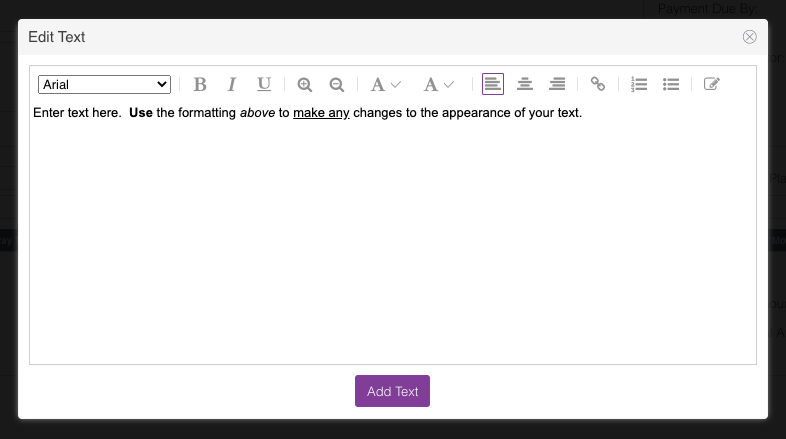
A pop-up box as displayed above will show after the pencil icon is clicked. Fill in this area as you would like the introduction and conclusion areas to appear to the patient. You have the option to use formatting to change the appearance and alignment of your text.
Click Add Text to save this information.
Completing the Expense Estimator
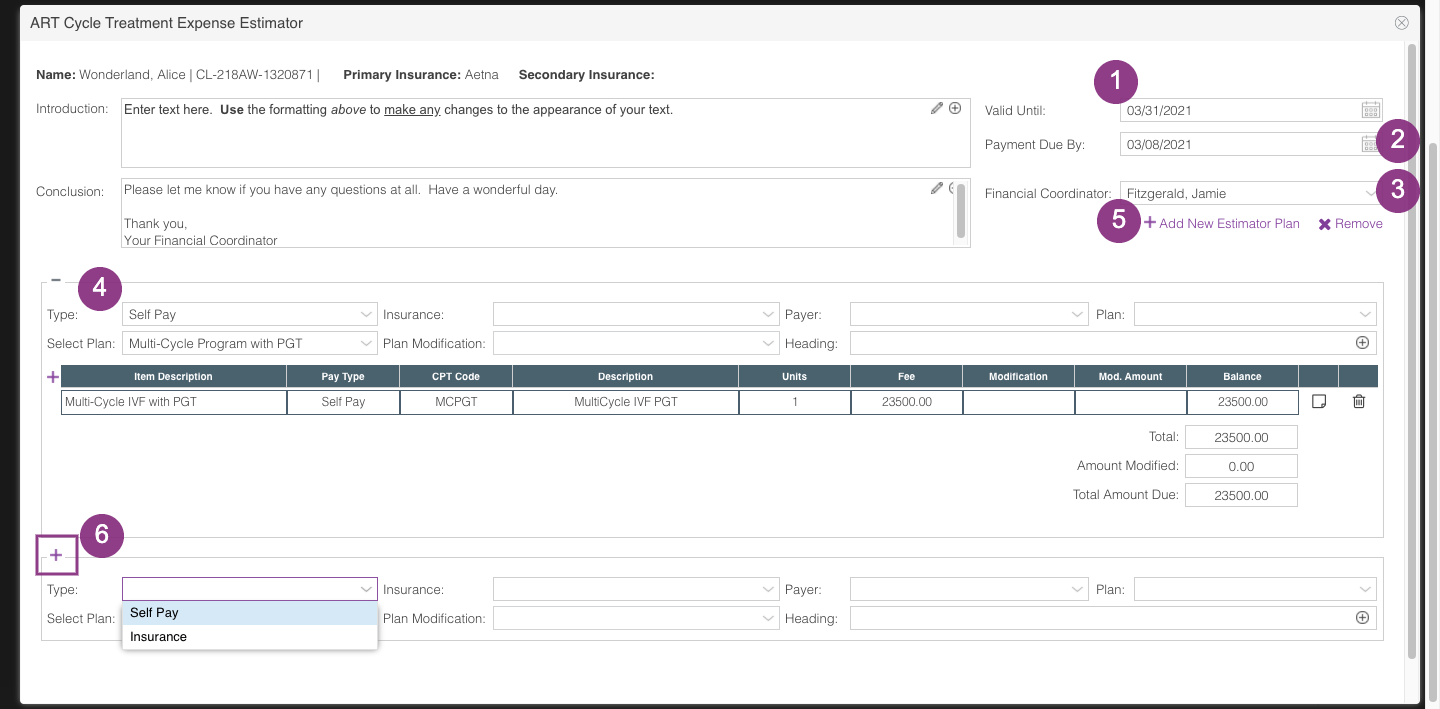
- Valid Until Date: the estimate will be active through the date entered.
- Payment Due By Date: enter the payment due date for the patient.
- Financial Coordinator: select from the drop-down box the assigned Financial Coordinator.
-
Type: select from the drop-down Insurance or Self-Pay. This selection will pull the correct plan library to assign to the estimate.
- When Insurance is selected as the type, use the drop-down boxes to complete the Insurance, Payer, and Plan areas.
- Select Plan: select from the drop-down the specific plan you want to apply to the estimate.
- Plan Modification: plan modification allows users to add or subtract a percentage or a whole number from the entire total of the estimate. An example would be if the patient had a 25% military discount that was applied to the overall cost. Other examples are adding an account balance to the overall cost or a $1,000 professional courtesy to reduce the balance.
- Heading: type the name of the plan for this estimate. This is patient-facing and will reflect in the patient portal.
- Add New Estimator Plan: click the plus sign (+) icon to add another plan to the estimate. The additional plan will show below the original plan. To remove an estimate, click on the X Remove icon.
- Click the plus sign (+) icon to expand the view of the plan. Enter the information for the comparison plan.
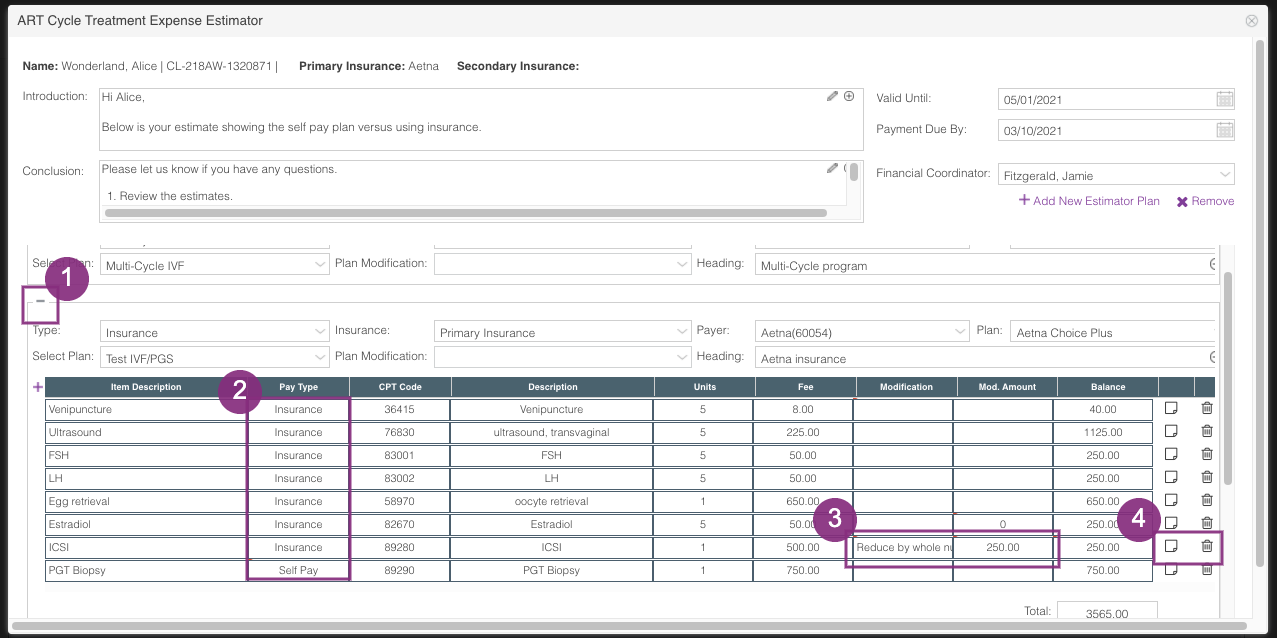
- Use the minus sign (-) icon to reduce the view of the plan.
- For insurance estimates, the Plan Type will auto-populate with "Insurance". If a certain line item is not covered by insurance, use the drop-down box to flip from Insurance to Self Pay. This will pull the self-pay rates for that procedure code and add it into the calculation.
- If applying a single line modification, such as a percentage or whole number, click in the Modification box and select the appropriate modification you want to use. For whole number modifications, enter the whole number amount you are adding or subtracting from that line item in the Mod Amount box.
- Use the Notes icon to add any notes for the line item. This will show up for the patient when reviewing the estimate. The trash can icon will remove that specific line item.
Insurance Estimates
The fees are calculated using the contracted rates for particular CPT codes in the plan for the insurance selected on the patient.
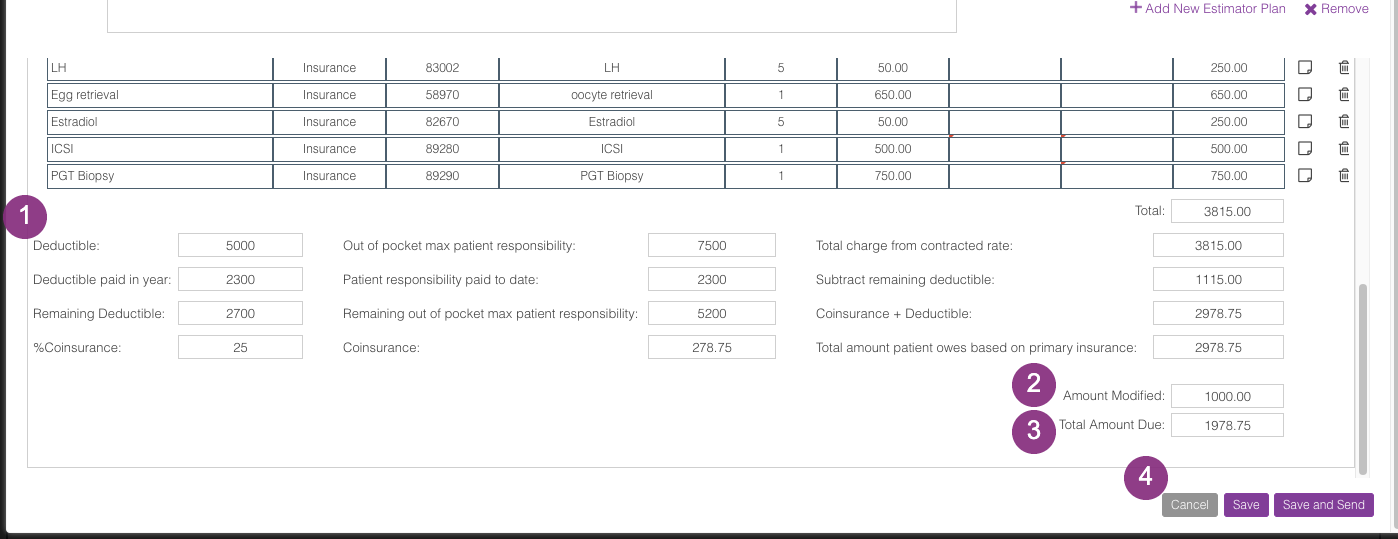
- The patient's deductible, co-insurance, and out-of-pocket maximum pull from the insurance benefit verification report (IBV) in the Insurance Info tab. **We recommend for an accurate estimate, to update the IBV with the correct remaining balances for the patient's insurance.
- Any amount modified for the entire plan will reflect here. Line item modifications will not display here.
- The total amount due from the patient.
- Click Save to save the entire estimate. Clicking Save and Send will save the estimate and publish it to the patient's portal.

Sent to Patient will now reflect after the patient's name in the ART Treatment Estimate screen.
Enter a New Line Item

To enter a new line item:
- Click on the purple plus sign icon (+) next to the Item Description.
- The new line item will show at the bottom.
- The Item Description: This area is patient-facing. You can make the item description easier for the patient to understand. For example, instead of PGT Biopsy < 8 that may be listed in the Description
- Entering the CPT code will fill in the Description field and vice versa.
- Enter the number of units for this procedure.
Stock Text
Stock text in the Introduction/Conclusion section functions as it does throughout the rest of Artisan. Stock text can be used to build a library of commonly used notes or bulk text and is easily accessible for users when documenting or charting.

Add Stock Text
To add a new stock text template to your library, click Add Stock Text.
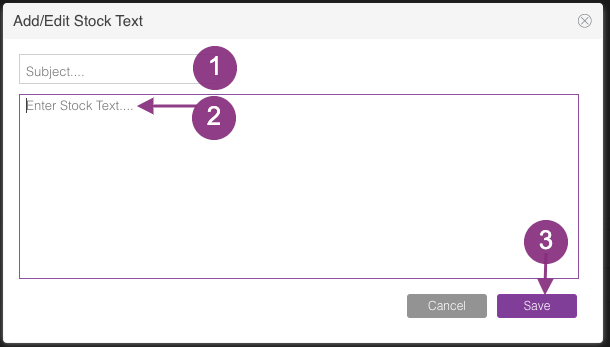
1. Add the title of your stock text in the subject line.
2. Enter the content of the bulk text template.
3. Click Save to create the new template and return to the stock text screen. All saved stock text will live in your stock text library.
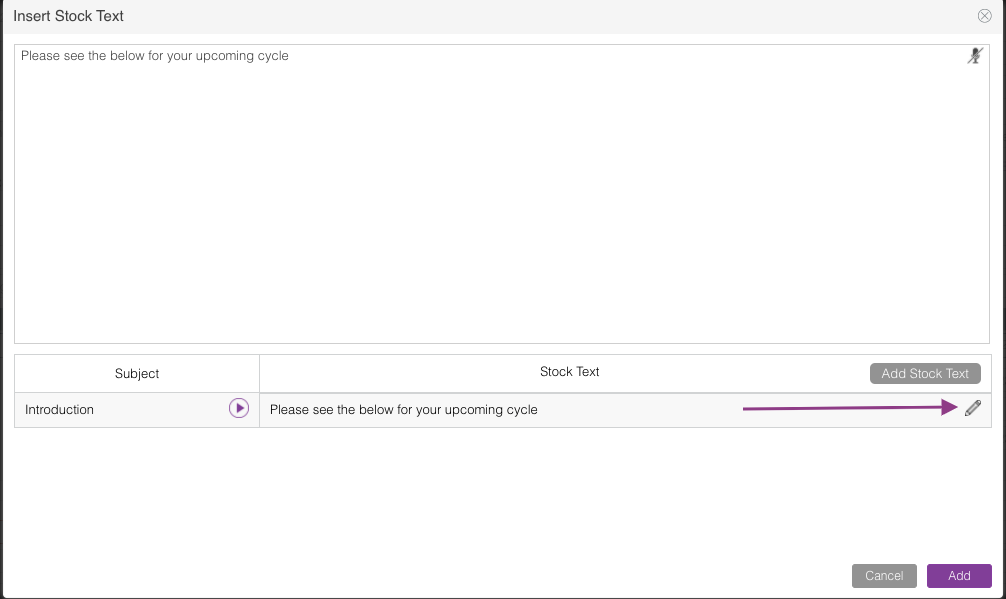
To Edit/Delete Stock Text
To edit/ delete a stock text, click the pencil icon as shown in the above photo.
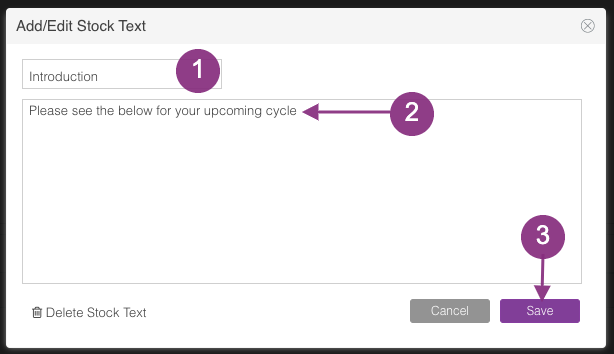
Once you select the pencil icon the stock text window will open and allow you to make your edits. Once the edits are done select save to save the updated stock text library.
1. Edit the subject line
2. Edit the body of the text
3. Save
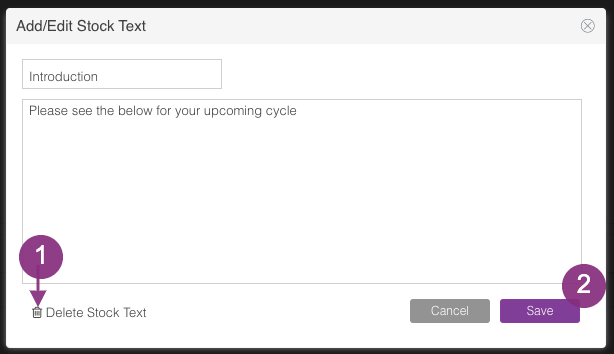
To delete the stock text, click the trashcan icon by Delete Stock Text. Then click Save to confirm changes and return to the stock text screen.

The stock text screen will display your library of stock text templates to choose from; select the play button of the desired template and click Add to pull the stock text into the body of the progress note.
**All manuals are compliant with HIPPA regulations. No patient information has been released. All screenshots above were taken from a test clinic with fake patient information.
Heather Yatsko
Comments