The Stimulation ART Protocol Templates are the the basis for creating the patient's ART Treatment Cycles within Artisan. Multiple protocol templates may be created so that they can be easily applied to different ART Treatment Cycles for individual patients.
Create a New Template
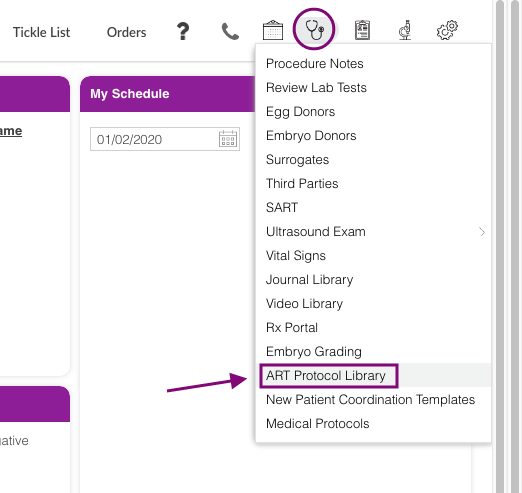
Select the ART Protocol Library from the Clinical Tools (Stethoscope icon).
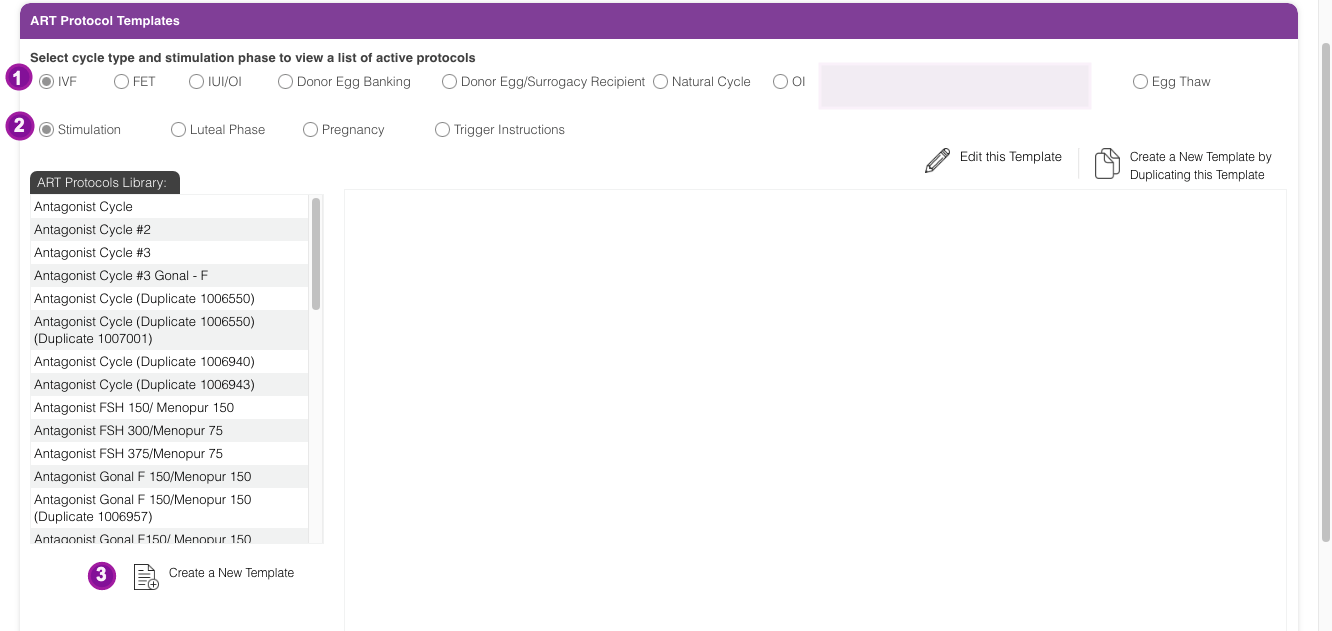
1. Select the type of cycle type to be created (if this template will be used for multiple cycle types just select one at this time).
2. Select either Stimulation phase.
3. Click on Create a New Template.
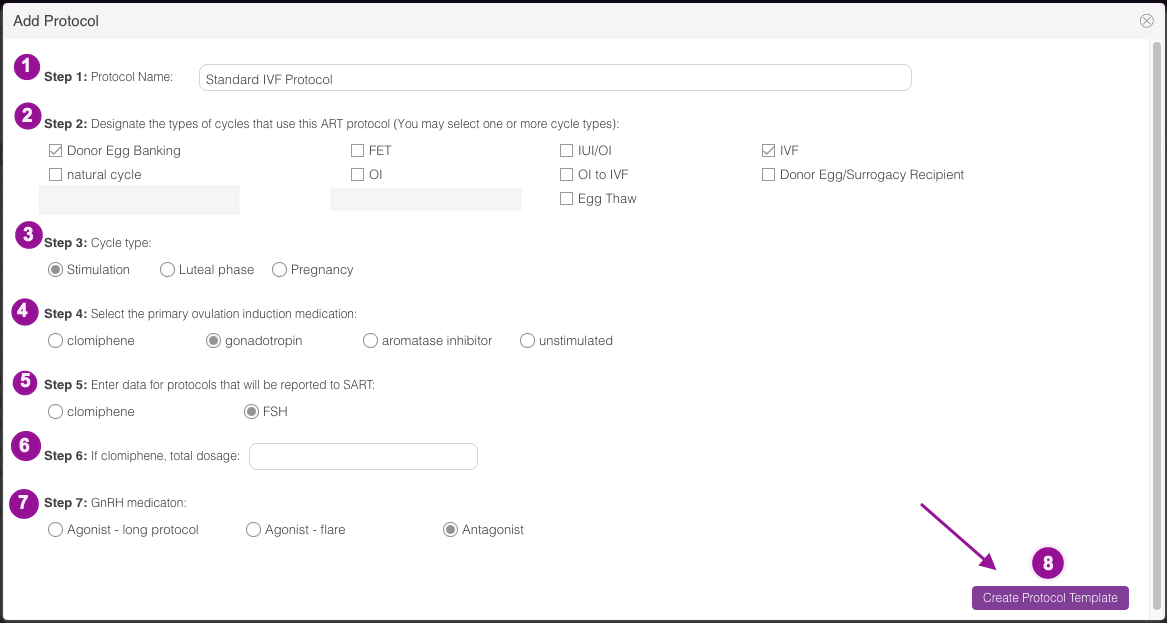
1. Create protocol name.
2. Choose the types of cycles that can use this ART protocol (you can select more than one, ie IVF and Donor Egg Banking).
3. Select the phase of cycle you are creating (ie stimulation phase or luteal phase).
4. Select primary ovulation medication being used (this is a SART field, if you are using both Clomid and a Gonadotropin select Gonadotropin).
5. If planning to report to SART, choose protocol that will be reported to SART.
6. If using Clomiphene, enter total dosage (this is a SART field).
7. Choose GnRH medication, (this is a SART field).
8. Click Create Protocol Template.
*If your practice is NOT reporting to SART, you may ignore the SART fields.
Protocol Details: Info Tab
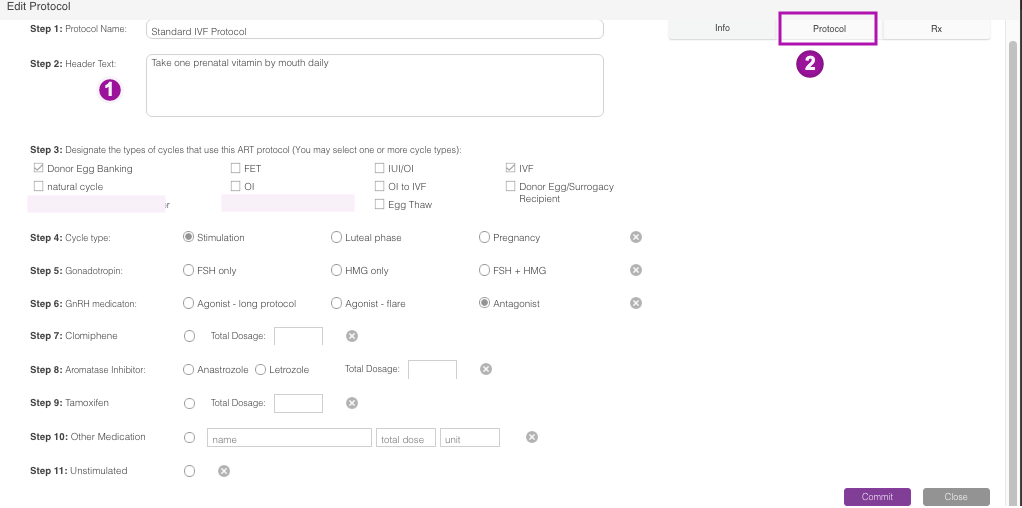
1. Enter any information that will appear on the top of each page of the patient's protocol. For example, Take one prenatal vitamin by mouth daily.
*If no other changes need to be made leave all other buttons untouched.
2. Select Protocol tab to start creating the patient's protocol.
Protocol Details: Protocol Tab

1. To add additional days to the protocol click the + sign.
2. To enter instructions, click into the line.
Entering Instructions
There are three ways within this section to add instructions:
1. Enter instructions directly on each line
2. Find and replace text, or
3. Insert instructions.
1. Entering Directly On Each Line

1. Click on a day to enter specific instructions.
Clicking the + sign will add more days to the protocol.

Within the Format Text box the daily instructions will be added. Instructions may be bolded, italicized, underlined, or highlighted. The font color and size can also be changed. A hyperlink may also be added, for example to add a medication teaching video.
Click Add to save the instructions for this day.

Doses of medications will also be entered on each day (if known). Note that am or pm doses can be added here.
The Medication Grid is what the clinic sees on the cycle sheet. The instruction column is what the patient see on their end through the patient portal. These two areas do not speak to each other so it is important to update the patient instructions every time the medication grid is updated or vice versa.
2. Find and Replace Text

Click on Find & Replace Text.

1. Enter the original statement that you would like to edit and replace throughout the calendar.
2. Enter the text that will replace the found text.
3. Select Replace Text.

The edited text has now been replaced.
3. Insert Instructions

Click on Insert Instructions.

1. Enter instruction to be inserted.
2. Enter the day the instruction should begin.
3. Enter the day the instruction should end.
4. Click Insert to add the instruction.

The instructions have now been added to the date range that was selected.

It is very important to select the Stim Start day on the protocol by pressing the radio button on the appropriate day. This is what will become the first day of the stimulation in the protocol and will show as CD1 on the stimulation sheet/cycle sheet.
Adding Instructional Videos from the Video library

Click the Video Icon on the line you wish to add the instructional video.
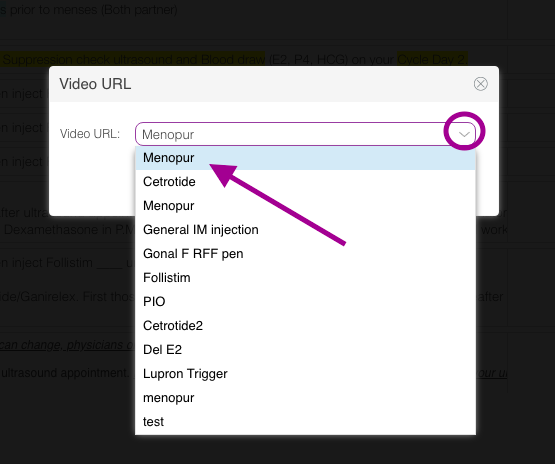
This window will pop up, click the drop down icon. Then select the instructional medication video that you would like to attach to the protocol instruction.
The video URL list is pulling from the Video library. Click here to learn more.
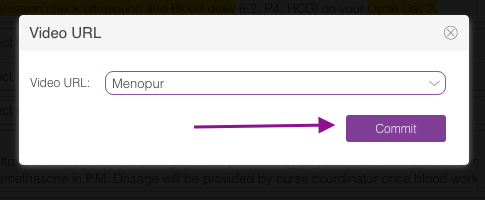
Click Commit.
Adding Additional/Custom Medications
If a medication is added to the protocol that does not have an assigned place on the grid of medications already (for an IVF cycle that includes FSH (am and pm dosing), HMG (am and pm dosing) and GnRH, then a custom medication may be added.

To add a new column for medication, click on the Custom button.

Click on the + button to add the new medication.

1. Add in the name of the medication. Please note the name cannot exceed 8 characters.
2. Click Save.

The new column for the medication is created.

1. Add the appropriate dosing.
2. Click Commit.
3. Click Close.
Creating Standard Medication Orders for Each Protocol Template/Prescription Templates
There are two ways of building the prescriptions into the template, depending upon what other features of Artisan you have selected:
1. If you are using E-prescribe/MD Toolbox-Surescripts integration then follow the steps for E-prescribing
2. If you are not using E-prescribe, then follow the second set of "Standard" instructions

Click Rx tab to create standard medication orders for this specific protocol template.
E-prescribing
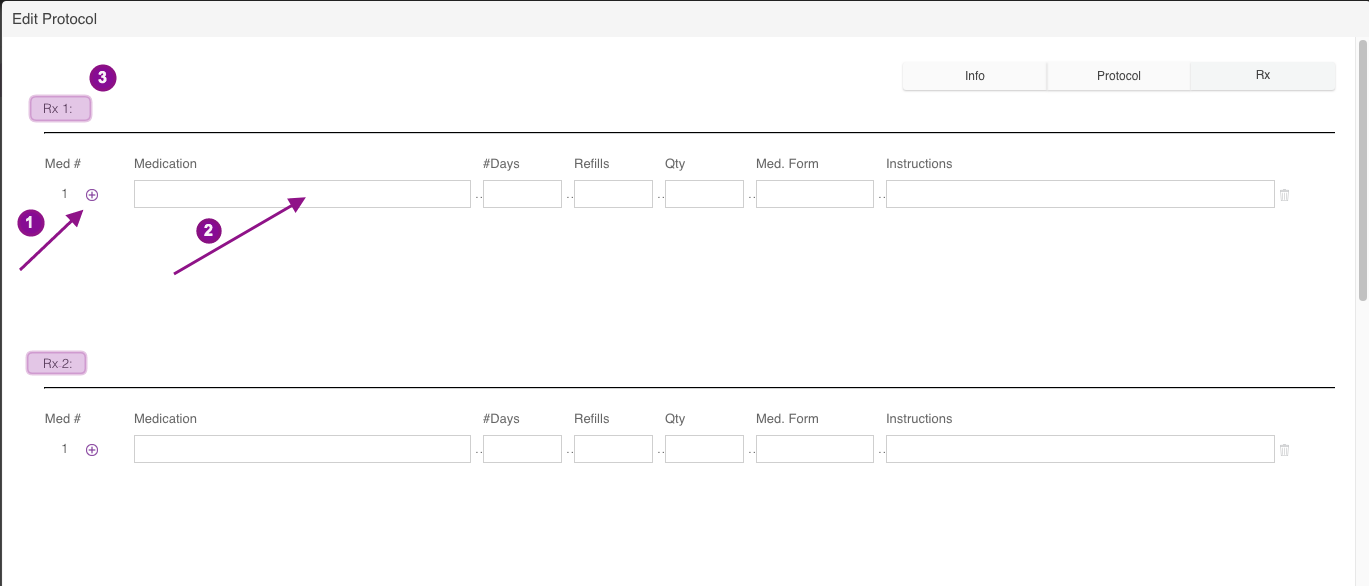
1. To add a line click the purple + sign.
2. Click into the first medication line.
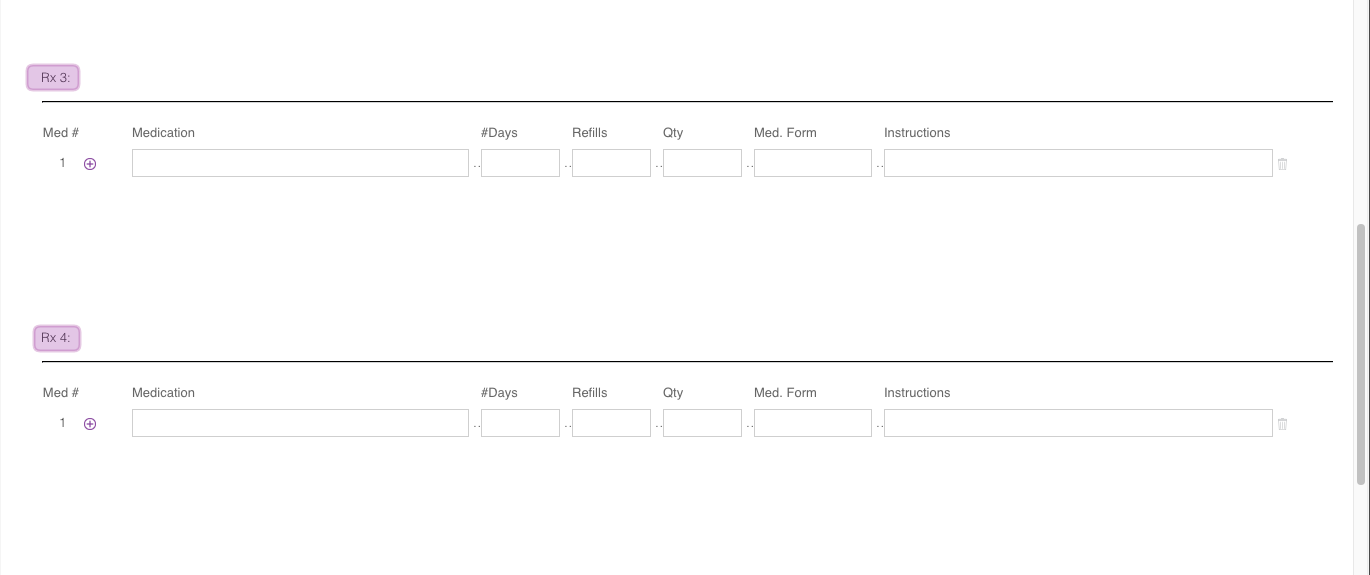
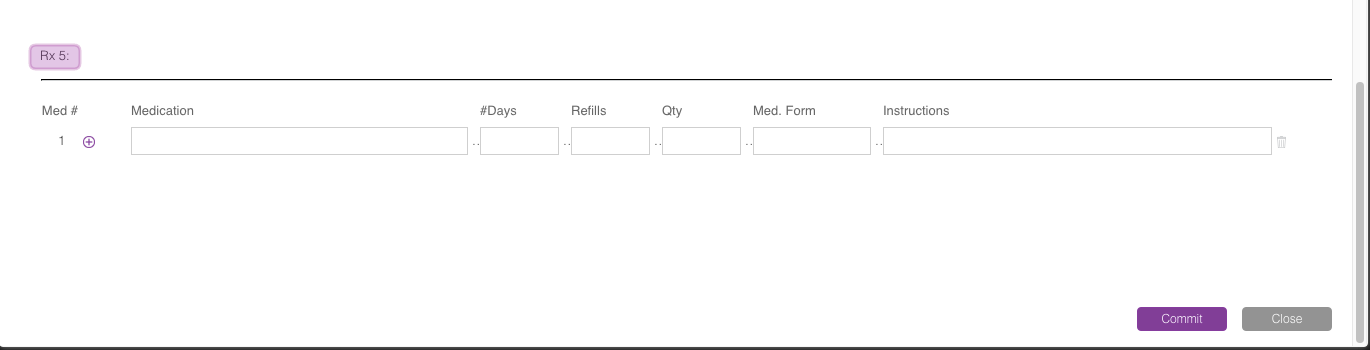
3. There are five Rx fields (Rx 1, Rx 2, Rx 3, Rx 4, Rx 5). It allows you to be able to separate multiple standard prescriptions to be sent to different pharmacies or put different numbers of days and refills for certain medications. Build the Prescription template on the Rx field that you wish to use.

Click the + inside the line to pull from the MDtoolBox Drug/Supply List.

There are three main sections for MDToolbox.
1. Favourite List: This is the first page you will land on when you open up the panel. The drugs listed here have been marked as "Favourites" by clicking the star next to the line item in the Drug and Supply Search sections.
2. Drug Search: The tool used to find the necessary drugs
3. Supply Search: The tool used to find the necessary supplies: (needles, syringes, sharps box, etc).
Drug Search

Type the name of the drug and press enter or click the magnifying glass.

In this example, we searched for Follistim. All entries containing "Follistim" have appeared.
1. Star any of the results you plan to save to your Favourite List.
2. Use this button if you cannot find something in the system.
Click on the entry you wish to add to your protocol.
From all of our users, the only prescription we have found NOT LISTED IS FOLLISTIM PEN. If you believe there is another drug not listed, please contact Artisan first to help in the search, and then use the button.
Supply Search

Type the name of the supply and press enter or click the magnifying glass. Click on the entry to add it to your protocol.
Medication Form/Instructions on the Rx Tab

1. On the Rx tab, on each line item, select the Medication Form from the drop down menu, you may also type and select.
2. In the Instructions field, there must be a number in symbol form (ex: 1 (not one)).
Make sure that in every prescription there is a number, otherwise MDToolbox will not accept the prescription.
Standard (No E-prescribe)

1. Enter as many different prescriptions as needed for this specific protocol. Clicking the + sign will make new lines available.
2. Rx 1, Rx 2, Rx 3, Rx 4 or Rx 5 may be chosen for example, if you want to put different numbers of refills on prescriptions, etc.
Click Commit to save the prescription section.
Close this section when completed.
Viewing or Editing the ART Protocol Template
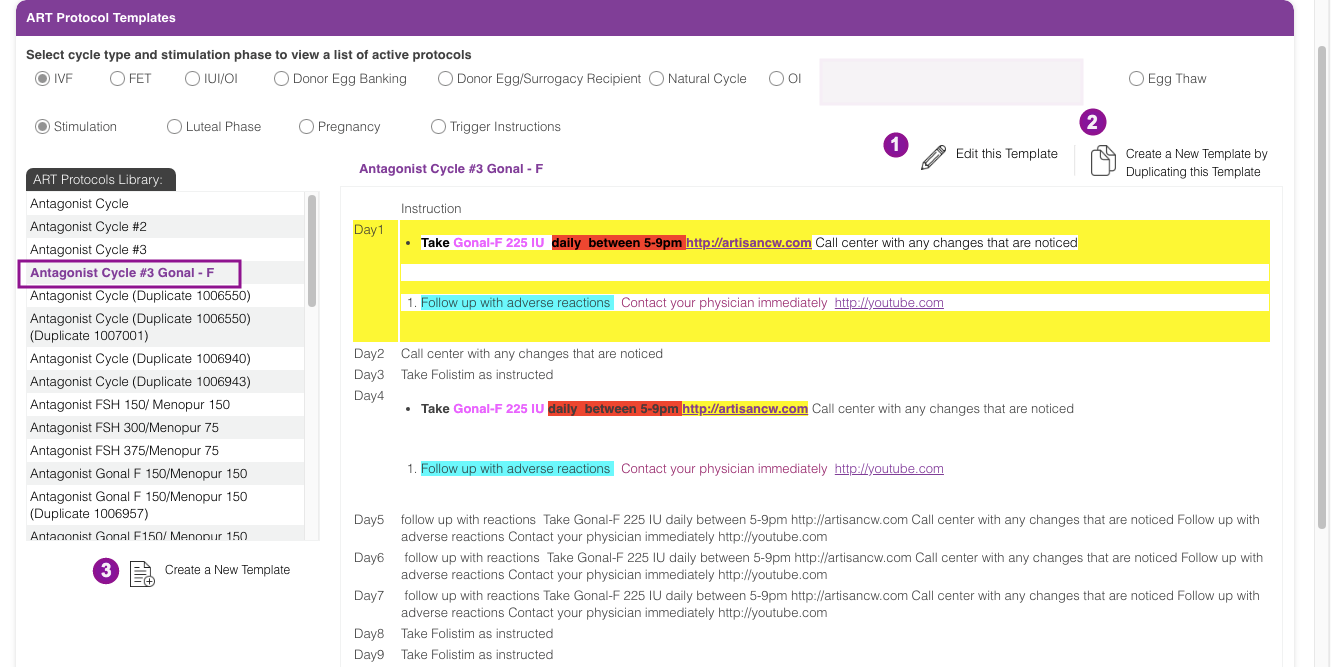
The protocol that was created will be seen in the list of protocols created specifically for the practice.
1. This protocol can be edited by selecting Edit this Template.
2. A new template can be created by duplicating the current template. This is often times done if there are similar protocol templates being created with minor changes within each protocol. Each template can be given it's own unique name. Click Create a New Template by Duplicating this Template.
3. A new template can also be created from the beginning on this page, click Create a New Template.
Build out all of the appropriate cycle types and templates used in your practice using these sets of tools. You may have as many templates as you like, and edit/update them as frequently as needed.
Artisan Support
Comments