Progress Notes combine information from different sources to create a record of patient care. All notes created by staff members and SOAP notes generated from the cycle progress notes will flow into the patient's chart.
In Artisan, different user privileges will have different view of the basic progress note.
Navigation for Practitioner and Clinic Staff user
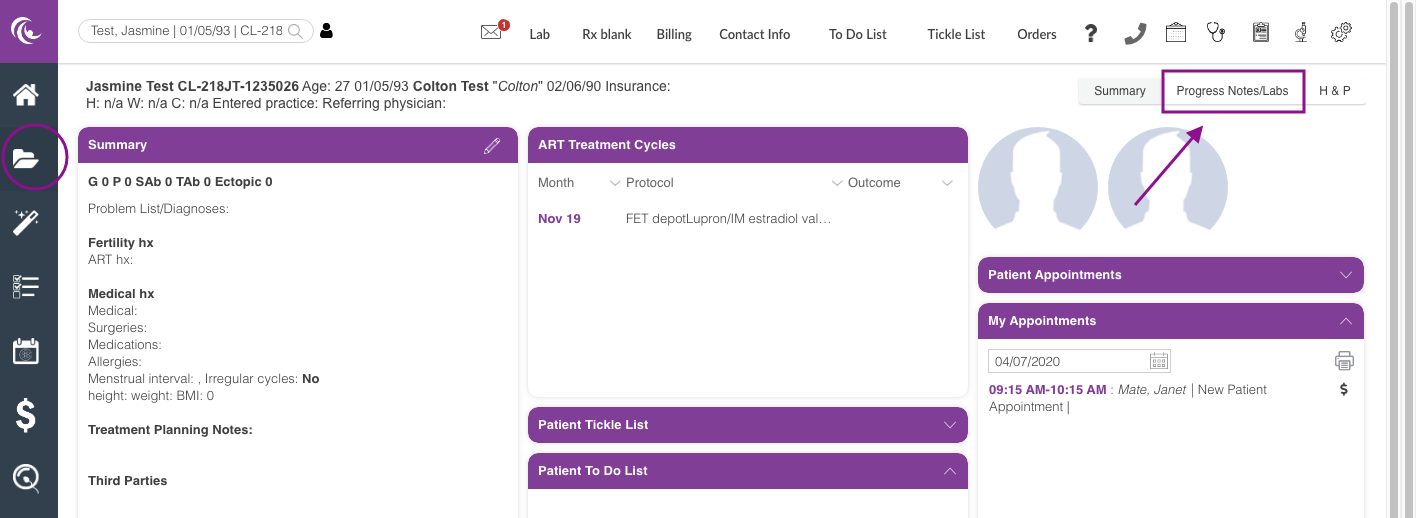
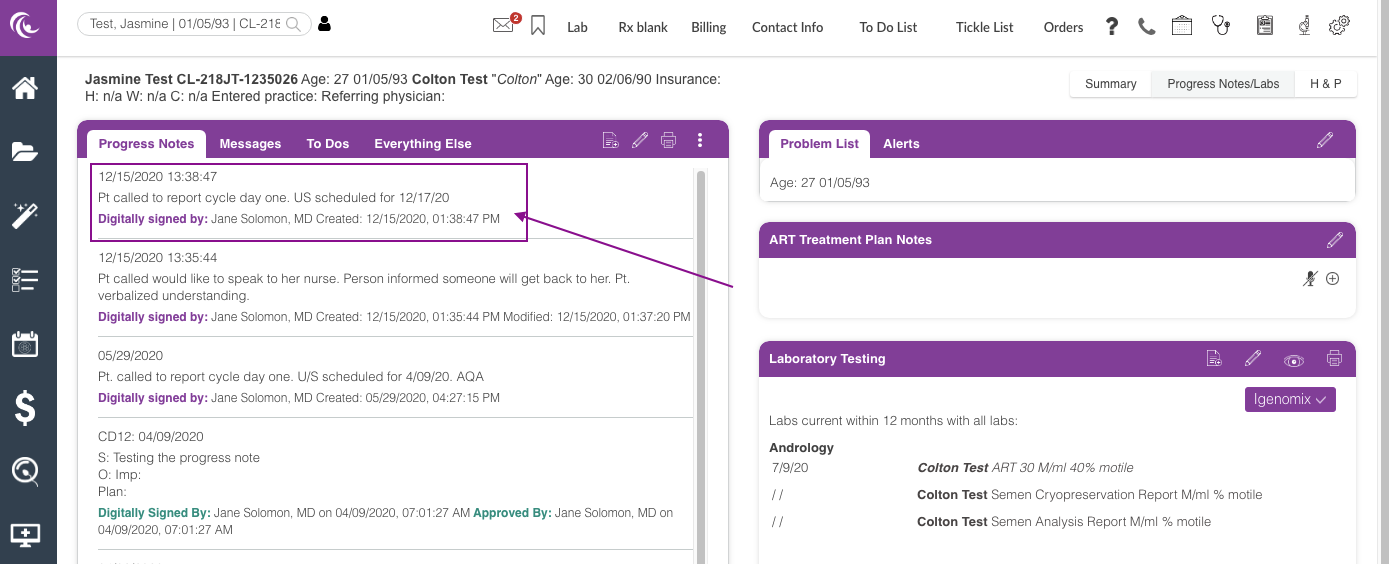
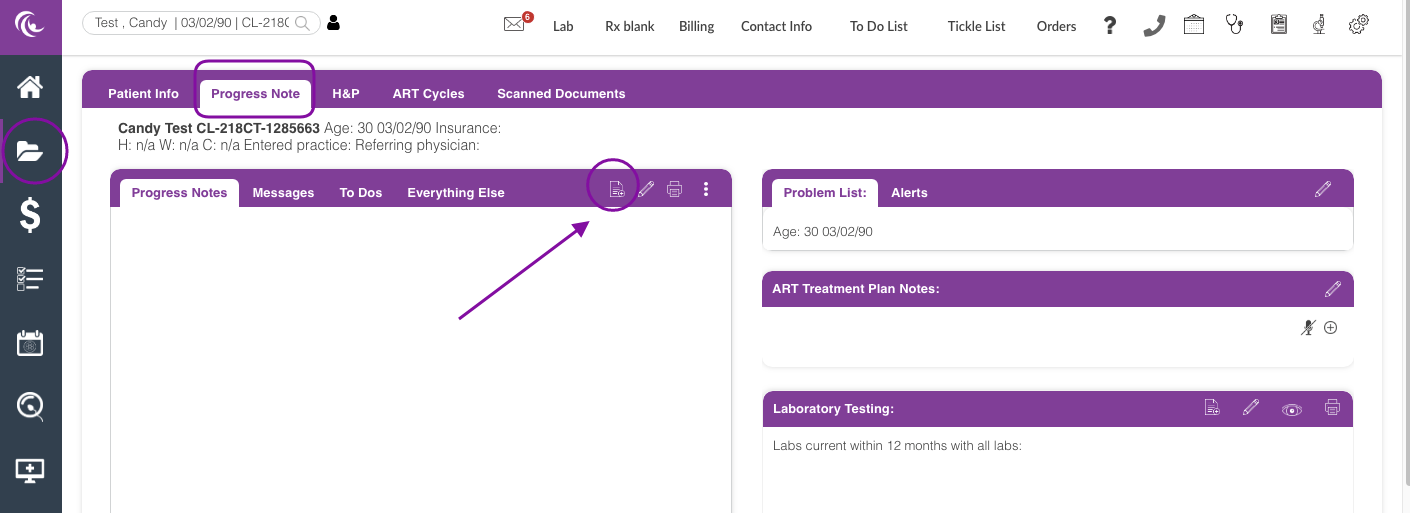
Within the patient's chart (Clinical Info) click on the Progress Notes/Labs tab.
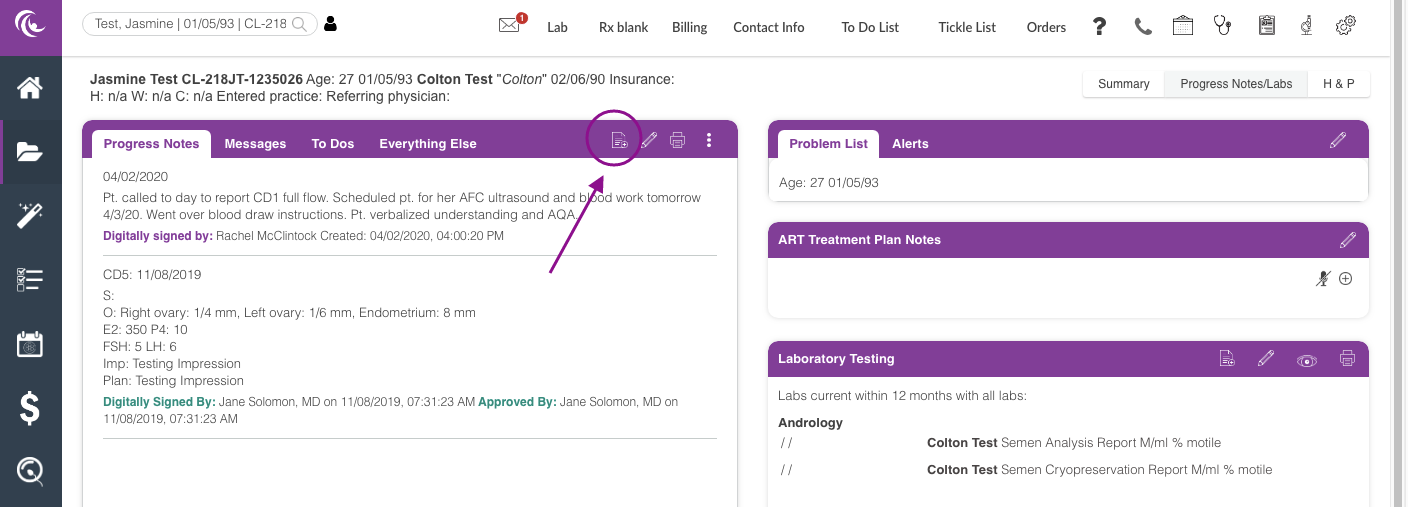
To write a new Progress Note click the Paper icon.
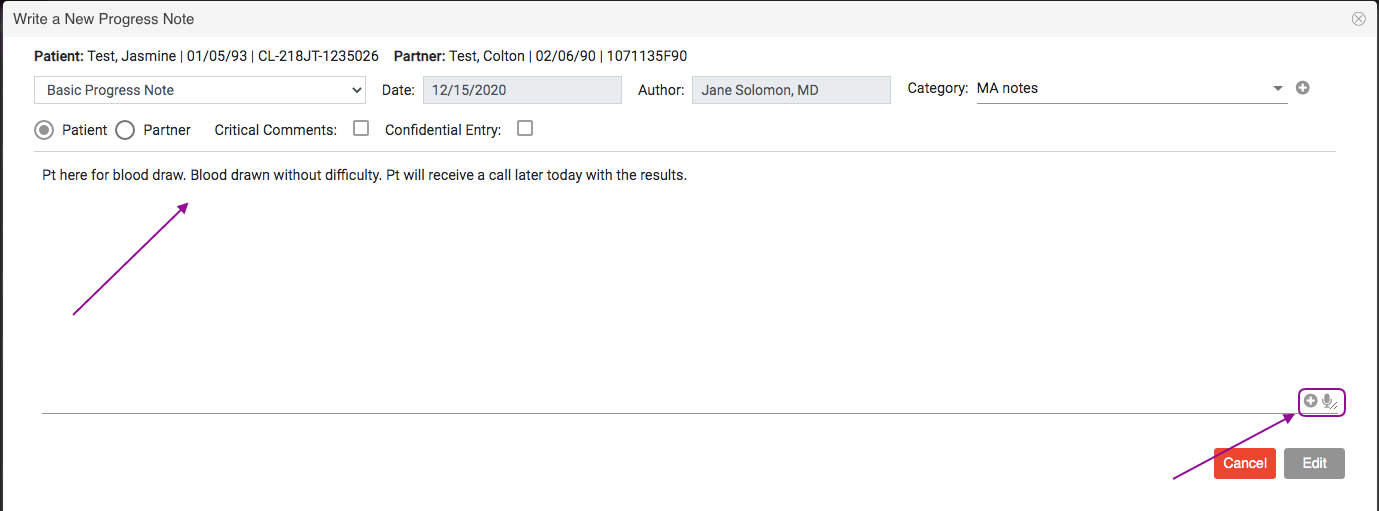
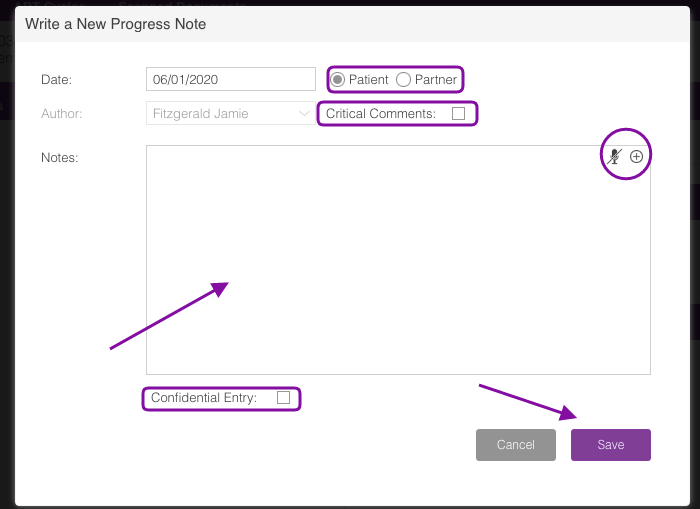
You can enter your progress note either by manually typing the note or by using the Voice Recognition software by clicking the microphone icon. Click How to Dictate Into the EMR to learn more.
To use stock text click the +.
Creating Stock Text for Routine/Repetitive Progress Notes
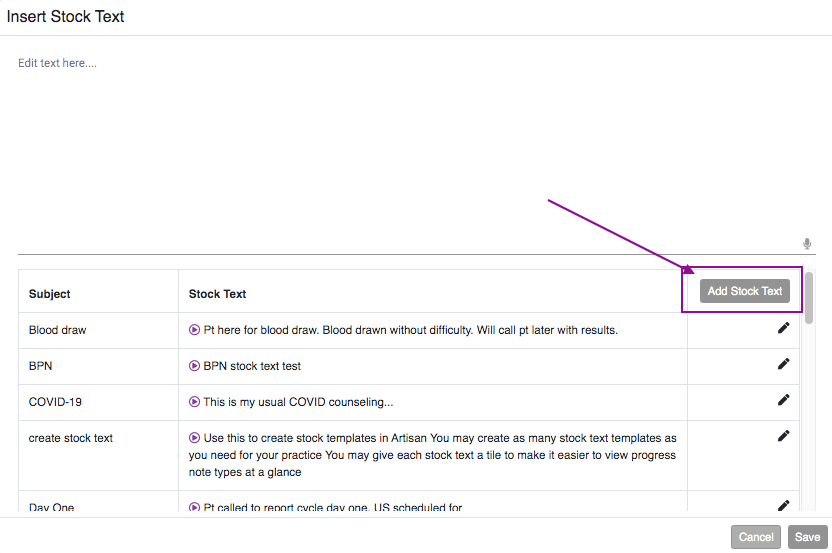
You may have some notes that you typically write the same thing each time you write your progress note. In this case, you can create Stock Text that can be chosen and inserted into your note very easily to save you time. Keep in mind that stock texts are unique to each user, so each user will need to enter his/her own stock texts.
Click on Add Stock Text to create new stock text.

Create your Stock Text in the dialogue box and click Save to save your text.
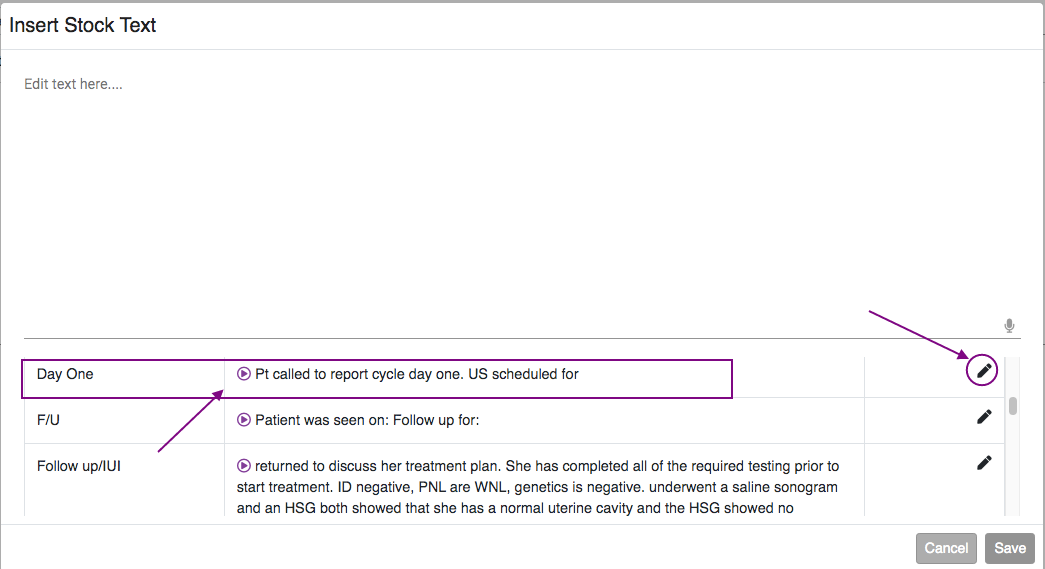
You can create multiple stock text to be added to your library. Click the pencil icon to edit the text.
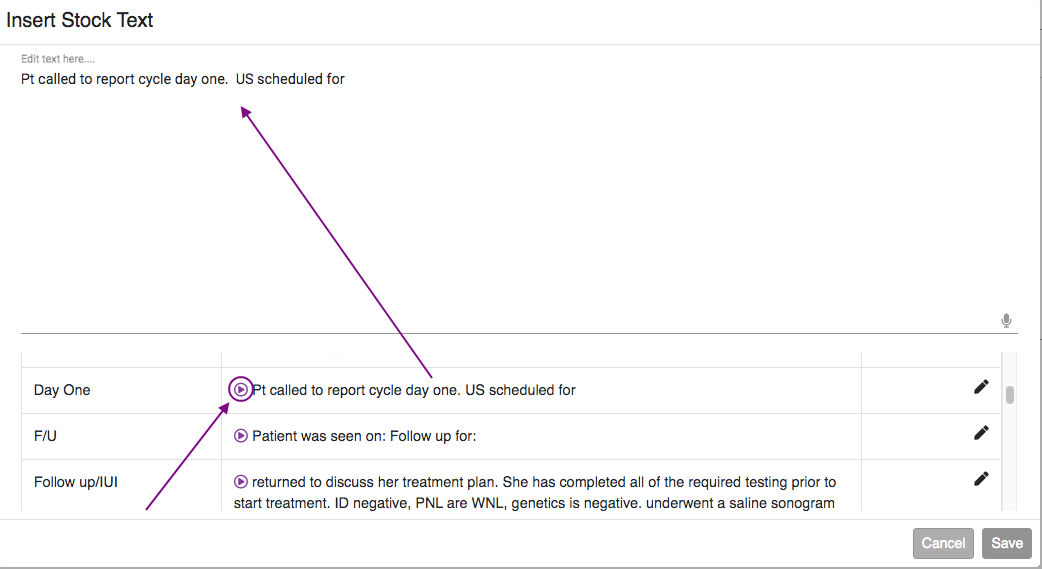
Clicking on the Play button will insert the corresponding text into your note. You can add more than one stock text to a single progress note if desired by clicking on the play button for each corresponding note. Click the Add button to bring you back to your basic progress note.
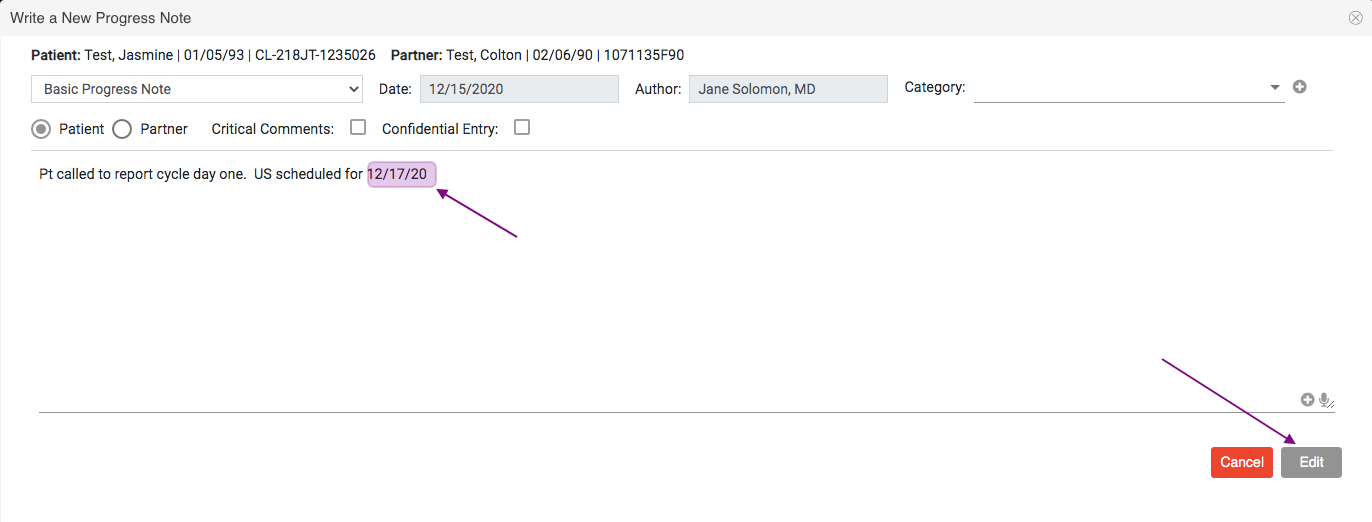
You will be taken back to the Basic Progress Note screen. Enter any additional notes then click the Exit Button.
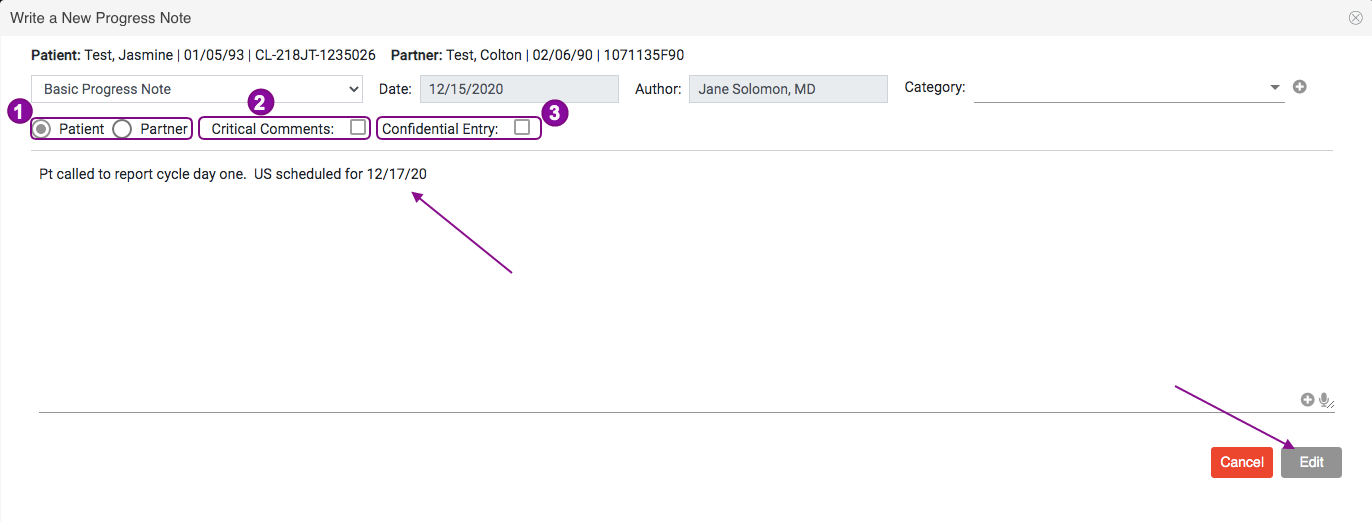
On occasion, it is necessary to give some progress notes special annotation. Users can do this at the time the progress note is created.
- Notes referring to the partner may be documented by clicking on the radio button for partner.
- Notes can be designated as critical by checking the box for critical comments.
- Notes can be marked as confidential by checking the box for confidential entry. Confidential notes can be viewed only by the user entering the note as well as Practitioners and Clinical Admin users. Confidential notes cannot be printed along with other progress notes.
From this window you are able to add anything else you would like to your note. When you are finished, click Edit.
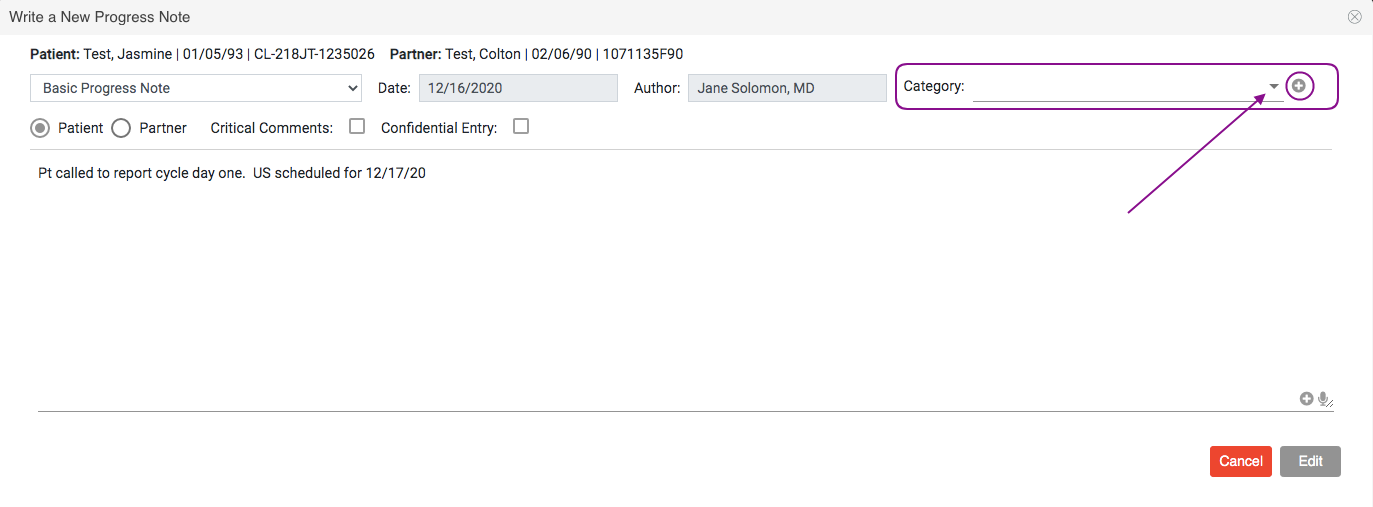
You are also able to categorize your progress note as needed by clicking the drop down to select a category. Clicking the plus sign icon will allow you to create a new category.
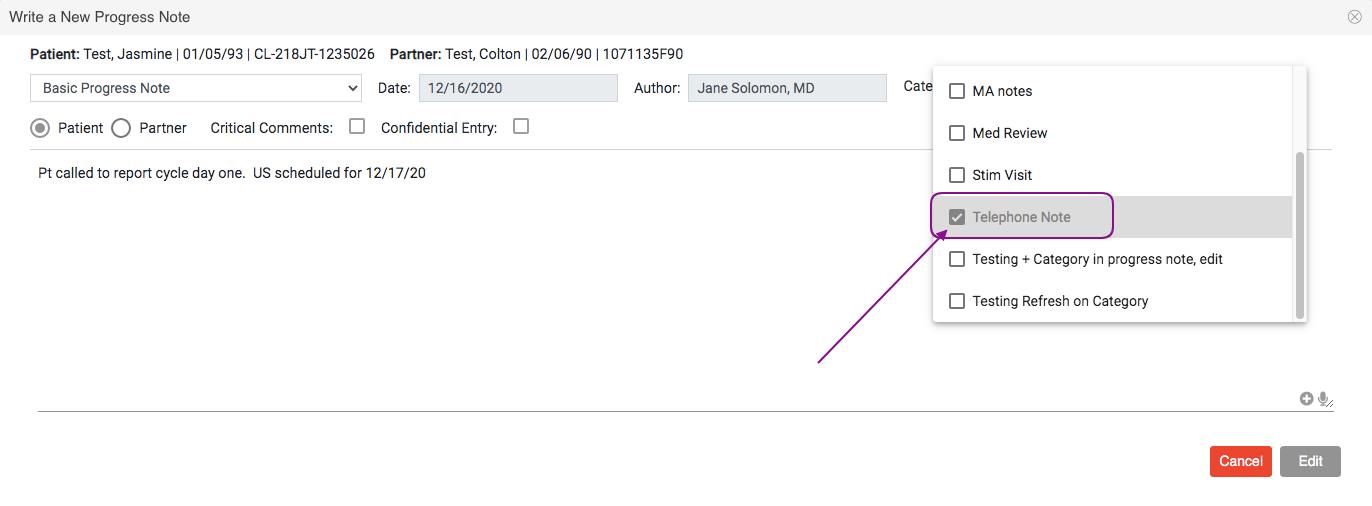
In the above example, a telephone note category has been selected.
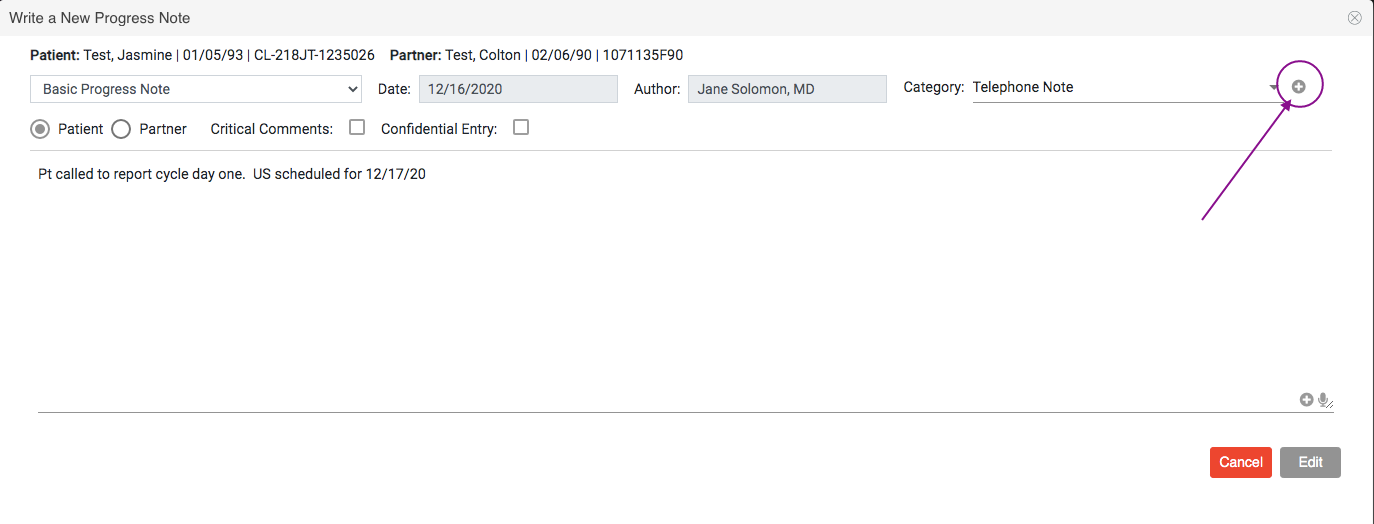
To add a new category, click the plus sign icon.
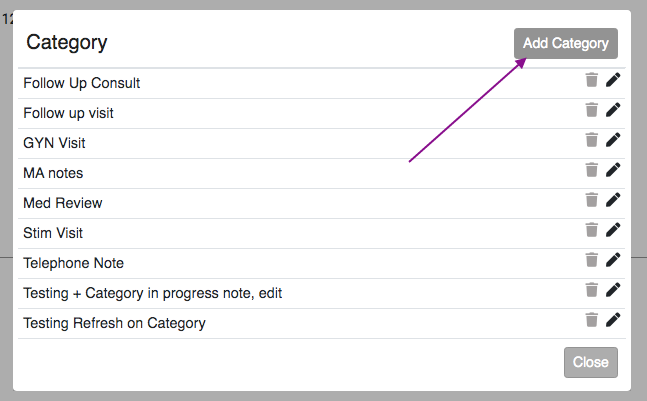
Click the Add Category button.
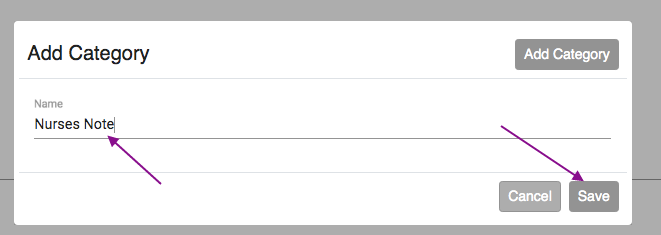
Enter the Category Name then click Save.
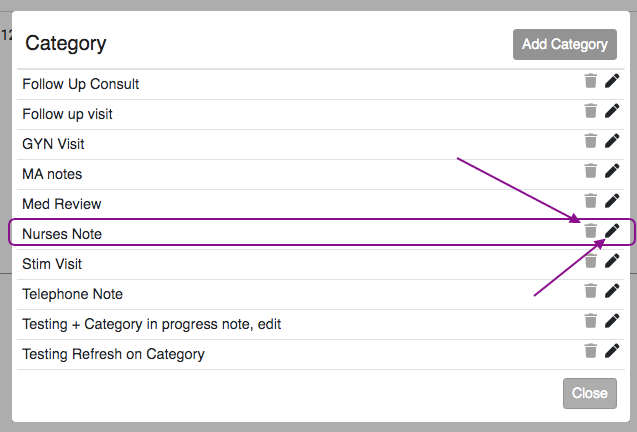
The created category will now be available for selection. To delete a category click on the trash can icon. Click the pencil icon to edit.
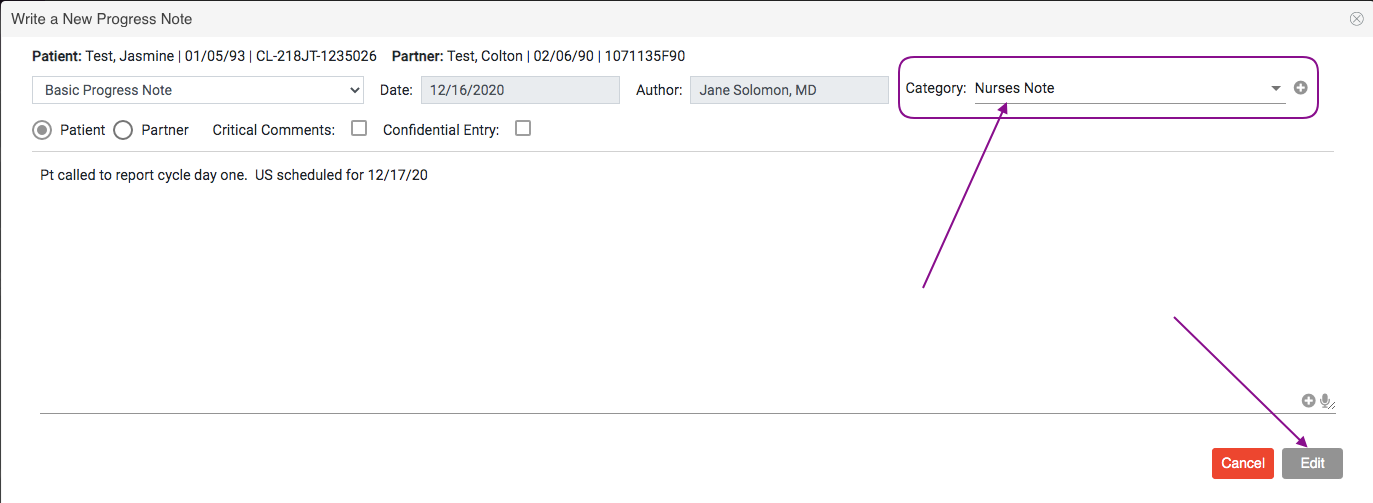
Once the note is completed, click the Edit button.
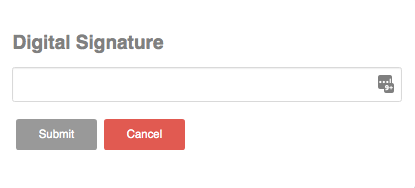
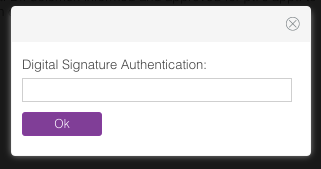
A Digital Signature Authentication window will pop up for you to enter your password. Click Submit and the progress note will be saved to the patient's medical record.
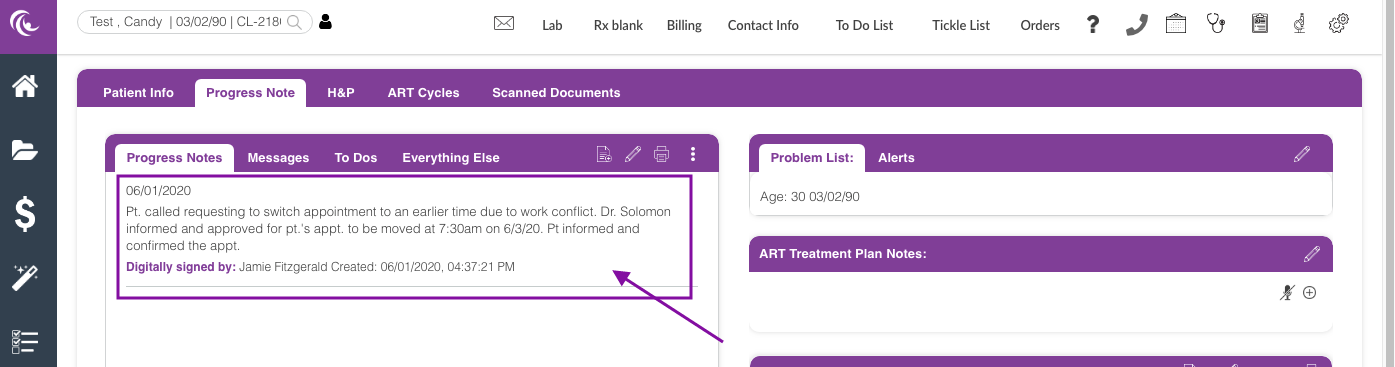
The note will now be present in the progress note tab.
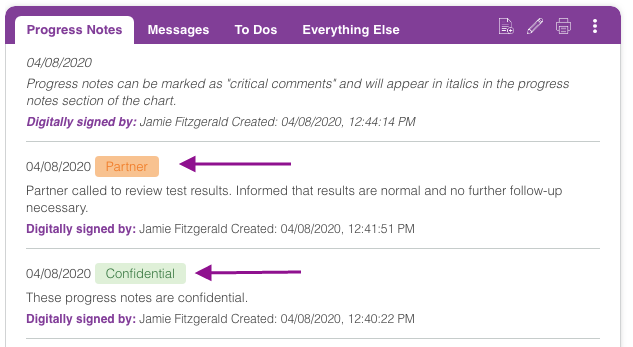
In the patient chart, progress notes with special annotations will appear as you see above. Critical notes do not have a color box within the note but they appear in italics. Partner notes will have an orange box noting they refer to the partner. Confidential notes will have a green box stating "Confidential".
Navigation for Clinic Admin and Administrative Staff User
From within the patient's chart under the Progress note tab, click the paper icon.
Enter your Progress Note in the Dialog Box, select the radio button for Partner if you are creating a note for the partner. Click on the microphone icon to use the google dictation feature or click on the plus sign icon if you wish to use your stock text.
You are also able to mark the note as critical or confidential entry, then click Save when you are finished.
Enter your Digital Signature.
You have now created your basic progress note within the patient's chart.
Editing the Progress Note
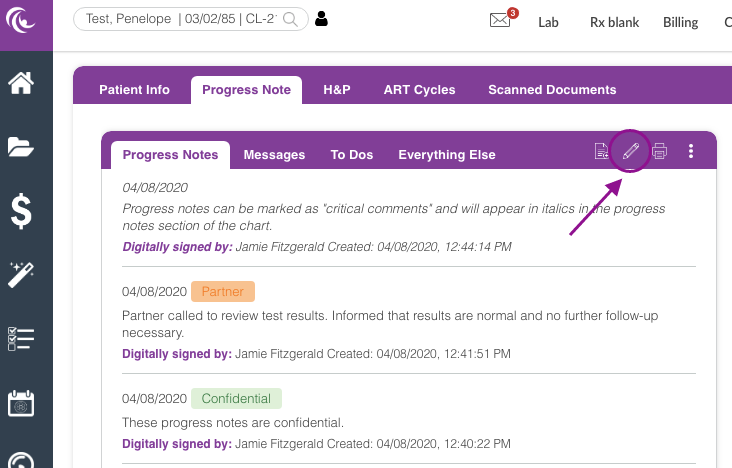
If you need to edit your note you can simply click on the Pencil icon to open up the note.

Click on the date of the correct progress note and edit in the Notes section then click Save.
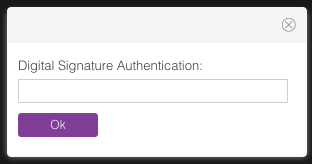
Enter your digital signature then click Ok.
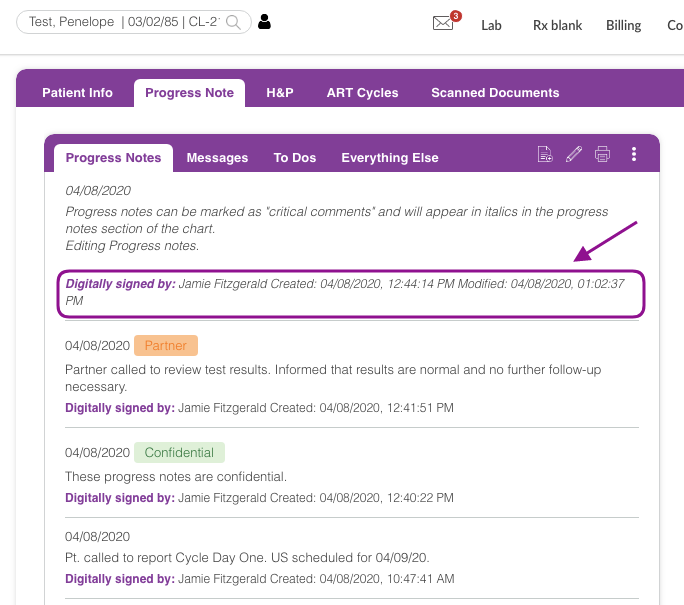
Your progress note will be updated with the date and time stamp.
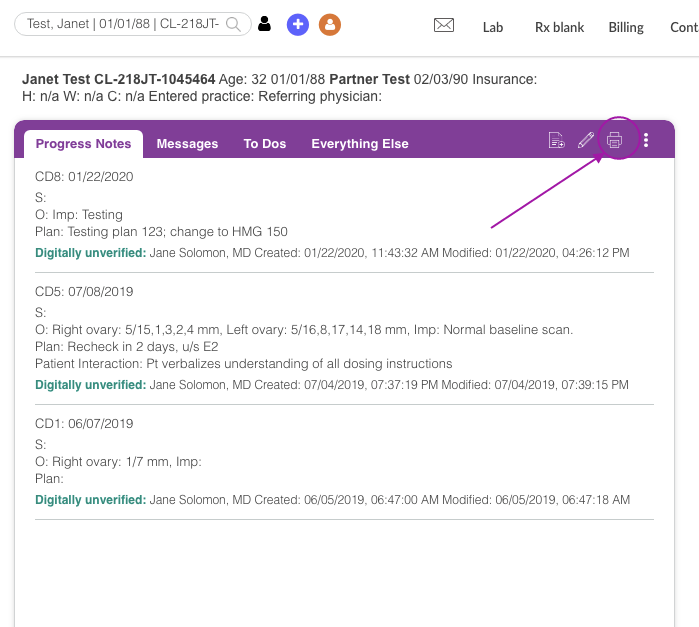
To Print the progress notes, click the printer icon.
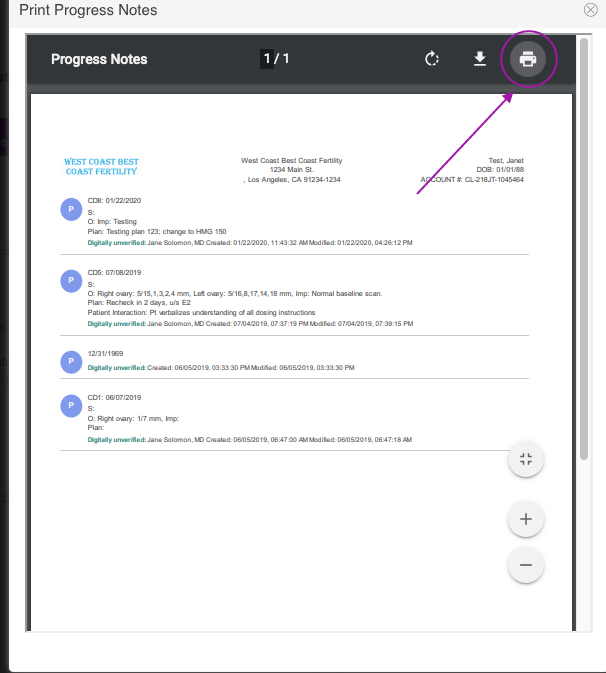
This window will pop, click the printer icon to proceed.
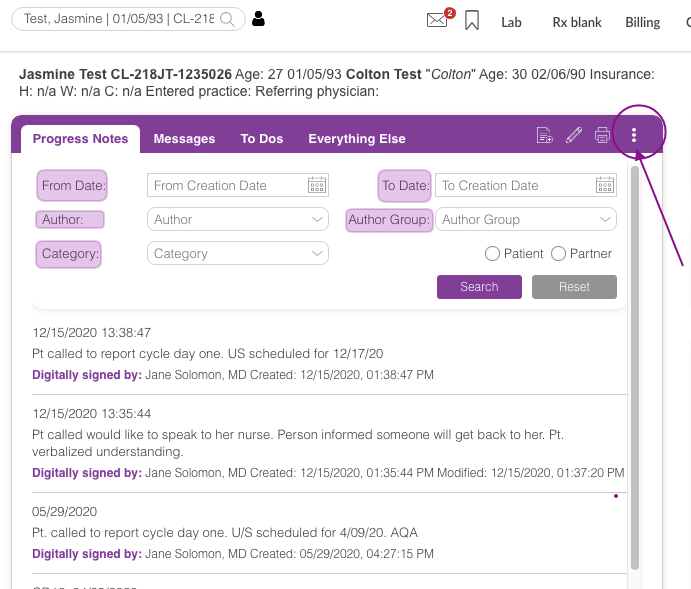
Clicking the 3 dots icon will allow you to filter by Date (from and to date), Author, Author Group and Category.
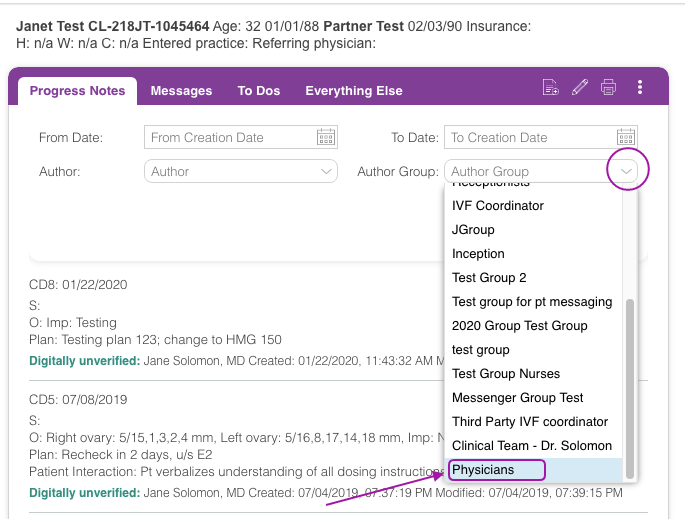
In this example, we are filtering by Author Group.
Click the drop-down icon, then select the Author Group. The author group list pulls from the Groups created in the Instant Messaging Group Inbox. See Instant Messaging manual to learn more.
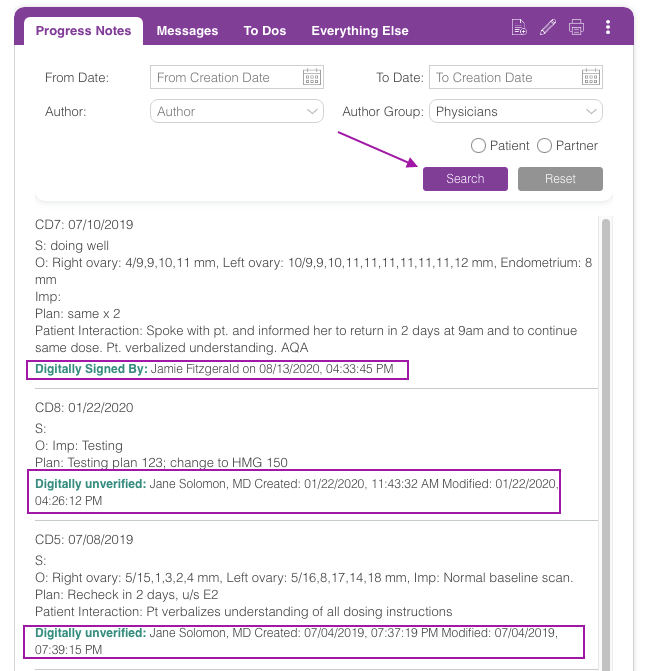
Once the Author Group is selected, click the search button. It will pull up all notes created by the staff that is included in that Group inbox.
Note: You have up to 72 hours to edit your note before it is finally committed to the database and can no longer be edited. Keep in mind that only the person who created a note can edit the note.
**All manuals are compliant with HIPAA regulations. No patient information has been released. All screenshots above were taken from a test clinic with fake patient information.
Artisan Support
Comments