Advanced Progress Notes allow the clinic to create templates for the different types of patient visits. Basic progress notes can also be written in the Advanced Progress Notes.
Advanced Progress Note Library
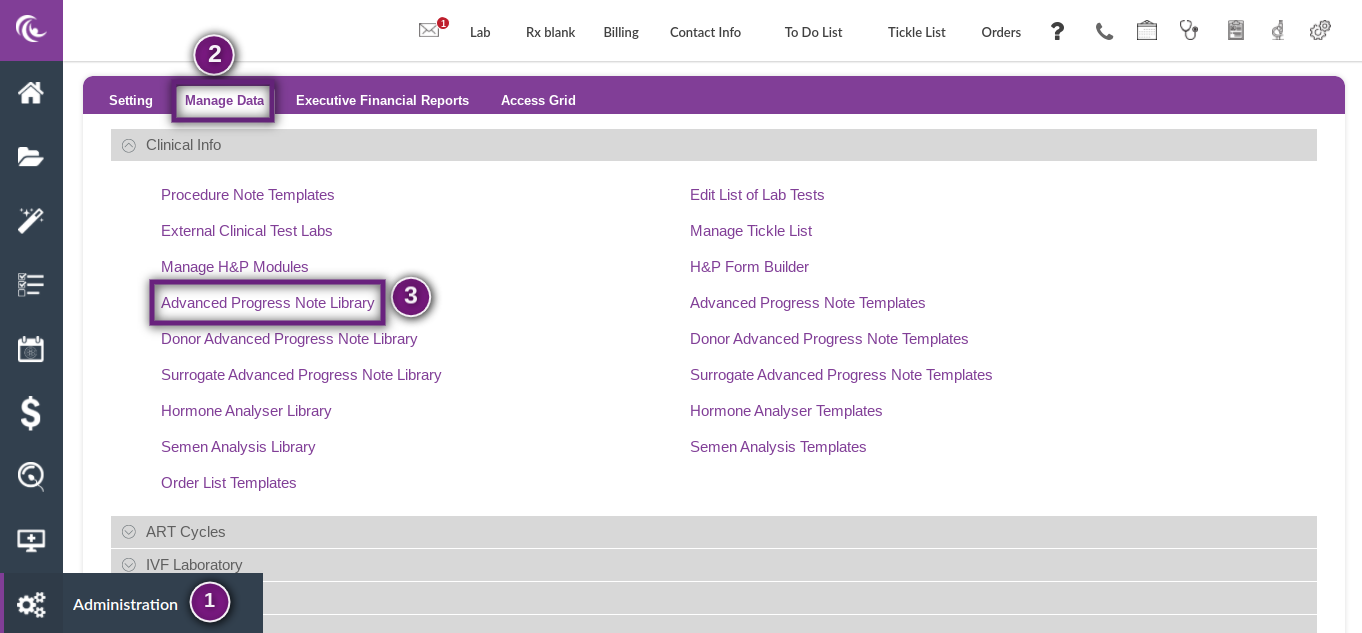
The advanced Progress Note Library holds all of the elements that can be added to an Advanced Progress Note template. To access the Advanced Progress Note Templates and Library, click on Administration in the bottom left corner of the screen (Gears icon) and then Manage Data in the top tab in the purple bar. Click on Advanced Progress Note Library.
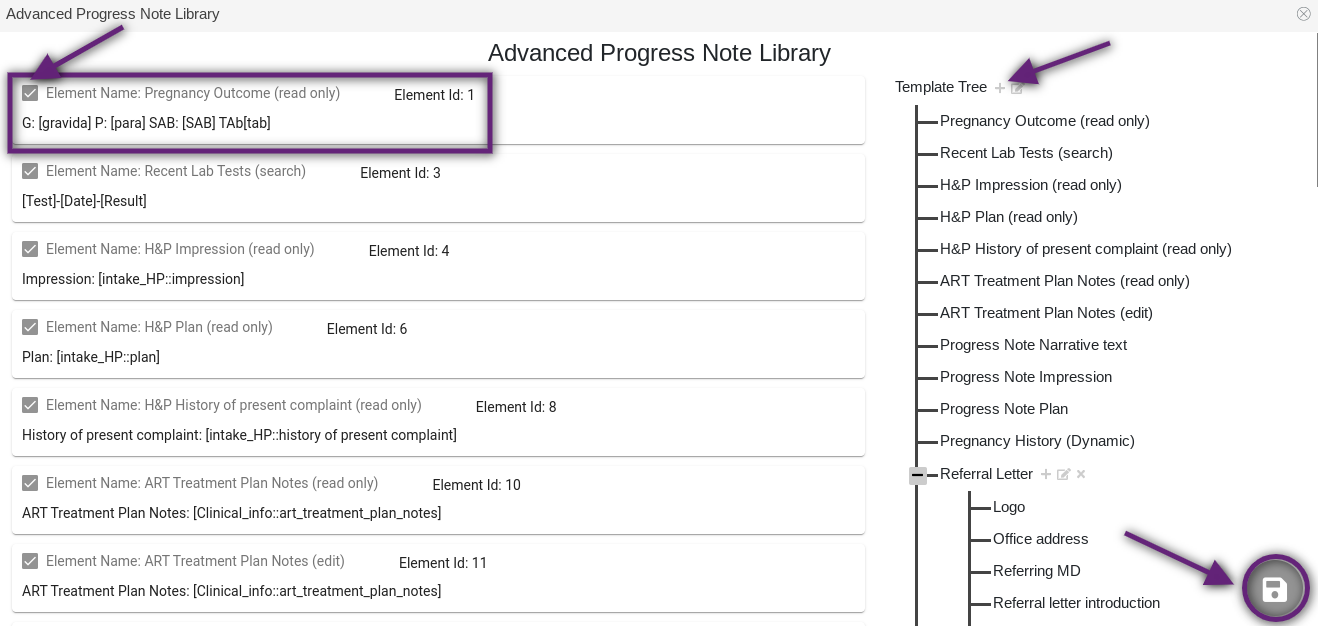
Within the Advanced Progress Note Library, the Template Tree on the right lists all of the Elements available for the Advanced Progress Note. On the left, the elements can be enabled and disabled for selection in the templates. To enable an element, click the box for that element so that a check appears in the box. To disable an element, click the same box so that the box is empty. Any elements that are disabled will not appear in the Advanced Progress Note Templates to be selected. Once all desired changes have been made, click the Disc icon in the bottom right corner of the screen to save.
Creating New Templates for Advanced Progress Notes
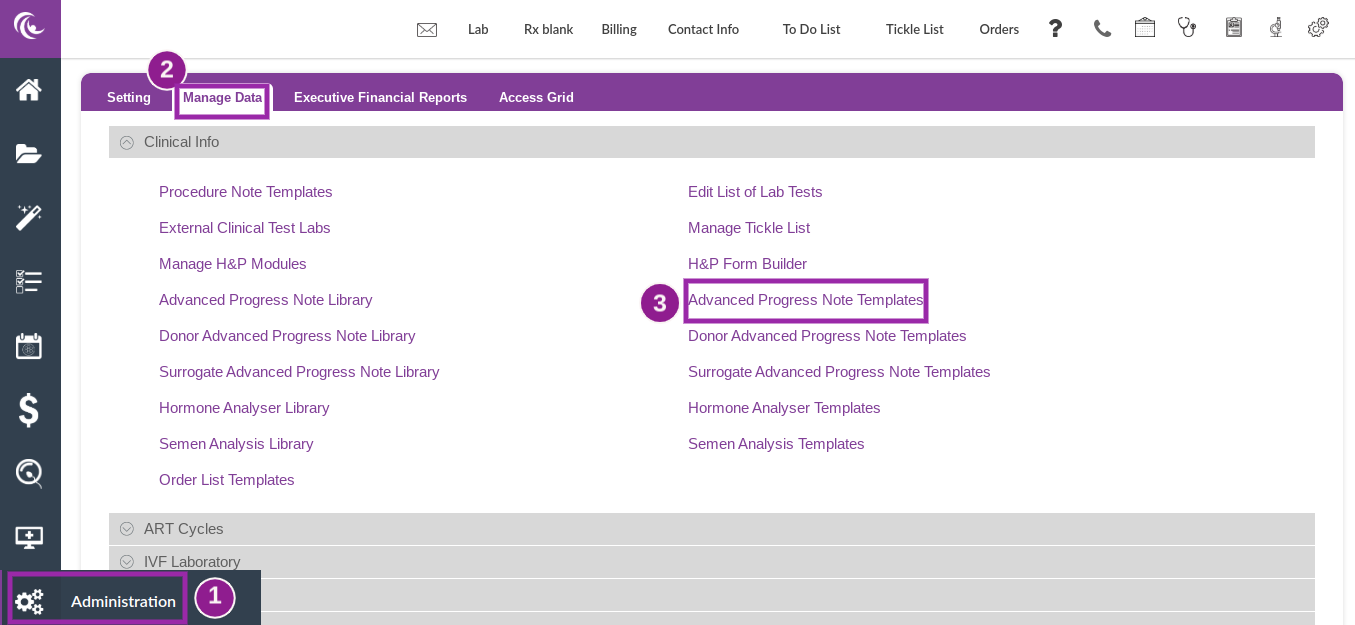
To access the Advanced Progress Note Templates, click on Administration in the bottom left corner of the screen (Gears icon), then Manage Data in the top tabs and then Advanced Progress Note Templates.
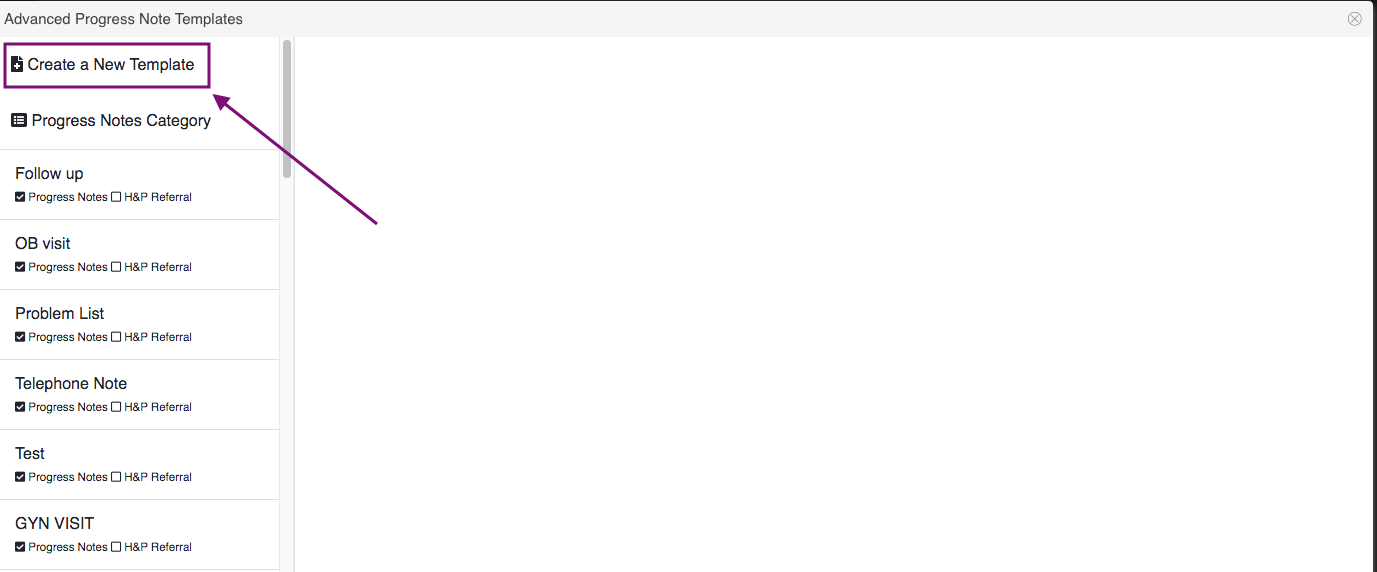
Click on Create a New Template.
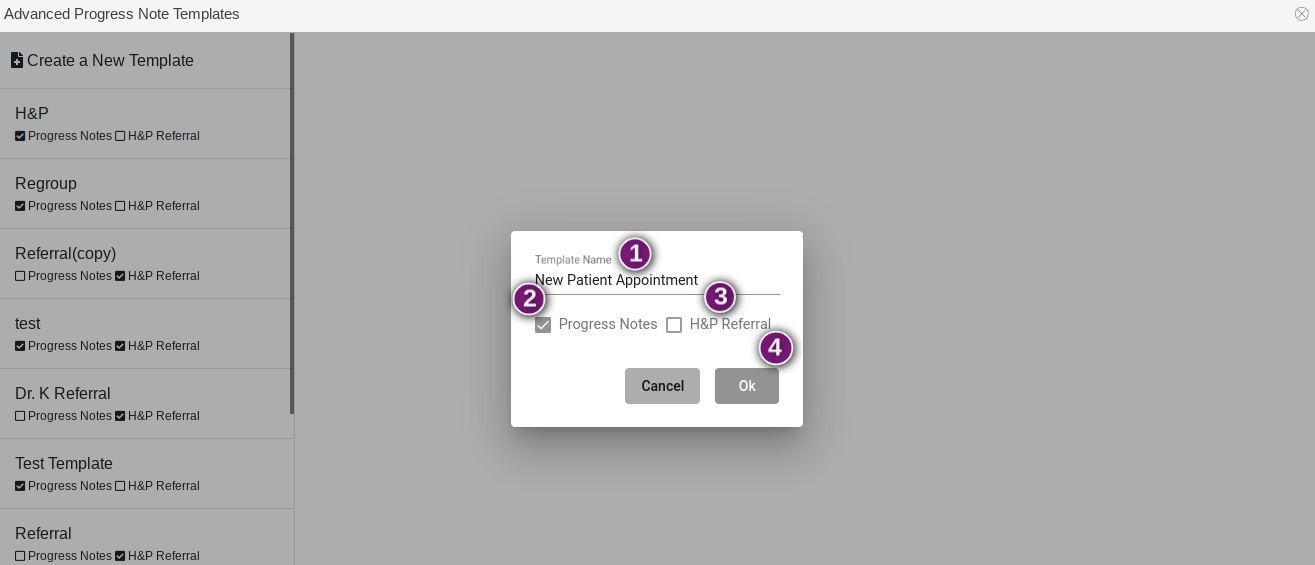
- Create the Template Name.
- Select Progress Notes.
- The H&P Referral is used to create referral letters to professionals. When building templates for the Advanced Progress Notes, you will not select this. The instructions for building and using the H&P Referral are in a different manual entitled H&P Referral.
- Click Cancel to cancel the template you are working on or Ok to move to the next step.

Once the Template is saved, it will be listed in the column to the left. Click on the template and the following options will be available:
- Edit this template: Click on this to build the template.
- Create a new template by duplicating this template: Click on this to duplicate a template that has already been built. This will allow you to build further on the template for another patient visit type.
- Delete this template: Click this to delete any template.
To build the template you have created, click Edit this template.
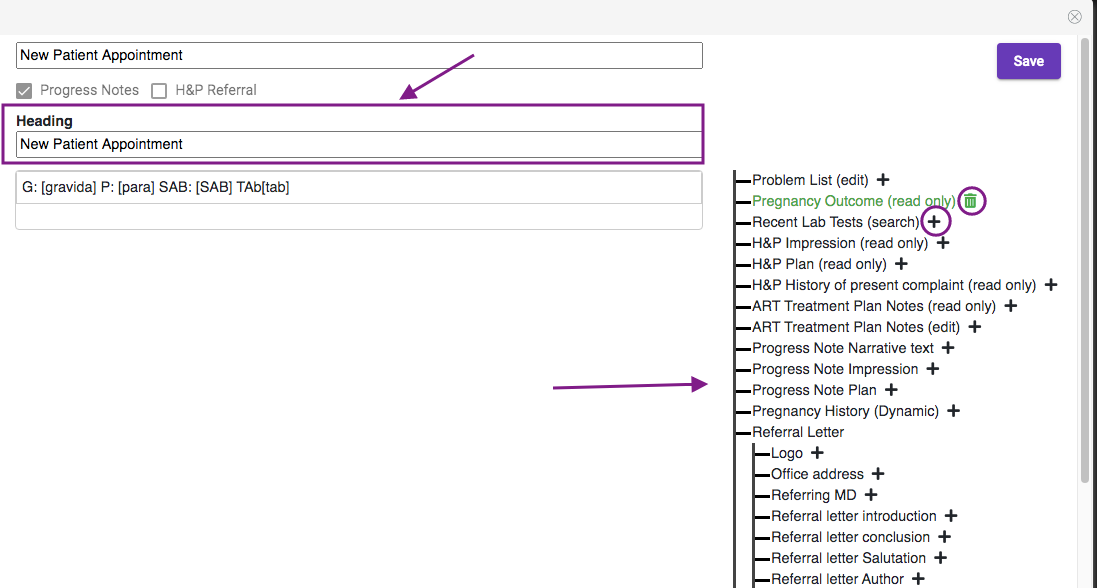
Enter a Heading to add a template title.
The elements that are available to add to an Advanced Progress Note Template are housed to the right of the template. Click the + sign to add an element to the template. Click the Trashcan icon to delete an element from the Advance Progress Note template.
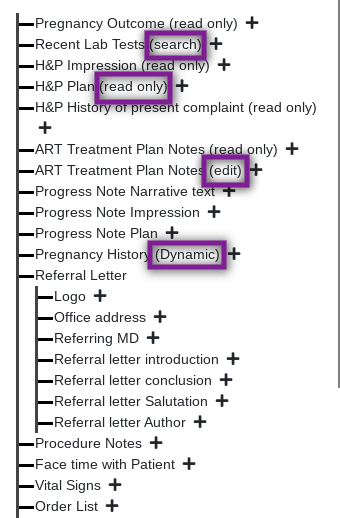
Some of the elements will have the following categories listed next to them: Search, Read Only, Edit and Dynamic.
Search indicates this element has the option to search for results/reports within a time range. Recent Lab Tests, Ultrasound Reports and Andrology are all elements with the capability to use the search feature.
Read Only indicates this element will pull the information from the H&P into the Advanced Progress Note but no edits can be made to it in the note. Pregnancy Outcome, H&P Impression, H&P Plan, H&P Impression, H&P History of present complaint and ART Treatment Plan Notes (read only) are all elements that can be pulled into the Advanced Progress Notes as a read only field.
Edit indicates this element is available as a Read Only form, but this form will allow you make edits to it on the Advanced Progress Note. This will not edit the original information on the H&P. ART Treatment Plan (edit) is a field that pulls in from the H&P that can be edited on the Advanced Progress Notes.
Dynamic indicates this element will pull the reference information from the H&P and can be edited. Any edits made here will also edit the H&P. Pregnancy History is an example of a Dynamic element.
Other Elements

Procedure Notes will allow the user to pull in the Procedure Note templates that are built in EMR Settings>Procedure Note templates. This makes it easy to fill out a procedure note that will appear in Progress Notes.
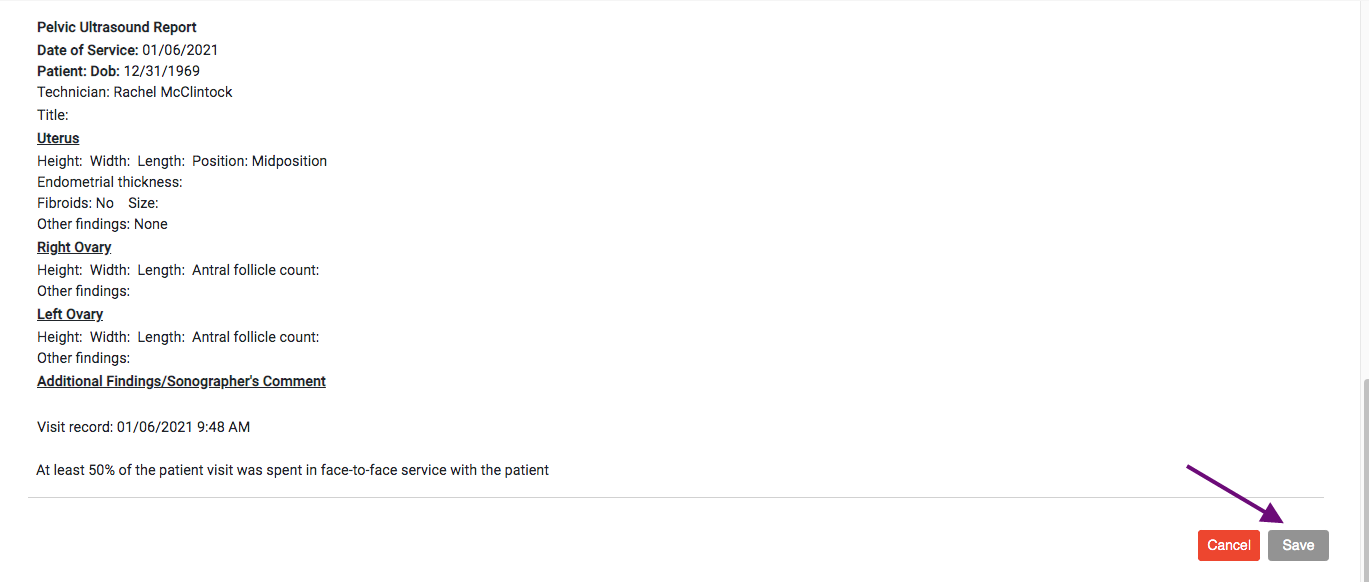
Face time with Patient will read "At least 50% of the patient visit was spent in face-to-face service with the patient" but can be edited in the Advanced Progress Note in the patient chart.
Vital Signs will pull the vital signs from Clinical Tools>Vital Signs if vital signs were entered there for the patient on the day that the advanced progress note was written.
Order List will allow the user to create an Order in the Advanced Progress note.
Basic Patient Info will pull the patient's name, date of birth and chart ID into the note.
Physical Exam will allow the physician to create a new physical exam and use stock text and dictation to enter in information on those fields.
Surgical History will pull the current surgical history that is on the Summary page of the patient chart. Any changes made to the surgical history in the advance progress note in this field will also update the Summary. This will not update the Surgical History on the H&P.
Allergies will pull the current allergies that is on the Summary page of the patient chart. Any changes made to the Allergies in the advance progress note in this field will also update the Summary. This will not update the Allergies on the H&P.
Current Medications will pull the current medications that is on the Summary page of the patient chart. Any changes made to the Allergies in the advance progress note in this field will also update the Summary
Visit Description will allow the physician to create a visit description and use stock text and dictation to enter in information on this field.
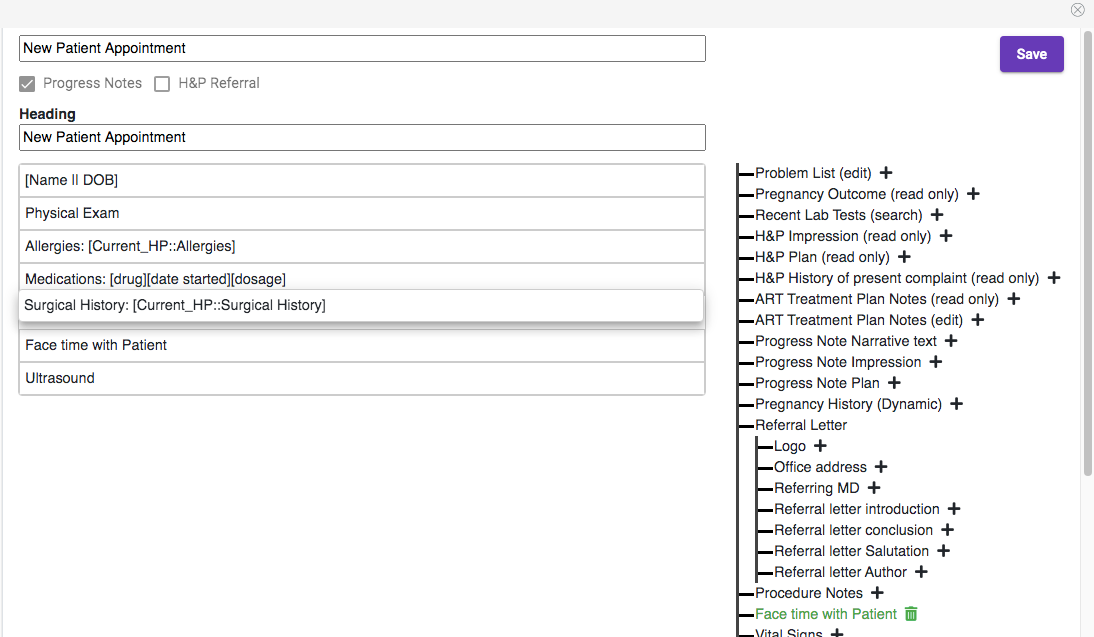
When elements are added to the template, they will appear to the left of the elements list panel. Drag and drop the elements in the template to put them in the desired order in which they will appear on the Advanced Progress Note.
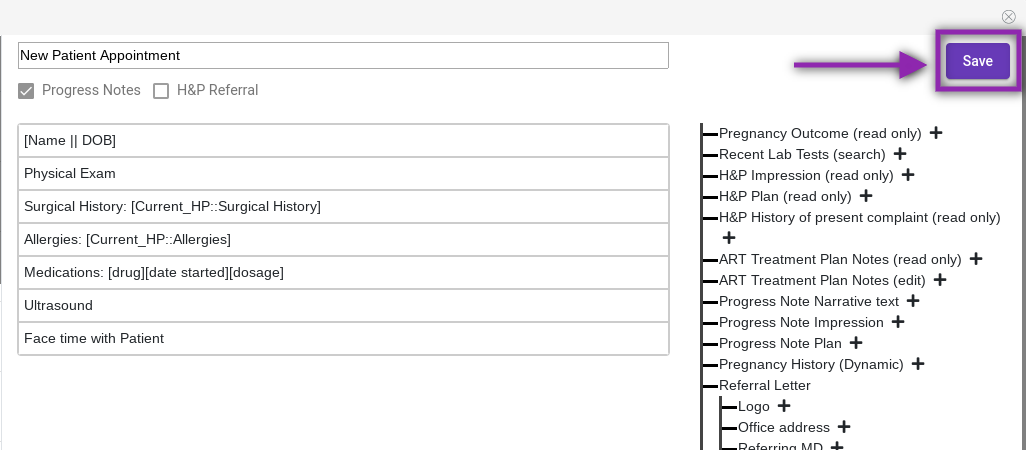
Once all of the elements are in the desired order, click Save to save the template.
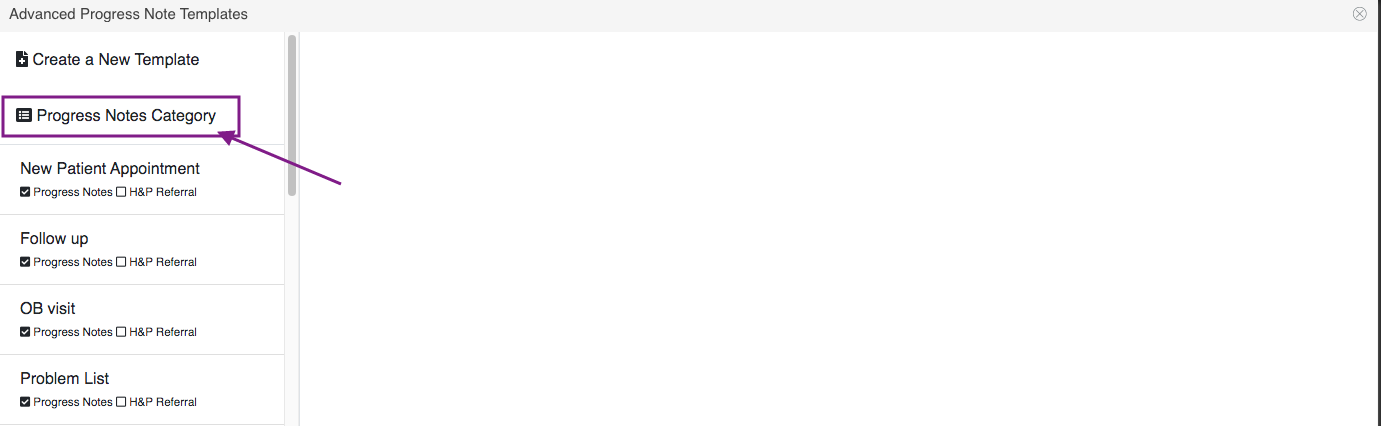
To create a list of categories, click Progress Notes Category.
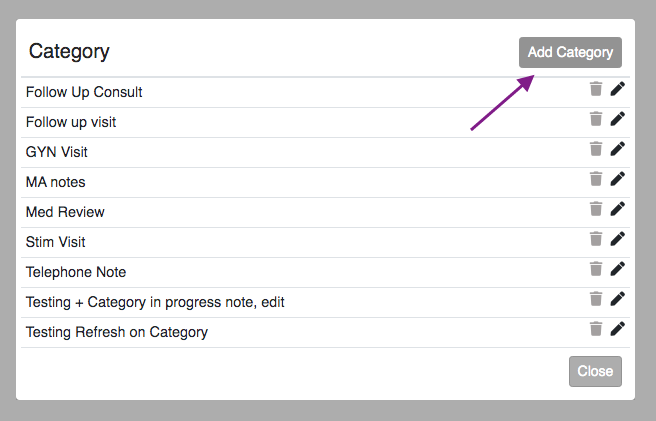
Click the Add Category button.
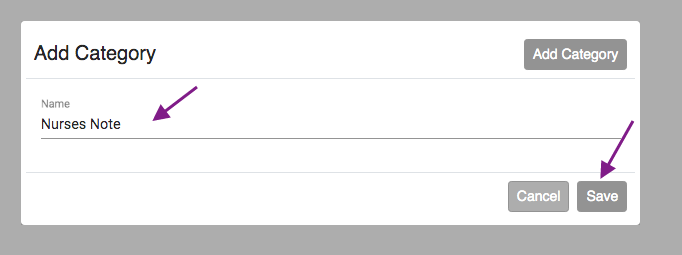
Enter Category Name then click Save.

You will now have a list of different categories. This makes it easy to filter different progress notes on the patient's chart. Click the trash can to delete and click the pencil icon to edit.
As many templates as needed for different patient visit types or patient interactions can be built in the Advanced Progress Notes Templates.
Writing an Advanced Progress Note
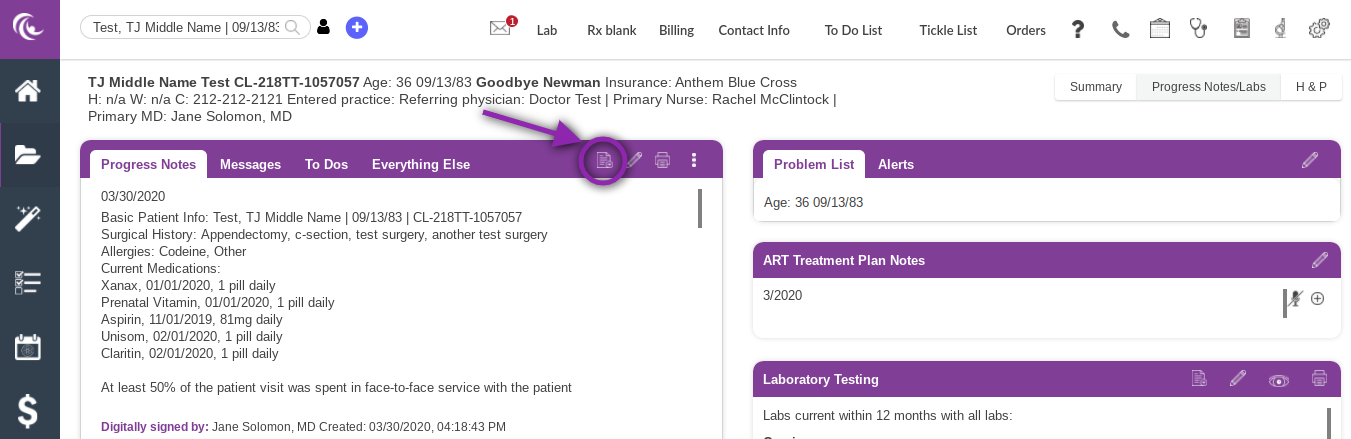
To access the Advanced Progress Notes, in the patient chart open the Progress Notes/Labs page and go to Progress Notes. Click on the Page icon to open up the Progress Notes.
The Advanced Progress Note will automatically default to a Basic Progress Note in the drop down box. To write a Basic Progress Note, free type in the text field or use the Stock Text or Dictation options and then Click Next. For detailed instructions on a Basic Progress Note, please read the manual How to Write Basic Progress Notes.
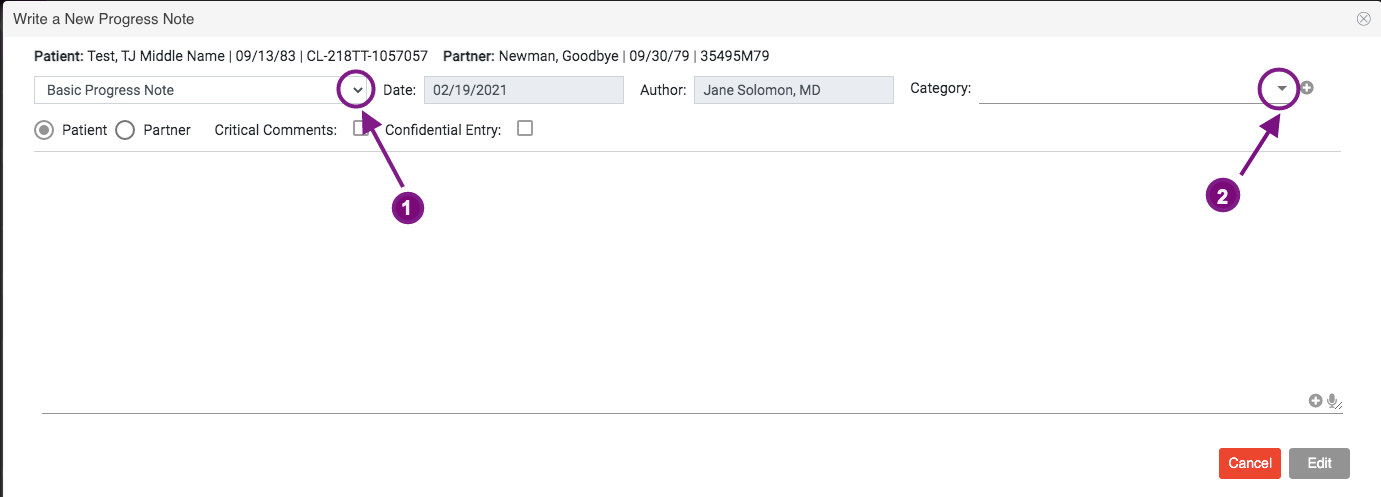
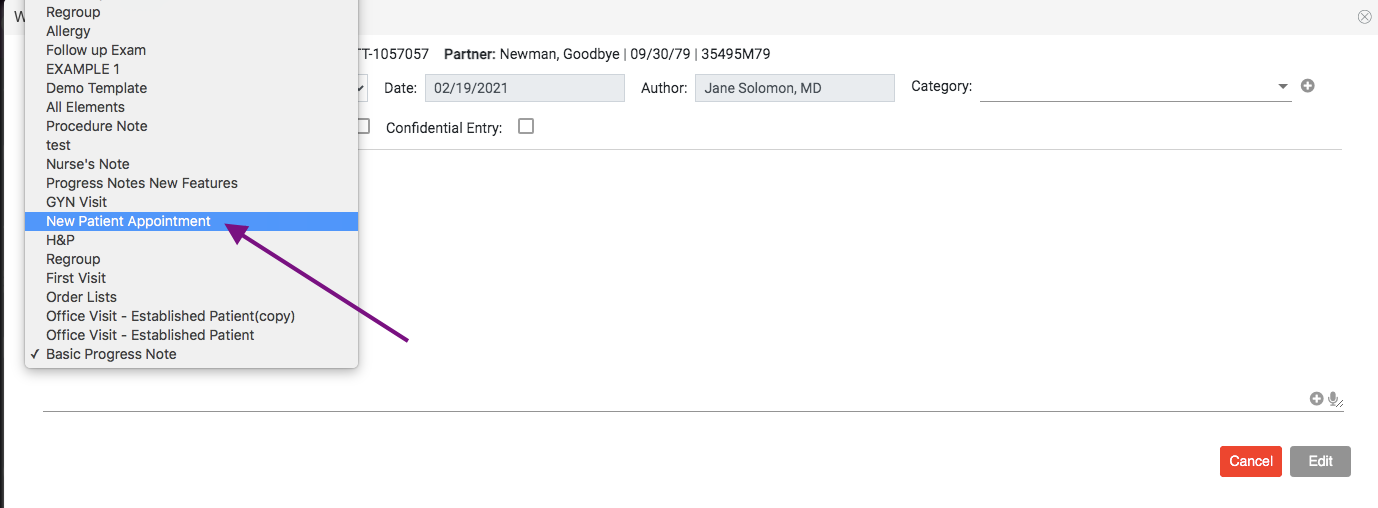
1. To write an Advanced Progress Note, click the drop down menu and click on the desired template.
2. To Add a category, click the category drop down
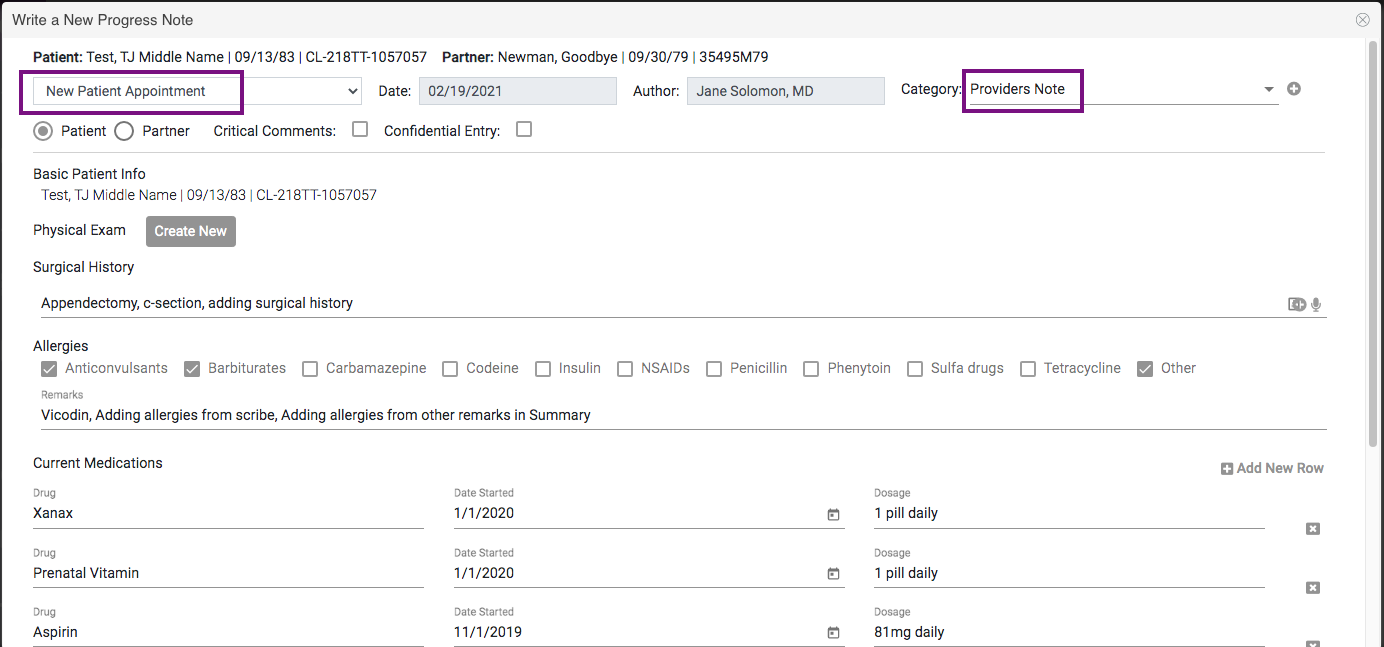
The selected template and category will pull up on the next screen. If the template needs to be changed, click the drop down box in the top left corner of the screen to selected the correct template. The Advanced Progress Note is now ready to be filled out.
Features of Different Elements in the Advanced Progress Note

Allergies can be selected and removed by clicking in the box to the left of the item. This will update the allergies in the Summary but will not change the allergies in the H&P.
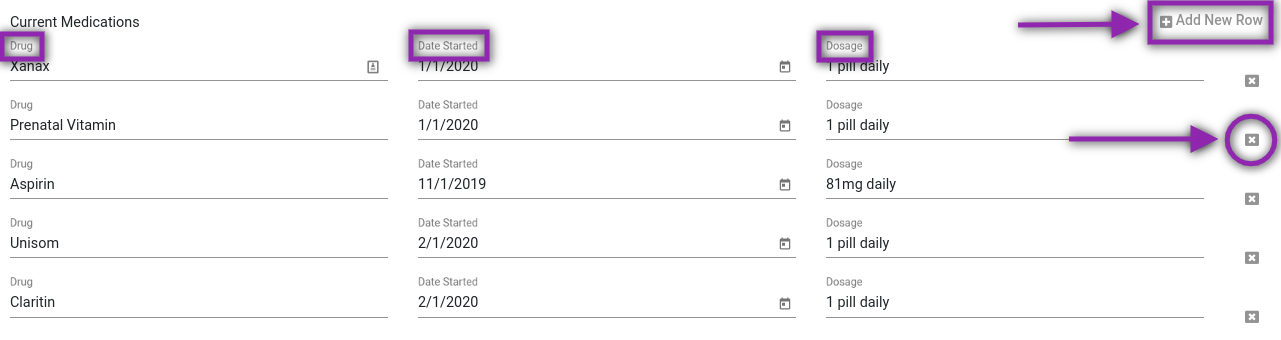
Current Medications will allow the user to add a new medication or multiple medications by clicking Add New Row and filling in the Drug, Date Started and Dosage. A listed medication can also be deleted from the list by clicking on the X to the right of the corresponding medication. Medications listed can also be edited by clicking into the Drug, Date Started or Dosage fields for the corresponding medication. Any changes made will change the Current Medications on the Summary in the patient chart but will not change the H&P.

Surgical History can be edited by removing items or adding items. To remove or add a surgery, click in the text field. Surgeries can also be added by using the Stock Text and Dictation to the right of the Surgical History. Any edits made in this field will update the Summary in the patient chart but will not change the Surgical History in the H&P.

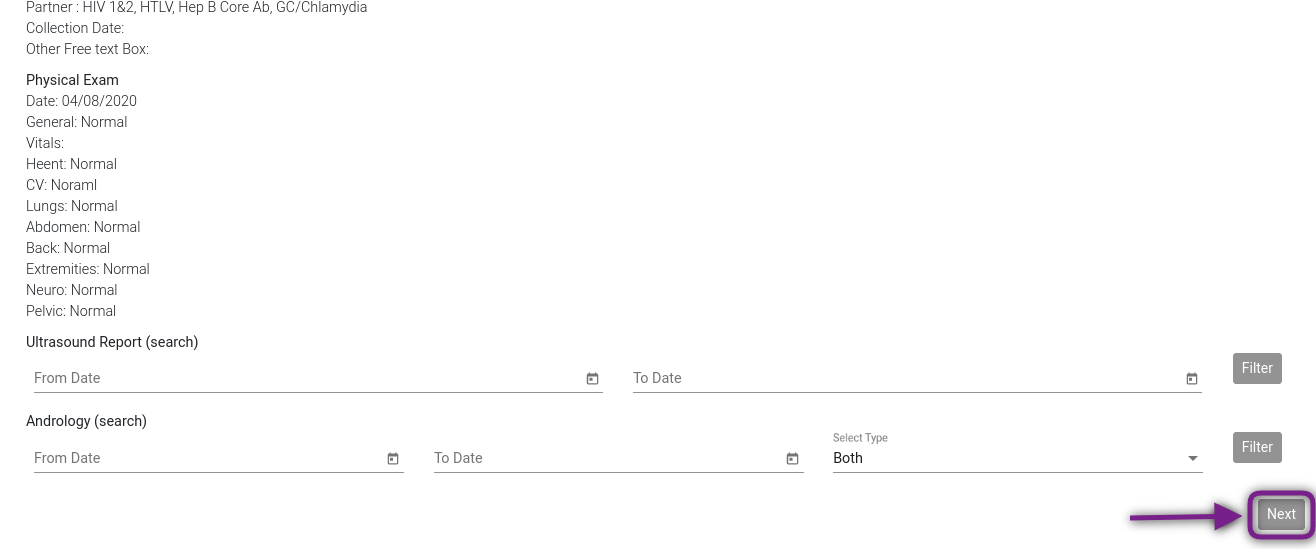
Recent Lab Tests allows the user to search for lab tests that have either been manually entered into Artisan or have been loaded to the patient chart through a lab integration. Test results can be searched through the following steps:
- Enter the From Date (date in which you would like to begin the search).
- Enter the To Date (date in which you would like the end search).
- Select from the drop down if Patient, Partner or Both Patient and Partner tests need to be searched.
- Click Filter.
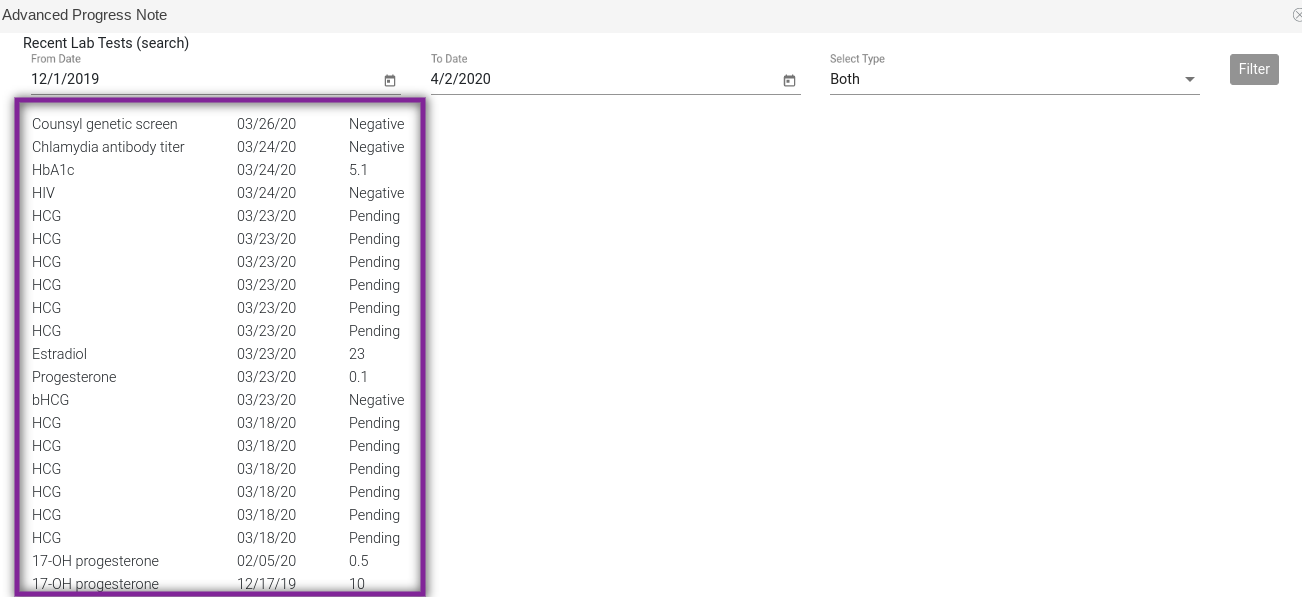
All tests performed within the date parameters in Artisan will display below the search field with the test, date test was performed and the result. The Ultrasound Report search and Andrology search will filter those reports in the same manner.

ART Treatment Plan Notes has 2 different options- read only and edit. The read only will pull in the ART Treatment Plan Notes from the H&P but will not allow the user to edit. Edit will allow you to enter in new ART Treatment Plan Notes but will not edit the notes in the H&P. To enter notes in this field, click into the free text field or use the Stock Text and Dictation options to the right of the text field.
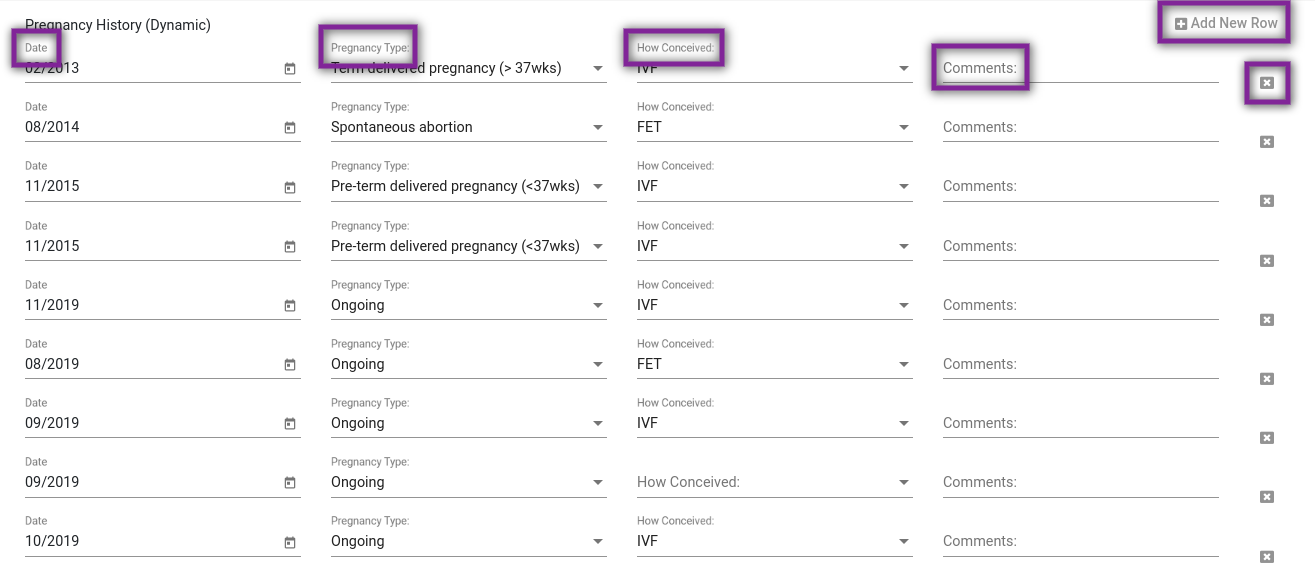
Pregnancy History will pull this information in from the H&P. In this dynamic field, any changes made here will be reflected on the H&P as well as the Summary. The existing pregnancy history fields (Date, Pregnancy Type, How Conceived, Comments) can be edited or deleted with the X in to the right of the line. To add to to the pregnancy history, click Add New Row and fill in the information.

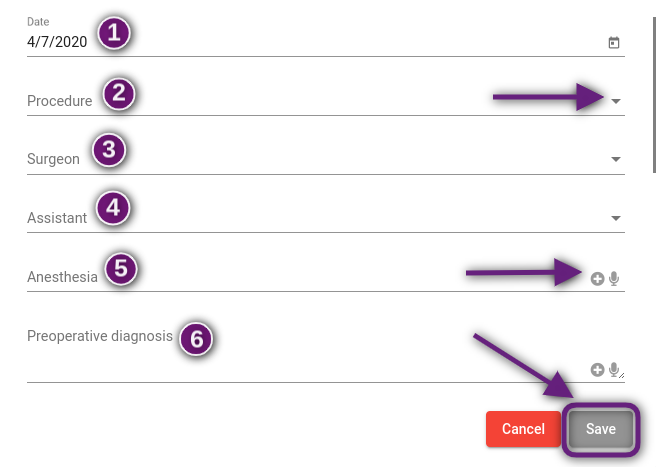
To create a Procedure Note in the Advanced Progress Note, click on Create New and fill in the fields indicated:
- Date of procedure
- Procedure- Click the drop down arrow and select the procedure. The procedure templates that are pulled in to this drop down come from the Procedure Note Templates in EMR Settings. For detailed instructions on how to create Procedure Note Templates, please read the manual How to Write Procedure Notes.
- Surgeon- Select the name of the doctor performing the procedure from the drop down list.
- Assistant- If there is an assistant for the procedure, select the name of the person from the drop down. This field may be left blank if it is not applicable.
- Anesthesia- Use stock text, dictation or free type into the field to indicate the anesthesia used. This field may be left blank if it is not applicable.
- Preoperative Diagnosis- Use stock text, dictation or free type into the field to record the patient's preoperative diagnosis.
There are 5 additional fields that will also be filled out in the Procedure Note (not pictured) for Postoperative Diagnosis, Findings, Estimated Blood Loss, Complications and Operative Note. Those can be filled out by free typing in the text field or using stock text or dictation. Click Save to save the procedure note or Cancel to discard the note.

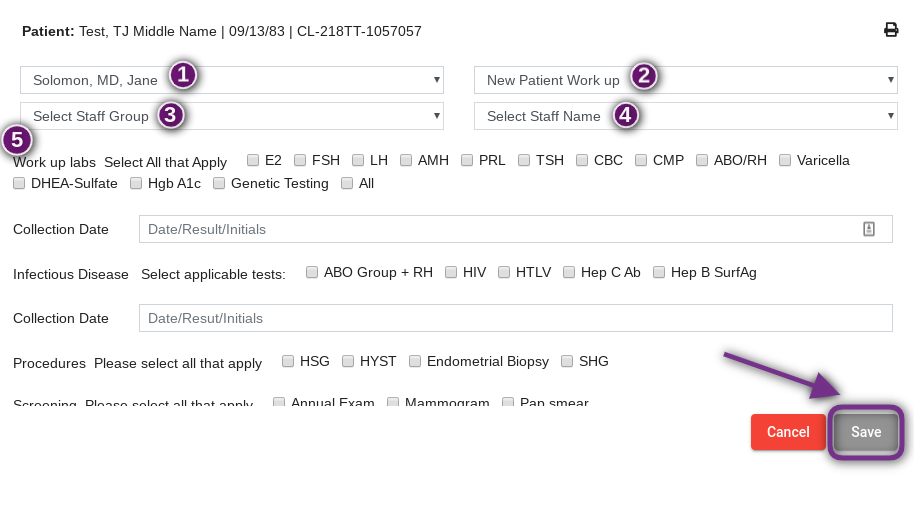
To create an Order List in the Advanced Progress Note, click on Create. The user will be prompted to fill out the following fields:
- Physician Name- This will auto-populate.
- Template- Select a template from the drop down box. These templates pull from the Order List Templates under Manage Data in Administration. For detailed instructions on how to build these templates, please read the manual Order Lists.
- Select Staff Group- Select the staff group the order list will be assigned to by clicking on the drop down menu.
- Select Staff Name- Select the name of the staff member the order list will be assigned to by clicking on the drop down menu. The list of staff members will pull based on the staff group that is selected.
- Select the tests and tasks that are being ordered.
Click Save to save the order list. Click Cancel to discard.

To fill out a Physical Exam on the advanced progress note, click Create New.

Select the date and fill in the assessment of systems. You may free type into the text field for each system or use stock text or dictation to enter in the documentation. Any fields that are left blank will not pull into the note in the patient's chart. Once the documentation is complete, click Save. Click Cancel to discard.
Once all applicable areas on the advanced progress note have been filled out, click Next.
***Please note that any fields not filled out on the advanced progress note will not pull into the next page.****

Select the following fields:
- Indicate whether the note is for the Patient or Partner by clicking the radio button next to the applicable selection.
- Click the box next to Critical Comments if it is a critical note. When this is selected, the note will be in italics.
- Click the box next to Confidential Entry if applicable. Confidential notes can be viewed only by the user entering the note as well as Practitioners and Clinical Admin users. Confidential notes cannot be printed along with other progress notes.
The body of the progress note can be edited by clicking into the text field and making any desired changes. Once the progress note is complete, click Save. Click Cancel to discard the note.

The author of the note will be prompted to enter a his or her digital signature and then click Ok.
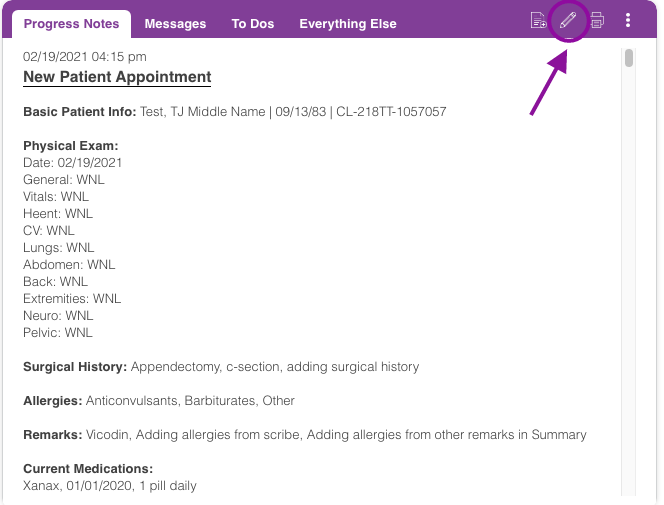
The progress note will now live under the Progress Notes tab in the patient chart. The note may be edited by the author up to 72 hours after it is written by clicking on the Pencil icon.
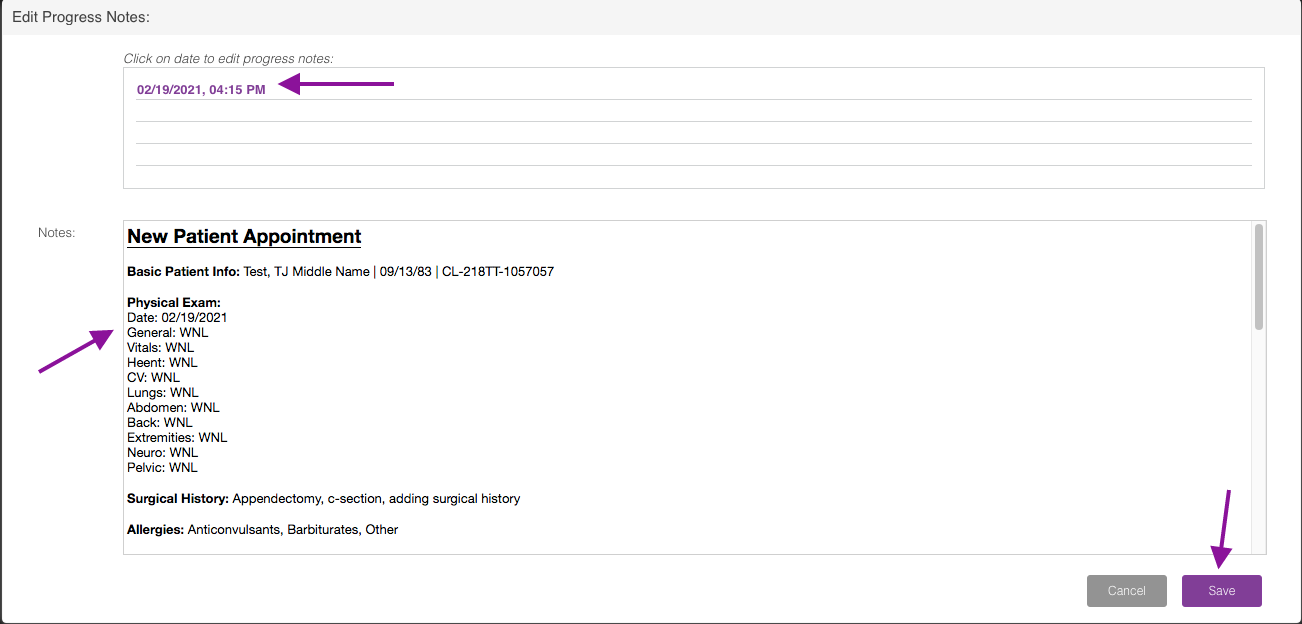
Click on the date of the progress note to be edited and make any changes to the Notes field below. Click Save to save the changes made to the note. Click Cancel to discard the changes. After the 72 hour window, the note will lock and the author will no longer have the ability to edit.
***Please note that Advanced Progress Notes are only available to Practitioners, Clinic Staff and Lab Staff users. All other users will use the Basic Progress Notes. Please read the manual How To Write Basic Progress Notes for detailed instructions.***
Tristan Newman
Comments