The ER/ET tab supports all of your egg retrieval documentation. In this Lesson we will review Preop Orders and H&P Note.
Before You Start: Setup Your Standard Preop/Postop Orders Template
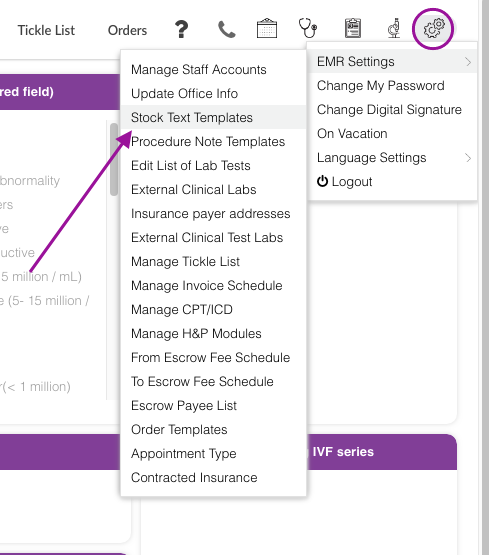
Go the the Gear icon on the Quick Picks bar. Select EMR Settings and Stock Text Templates to view the templates for preop and postop orders.
You may edit these standard orders anytime you wish by entering the the text inside the appropriate box. Click the x icon.
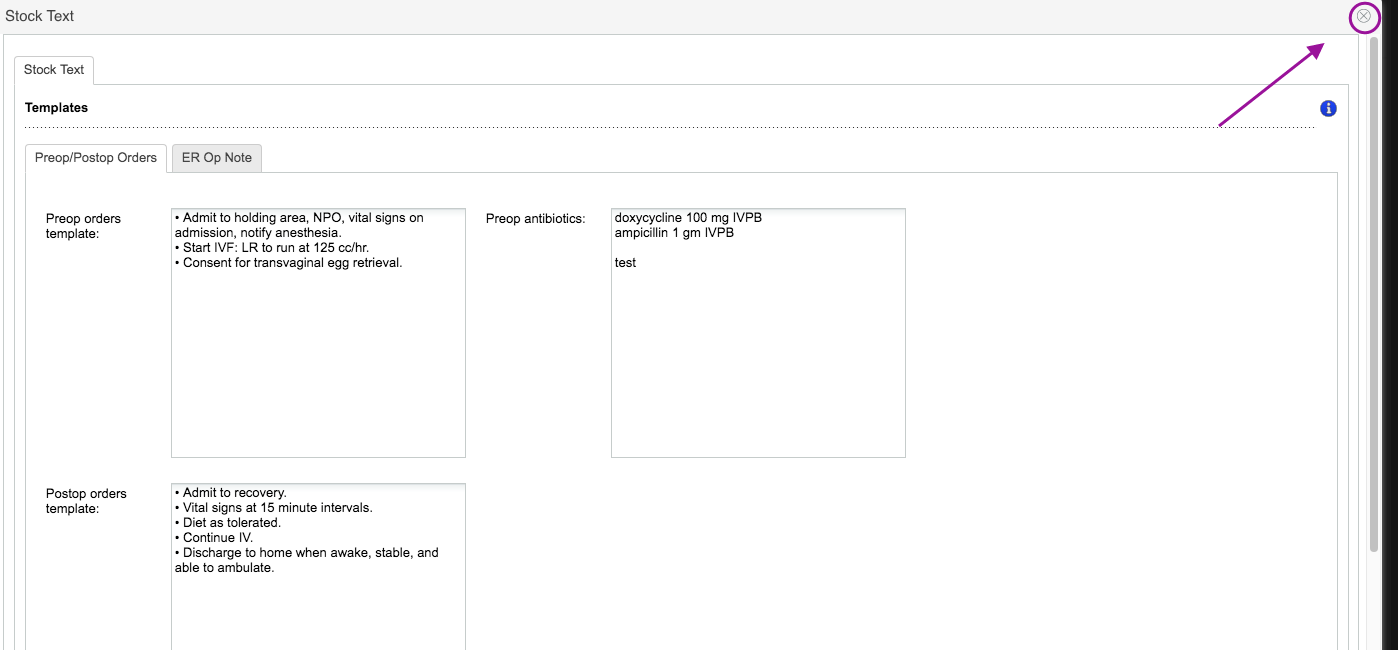
Preop/Postop Orders
Basic preop orders are inserted from the Stock Text template (above) into your orders.
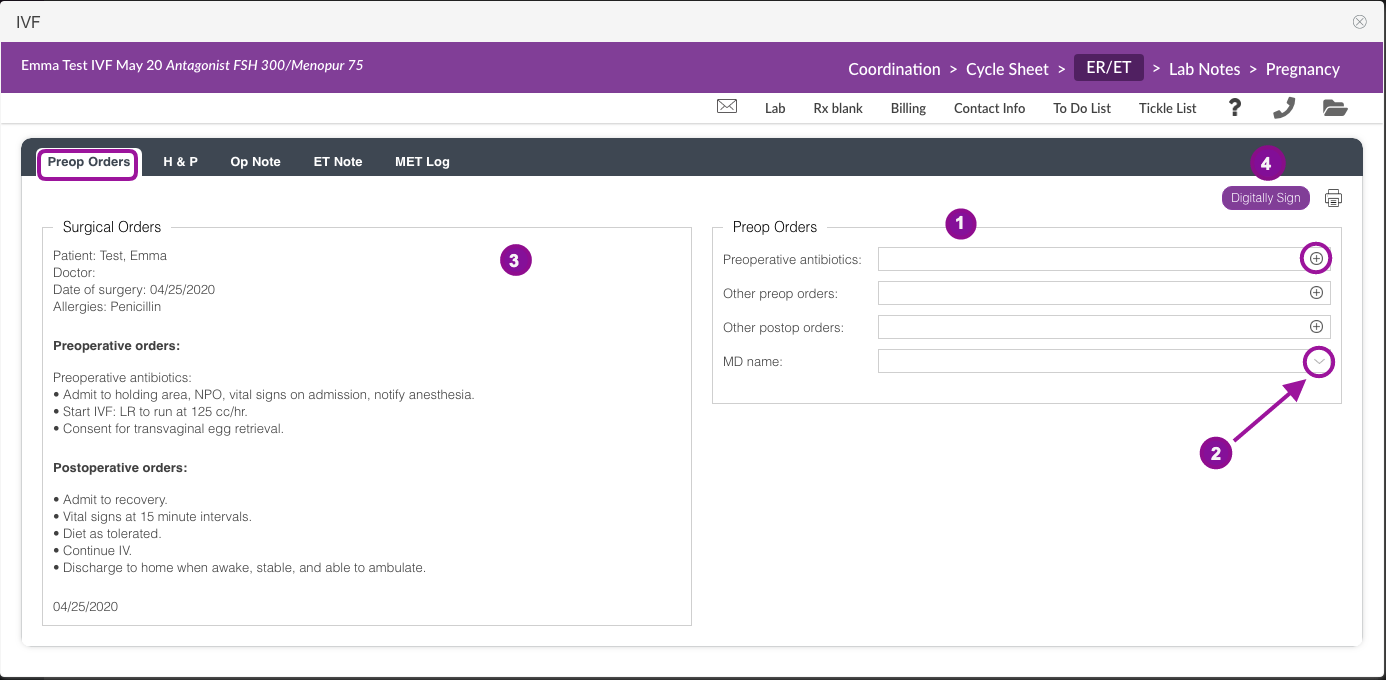
From the ER/ET under Pre-op Orders tab within a patient's treatment cycle, follow the steps below:
1. Use the fields on the right side of the page to add preoperative antibiotics, other pre-op & post-op orders. Clicking on the + sign inside the field will open your stock text feature within artisan.
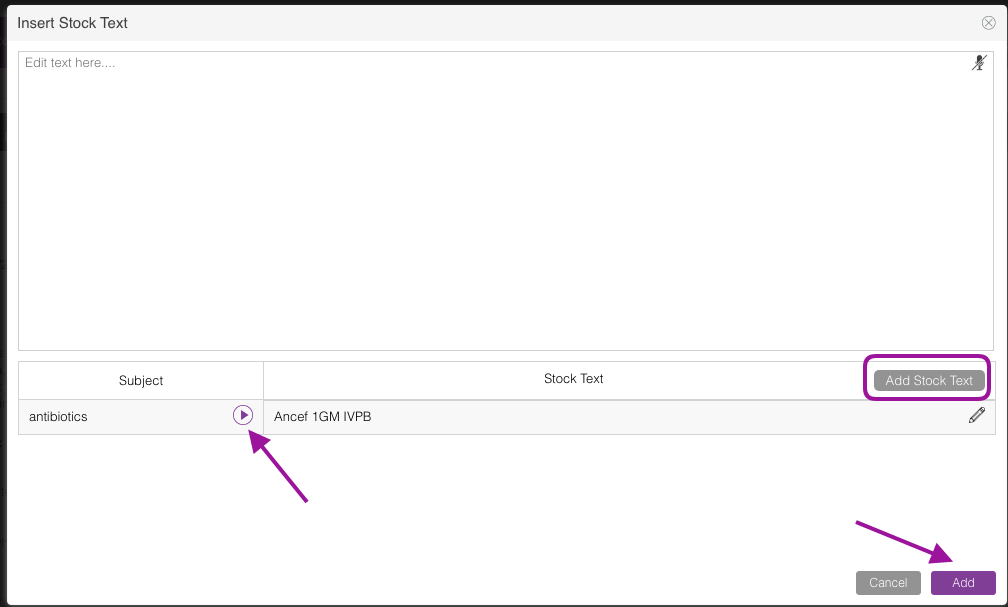
Select the stock text that you want to insert on the appropriate field then click the add button. To create a stock text click the Add Stock text button.

2. Click the drop-down icon select MD name.
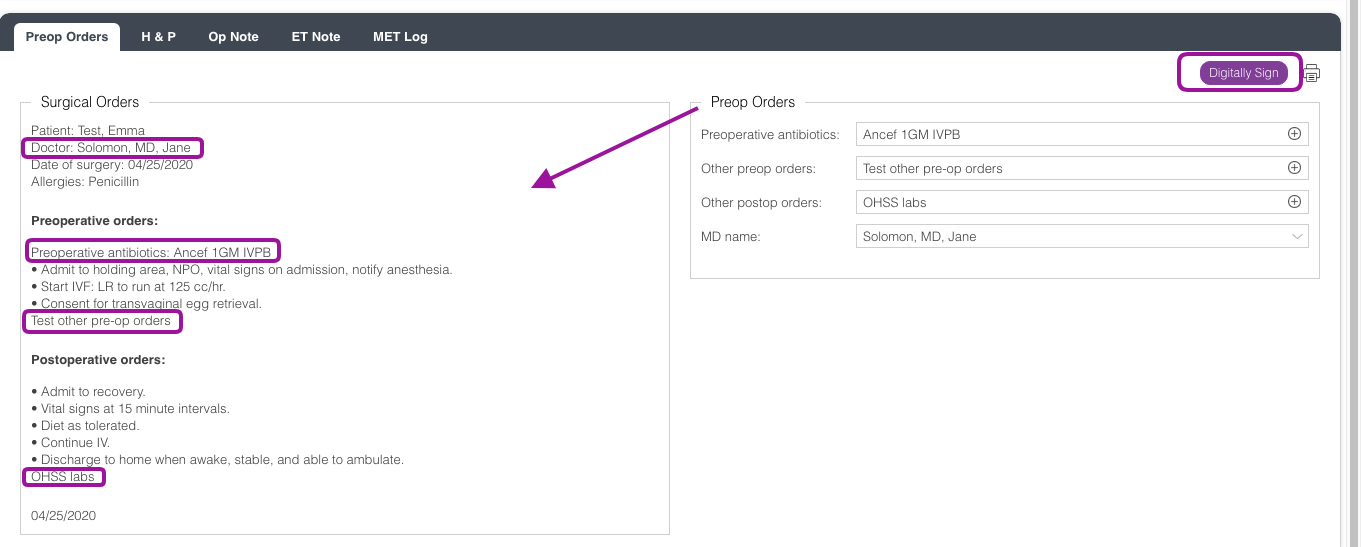
3. The documentation added to the right will populate to the left-hand side under Surgical Orders. Click the Digitally Signed button.
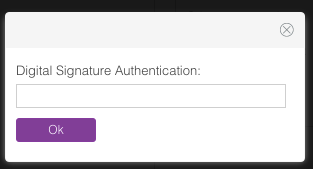
4. Enter your Digital Signature.

Once the note has been digitally signed. The author has 72 hours to edit the surgical orders note.
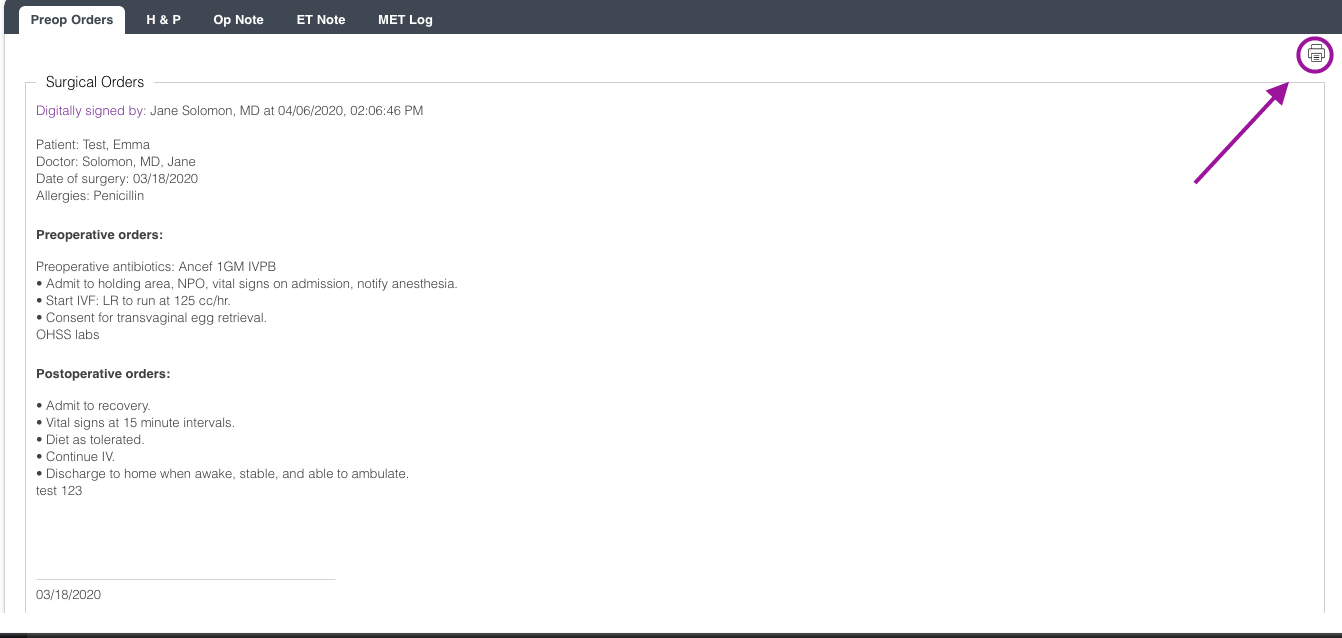
After the 72 hours window, you are unable to edit or make any changes in the pre-op orders and it will only allow you to print the order as needed by clicking the printer icon.
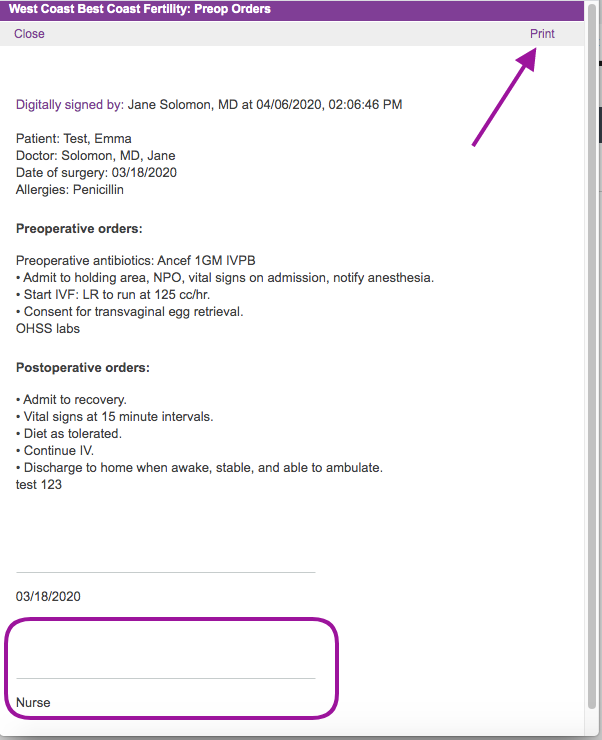
The Nurse field will populate once you click the printer icon. This applies to a practice that requires a surgery nurse to sign the order on the day of the surgery. Click Print to proceed then click close.
History and Physical Form
The H&P tab is where you will be documenting the pre-operative history and physical update before the patient's IVF procedure if it applies to your practice.
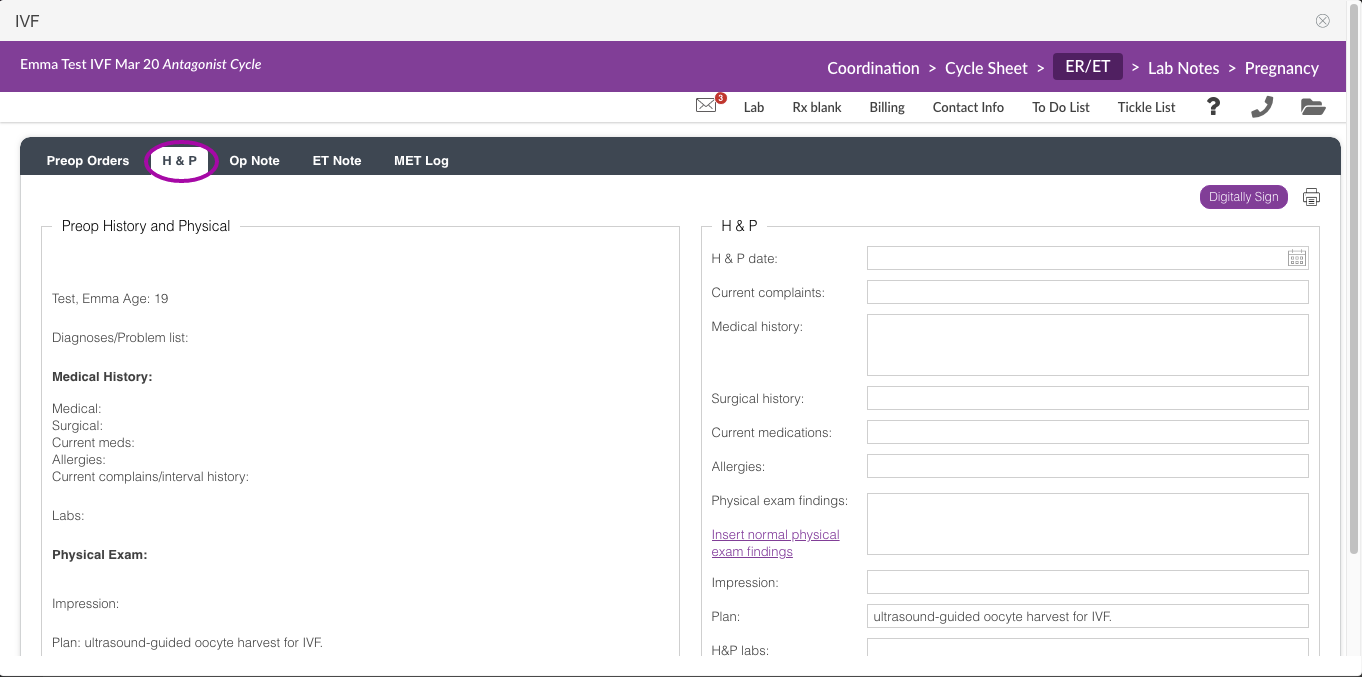
Fill in the fields to the right-hand section of the screen to record your pre-op history and physical notes. The notes will auto-populate to the left-hand corner of the screen.
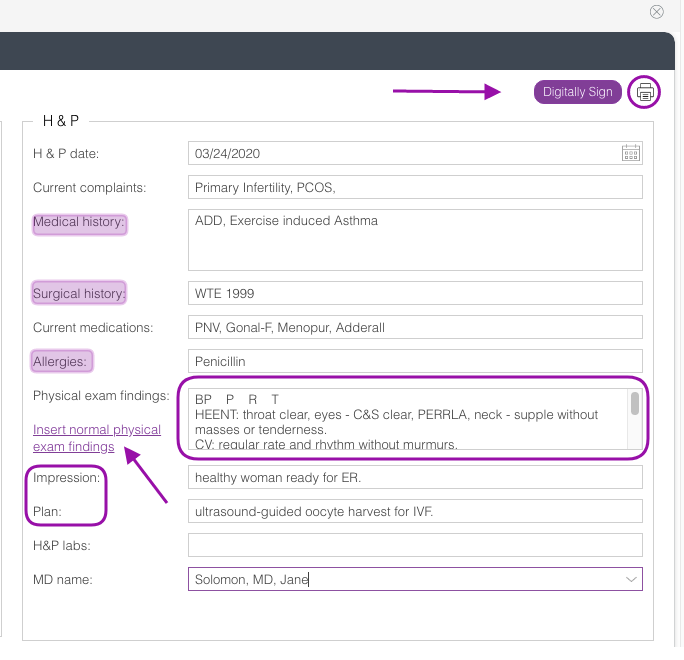
The Medical, Surgical History, and Allergies fields are pulling from the Patient H&P form that has been completed during the New Patient Consultation. Edit or update the information as needed.
Physical exam findings can be manually entered or click on Insert normal physical exam findings hyperlink to generate an editable Normal Physical Exam note.
Impression and Plan are coded within the H&P note. Click inside the box to edit or update the field.
Once everything has been filled out, click Digitally Sign or the printer icon to print the H&P notes.
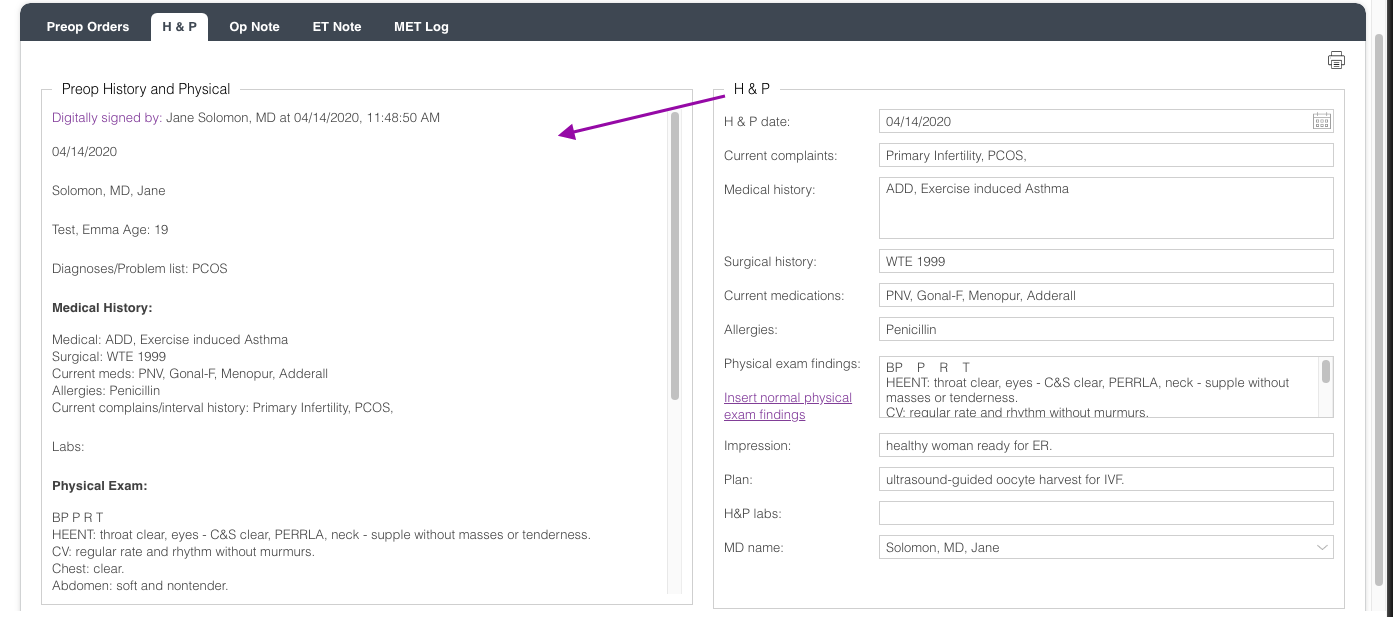
H&P notes will appear on the left-hand side of the screen with your digital signature and time-stamped. You have 72 hours to edit the information by manually entering the text on the appropriate fields to the right-hand area.
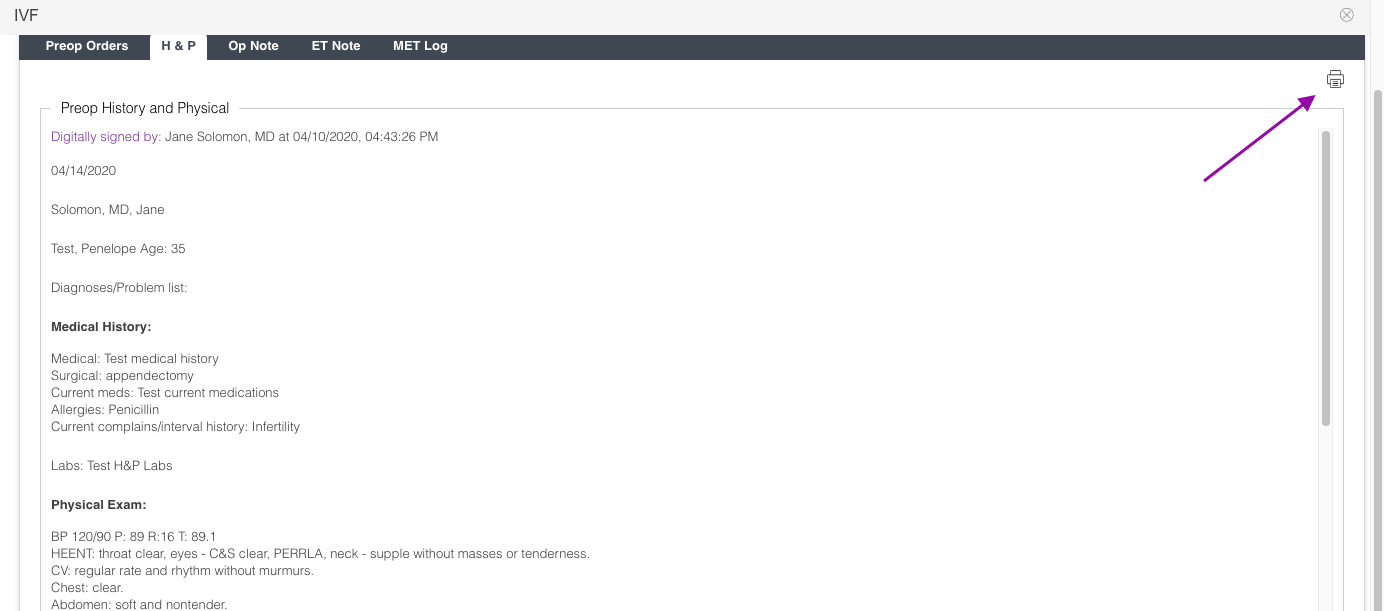
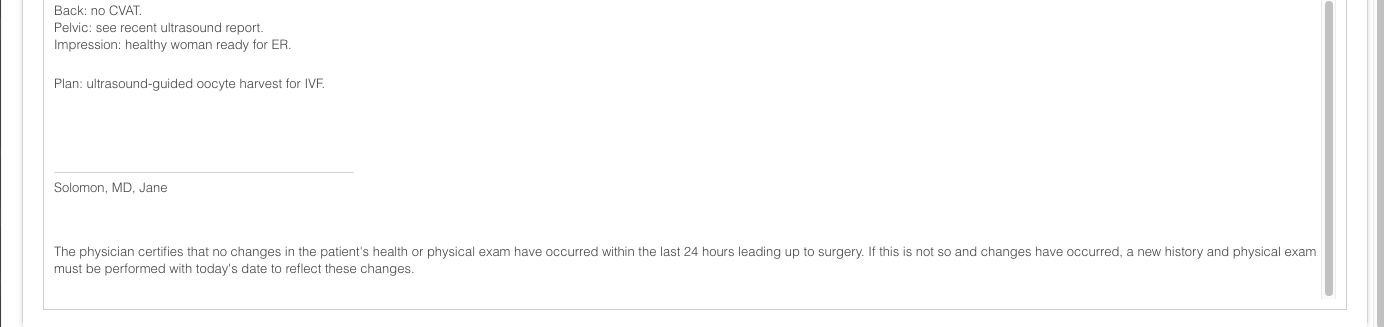
The form will be converted to a hardcoded note, and you will only be able to print as needed.
**All manuals are compliant with HIPPA regulations. No patient information has been released. All screenshots above were taken from a test clinic with fake patient information.
Artisan Support
Comments