Artisan stores your center's standard operative report for the egg retrieval as a template. These orders are inserted into the Operative Report when a cycle is created. You may add any unique notes for the case.
Before You Start: Setup Your Standard Op Note Template
For setup, click here.
Op Note
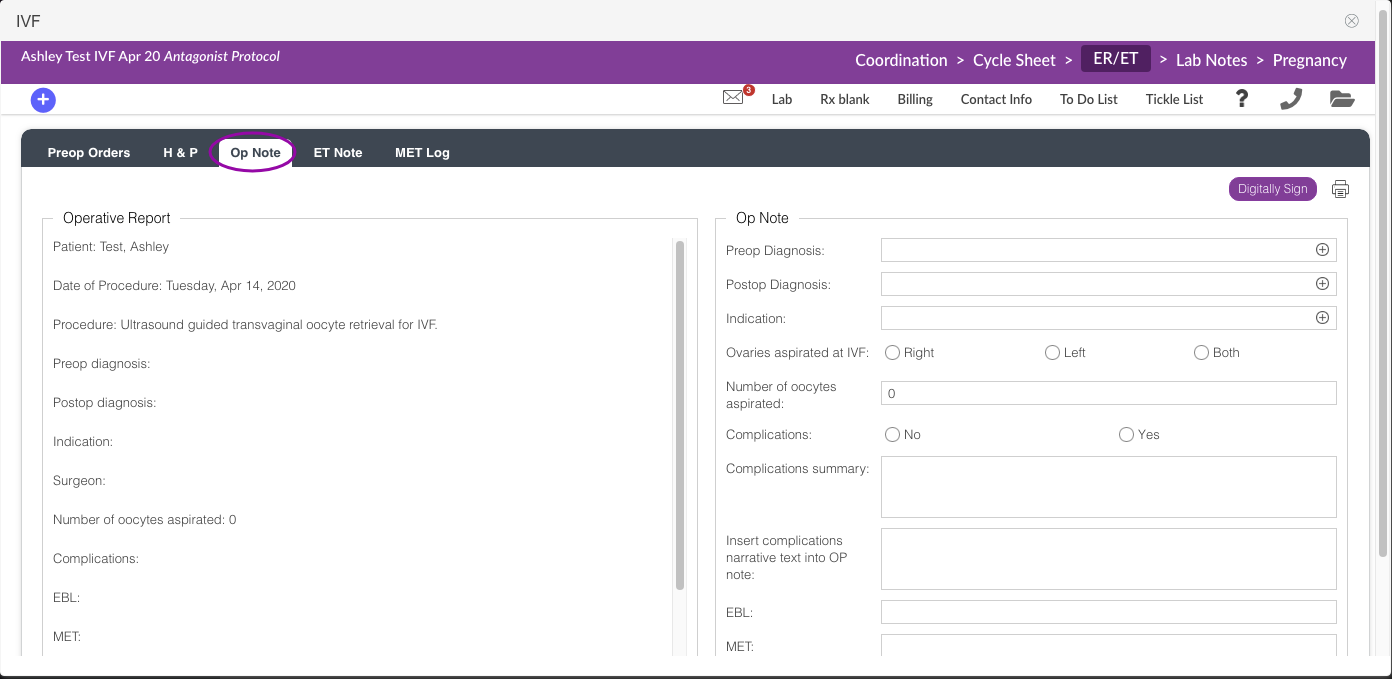
From within the ER/ET tab, click on the Op Note tab.
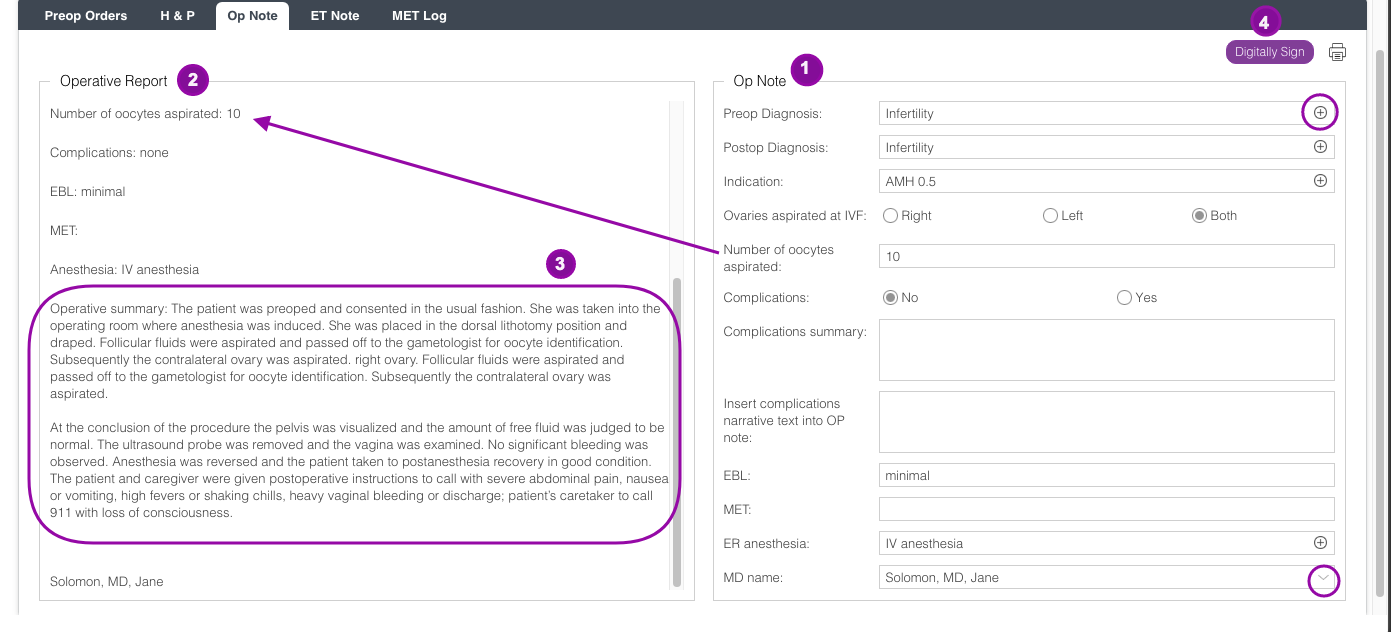
1. Fill out the applicable fields (post-op diagnosis, post-op diagnosis, indication, etc.) Click on the + icon to use your stock text feature.
If there are any complications, select Yes in the Complications radio box. Enter a brief description of the complication in the Complications Summary field. This text is inserted into the operative report. Enter a full description of the events in the Insert complications narrative text into the Op note field. This text will be merged into the operative summary. Click the dropdown icon to select the MD name.
2. All information that has been added to the right-hand side will populate to the left side and will create your operative report.
3. Operative Summary is pulling from your standard operative template.
4. Click the Digitally Sign button.
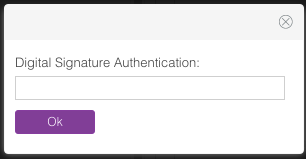
Enter your Digital Signature then hit Ok.

If it is your practice to perform a mock embryo transfer at egg retrieval, record the details in the MET field. The contents of this field will be automatically entered into the patient's Mock Embryo Transfer Log.
You have now created your Operative Report. You have 72 hours to edit the information after that you are unable to make any changes. If you wish to print the Op Note, click the printer icon.
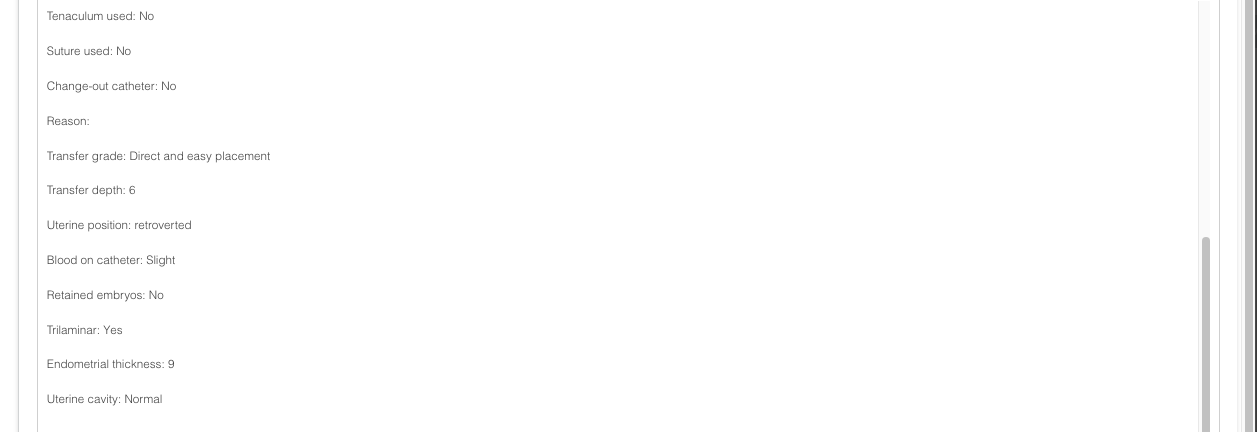
Embryo Transfer Note
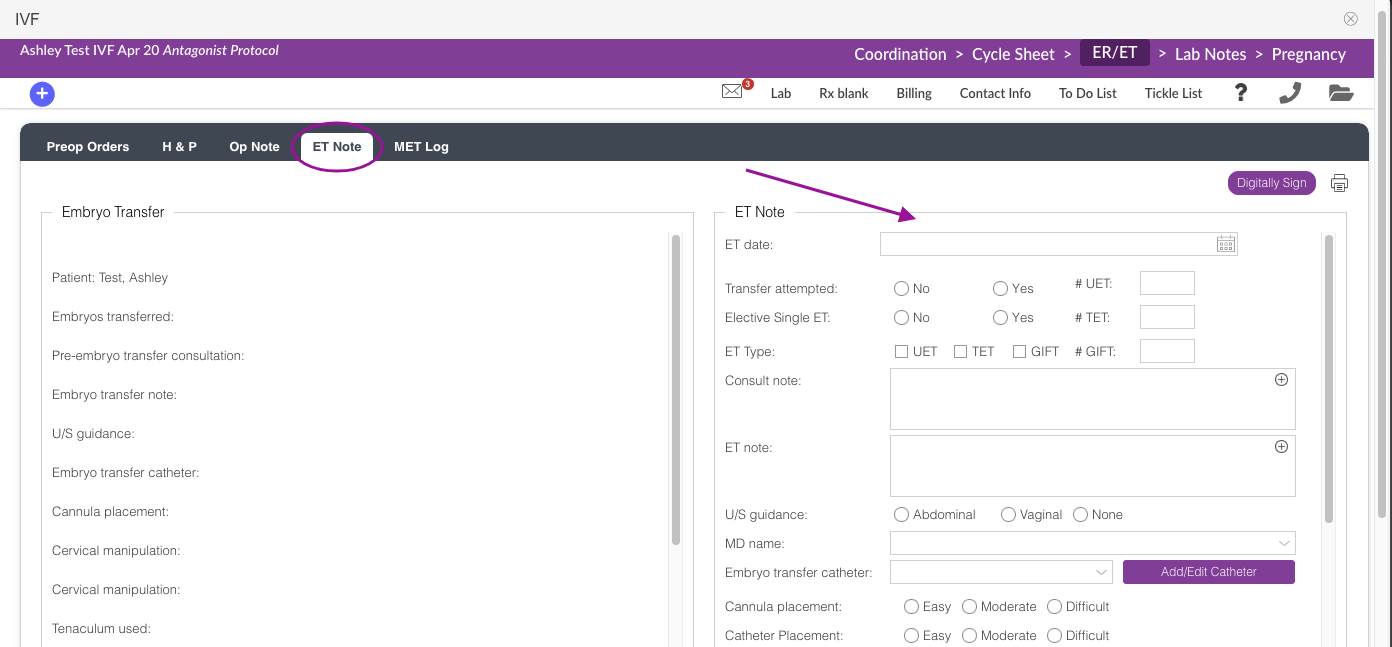
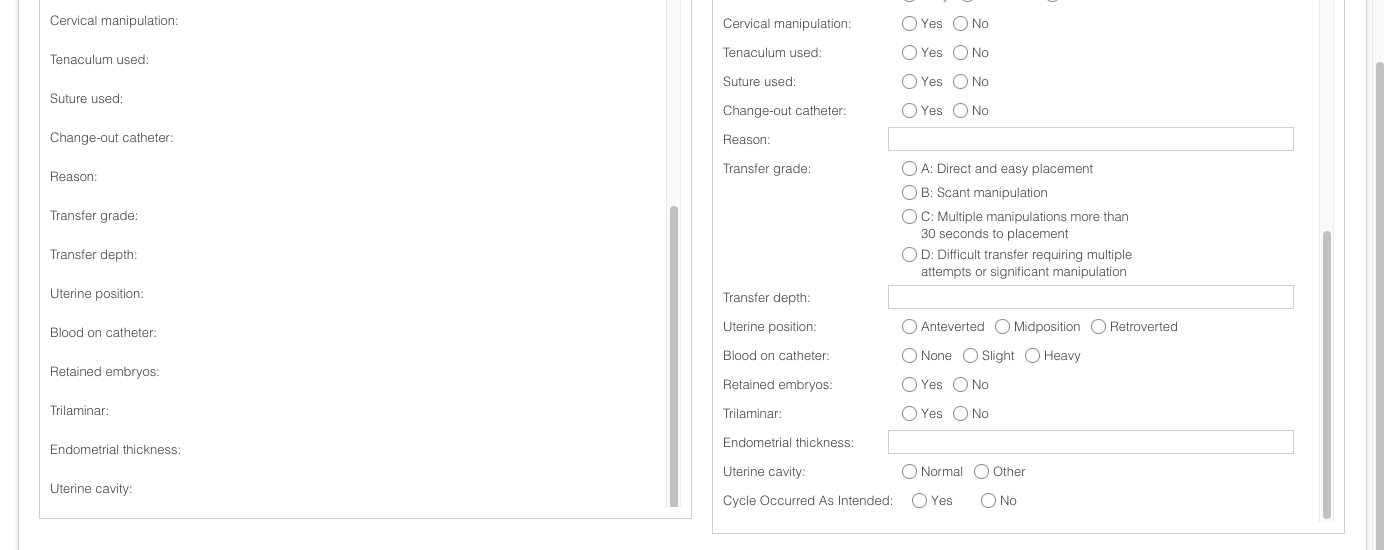
Begin by filling in the information on the right hand side and it will auto-fill the fields on the left to create a Transfer Report. Fill in those you usually use in your practice and leave the unused fields blank.

Click the + sign icon to use the stock text feature to enter your Consult Note and ET note if applicable.
If you wish to add a list of catheter to be available on the Embryo transfer catheter field, click Add/Edit Catheter.
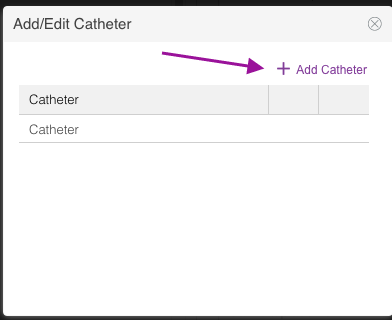
Click Add Catheter.
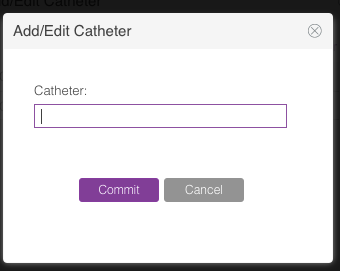
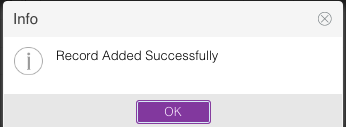
Enter the name of the Catheter, click Commit. Then, Click Ok.
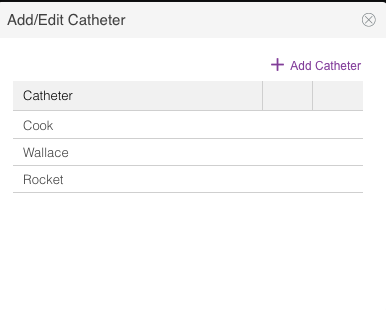
Click the x icon to close out of this window.
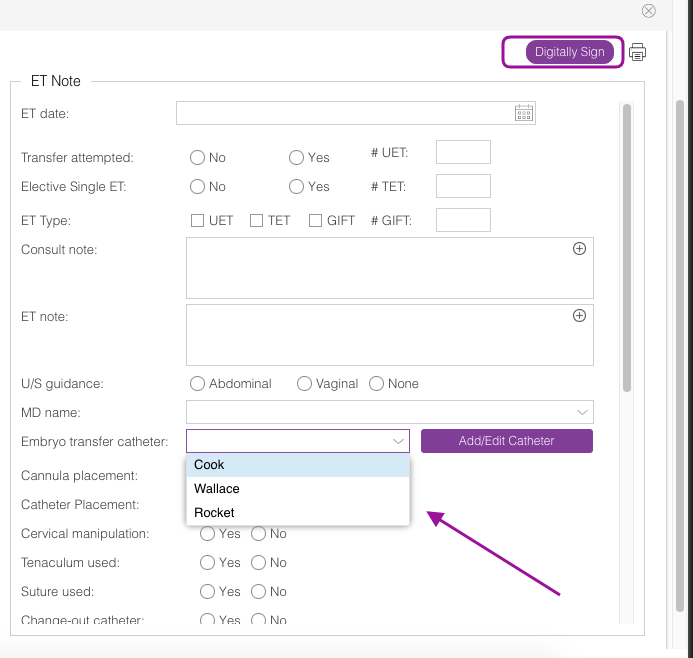
You will now have a list of catheter selection to choose from the drop down. Continue filling out the appropriate fields. Then click the Digitally Sign button to enter your Digital signature. You have 72 hours to edit the note.
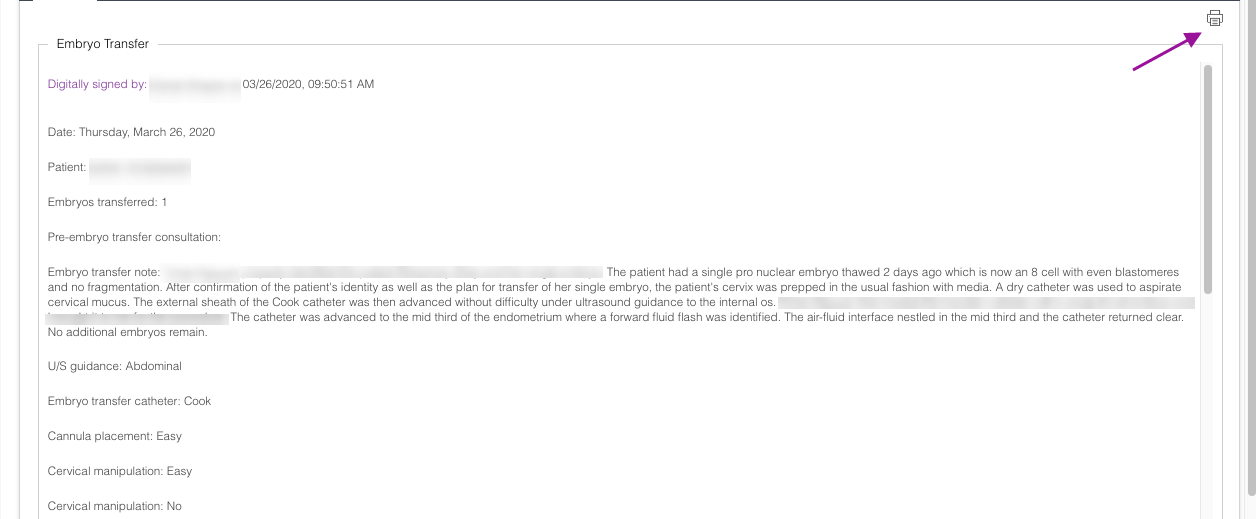
If you wish to print the ET note, click the printer icon.
Artisan Support
Comments