The Cryo Storage Portal allows users to pull the current cryo inventory for a patient and/or partner into an Advanced Progress Note and the Lab Referral. The user can then select what is to be thawed for the patient’s next cycle. This improves compliance and increases safety in managing cryopreserved specimens by combining these tools into one unified system. All frozen specimens including embryos, oocytes and semen will all pull into the cryo storage portal.
Setup in the Advanced Progress Note
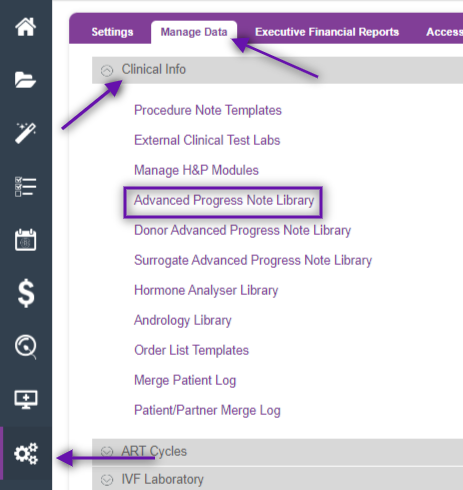
Go to Administration>Manage Data>Clinical Info>Advanced Progress Note Library.
Select the checkbox next to the Cryo Storage Portal element (Element ID 186). Click the Save icon in the bottom right corner.

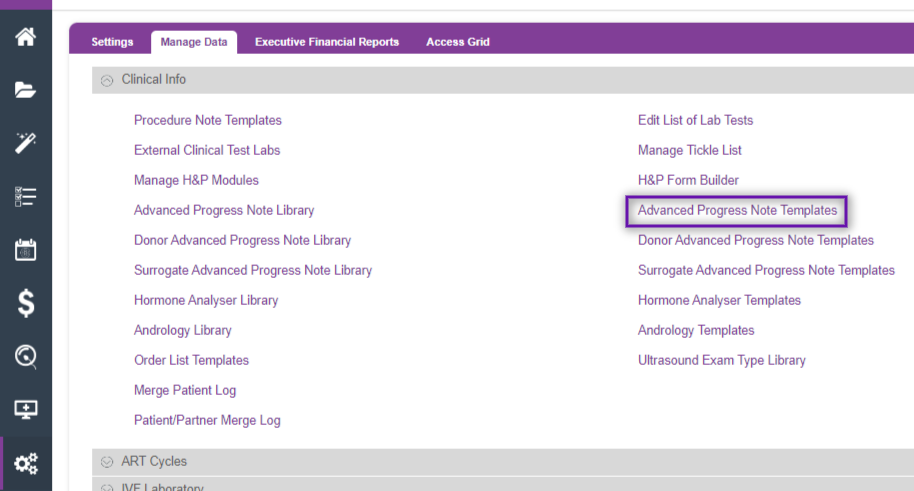
Next, select Advanced Progress Note Templates.
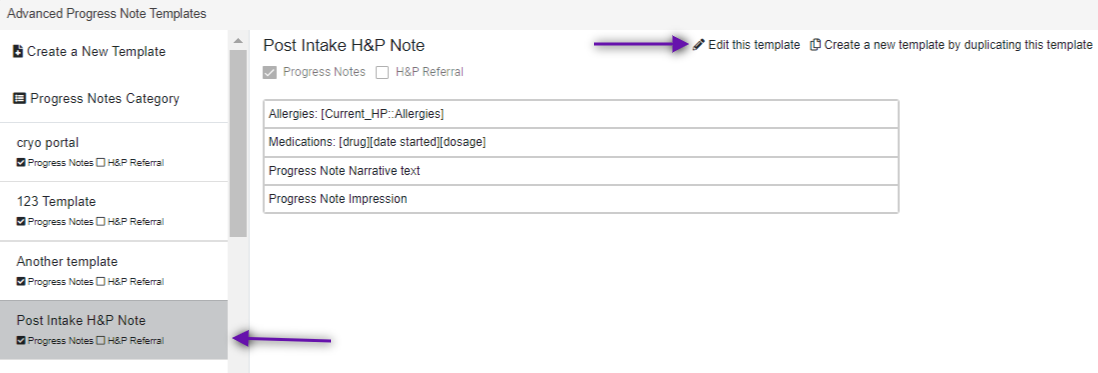
You can either create a new template or edit an existing template. In the below example, we are selecting an existing template and clicking on Edit this template.
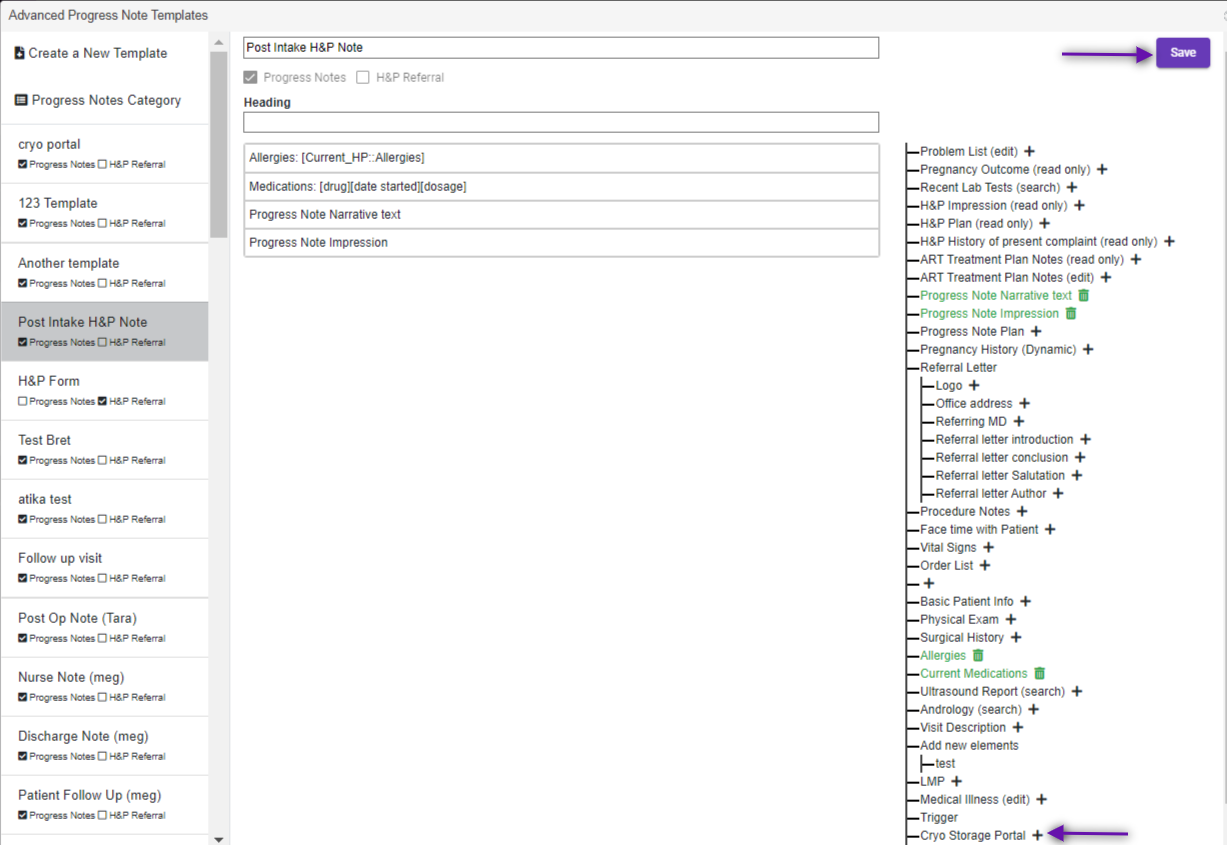
At the bottom of the elements list on the right, click the + next to Cryo Storage Portal to add this feature to the Advanced Progress Note template, then select Save.
Using the Cryo Storage Portal in the Advanced Progress Note
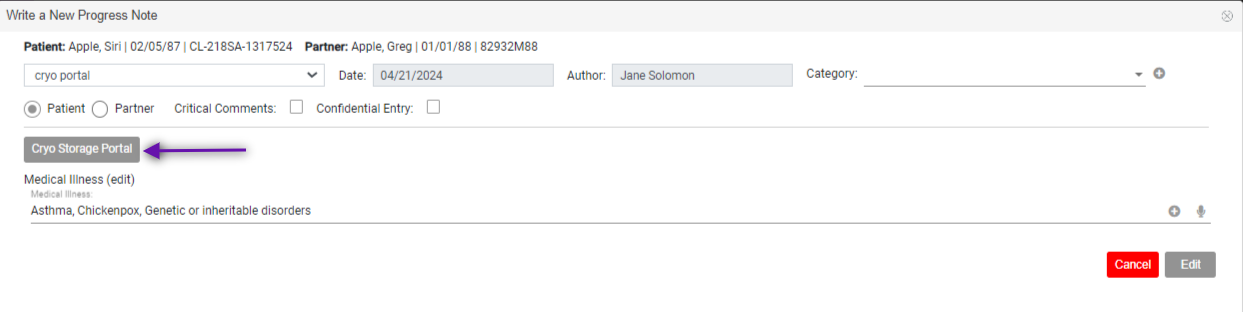
Within the Advanced Progress Note, select the desired template from the dropdown. Click on the Cryo Storage Portal button within the note.
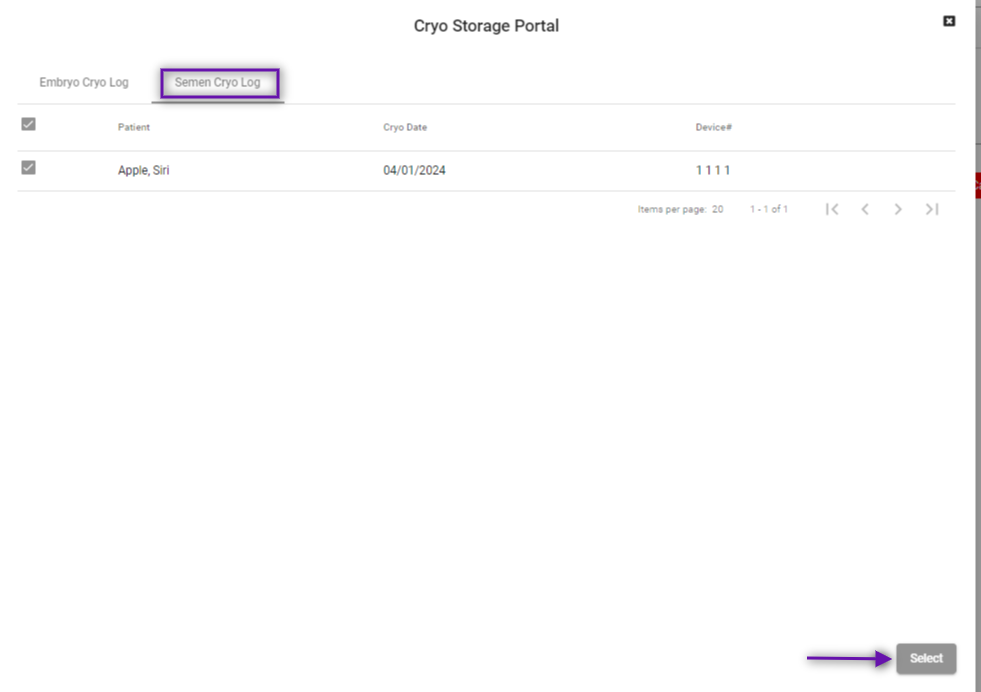
Click on the Semen Cryo Log tab to view any semen that the partner and/or partner currently have frozen. Click the checkbox to select samples that will be used in the patient’s next cycle. Click the checkbox again to deselect any samples. Click Select at the bottom right to save your selections.
The selected inventory will be displayed on the next page. Click Cryo Storage Portal again to edit your selections. Click Edit and then Save in the bottom right to save the progress note.
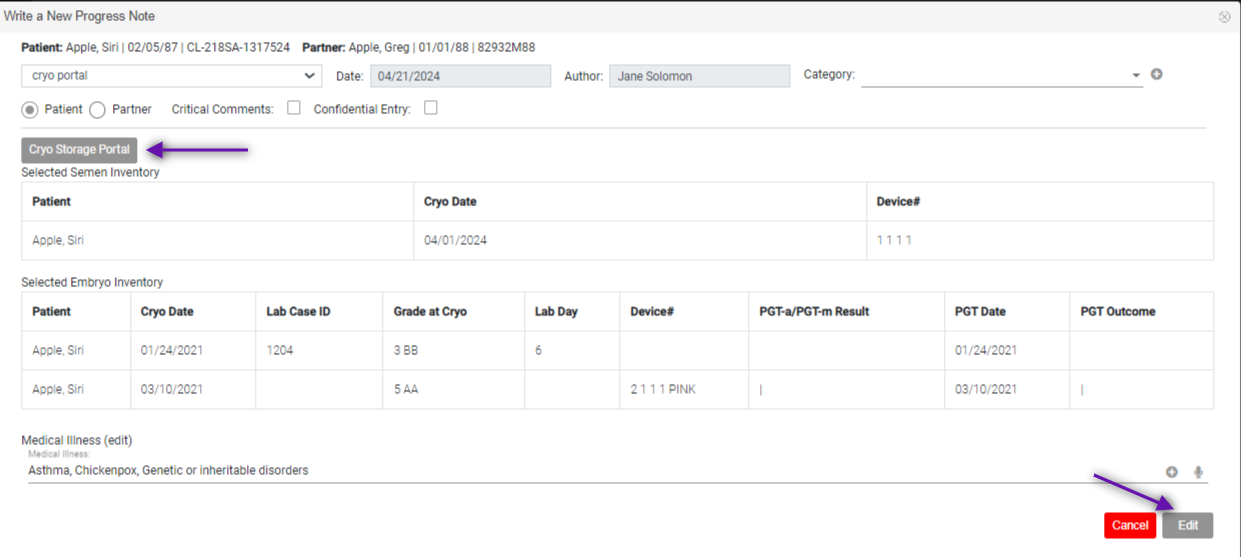
The selected inventory will be displayed in the Advanced Progress note.
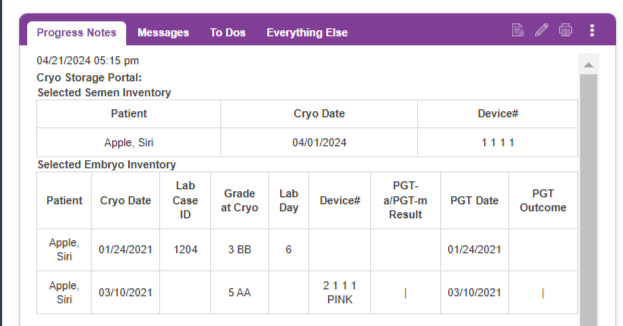
Please note: Selecting the cryo inventory in the Advanced Progress Note will not thaw any samples in the Cryo Log, only allow the user to display the selected samples to be used in the patient’s next cycle.
Setup in the Lab Referral
Go to Administration>Manage Data>ART Cycles>Lab Referral Library.

Select the checkbox next to the Cryo Storage Portal element. Click the Save icon in the bottom right corner.

Next, select Lab Referral Template.

Select Edit This Template.
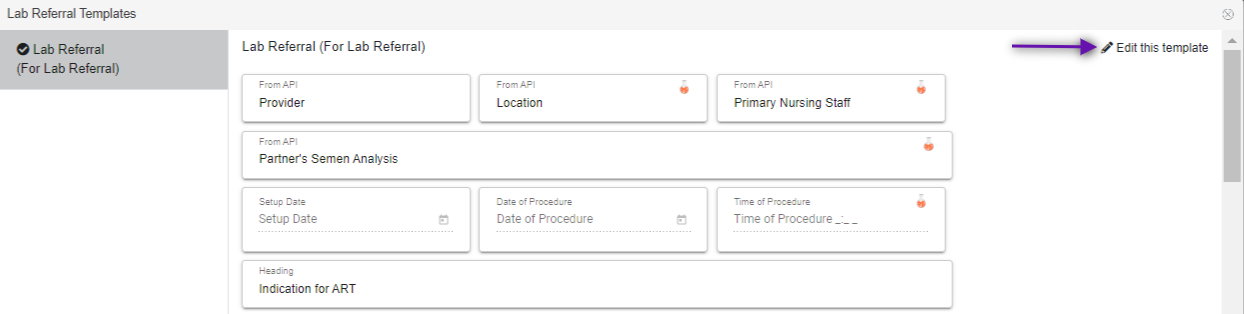
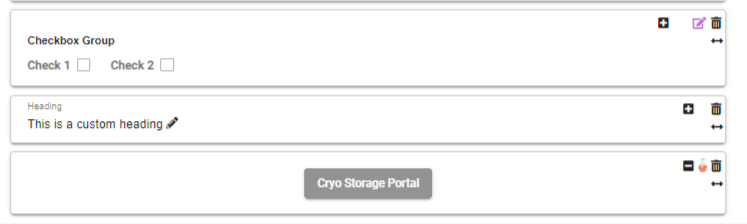
The Cryo Storage Portal will be enabled by default at the bottom of the template. Click and drag the element to move it where desired on the lab referral template. Select Save at the top right of the window to save your changes.
Using the Cryo Storage Portal in the Lab Referral
Within the ART cycle, navigate to the Lab Referral tab in Coordination.
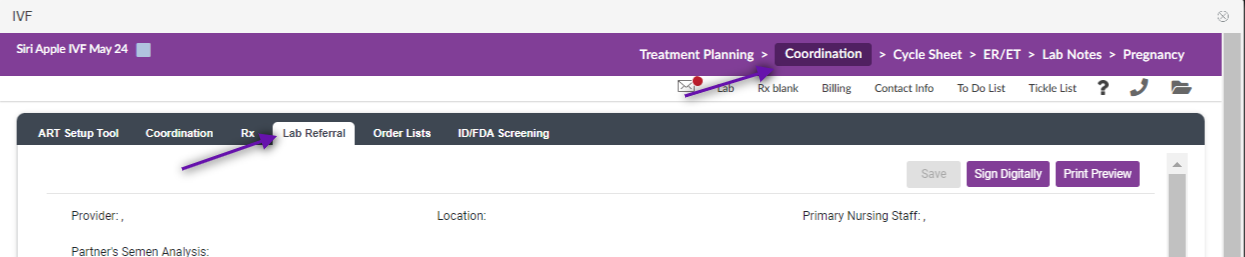
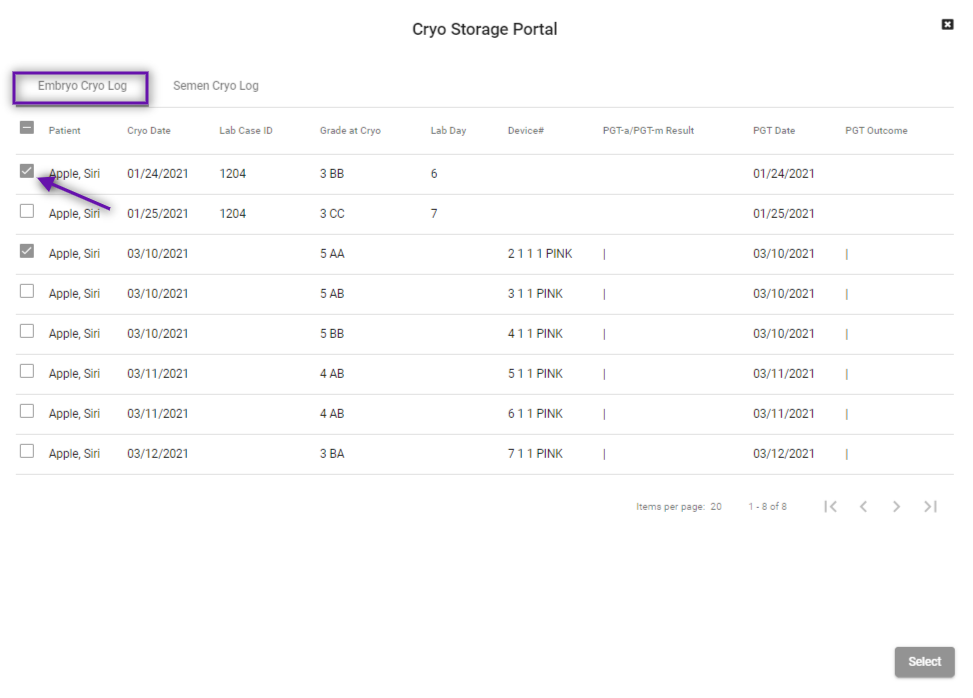
Click on the Cryo Storage Portal button within the Lab Referral to open the patients currently frozen samples from the Embryo Cryo Log and the Semen Cryo Log. The Cryo Storage Portal will work exactly the same in the Lab Referral as it does in the Advanced Progress Note. Select Save at the top right of the Lab Referral to save the selected inventory.

**All manuals are compliant with HIPPA regulations. No patient information has been released. All screenshots above were taken from a test clinic with fake patient information.
Tristan Newman
Comments