This manual provides steps on the process of bringing fresh Donor Eggs into Lab Notes. This will focus on how to "route or allocate" donor eggs through the Egg Donor Bank to their final disposition, to an intended parent or for storage in the Egg Donor Bank for later use by intended parents.

Donor Banking Egg Retrieval Lab Notes
Lab Notes for Donor Banking consists of two tabs -
1. Egg Retrieval: To document the retrieval, grade and mark the disposition of the eggs.
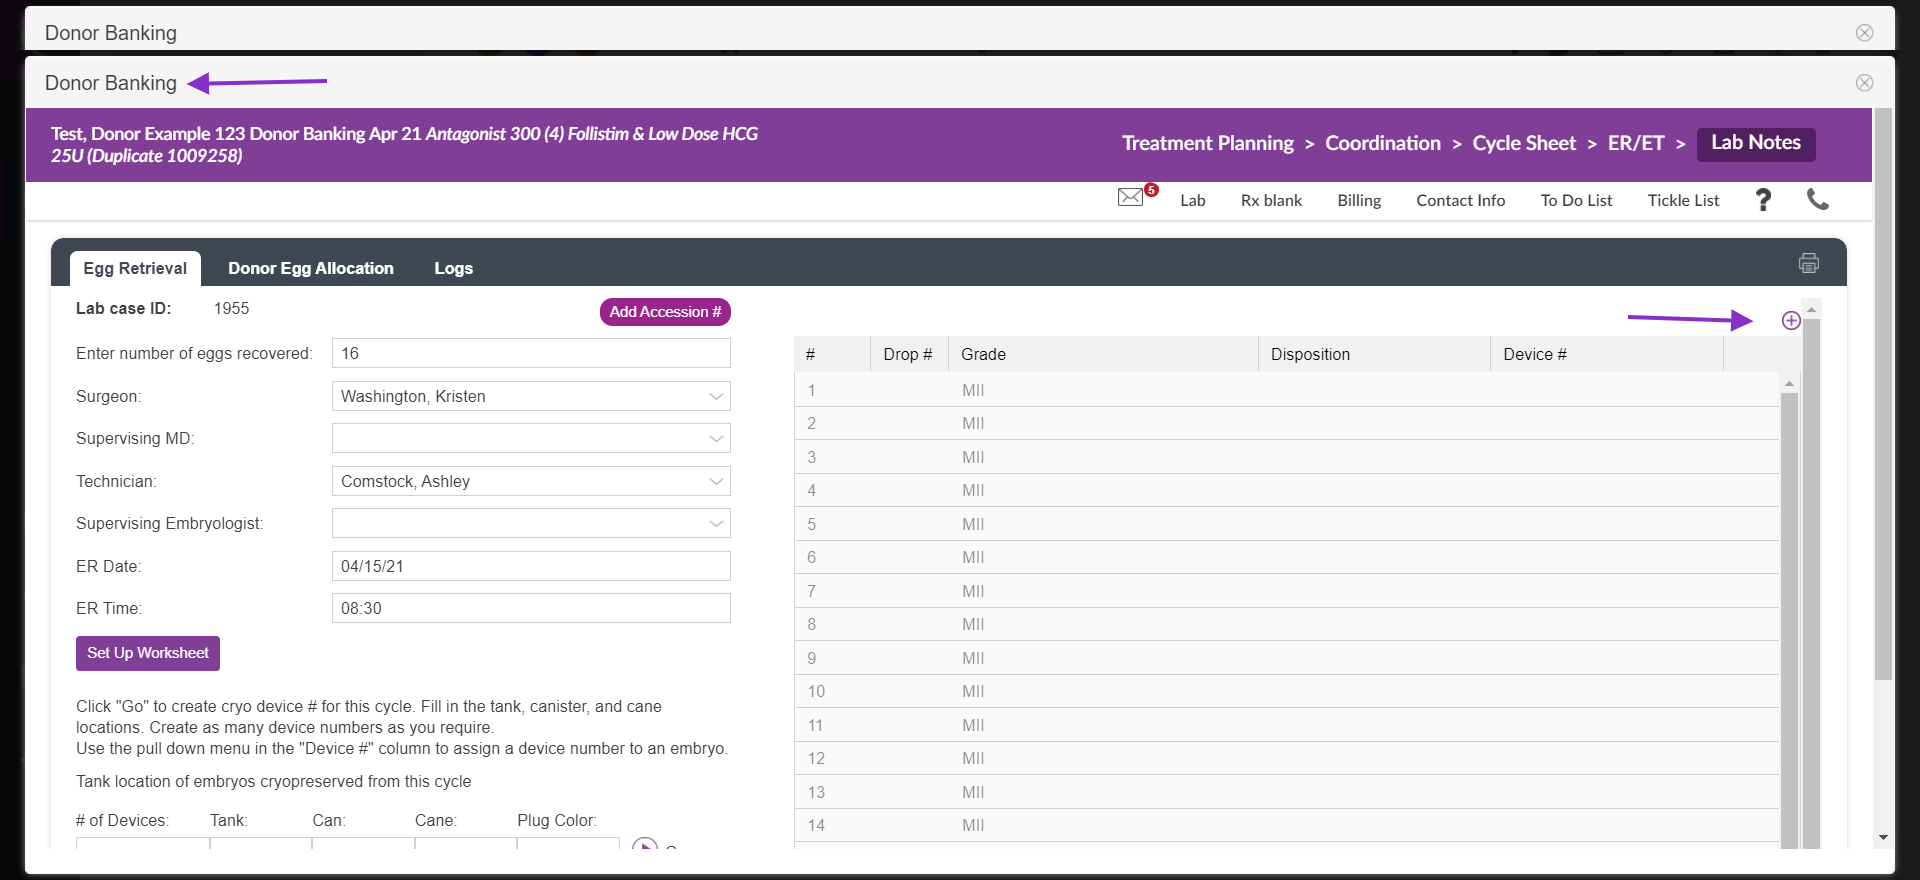
To Set up the Worksheet, complete all of the fields indicated by the purple box above and then click Set up Worksheet.
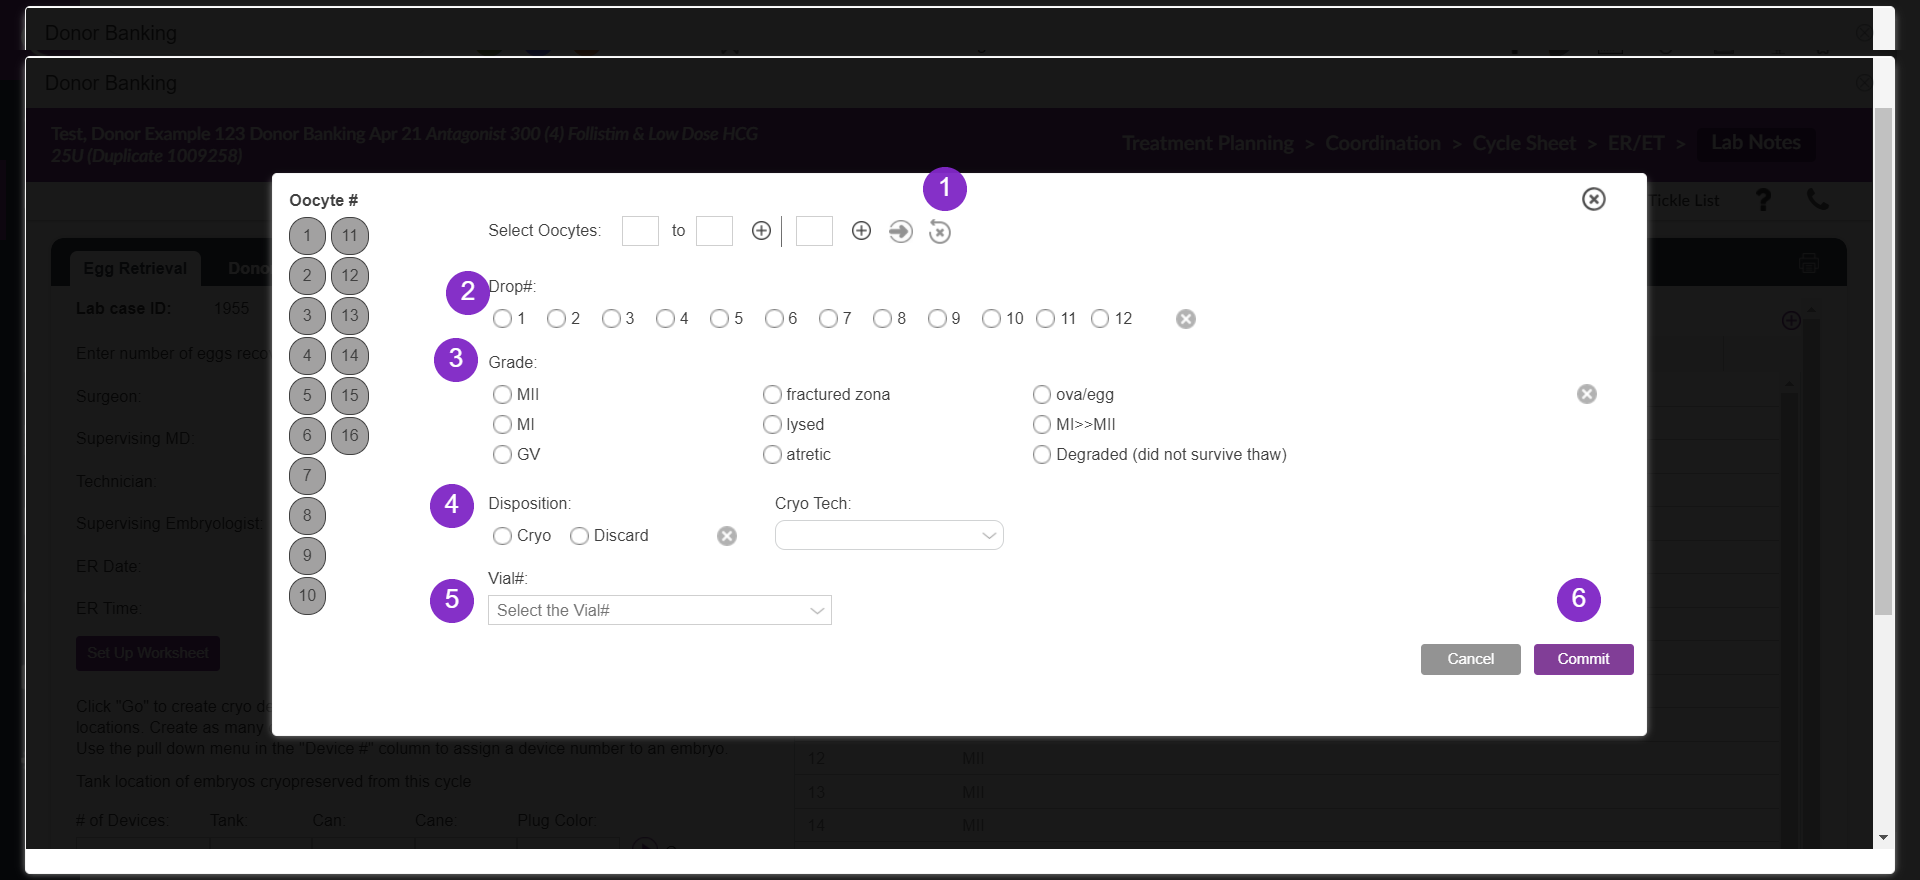
Bulk grading is most commonly used for donor eggs, so begin by:
-
Selecting the range of oocytes and click the arrow to begin
-
If using Drop #, select here
-
Grade
-
If cryopreserving or discarding the oocytes, select the disposition
-
If applicable select the vial# from the dropdown
-
Click "Commit".

In this example, five of the 10 oocytes are marked for cryopreservation to be allocated to the Donor Egg Bank. The other 5 will be given fresh to a patient.

Straws/vials must be created to cryopreserve the oocytes marked for cryopreservation. To do so, use the tool in the bottom left corner to create Cryo vial numbers.:
1. Click the Go arrow icon to create a cryovial number:
2. Edit and fill in the Device label, Tank, Can,Cane label and Device Color for each.

Once all of the fields are filled in then you can assign the straw/vial # to the samples by clicking into the "Vial" field.

Select the Straw/Vial number to assign to each oocyte marked for cryo and click Commit.

Once all samples have been assigned, the Egg Retrieval tab is complete.
In order to support the practice of donor egg banking, we have modified our records to create an independent cycle for the egg donor. By " routing" all donor eggs through a record-keeping device we will call this the "Donor Egg Bank".
Donor eggs are then allocated to immediate use by patients in fresh cycles, cryopreserved for future use by a designated intended parent, or added to the center's list of banked oocytes for sale at a future time.
The next steps demonstrate how donor eggs are allocated via the donor bank to their eventual owner.
Donor Banking Donor Egg Allocation Lab Notes

We will divide the eggs from this Donor Egg Banking cycle into three groups:
-
Bank Cryopreserved Donor Eggs in the Egg Bank for future use by a recipient
-
Allocate Fresh Donor Eggs to an intended parent
-
Allocate Cryopreserved Donor Eggs to an intended parent
Click "Donor Egg Allocation" to begin the process of allocating eggs to patients and the Donor Egg Bank.
Allocate Cryopreserved Donor Eggs for Oocyte Banking

-
Select the eggs you would like to allocate.
-
Click in the box under Allocation to assign the egg to a patient or the Donor Egg Bank.

In this example, we are freezing 5 of the 10 eggs for the Donor Egg Bank. The other 5 samples will go fresh to a patient. Select the 5 in the column on the left, click in the allocation column and select Oocyte Bank and Commit to save.

The eggs "greyed out" are now cryopreserved and in the Donor Egg Bank.

The oocytes are displayed as allocated to the Oocyte Bank in the Donor Egg Banking cryolog. These may be allocated to intended parents from the Donor Egg Bank.
Allocate Fresh Donor Eggs to a Donor Oocyte Recipient Cycle

Select the eggs to allocate fresh to the patient on the left, click allocation, select Fresh to Patient and then select commit.

Follow the prompts on the screen:
-
Select the patient the eggs are being allocated to.
-
Select the corresponding Donor Egg Recipient cycle for that patient.
-
Click Commit to Save.

You may allocate to multiple patients if you choose. Simply select the samples that will be given to each recipient.
If you select a patient who does not have a donor-recipient cycle you will not be able to allocate eggs fresh to the IP. The IP must have a cycle associated in order to receive the fresh allocation.


Please note: all donor eggs are represented in lab notes in italics as opposed to a normal font for a patient's eggs.
Lab Notes displays a history for Donor Eggs, providing the Donor's code name and number.
Allocate Cryopreserved Donor Eggs to an Intended Parent

Select the cryopreserved eggs in the column to the left and click in Allocation to allocate the eggs. Since these eggs have been cryopreserved, the options are to designate them to an intended parent or to add them to the oocyte bank.
Allocate these two eggs to the account of the patient that received the fresh eggs. Click Cryo to Patient and use the pull-down menu to select the patient's name.
Click Commit. Lab notes will then display that the oocytes have been allocated as cryopreserved to a patient.

The oocytes will be entered into the patient's cryolog in both her Donor Egg Recipient lab notes and in her main Cryolog.
**All manuals are compliant with HIPPA regulations. No patient information has been released. All screenshots above were taken from a test clinic with fake patient information.
Artisan Support
Comments