In Artisan, you are easily able to allocate an IP's eggs/embryos to a surrogacy recipient cycle. Within the surrogacy recipient cycle Lab Notes, you are able to manage embryo development (in a fresh transfer from donor egg) transfer a fresh embryo and thaw a frozen embryo for transfer to a GC.
There are three main surrogacy cycle variations.
1. Fresh transfer from the (IP) IVF cycle
2. Fresh transfer from a Donor egg cycle
3. FET of the IP frozen embryo
Fresh Embryo Transfer From the (IP) IVF Cycle to the Surrogacy Recipient cycle
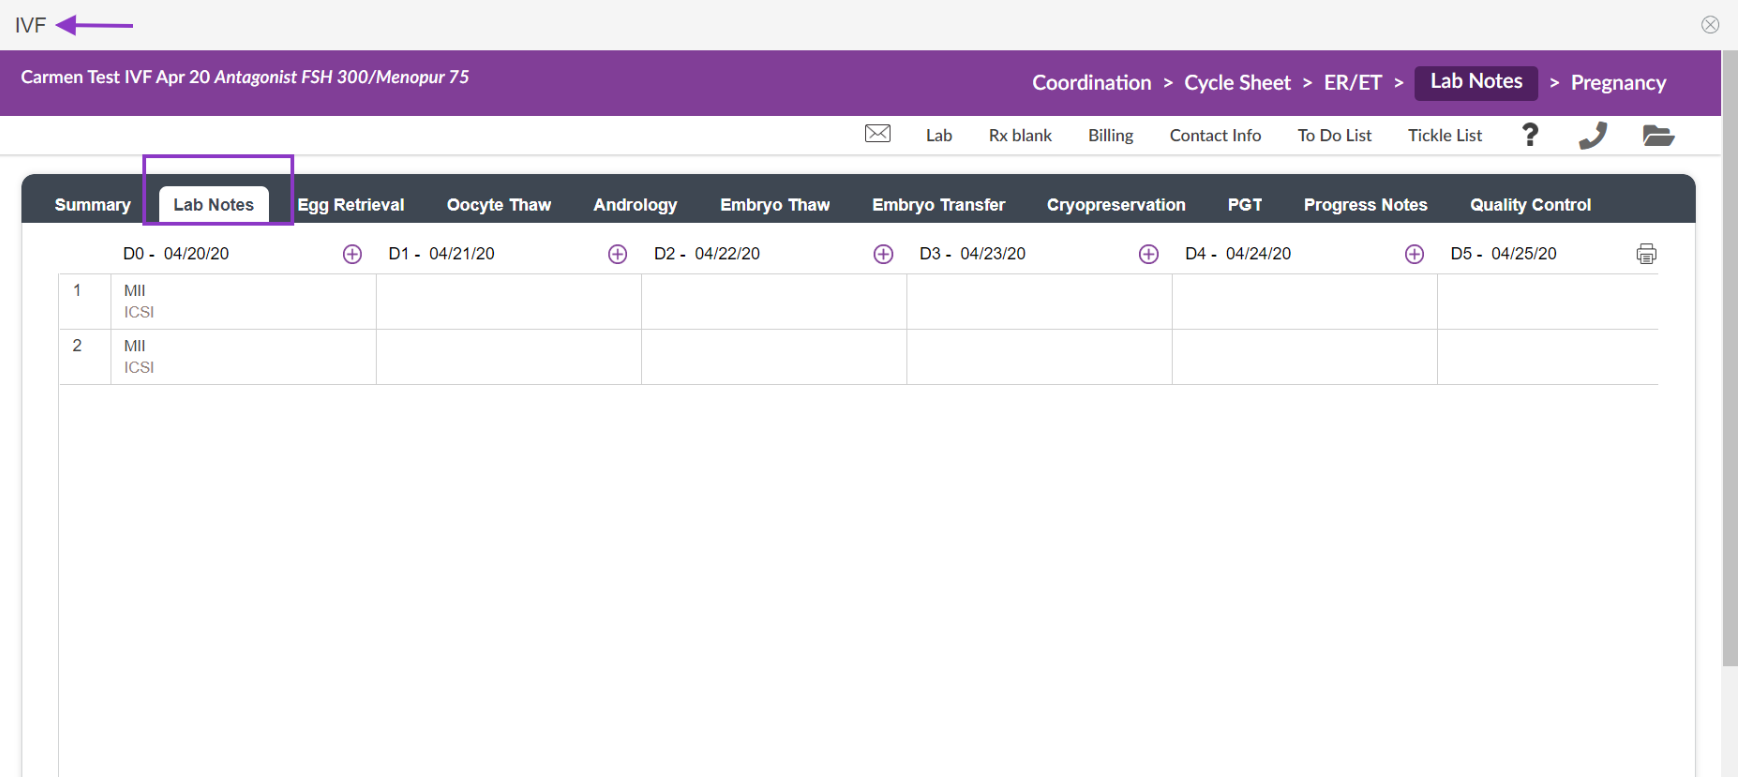
The embryo development will be recorded on the IP's IVF cycle. Click on Lab Notes in the IVF cycle.
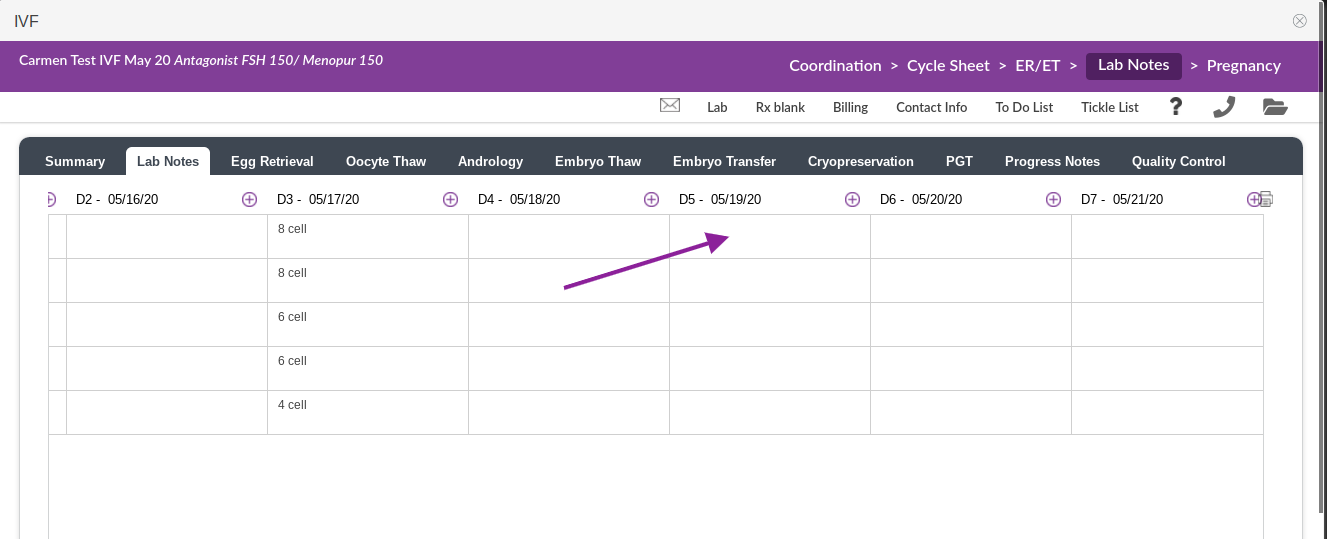
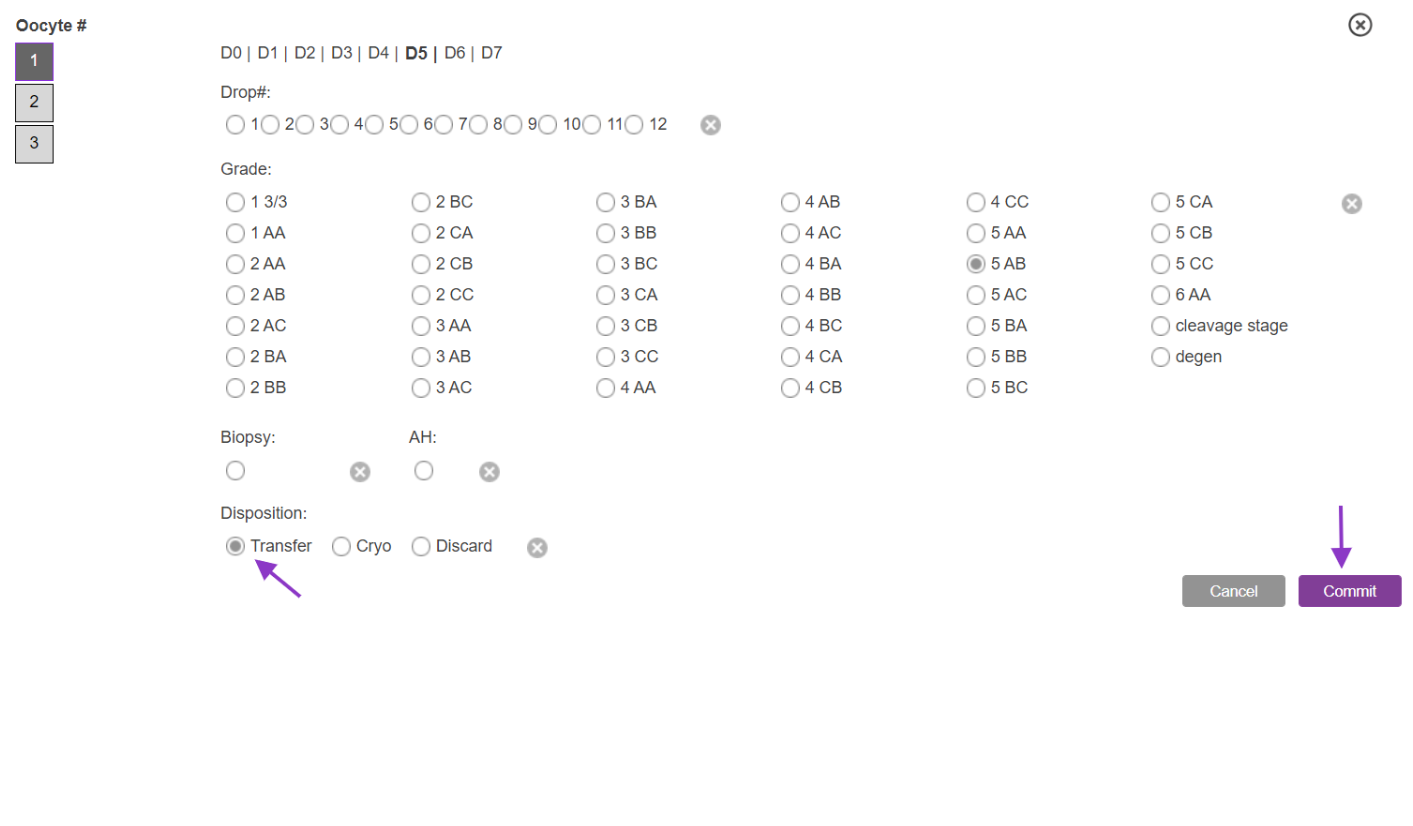
When you are ready to mark the embryo for transfer to the GC, in the IVF Lab Notes click on the cell of the embryo that will be transferred on the applicable day of transfer.
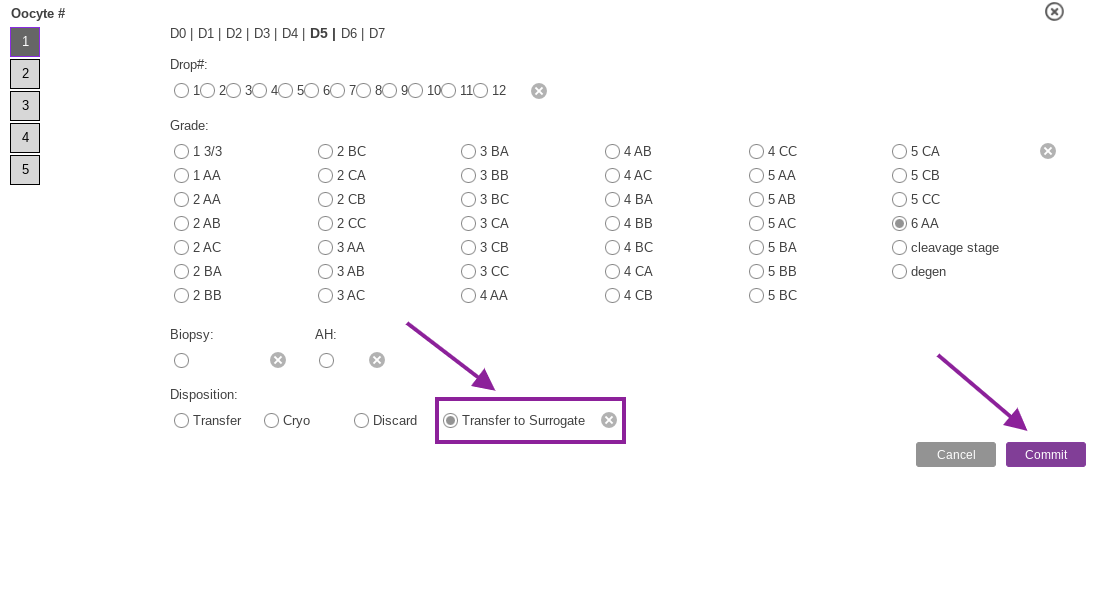
After clicking into the cell on the applicable day, the embryo grading system will appear. Grade the embryo as normal, make all necessary selections and then select Transfer to Surrogate. Click Commit to save your selections.
Please note that you must have a surrogacy recipient cycle under the intended parent with the dates aligned to the retrieval and transfer date within the IVF lab notes in order for Transfer to Surrogate to be a selection.
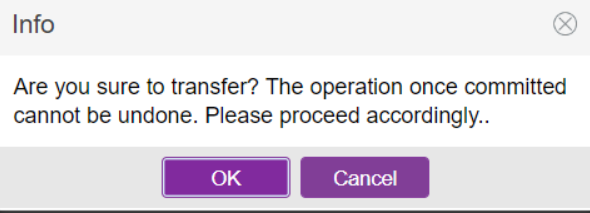
Once you select commit a pop-up verification window will display asking you to confirm the transfer. Select OK to continue to proceed with the cycle.
***Once this transfer is complete it can not be undone.
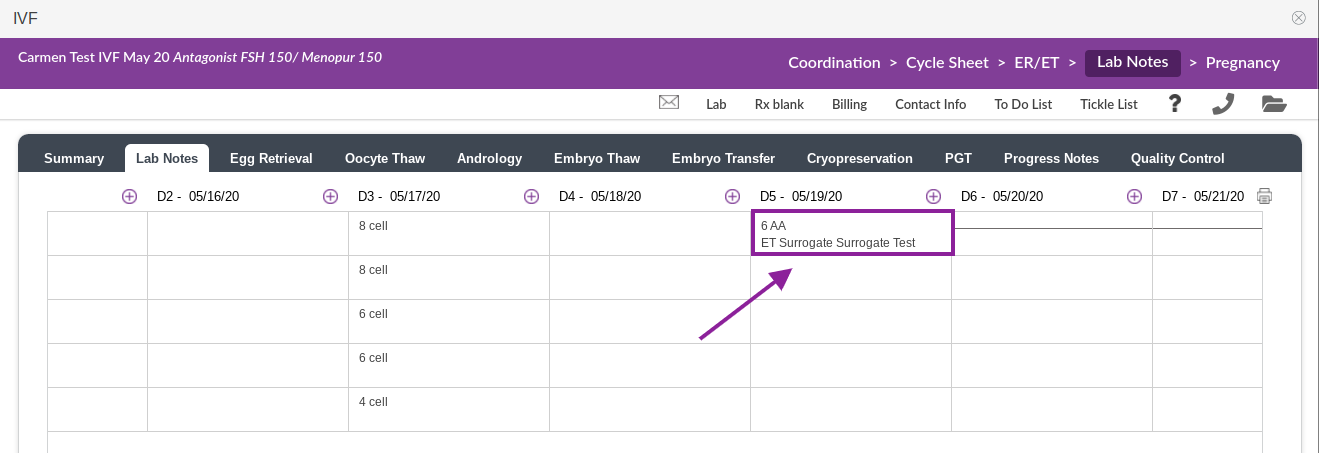
Lab Notes will now display ET Surrogate with the GC's name on the day you selected the transfer.
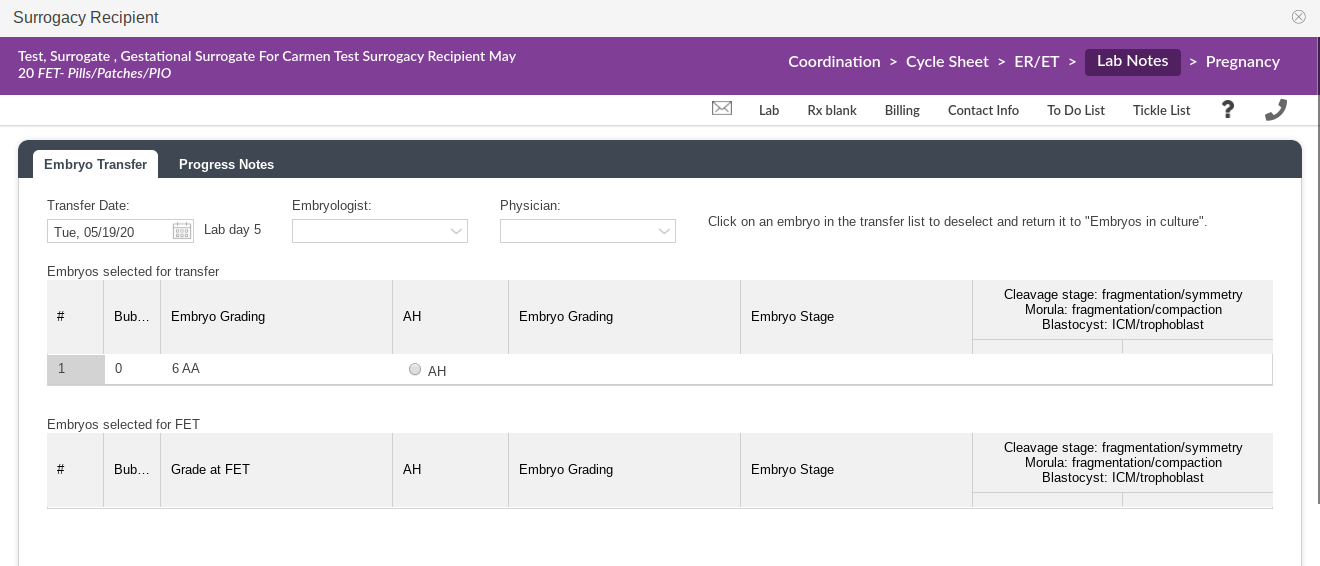
The embryo transferred from the IVF cycle will now appear in the Surrogacy Recipient cycle under the Embryo Transfer tab within Lab Notes. Fill in applicable fields as you would for any other transfer. Once these fields are completed, the transfer is complete on the Surrogacy Recipient Cycle.
Fresh Embryo Transfer from Fresh Donor Eggs in a Surrogacy Recipient Cycle
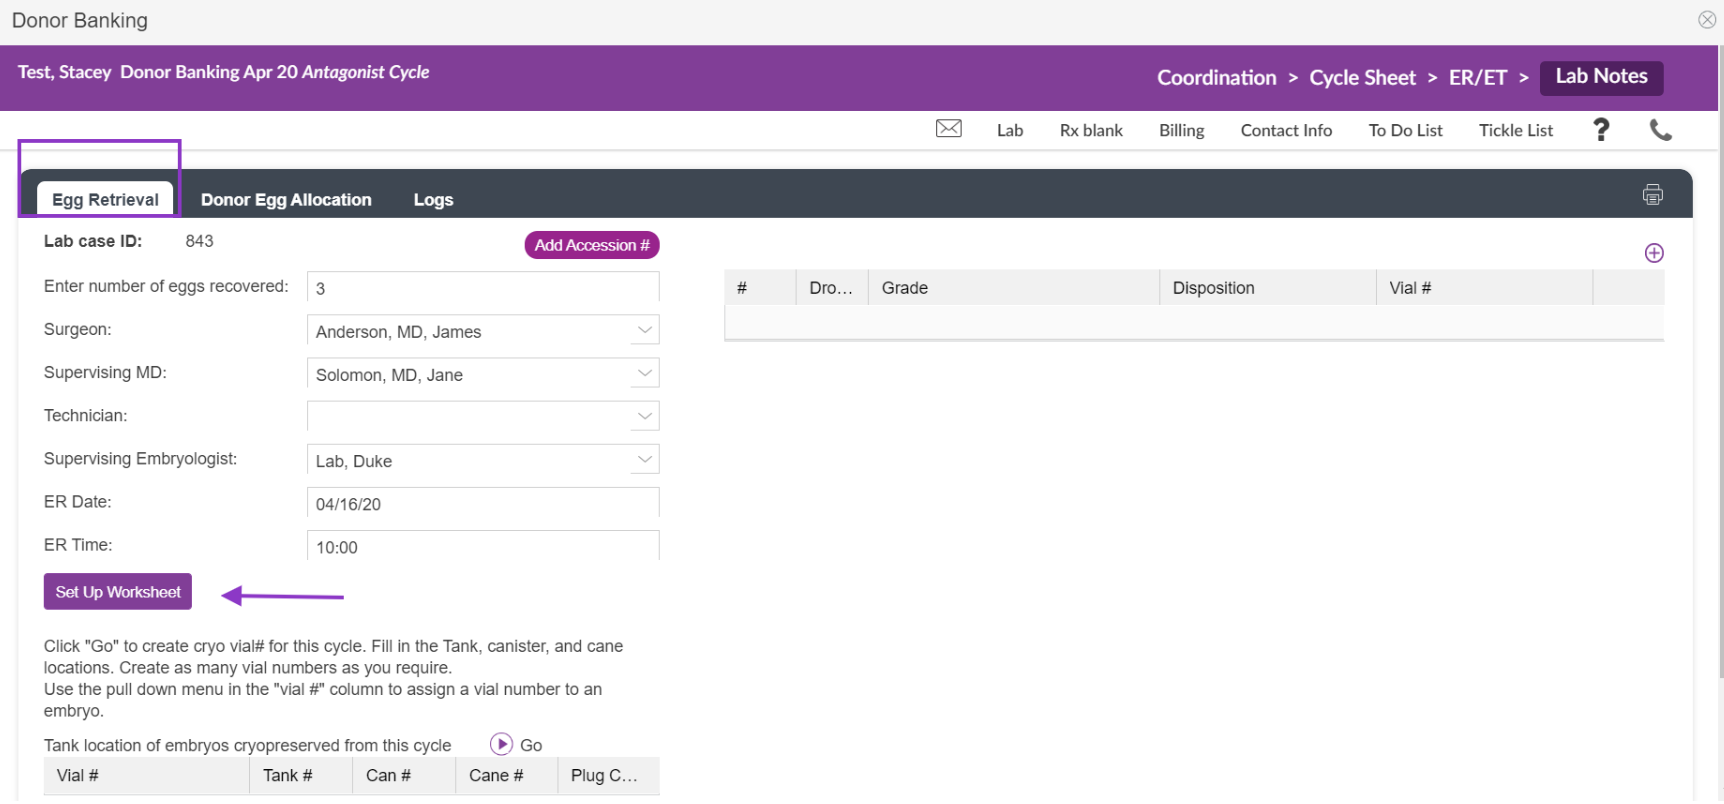
From the Egg Retrieval tab in the Donor Banking cycle you are able to allocate the donor eggs directly to the surrogacy recipient cycle. After the donor retrieval, input all necessary information and set up the worksheet. This will allow you to grade the oocytes before allocating them to the surrogacy recipient cycle.
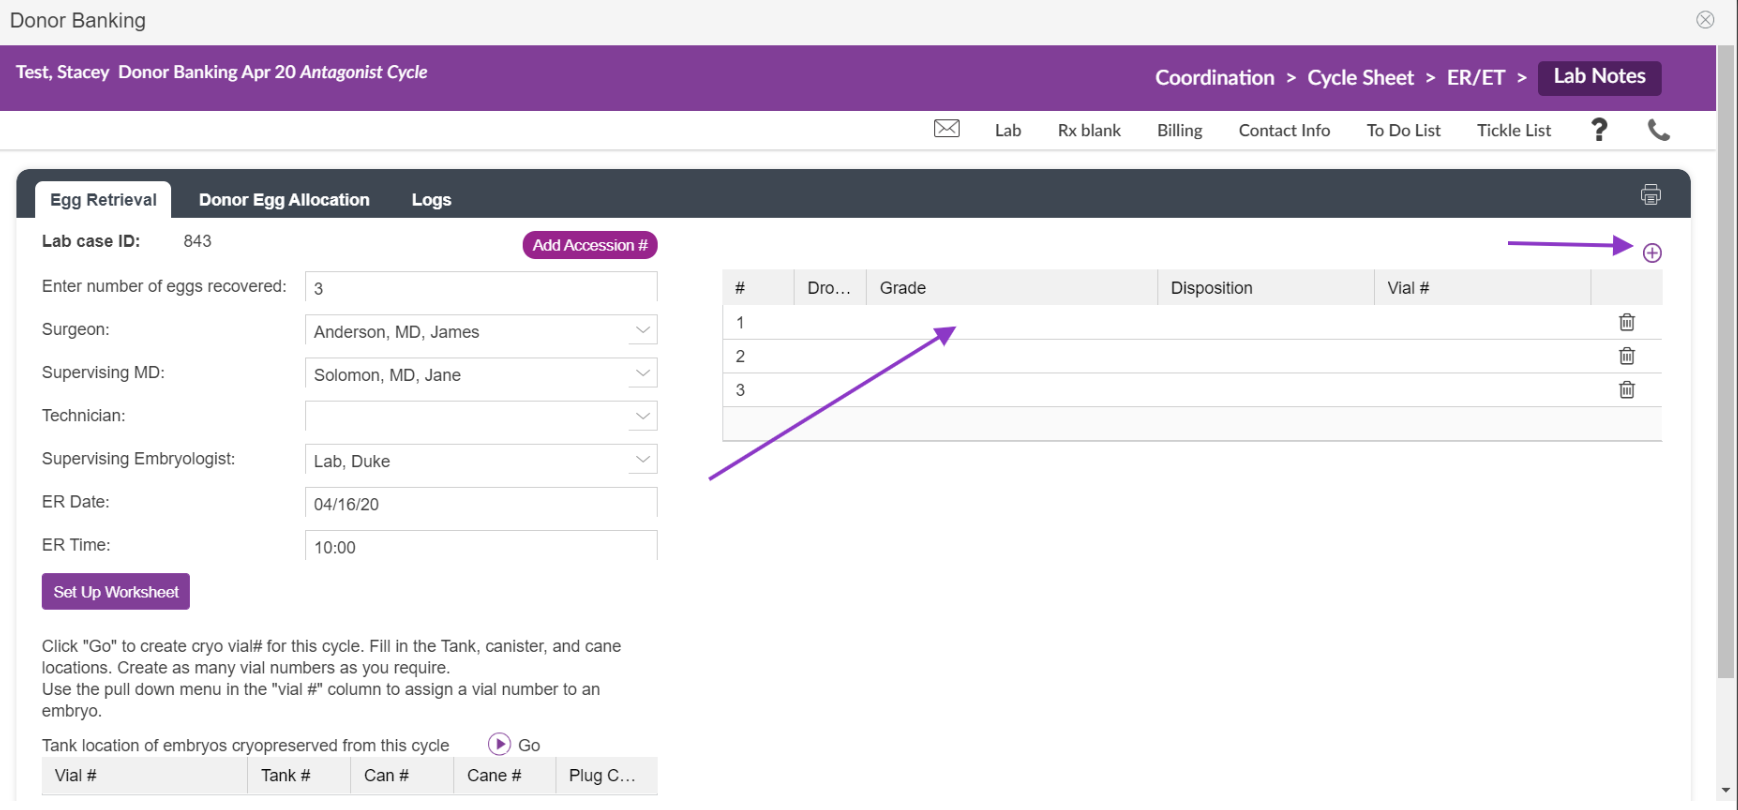
Select the purple plus sign to enter bulk grading of the eggs or select inside each cell to apply individual grading. Finish grading each egg as usual.
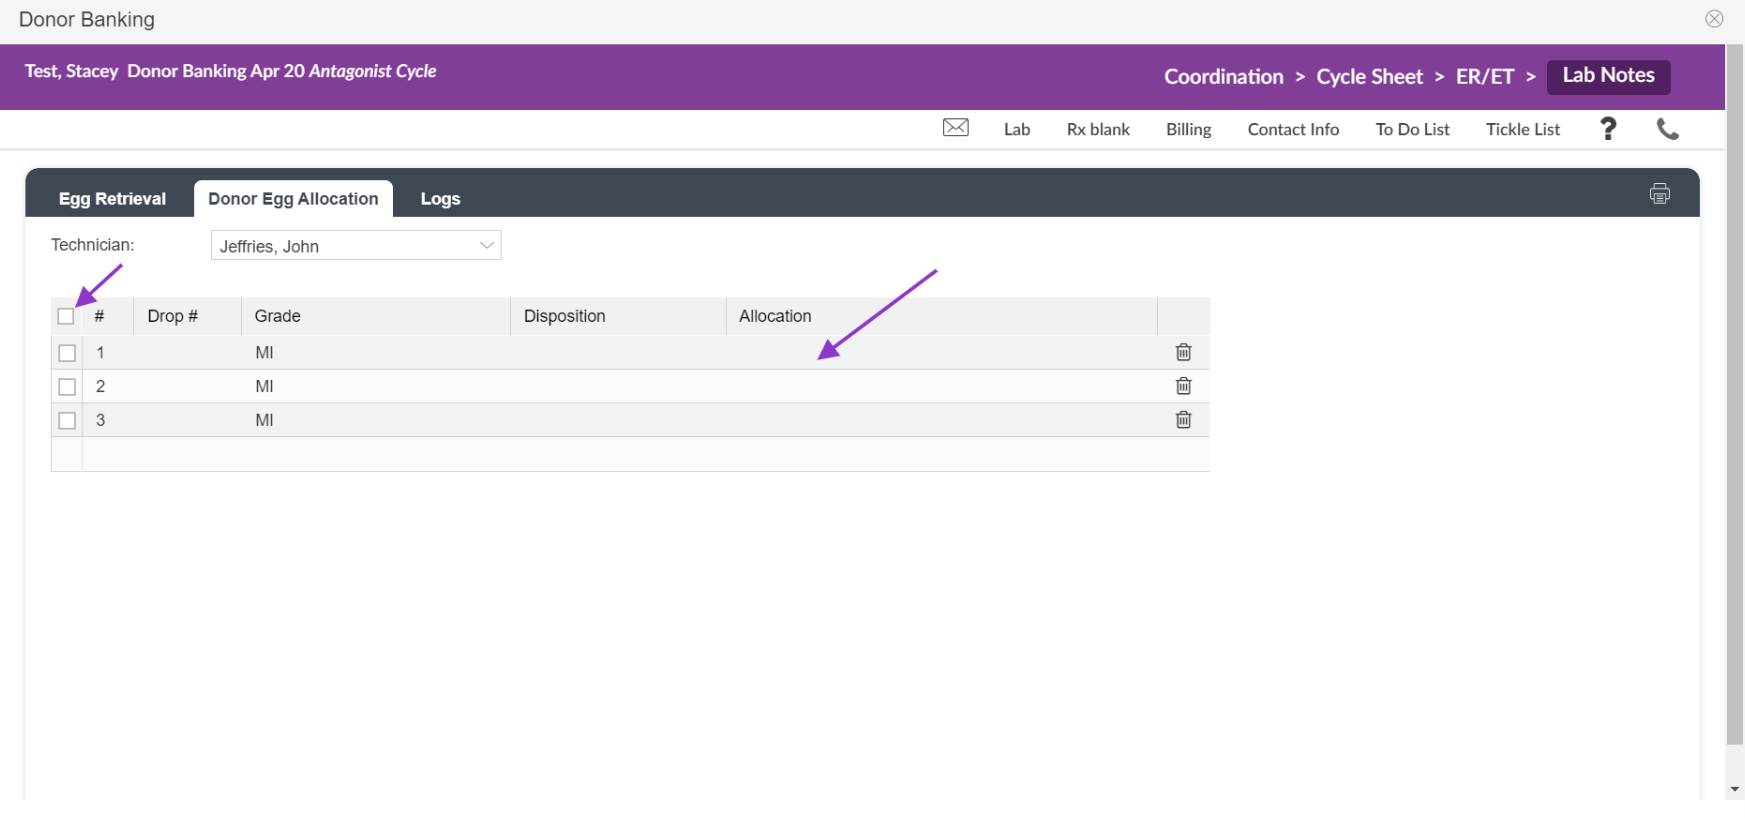
Still within the Donor Banking cycle, select all oocytes that you wish to allocate to the intended parent. Then, select inside the cell of one of the eggs that is selected under the allocation column to indicate who the oocytes are being allocated to.
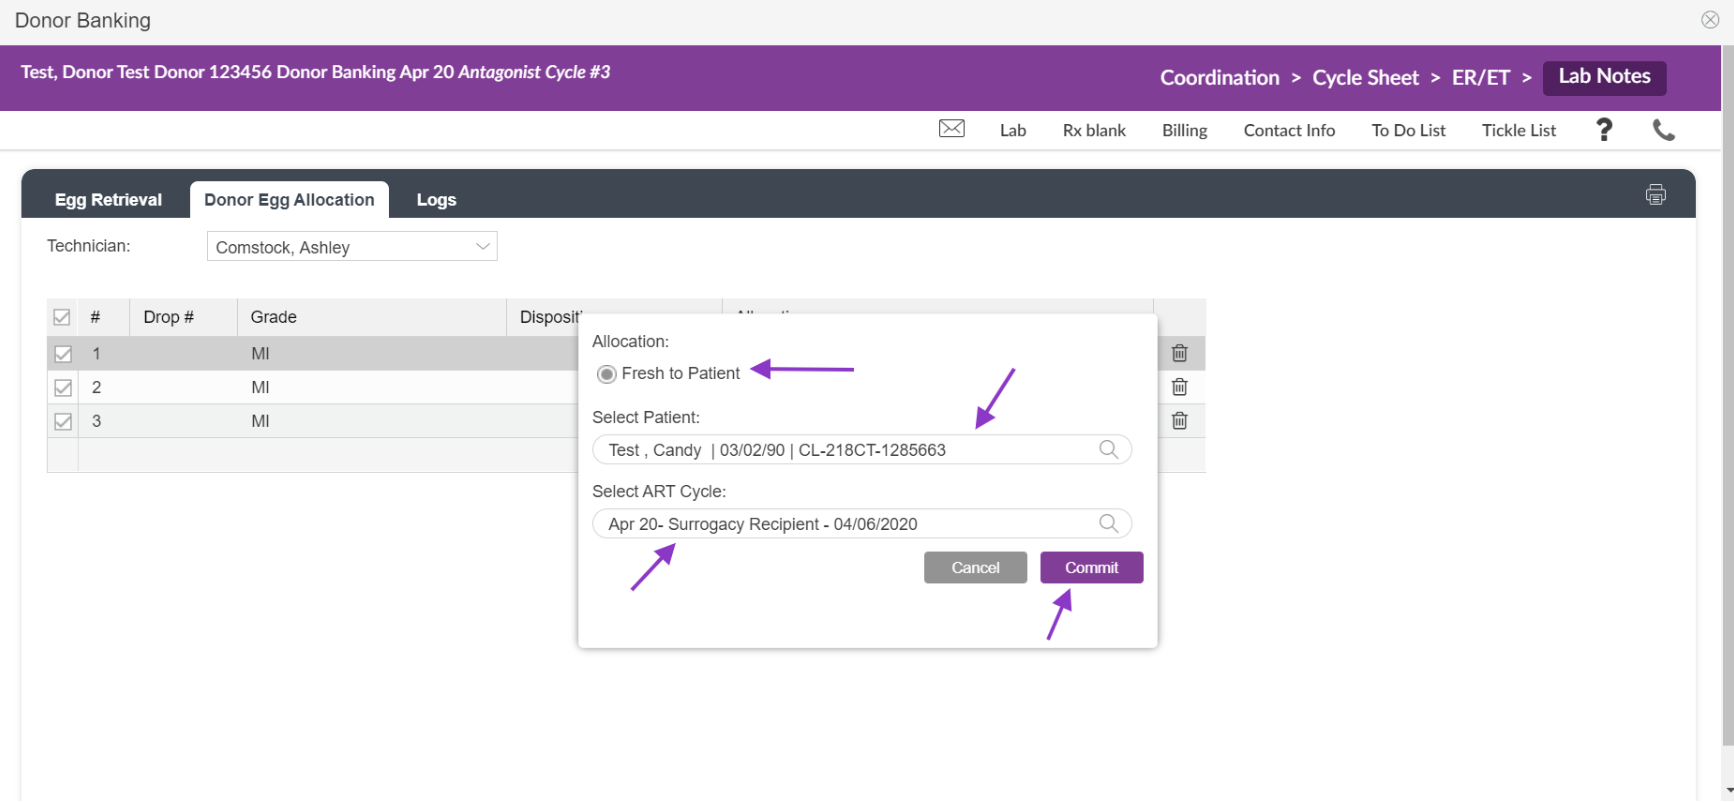
First, select Fresh to Patient. Then, under Select Patient, enter the IP's name and select it from the dropdown. Next, select the corresponding surrogacy recipient cycle under Select ART Cycle. Once you have selected the cycle, click Commit to save the allocation of the oocytes.
Please note, the IP must have a Surrogacy Recipient cycle open in order to allocate the eggs to that cycle.
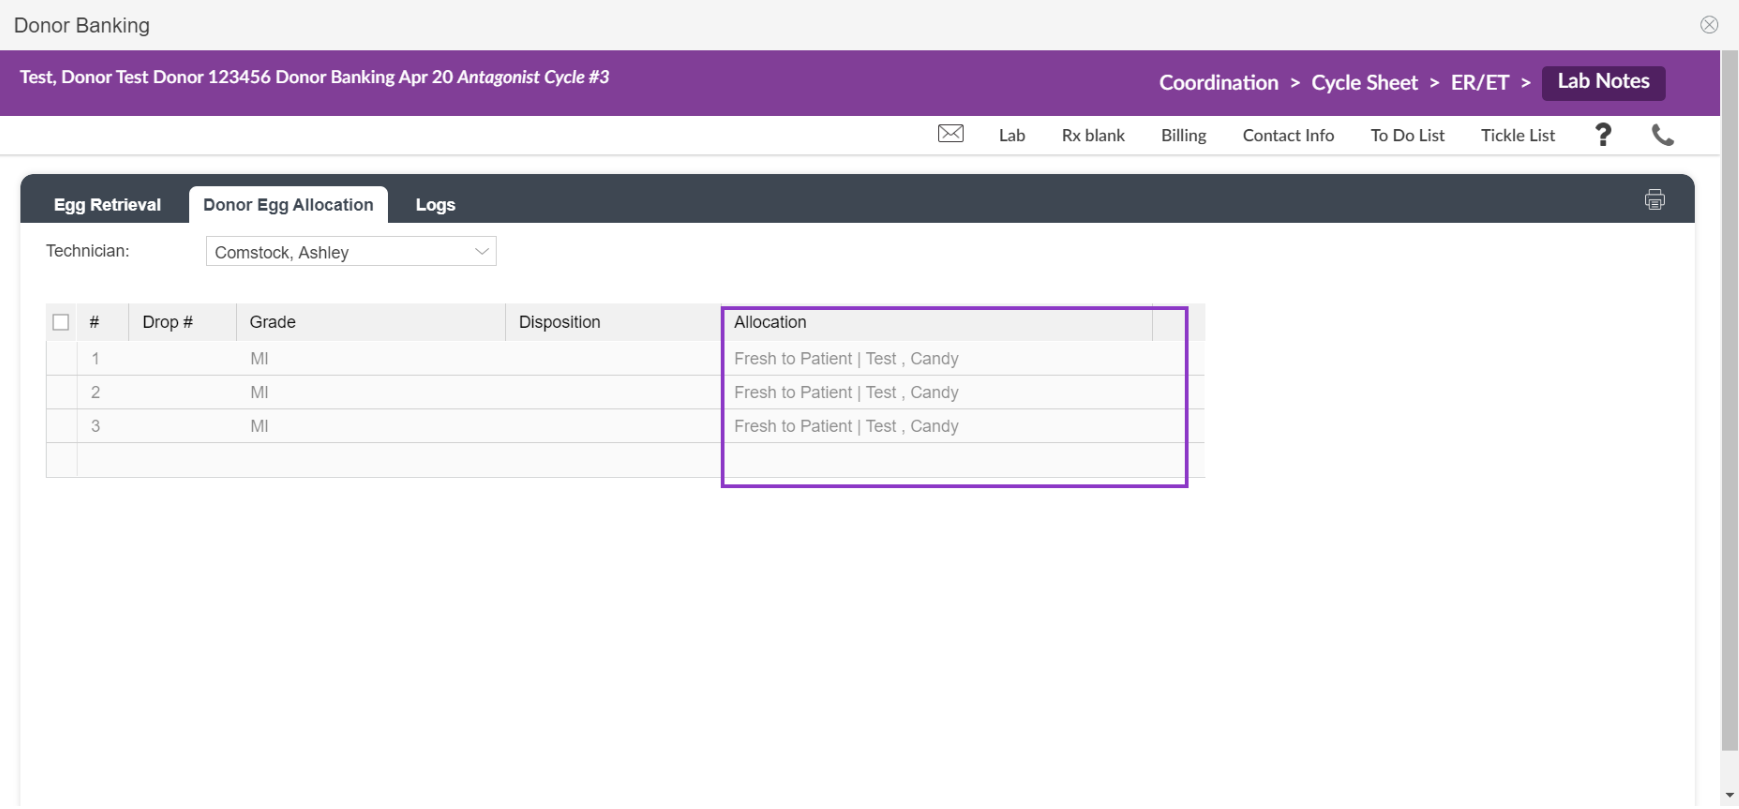
See the screenshot above of the donor banking cycle that has the fresh allocation of oocytes to the IP, Candy Test.
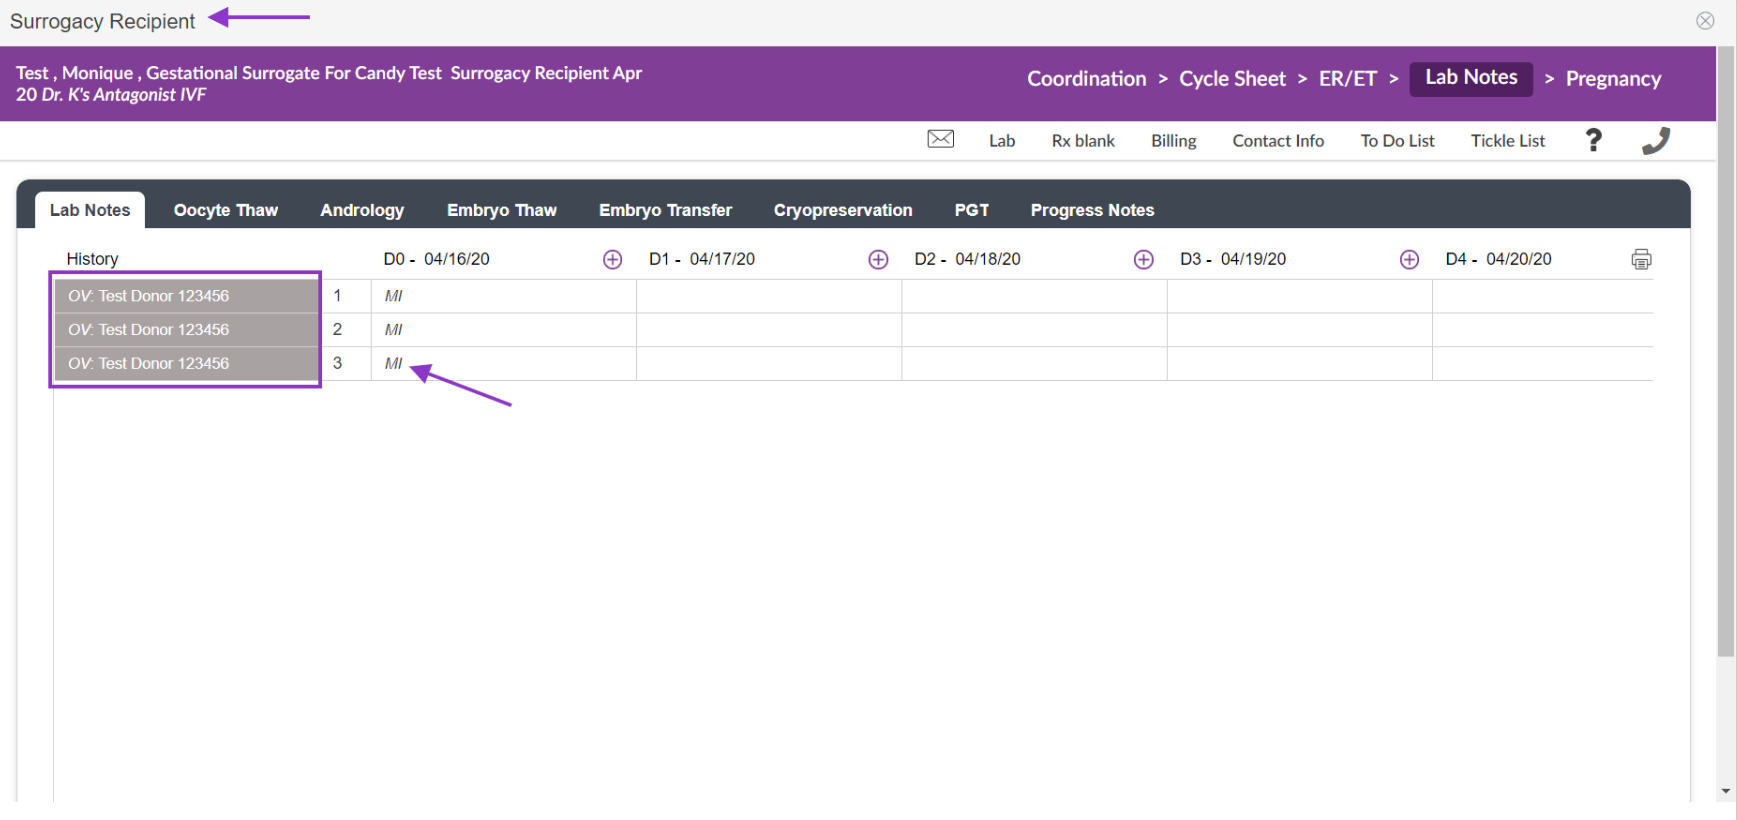
After allocating the oocytes to the IP, the oocytes will live in the Surrogacy recipient cycle (as the GC is who will have the transfer). The italics along with the history will display that this is a donor egg.
Grade all embryos as you normally would. On the applicable day, select the disposition as a transfer for the embryo to be transferred. Mark the correct disposition on all other embryos (cryo, discard). Select Commit to save the information entered.

In the Lab Notes under the selected day, the embryo will display with ET (embryo transfer). This embryo will now live in the Embryo Transfer tab for further transfer information.

The embryo will display under the embryo selected for transfer to indicate a fresh transfer.
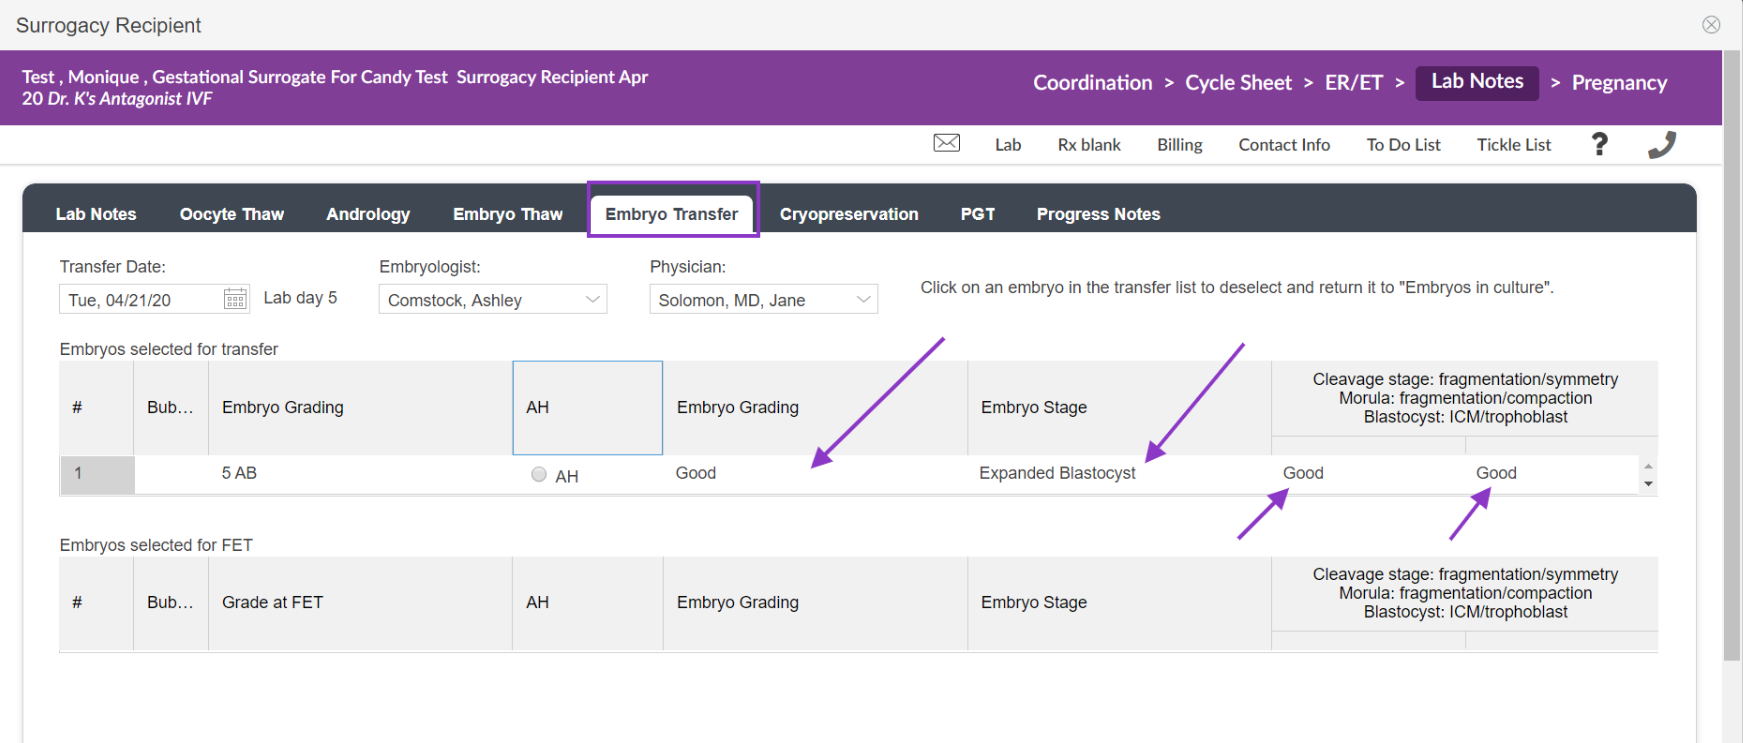
Complete the necessary fields such as AH. Use the drop-down to complete the other grading options (embryo stage, cleavage stage, morula, and blastocyst). Once the grading is completed from the Embryo Transfer tab, the embryo transfer is now complete.
All embryos marked for cryo from this cycle will display under the IP's cryo log.
FET from a Surrogacy Recipient cycle
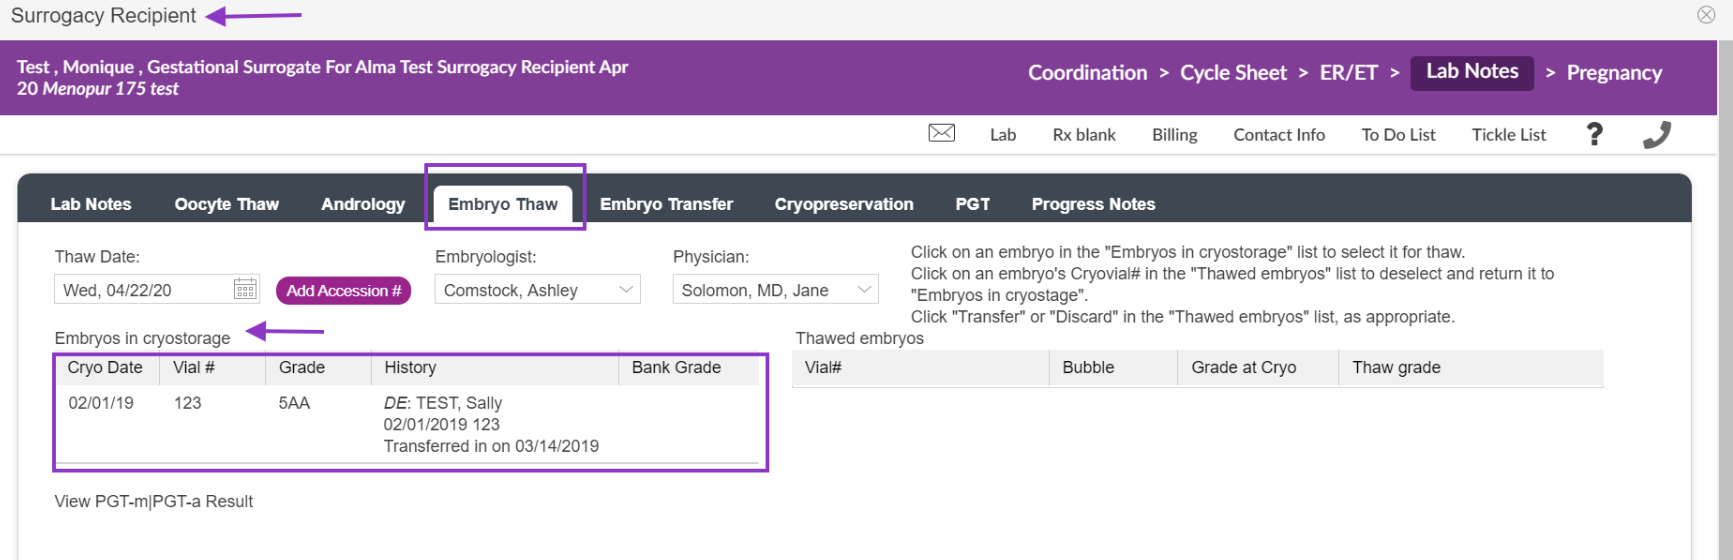
From the Surrogacy Recipient cycle, the IP's frozen embryos will live under the Embryo Thaw tab. Fill in the thaw date (the date of the embryo thaw). The embryo will appear on the left side of the page under Embryos in Cryostorage.
This embryo is from a previous cycle that the IP had. When using a surrogacy recipient cycle, the IP's frozen embryos will populate under the Surrogacy recipient cycle.
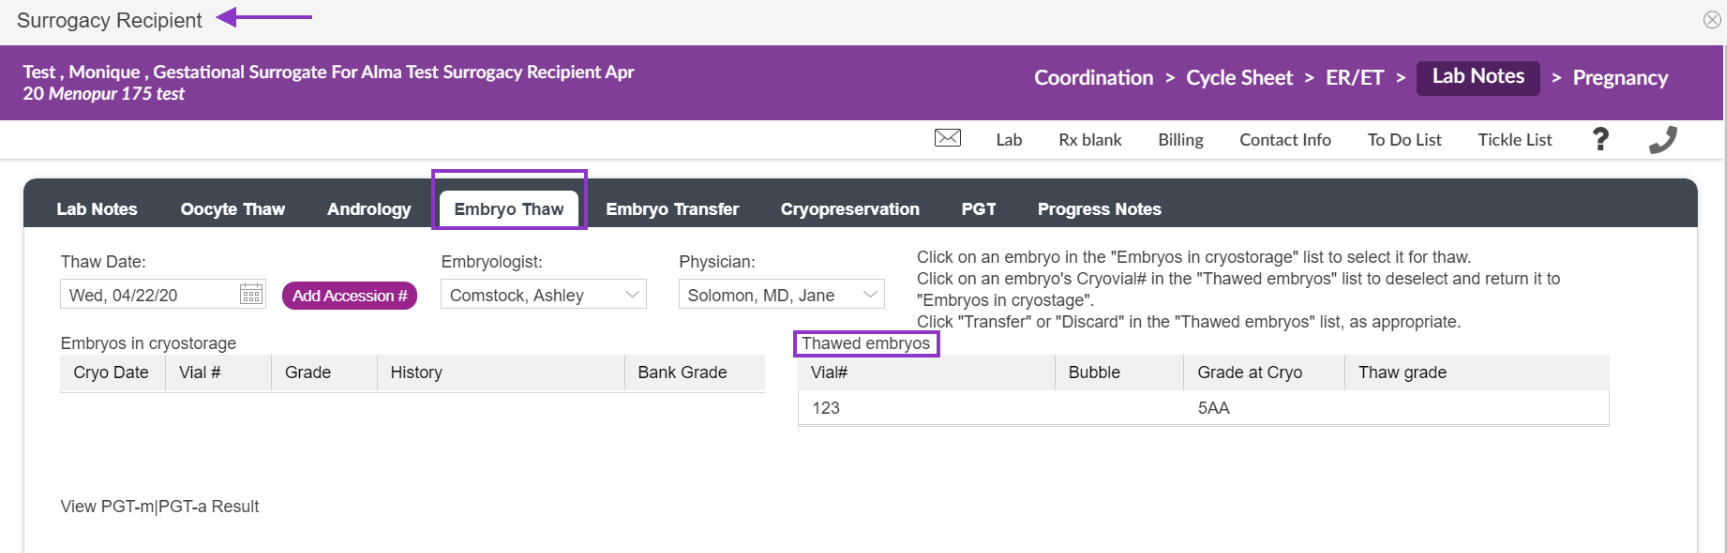
Click on the embryo under embryos in cryostorage that you wish to thaw to move it over to thawed embryos (on the right side of the screen).
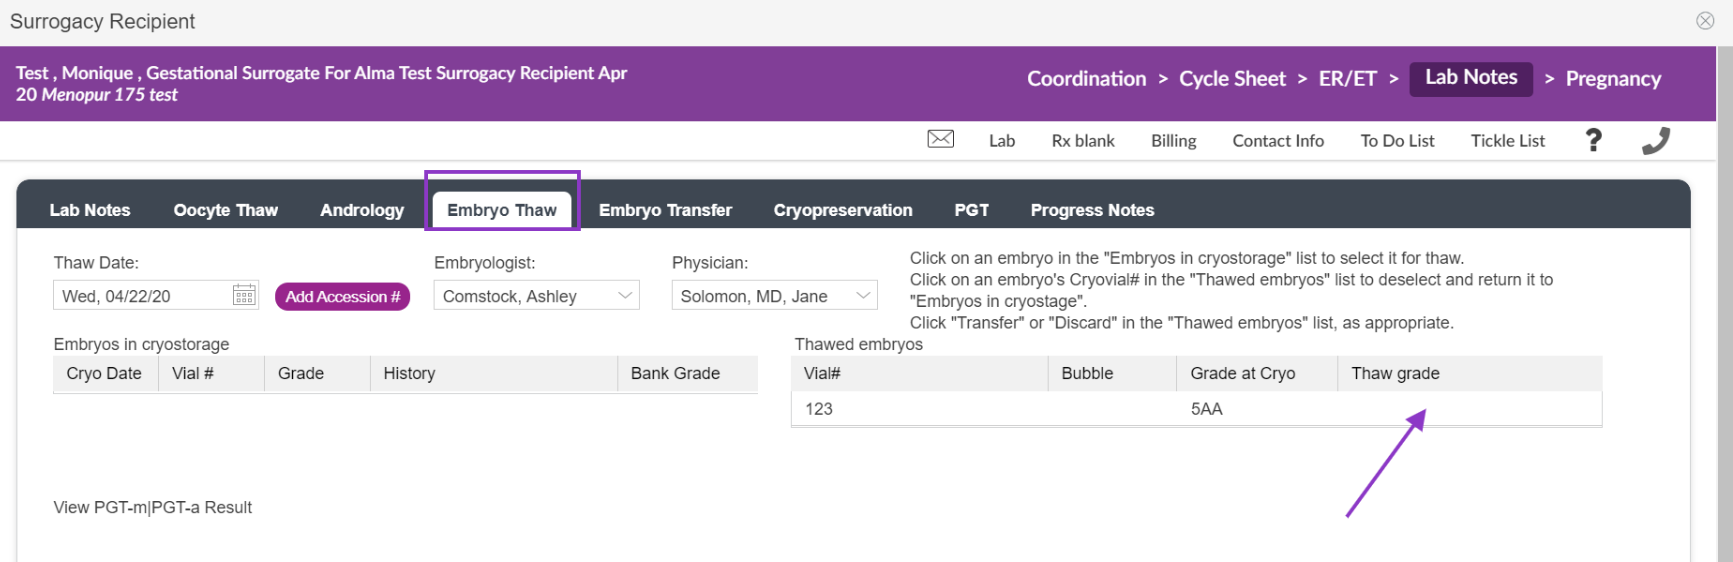
Click inside the cell under Thaw grade to select a grade for the embryo that you wish to thaw.
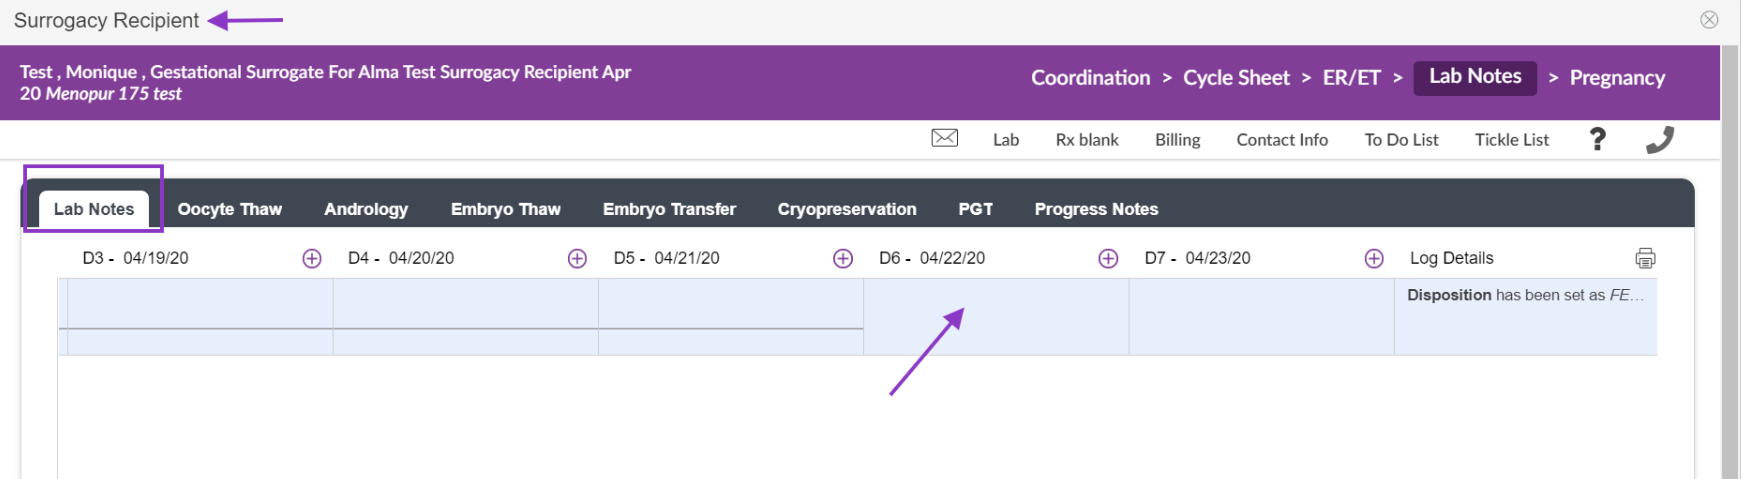
Under Lab Notes select the cell under the date that you wish to transfer.
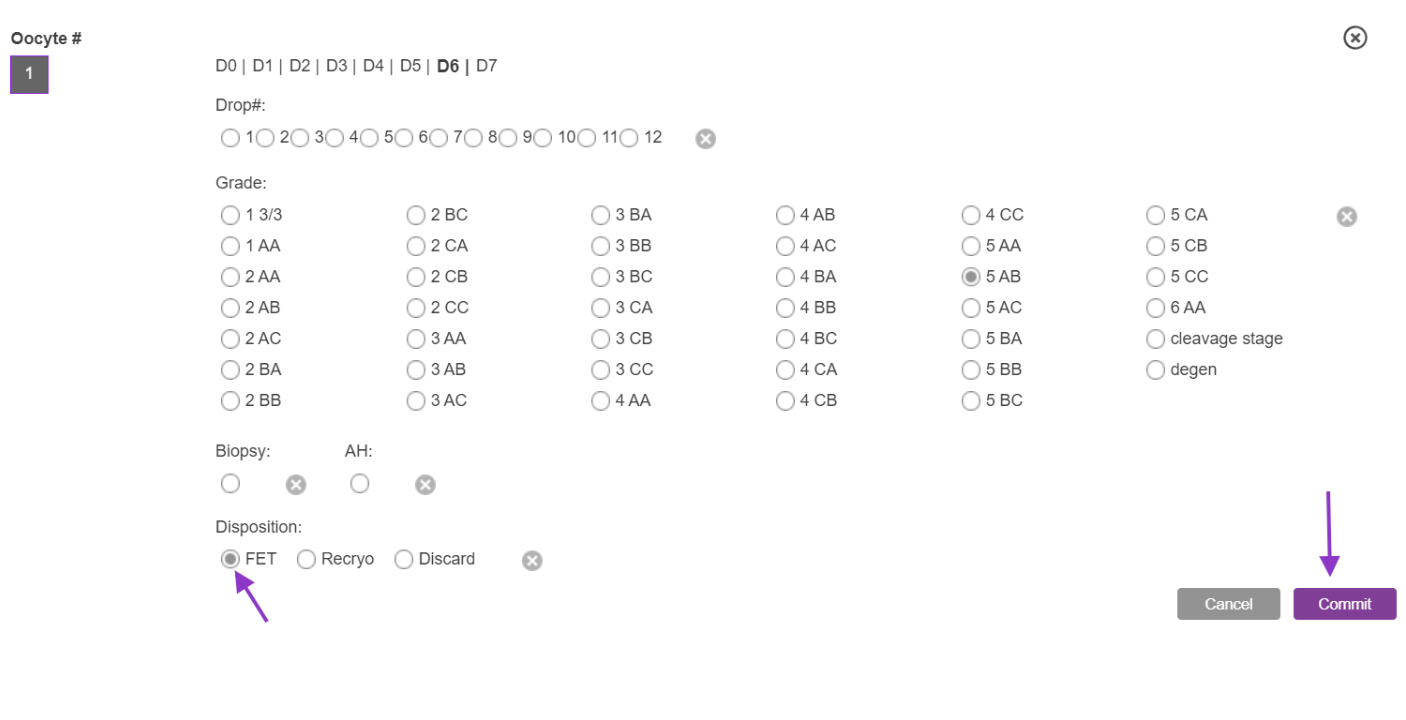
When you click inside the cell the grading window will open. Make your necessary selections and set the disposition as FET. Once all selections are done select Commit to save the information.
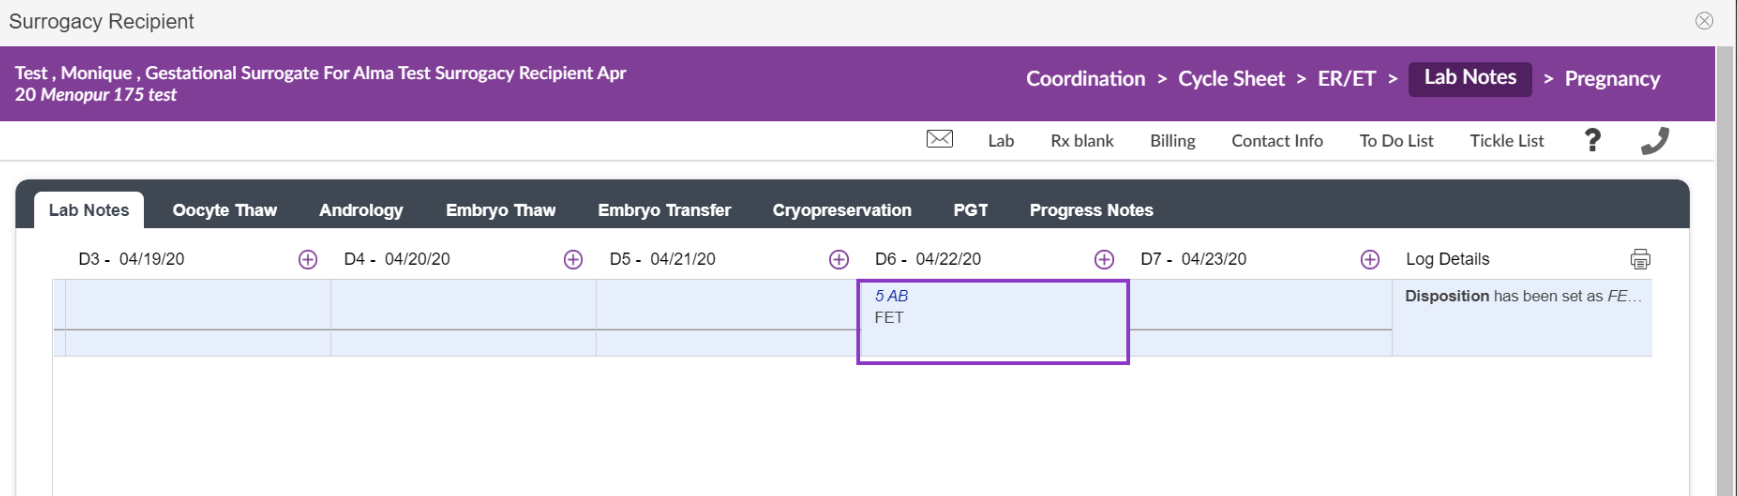
From Lab Notes, the embryo will display with FET under the day you selected for transfer.
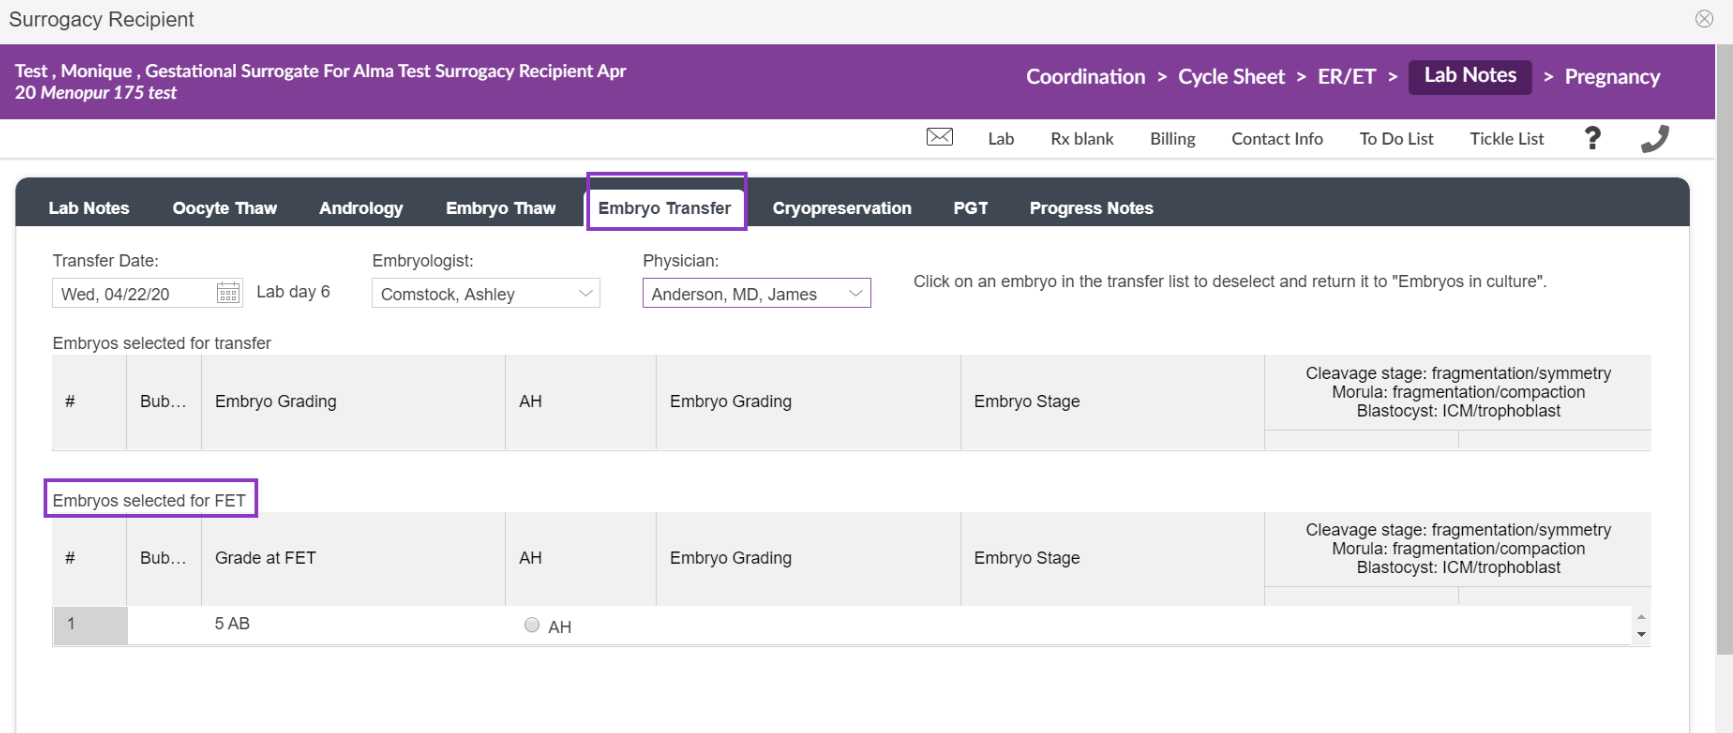
The embryo will display in the Embryo Transfer tab under the embryo selected for FET .
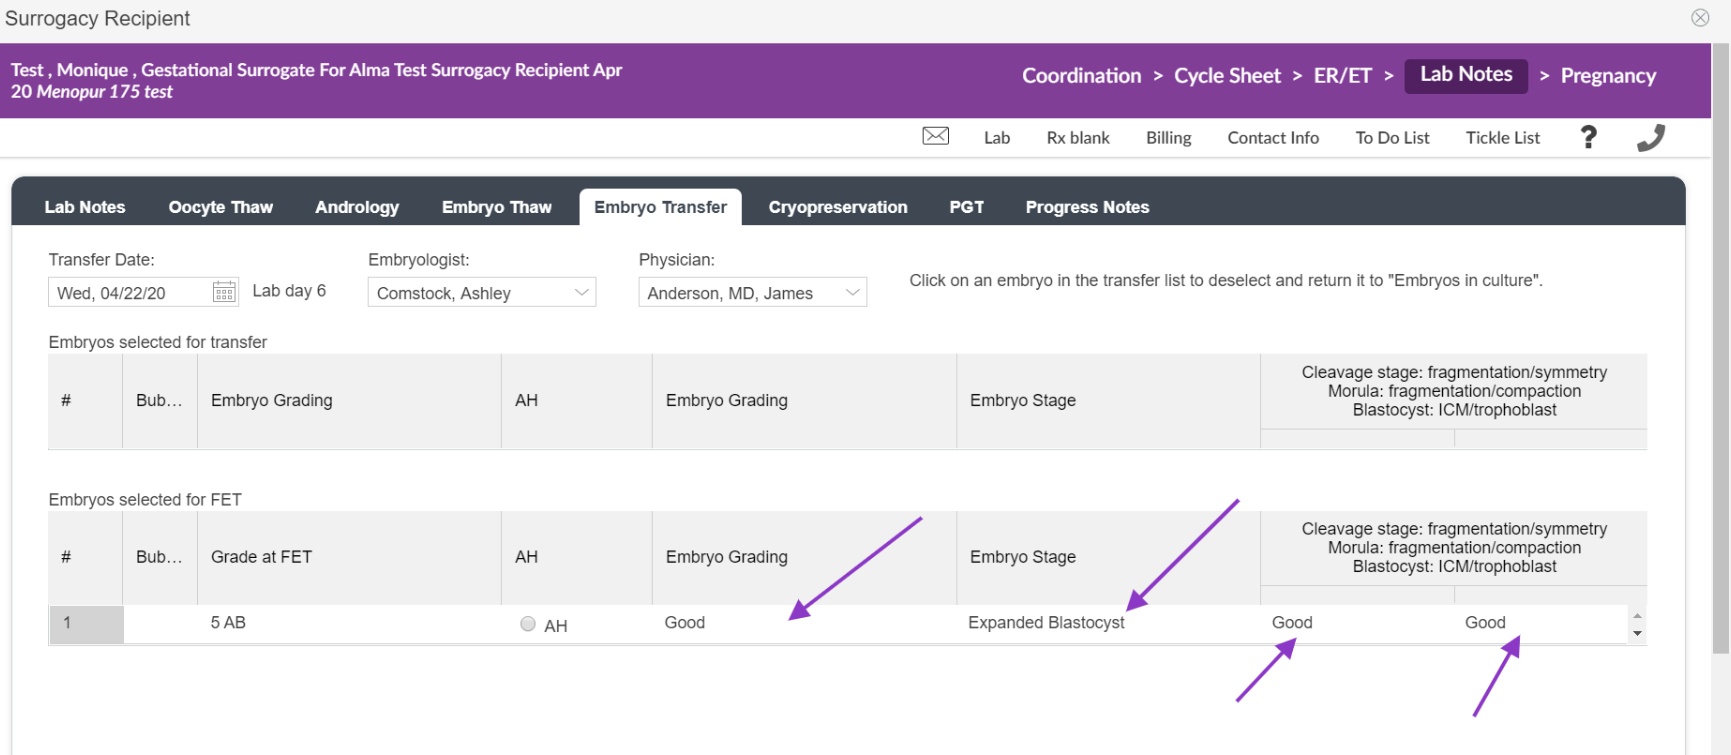
Complete the necessary fields such as AH. Use the drop-down to complete the other grading options (embryo stage, cleavage stage, morula, and blastocyst). Once the grading is completed from the Embryo Transfer tab, the embryo transfer is now complete.
**All manuals are compliant with HIPAA regulations. No patient information has been released. All screenshots above were taken from a test clinic with fake patient information.
Quinesha Bentley
Comments