Coordinating third party parenting cycles is very similar to a basic IVF cycle. The tools are the same, however, there are a few extra steps to accommodate these more complex cycle types.
Creating Cycles for Egg Donors and Donor Egg Recipients
All donor cycle types will be created using the same designation in Artisan, Donor Banking. Donors and recipients will each have their own cycles created in Calendar Wizard. Based upon the different scenarios of donor cases, the nature of the cycle will be different. Here are the most common cases:
1. Donor Cycle- Freeze all oocytes and allocate to clinic egg bank
2. Donor Cycle- Fresh allocation of oocytes to one or more donor egg recipients
Donor Cycle-Freeze All Oocytes and Allocate to Clinic Egg Bank
This cycle type will only require a cycle for the Egg Donor/Ovum Donor, as there is no IP Recipient.
Within Calendar Wizard:
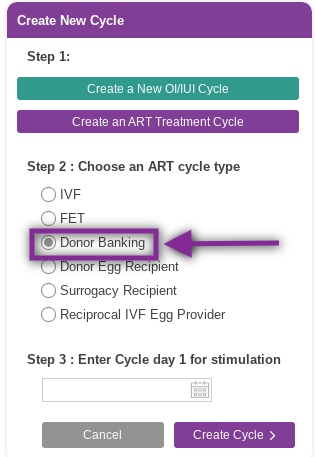
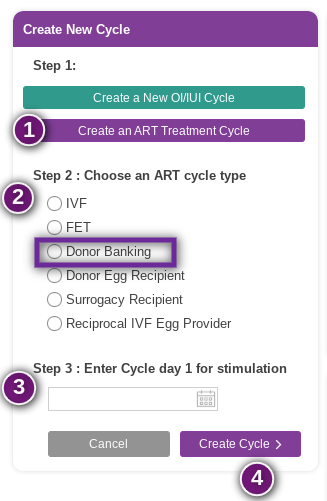
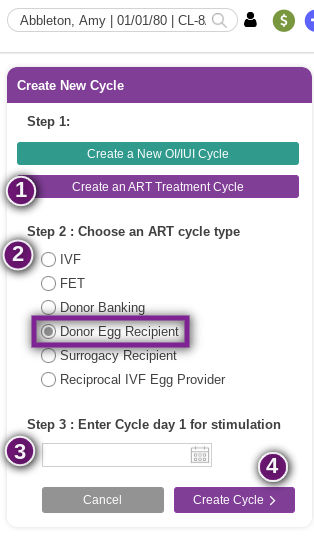
1. Click Create an ART Treatment Cycle.
2. Select Donor Banking cycle type.
3. Enter cycle day 1 for stimulation.
4. Click Create Cycle.

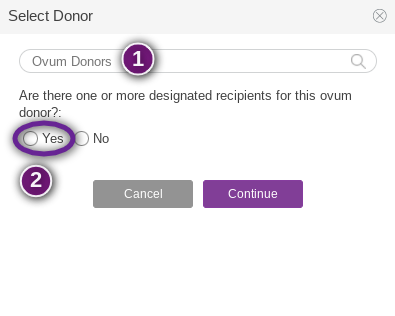
1. Select your Ovum Donor/Egg Donor from the drop-down menu by typing the last name of the donor and selecting her from the list.
2. In this example, there are no direct designated recipients for the donor, so select No.
3. Click Continue.

From here, the steps are the same as any other IVF or FET cycle.
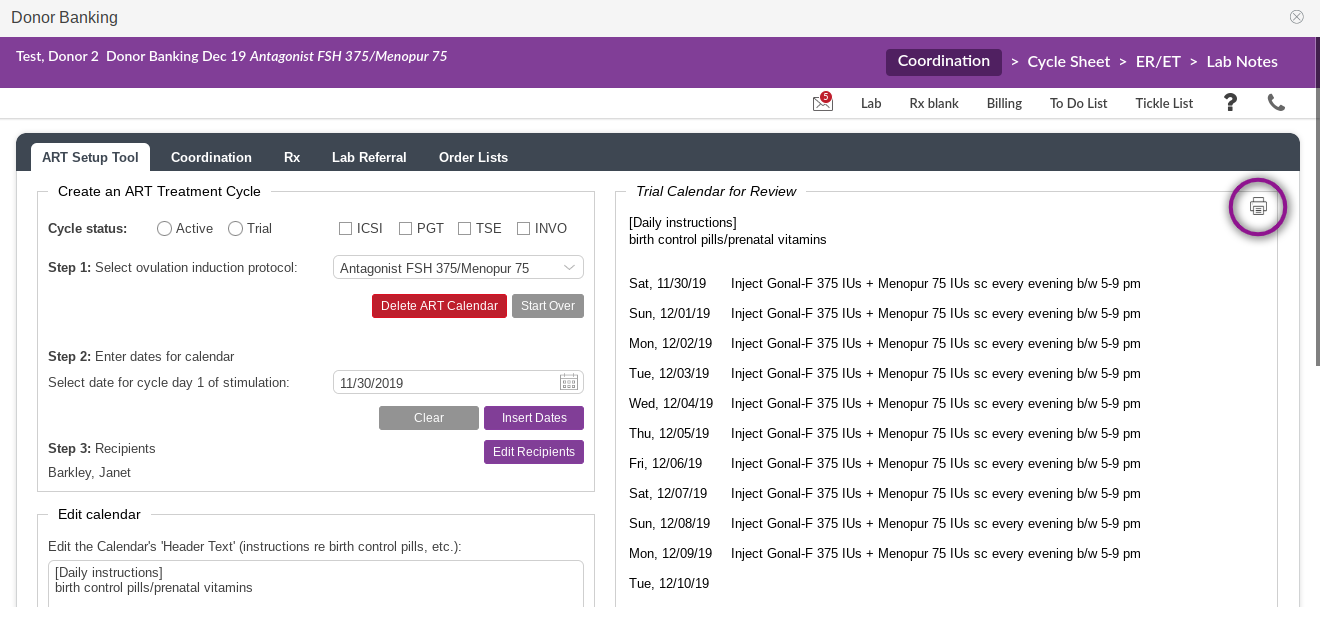
1. Select the ovulation induction protocol from the drop-down menu and click Create ART Calendar.
2. Then Insert Dates.
As there are no recipients in this cycle example, ignore the Edit Recipients button.

Once the ART calendar is created, the instructions will automatically be sent to the donor's portal. Click the printer icon to send an email to the donor to notify her that she has new medication instructions in her portal.
Donor Cycle-Fresh Allocation of Oocytes to 1 or More Donor Egg Recipients
This donor cycle type will require at least 2 cycles:
1. Donor Banking cycle for the egg donor.
2. Donor Egg Recipient cycle for each donor egg recipient.
Step 1: Making Sure the Recipient and Donor are Linked
For detailed instructions on how to link a recipient to a donor, please refer to the manual Link Donors and Surrogates to Intended Parents.
Step 2: Creating a Cycle for the Donor

Click Calendar Wizard to begin and follow these steps:
1. Click Create an ART Treatment Cycle.
2. Select Donor Banking cycle type.
3. Enter cycle day 1 for stimulation.
4. Click Create Cycle.
1. Select your Ovum Donor/Egg Donor from the drop-down menu by typing in the donor's last name and selecting her name from the drop down.
2. In this example, there are one or more direct designated recipients for the donor, so select Yes.
This will trigger the next drop-down to enter donor egg recipients.

1. Select the patients/donor egg recipients from the drop down menu by typing the last name of the recipient and selecting the name from the drop down. This may be done for up to 3 recipients.
2. Click Continue once all recipients for the donor egg banking cycle have been added.

From here, the steps are the same as any other IVF or FET cycle.
1. Select the ovulation induction protocol from the drop-down menu and click Create ART Calendar.
2. Click Insert Dates.
3. The recipients are listed here, however if they need to be changed or updated click the Edit Recipients button.
Once the ART calendar is created, the instructions will automatically be sent to the donor's portal. Click the printer icon to send an email to the donor with notification of new medication instructions in her portal.
The next step will be to create a cycle for each of the egg donor recipients.
Step 3: Creating a Cycle for the Donor Recipient(s)
Click Calendar Wizard to begin:
1. Click Select an ART Treatment Cycle.
2. Select the radio button for Donor Egg Recipient.
3. Enter cycle day 1 for stimulation.
4. Click Create Cycle.

1. Select the Ovum Donor/Egg Donor from the drop-down menu by typing the last name of the donor and selecting her name from the drop down.
2. Click Continue.

From here, the steps are the same as any other IVF or FET cycle.
1. Select the ovulation induction protocol from the drop-down menu and click Create ART Calendar.
2. Click Insert Dates.
3. The donor name is listed here, however this is clinic facing only. The name of the donor will not show on ANYTHING the patient is able to see.
The instructions will automatically be sent to the recipient's patient portal. Click the printer icon to send an email notification of new instructions to the recipient.
Notes about Donor/Donor Recipient Cycle Types
Headings

To make sure you have created the correct cycle type, check the notation at the header. An IP/recipient/patient should always have a "Donor Egg Recipient" cycle type.

A donor should always have a "Donor Banking" cycle type.
Clinic Facing vs. Patient Facing
The donor name will be listed on clinic facing aspects of the cycle throughout Artisan. The name of the donor will never show on ANYTHING the patient is able to see, either in the App, Patient Portal or on Treatment Calendars.
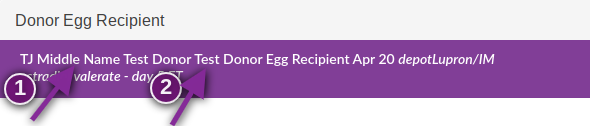
This is the clinic facing header for a Donor Egg Recipient. It contains:
1. Recipient Name
2. Donor Name
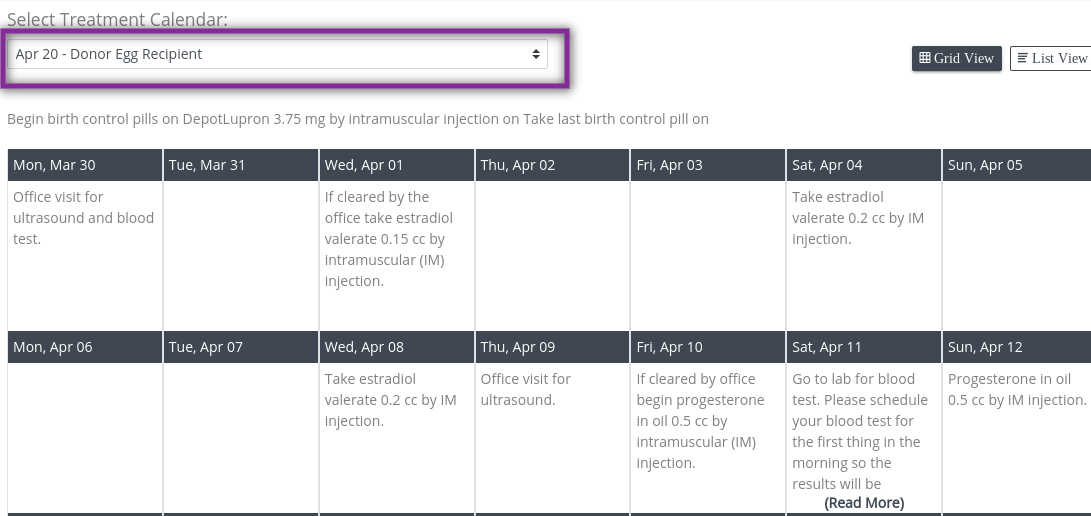
Above is an example of how the patient sees the same cycle from within the Patient Portal, App or on a printed treatment calendar.
Cycle Locations

Both the cycle for the donor and the donor recipient/IP will live in the chart of the IP and the Donor.
- In the patient chart, the cycle for the donor will be listed as Donor Banking and will be italicized. The cycle for the IP will be listed as Donor Egg Recipient. This will allow for easy access and the records to be linked.

In the donor chart, the cycles will be listed by the protocol name.
Triggering Donors and Preparing Donor Egg Recipients
Triggering Donors functions much the same as a standard IVF case. For the Recipients, you will simply enter the Egg Retrieval Date in the Trigger Tab and create the appropriate Luteal Phase Calendar for the Recipient.
Step 1: Triggering the Donor
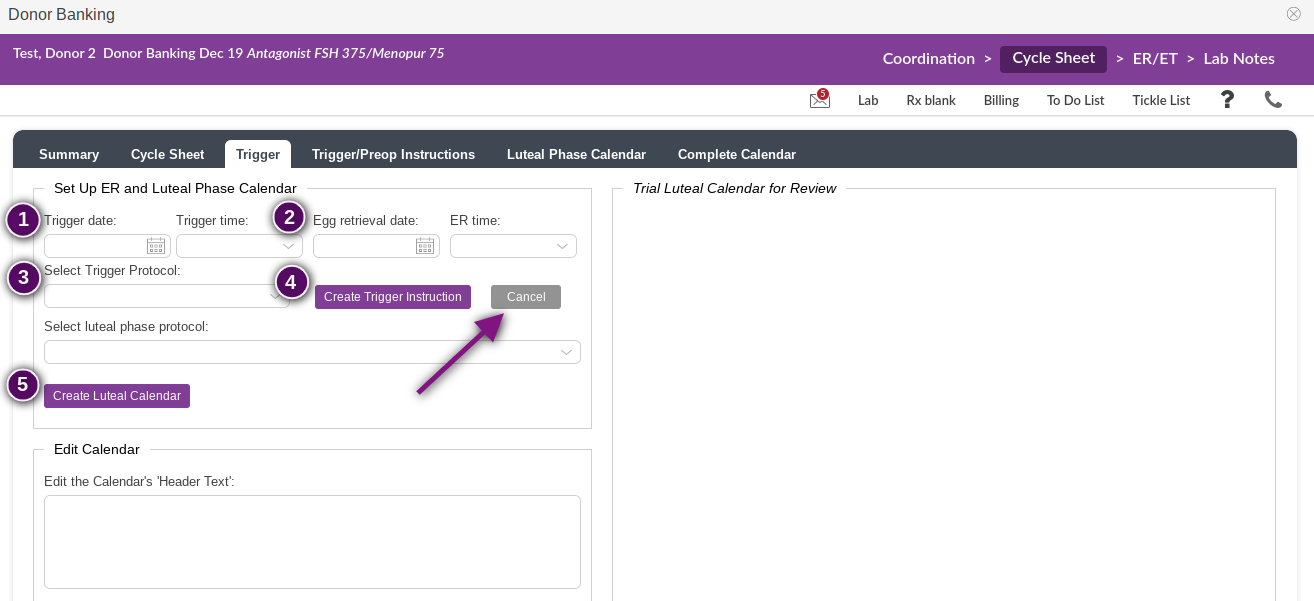
Follow all of the standard IVF steps for completing the trigger and luteal phase protocol that is appropriate for the donor.
1. Trigger Date and Time
2. Egg Retrieval Date and Time
3. Select the trigger protocol.
4. Create trigger instructions. You may click Cancel to cancel a trigger protocol and select a new one.
5. Select a luteal phase protocol and click Create Luteal Calendar.
Click the printer icon to notify the donor via email that she has new medication instructions in her portal.
Step 2: Setting Up the Trigger for the Recipient

1. Enter the donor's egg retrieval date.
2. Select a luteal phase protocol (As necessary, build donor recipient specific calendars).
3. Click Create Luteal Calendar.
4. If the recipient is having a fresh transfer, enter the Embryo Transfer Date and Time.
The luteal phase instructions will automatically be sent the to patient portal/app. Click the printer icon to send an email notification to the patient of new instructions.
**All manuals are compliant with HIPAA regulations. No donor or patient information has been released. All screenshots above were taken from a test clinic with fake donor and patient information.
Artisan Support
Comments