Multiple trigger protocol templates may be created so that they can be easily applied to different ART Treatment Cycles for individual patients.
Create a New Template

Select the ART Protocol Library from the Clinical Tools (Stethoscope icon).
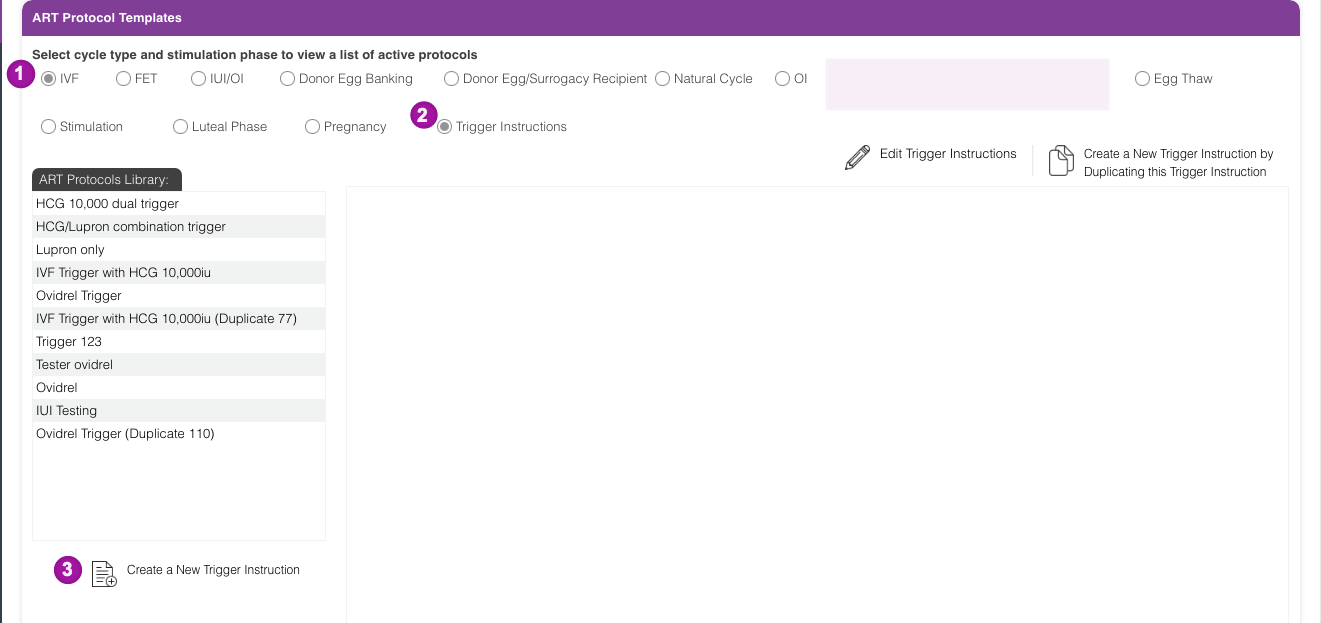
- Select the type of cycle the trigger will be used for (if this template will be used for multiple cycle types just select one at this time). Note that Trigger instructions that are marked for IVF will have different instructions than those marked for OI/IUI. Be sure to build Trigger instruction templates for IVF as well as OI/IUI.
2. Select Trigger Instructions.
3. Click on Create a New Trigger Instruction.
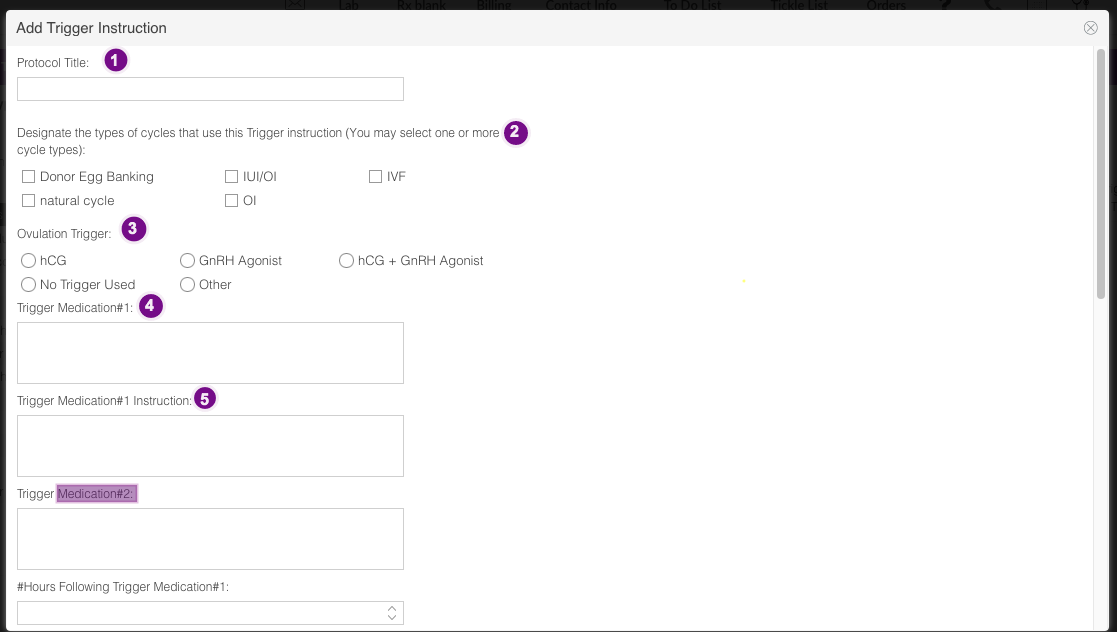

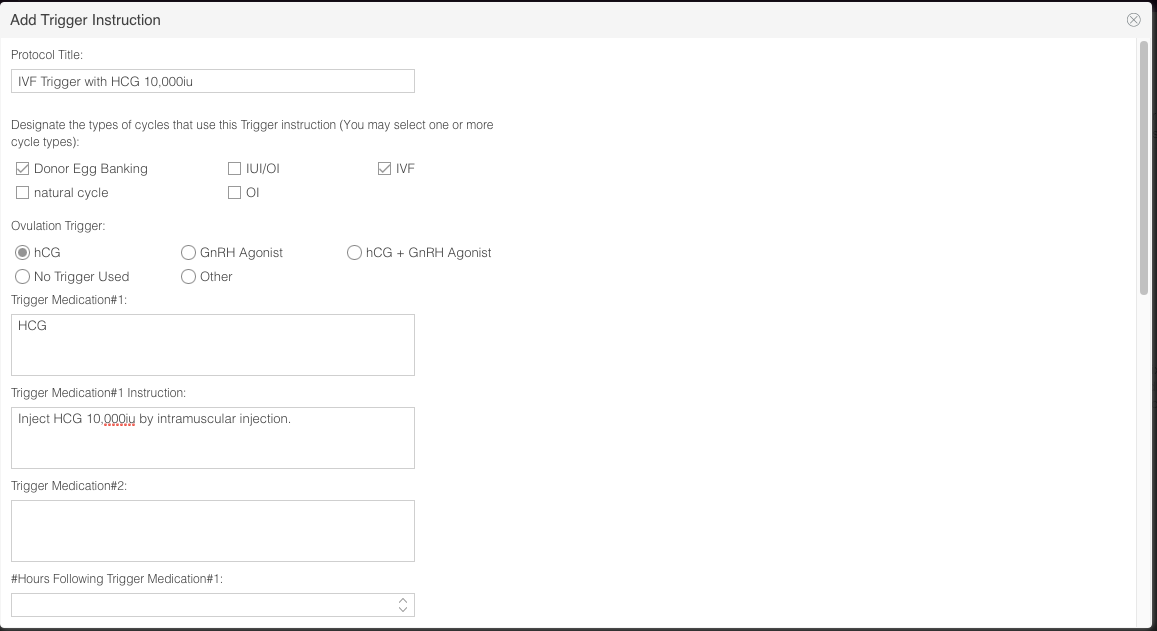
- Create a Protocol Title.
- Select all cycle types that use this Trigger instruction.
- Select appropriate Ovulation Trigger medication. This is a SART field.
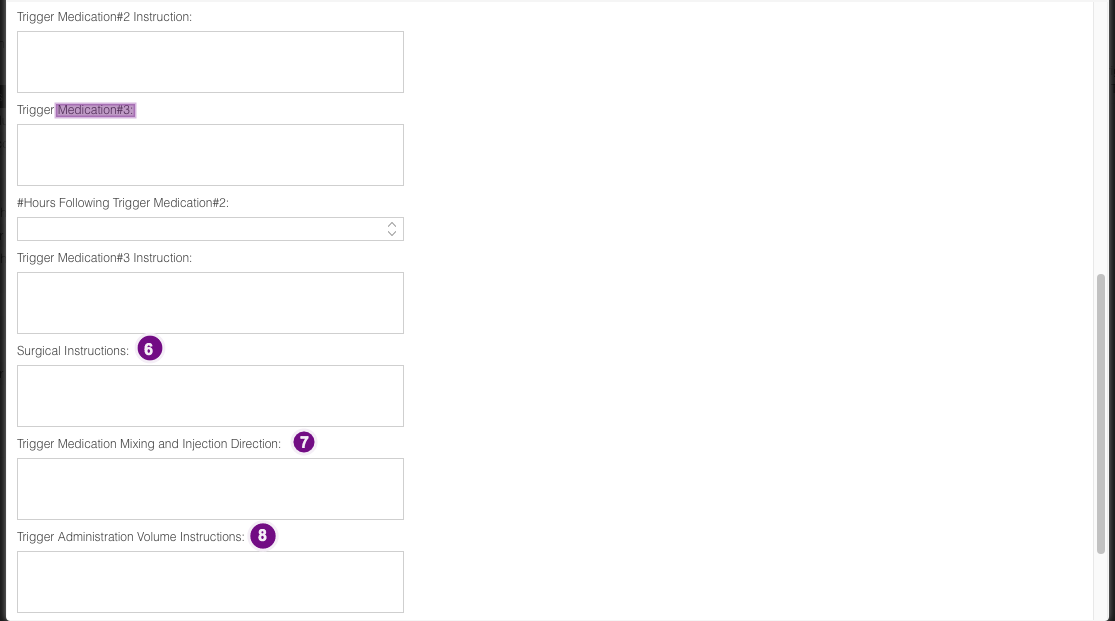
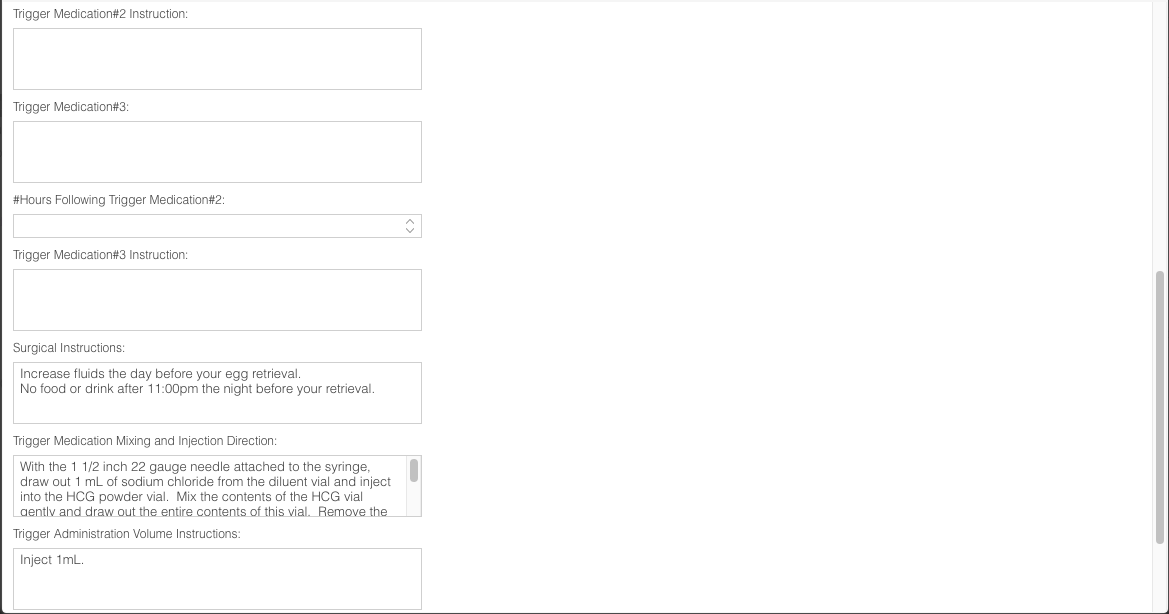
- Enter the name only of Trigger medication #1. (You may enter up to three Trigger medications to be used in a protocol) If the protocol has more than one Trigger medication, enter the medication name only for Trigger medication #2 and #3 as indicated.
- List the instructions for Trigger medication #1. This may include the dose, type of injection (subcutaneous or intramuscular), location of injection. Repeat this step for Trigger medications #2 and #3 if necessary. If using more than one Trigger medication, be sure to note the number of hours between medications and fill in the "#Hours Following Trigger Medication#1 or #2 field."
- List all surgical instructions. These instructions may include anything the patient needs to know from Trigger administration to day of retrieval. It may be helpful to decide in your practice what instructions you wish to include here.
- Include specific medication mixing instructions here for each Trigger medication. If using more than one Trigger medication, include mixing instructions for all of the medications here.
- The dosing volume for the Trigger medications is noted here.
- Provide patients with pre-op instructions in this block. This may include important instructions relevant to the day of egg retrieval. Again, it may be helpful to decide in your practice what instructions you wish to provide here.

Once all of the information for the Trigger protocol has been completed, click Commit and close.
*The example above shows the information filled in for the Trigger instructions that will be used for this Trigger protocol.
When you click on the Commit then the Close button, the information will populate directly into a template as shown below.
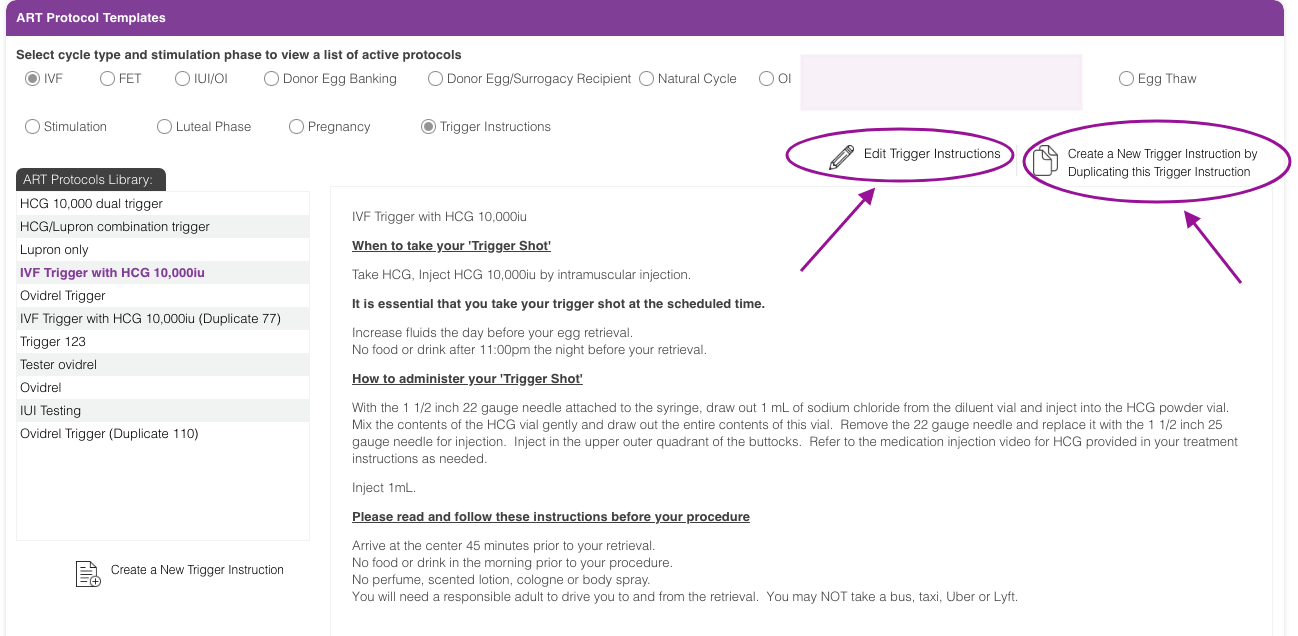
You may edit this template by clicking on Edit Trigger Instructions. You can also use the duplication tool to create a new template. This is often times done if there are similar protocol templates being created with minor changes within each protocol. Each template can be given its own unique name. Click Create a New Trigger Instruction by Duplicating this Trigger Instruction to accomplish this.
Bradley Carlson
Comments