The pregnancy tab within a cycle creates patient instructions, letters to referring physicians and tracks pregnancy data for SART.
Pregnancy Notes Tab

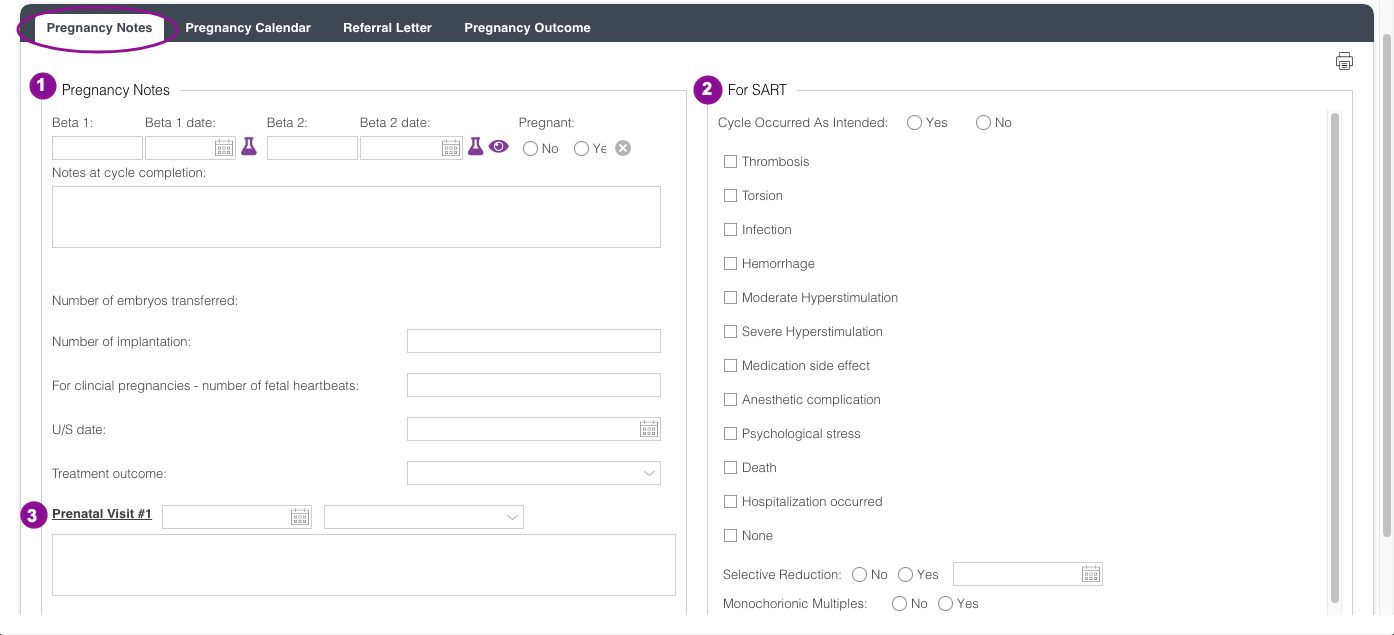
Use Pregnancy Notes to capture information from the time of the first pregnancy test through referral for obstetrical care.
Pregnancy Notes are integrated with other parts of Artisan, as follows:
[1] Beta hCG levels and pregnancy records: a positive pregnancy test creates a new record in the patient's "pregnancy log" in the database. For example, a G0 patient that has a positive pregnancy test has a new pregnancy record created, indicating that she is a G1P0.
[2] SART data: fields for SART reporting on this layout include Treatment Outcome, Number of Fetal Heartbeats, Complications, and Selective Reduction.
[3] Prenatal visits: Use these fields to record your pregnancy progress notes. A copy of this note is automatically inserted in the patient's main Progress Notes.
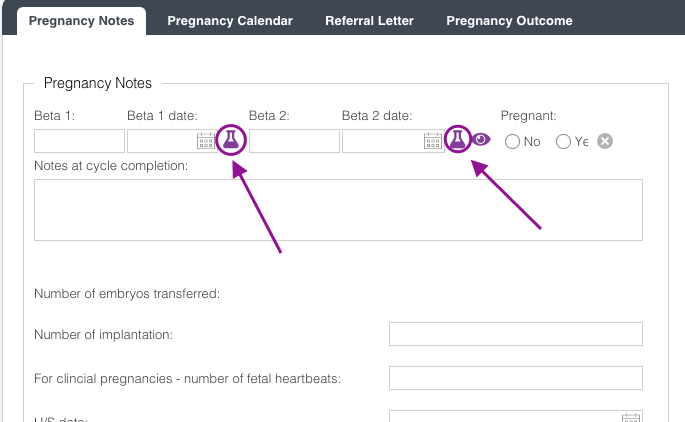
Manually enter the Beta results and date inside the appropriate box. If your practice is set up with an in house lab integration, click on the beaker icon to order the Beta HCG 1 or 2 if applicable.
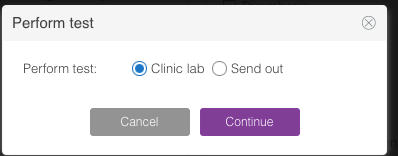
It will take you to this pop up window, select clinic lab then click continue.

Fill out the required fields: Date, Physician and select the appropriate test by clicking the drop down icon. Click continue.

This info window will pop up letting you know that the labs has been ordered successfully. Click ok.
Once the results are back, the values will auto populate inside the Beta 1 box. Do the same process for Beta 2, if applicable.
In this example, the patient's beta HCG results came back.
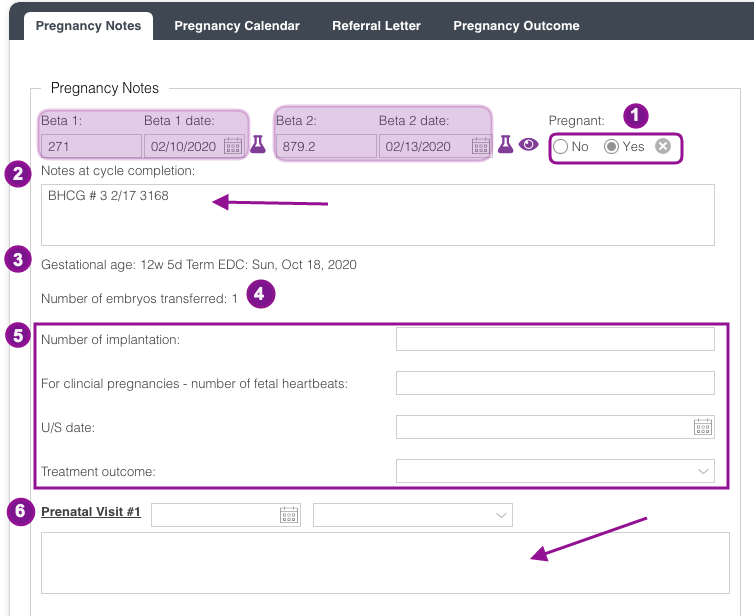
1. Pregnant: Mark Yes or No to confirm a patient's pregnancy
2. Notes at cycle completion: This is a free text box. Enter any pregnancy notes, if applicable. In the example above, a third beta result has been documented.
3. Gestational age: The system auto-updates this information.
4. The number of embryos transferred is pulling from the ER/ET tab under the ET note.
5. This information can be manually entered once information is known.
6. Prenatal Visit #1 will be documented in this section.

In this example, pt. came in for her first OB visit. Once the date has been selected it will automatically open up a Prenatal Visit #2 Field. Enter the OB notes inside the free text box.
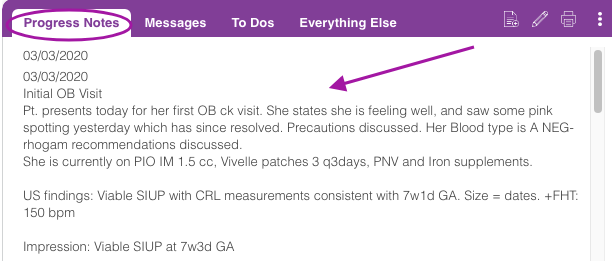
Prenatal notes from the pregnancy tab will also populate on the progress notes within the patient's chart.
Pregnancy Calendar Tab
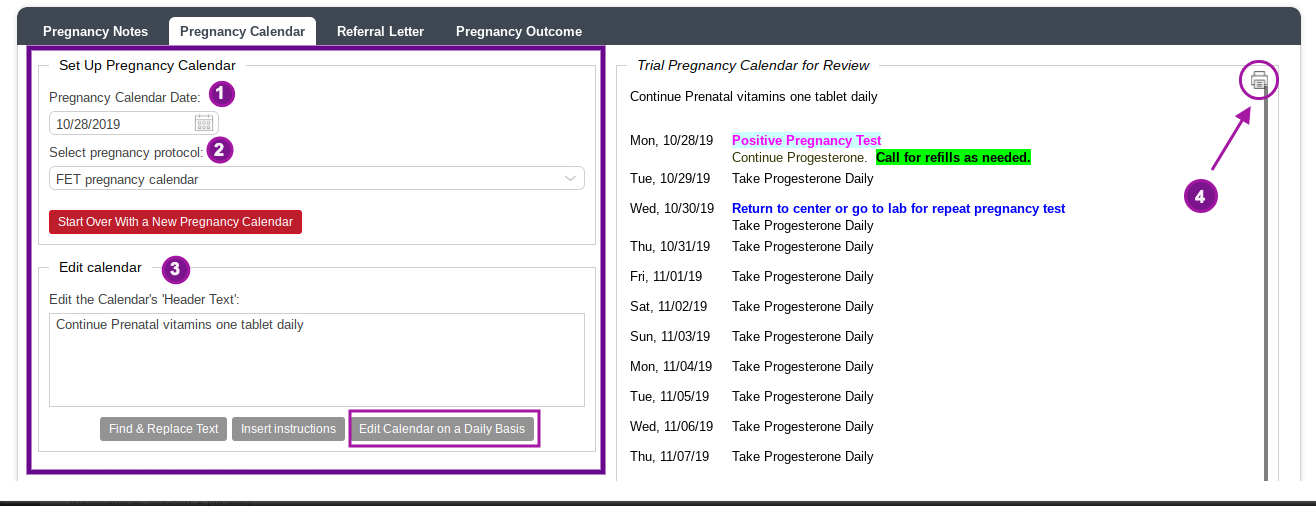
The Pregnancy Calendar tab generates instructions for newly pregnant patients based on the pregnancy protocols created in the ART Protocol Library.
1. Use the fields on the left side of the layout to insert a pregnancy calendar date (typically the date of the patient's first positive beta).
2. Select a pregnancy protocol. The treatment calendar instructions will appear on the right-hand corner of the screen.
3. Edit the calendar's header text and daily instructions to meet each patient's specific needs. If edits to the chosen calendar need to made, you can edit the calendar on a daily basis and customize the instructions to meet the needs of the patient.
4. Click the printer icon to send the instructions to the patient's portal.
The pregnancy calendar that is selected will be the calendar the patient will be on until the patient graduates from the practice.
Referral Letter Tab
Artisan gathers information from the patient's ART treatment cycle and pregnancy notes to construct a referral letter for the patient.
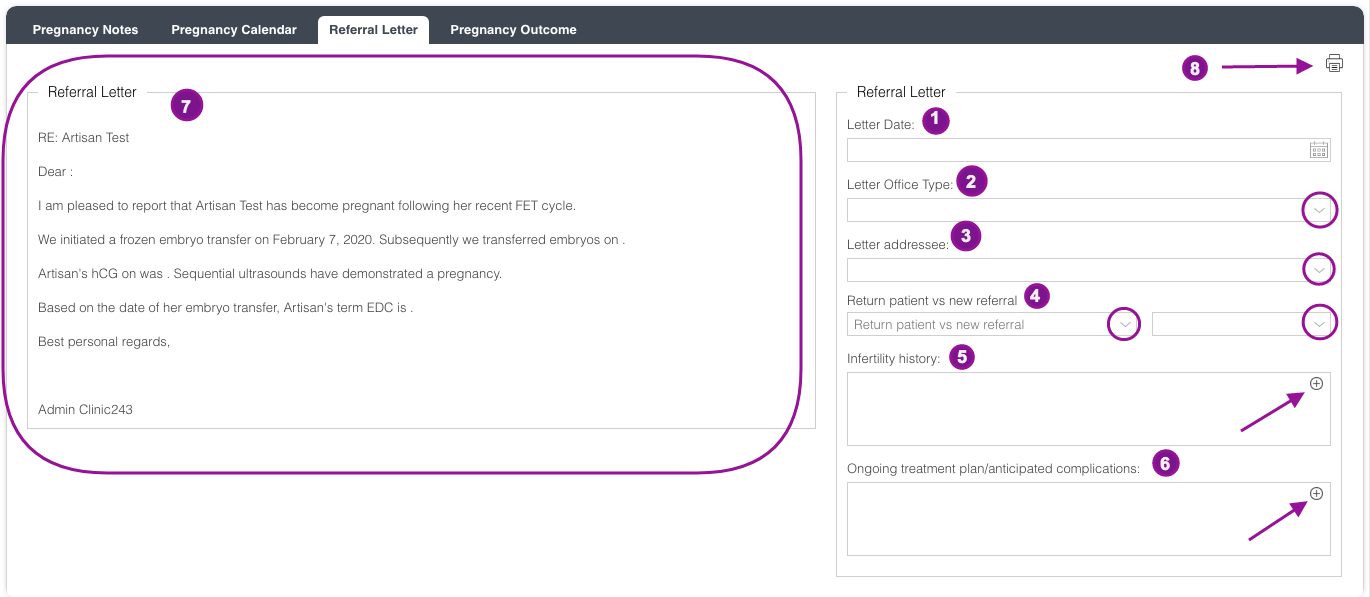
1. Select the Letter Date
2. Click the drop-down icon to choose the type of office letter that you are creating (e.g Primary Care or Referring Physician)
3. Letter addressee is pulling from the address book. Select the practitioner's name from the drop-down selection.
4. Click the drop-down to mark if this is a new or returning patient referral to an OB/GYN.
5. Enter the patient's Infertility History, click the + sign icon to use your stock text.
6. Enter the Ongoing plan or anticipated complications, click + sign icon to use your stock text.
7. The system generates a hard-coded text within the referral letter.
8. To print the letter, click the printer icon.
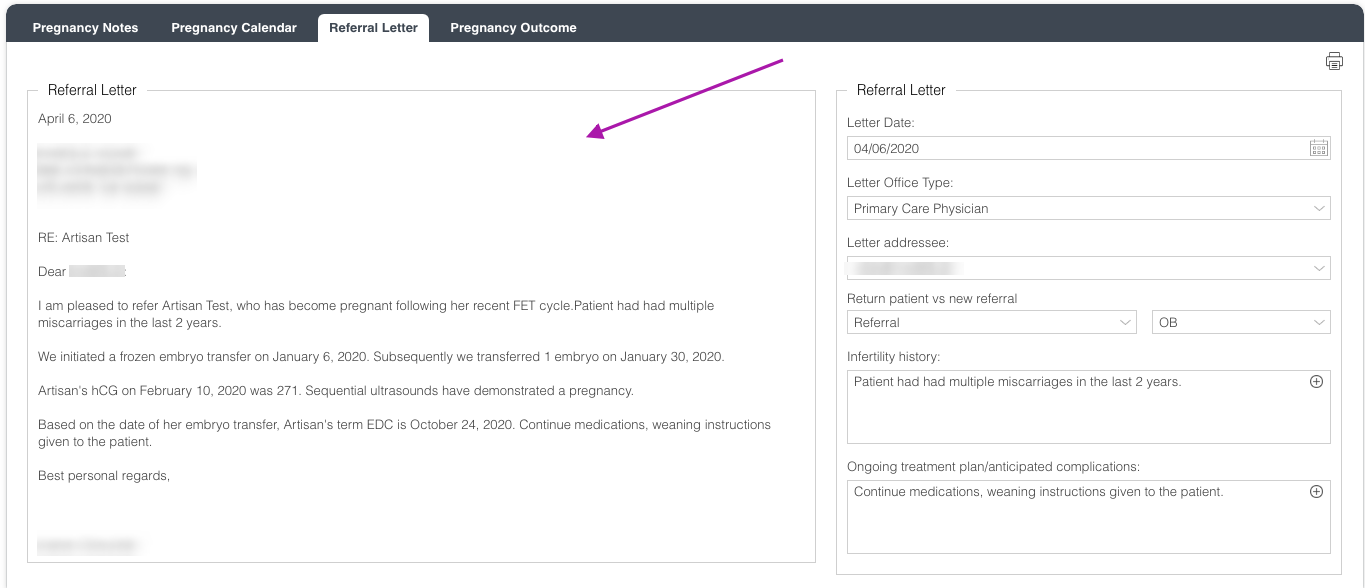
The notes added to the right-hand side will auto-populate to the left side and will construct a comprehensive Referral Letter.
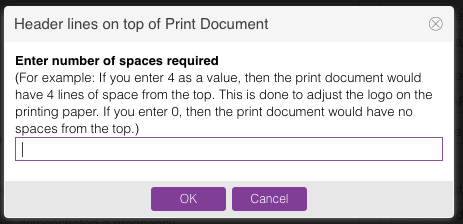
Once the printer icon is selected, this header lines option will pop up. Enter the numerical value inside the box and click ok to leave space for a logo or to print on letterhead.

Click Print then close.
Pregnancy Outcome Tab
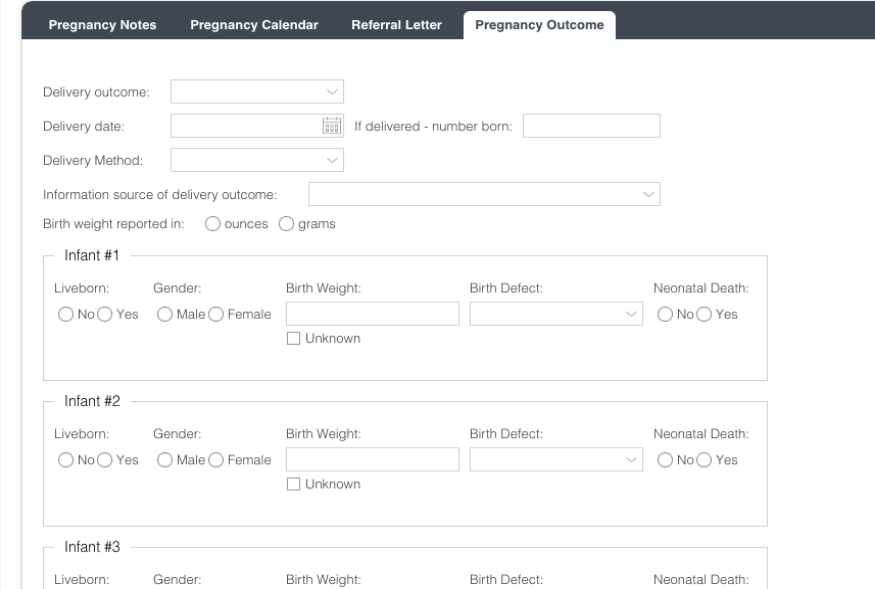
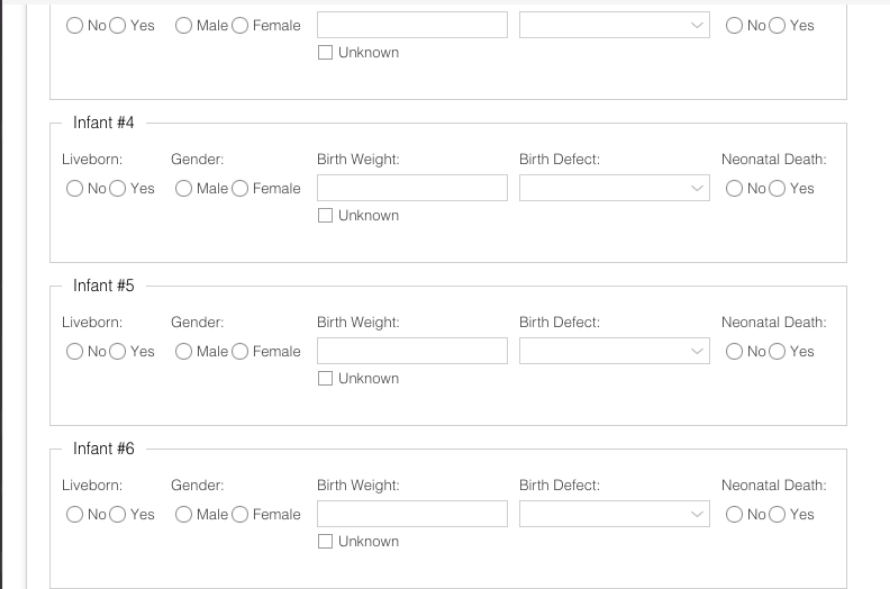

Pregnancy Outcome tracks required data for SART reporting. This is the section of the system to record the delivery outcome for the cycle. Manually Enter the delivery outcome on the appropriate fields once the information is known.
**All manuals are compliant with HIPPA regulations. No patient information has been released. All screenshots above were taken from a test clinic with fake patient information
Artisan Support
Comments