The H&P setup is usually completed during your Artisan training. It is customizable for each practice and the items in the H&P can be edited at any time.
The Artisan H&P Form set up allows the practice to design five separate H&Ps based upon the three different couple types and the single female and single male that may be seen in the practice:
1. Female and Male (the female will be added as the patient, the male as the partner)
2. Female and Female (in this case the patient and partner ordering is less critical)
3. Male and Male (in this case the patient and partner ordering is less critical)
4. Female Only (single female with no partner)
5. Male Only (single male with no partner)
Navigation
Click on the Gears icon in the bottom left corner of the home screen title Administration.
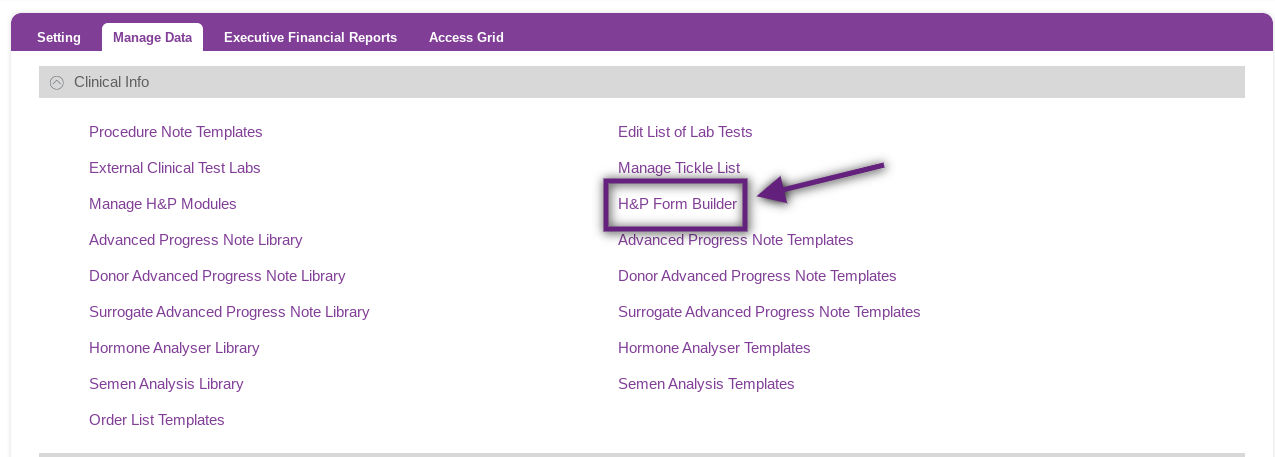
Under the Manage Data tab, click on H&P Form Builder.
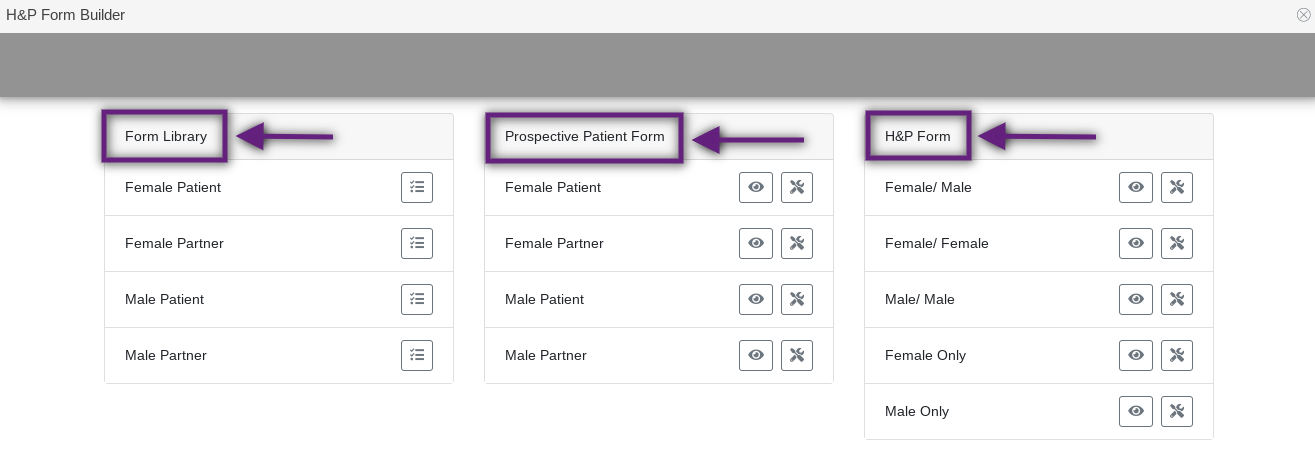
There are 3 categories in the H&P Form Builder: Form Library, Prospective Patient Form and H&P Form.
Form Library
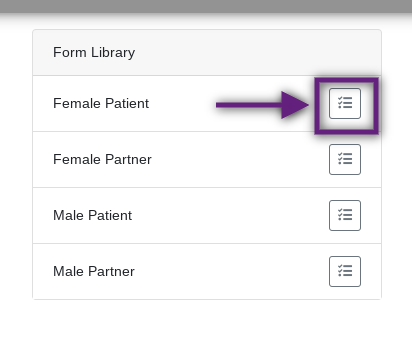
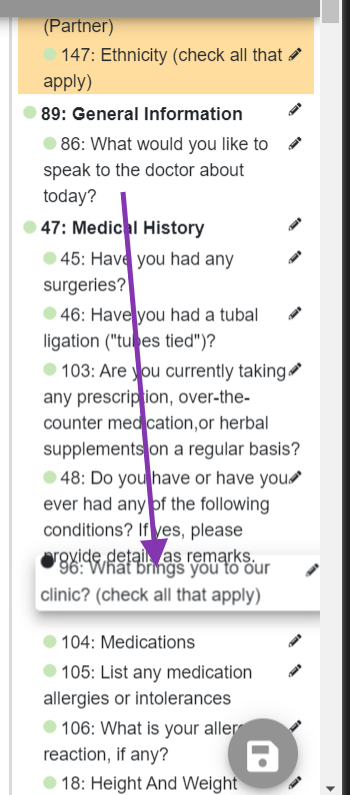
The Form Library displays all of the items, or elements, available to select on the Prospective Patient Form and the H&P Form. There are 4 different categories here: Female Patient, Female Partner, Male Patient and Male Partner. To access the elements in one of the categories, click on the Page icon to the right of the category.
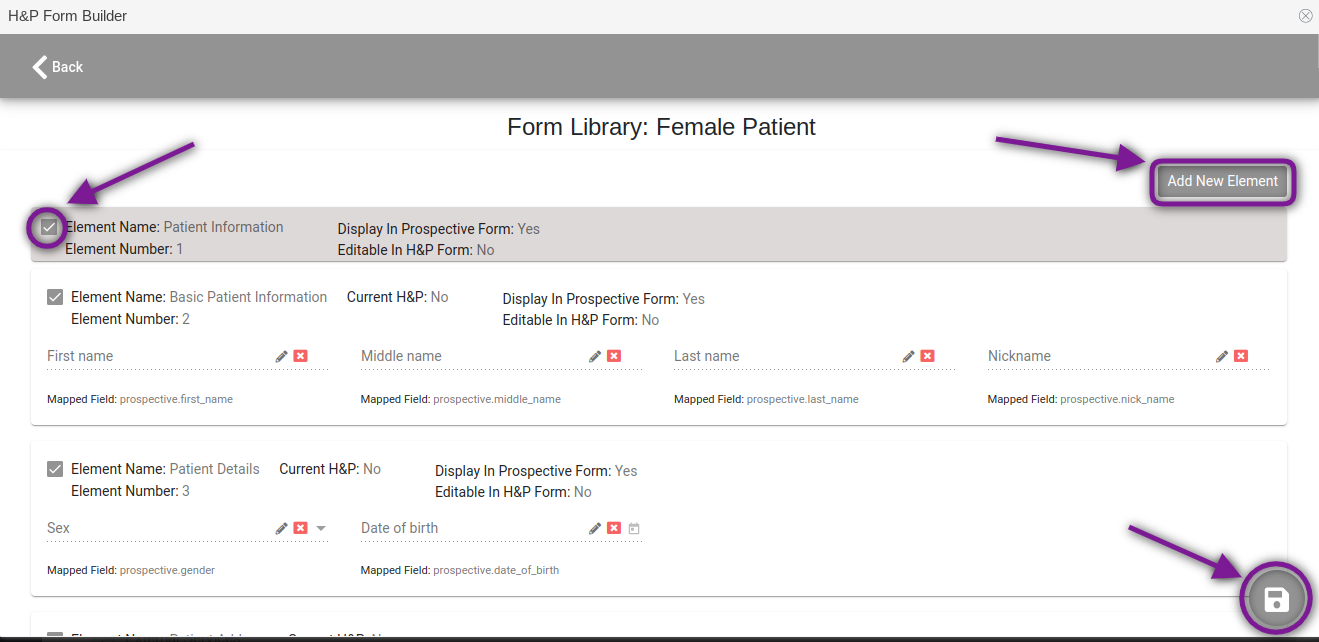
Within the Form Library, each element will display the Element Name, Element Number, Display in Prospective Form and if it is Editable in H&P Form.
If an element has a No in the Display in Prospective Form, it will not be a question on the patient's H&P Portal.
If an element has a No in the Editable in H&P form, it will not be a section the staff will be able to edit on the patient's H&P in the patient's chart.
The check box to the top left of the element will indicate whether an element is currently available in the Prospective Patient Form and H&P Form to be selected. A check will indicate it is currently selected and an empty box indicates that it is not currently selected. To select or de-select an item, click on the check box. To save any changes made in a Form Library, click the Disc icon.
Users are able to also add custom elements. To do so, click Add New Element.
Custom Headers and Items
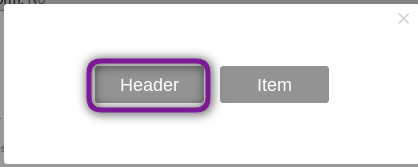
To add a custom header, select Header.
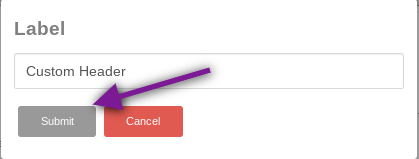
Type in the name of the custom header and click Submit.
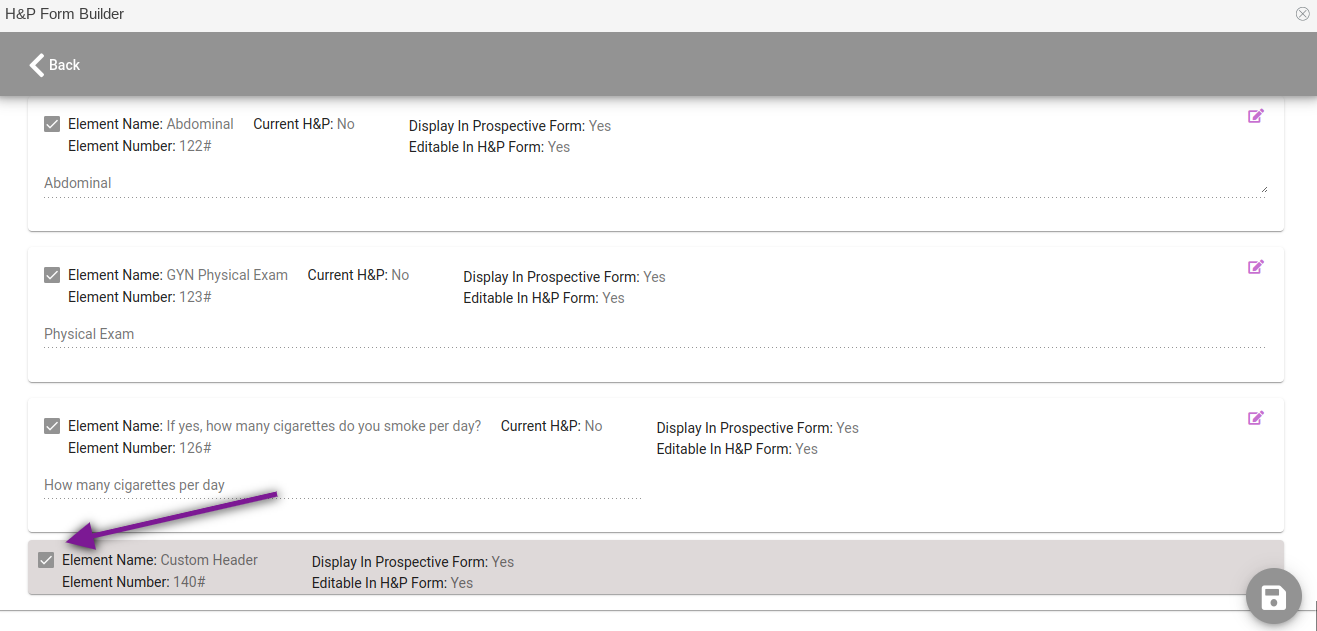
The header will show at the bottom of the library.
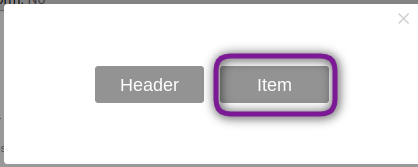
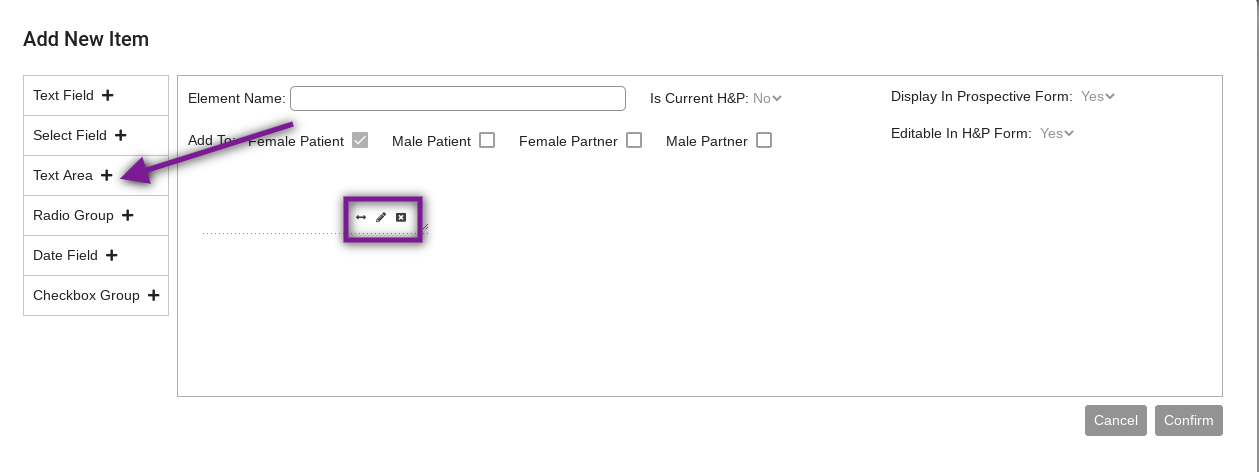
To create a custom item, select Item.
Text Field
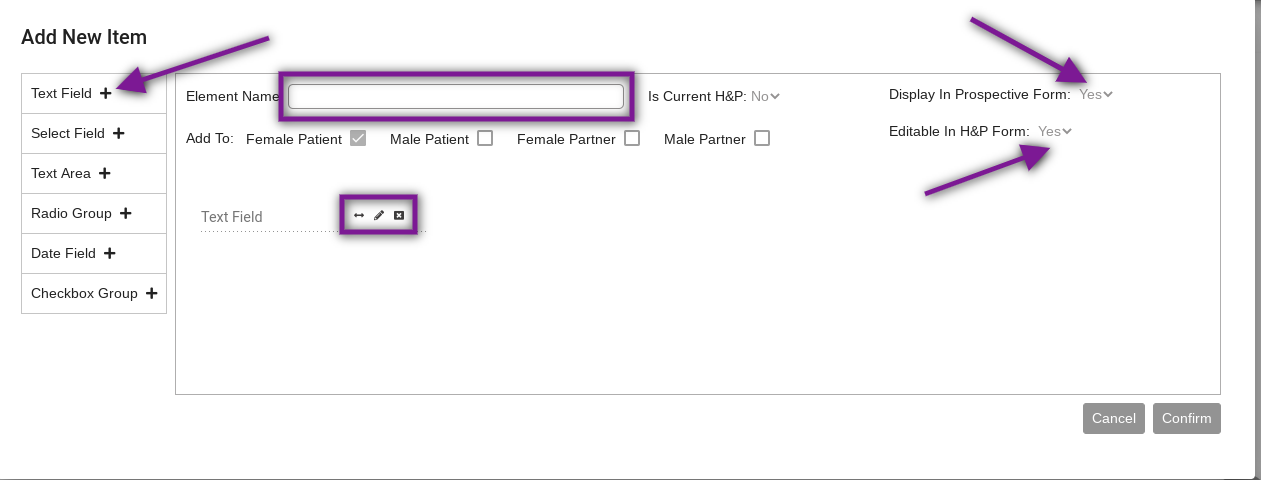
A text field will create a free text field on the element.
Display in Prospective Form: Select Yes or No
Editable in H&P Form: Select Yes or No
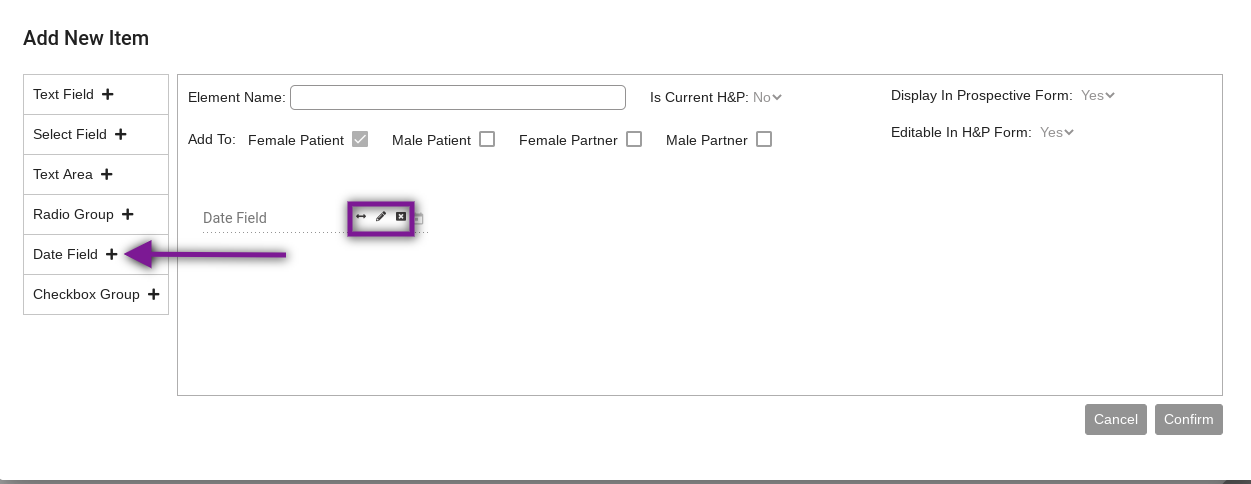
Click the plus sign to add a text field. The double arrows will allow you to change the size of the text field to 12, 25, 33, 50 66, 75 or 100%. The Pencil icon will allow you to change the label of the text field. The X will remove the text field from the element. Clicking Confirm will save the element.
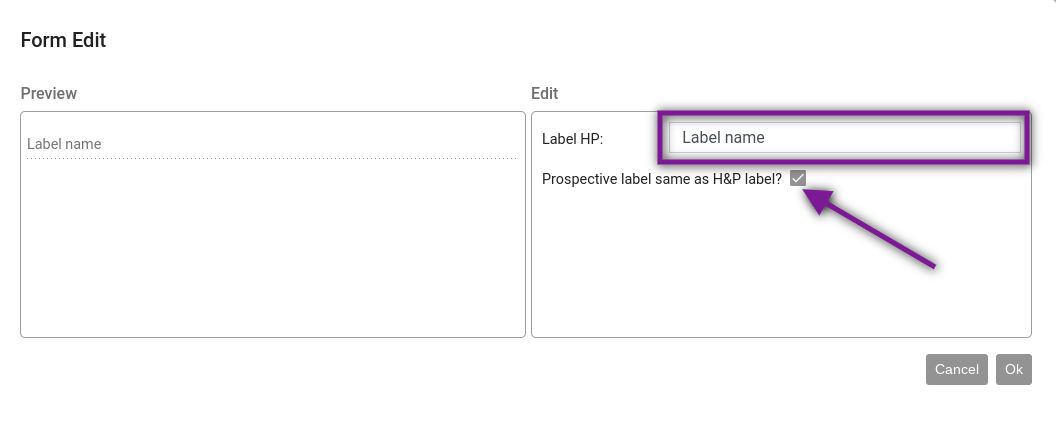
Clicking the pencil icon to edit the label name will take you to another window. Type the new label name in the text field next to Label H&P. Check the box if the prospective label will be the same as the H&P label. Click Ok to save your changes.
Select Field
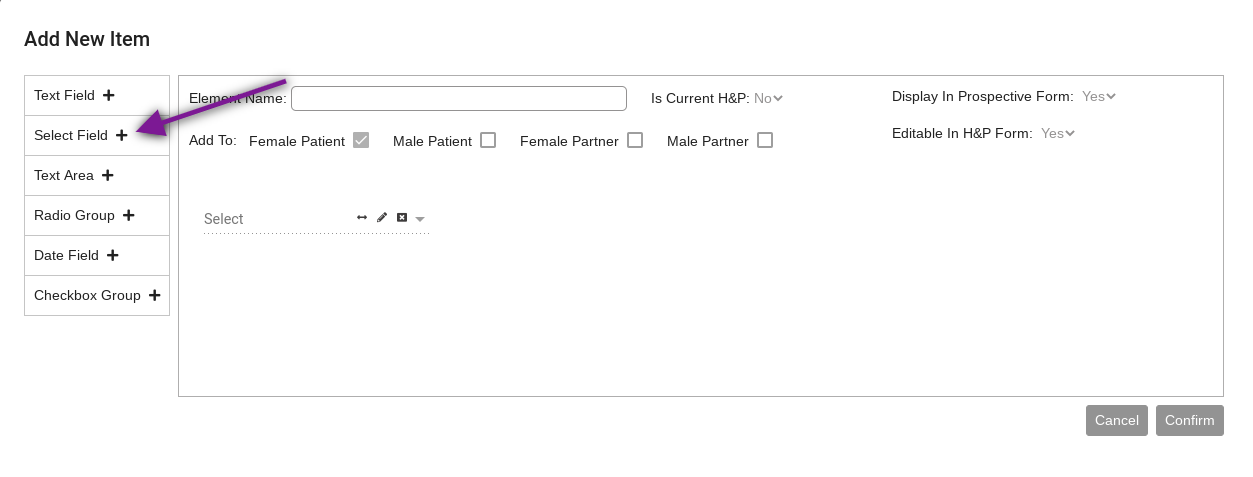
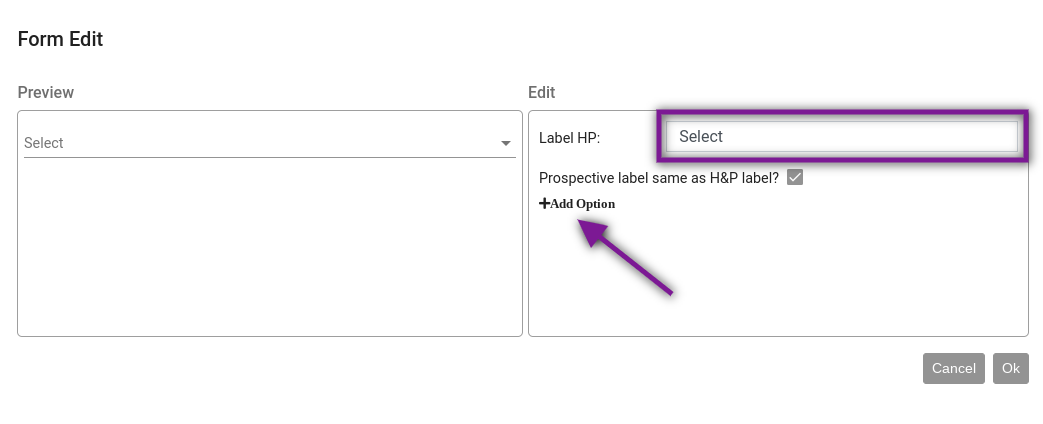
The Label HP free text field will allow the user to change the label on the select field. Click Add Option to add an item to the drop down.
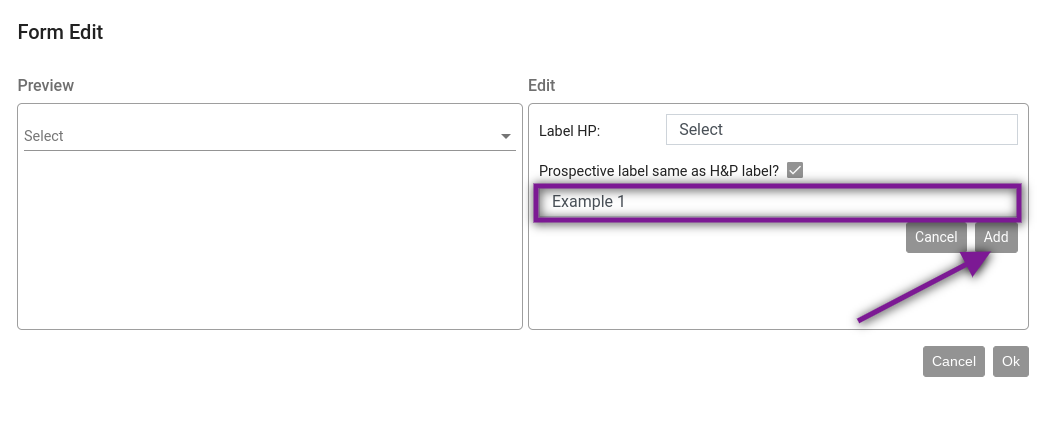
Type the item name in the free text field and click Add.
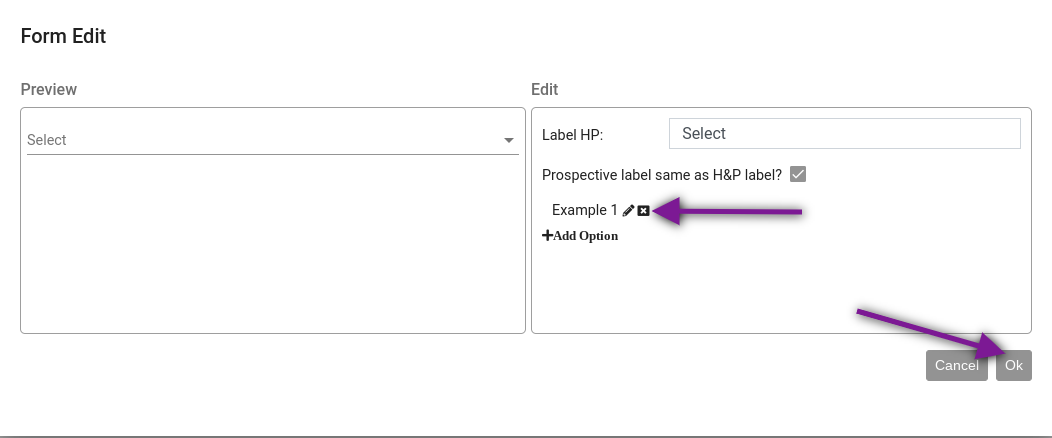
Click the pencil icon to edit an item. Click the X to remove the item. Click Add Option to add additional items. Once all of the items have been added, click Ok.
A text area will add a free text area to the element. The pencil icon will resize the text area. The pencil icon will allow editing of the of the label on the text area. The X will remove the text area.
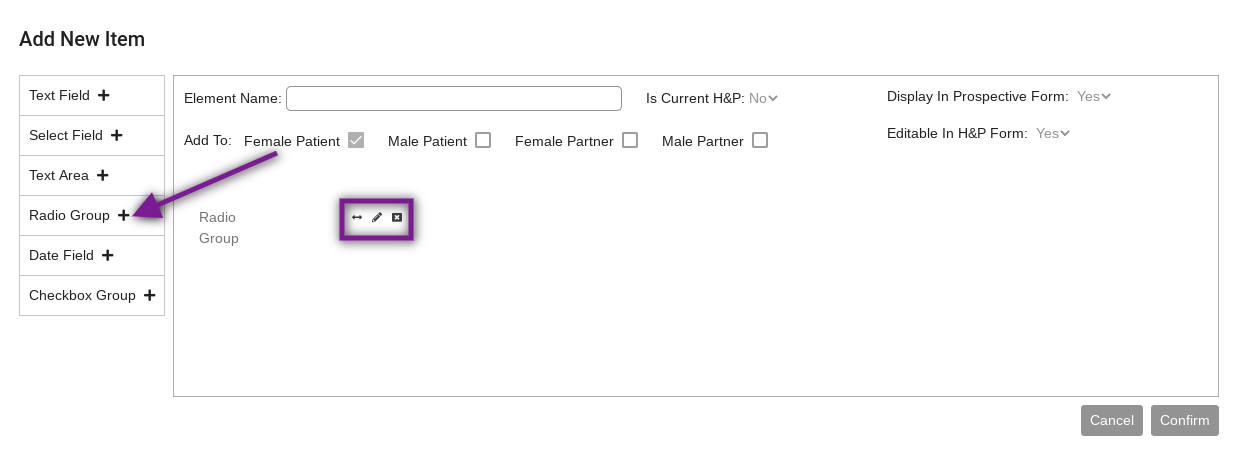
A Radio Group will allow the user to add a group of items with radio buttons (this will allow for one item to be selected in that group by the patient or the clinic staff). Click the double arrow icon to resize the radio group. Click the pencil icon to edit the radio group name and add items to the radio group. The X will remove the radio group from the element.

When the pencil icon is selected to edit, the user can update the radio group label (in free text field next to Label HP) and add items to the radio group by clicking Add Option for each item that needs to be added. Click Ok to save the changes.
Prospective Patient Form
Based upon the genders indicated when patients and partners are entered into the Artisan EMR, the system will properly generate the appropriate H&P, based upon the setup of modules in your practice. The items selected for the patient type in the Prospective Patient Form will be available in the Prospective Patient Portal under Medical History to fill out prior to the patient's first appointment. There are four different Prospective Patient Forms that will need to be built: Female Patient, Female Partner, Male Patient and Male Partner.
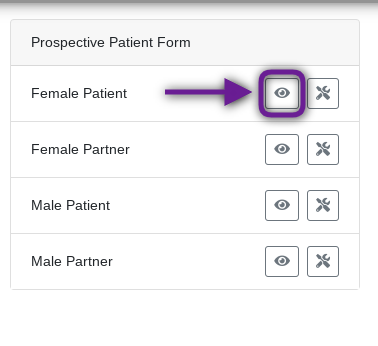
To preview the form, click the Eye icon next to the applicable patient type.
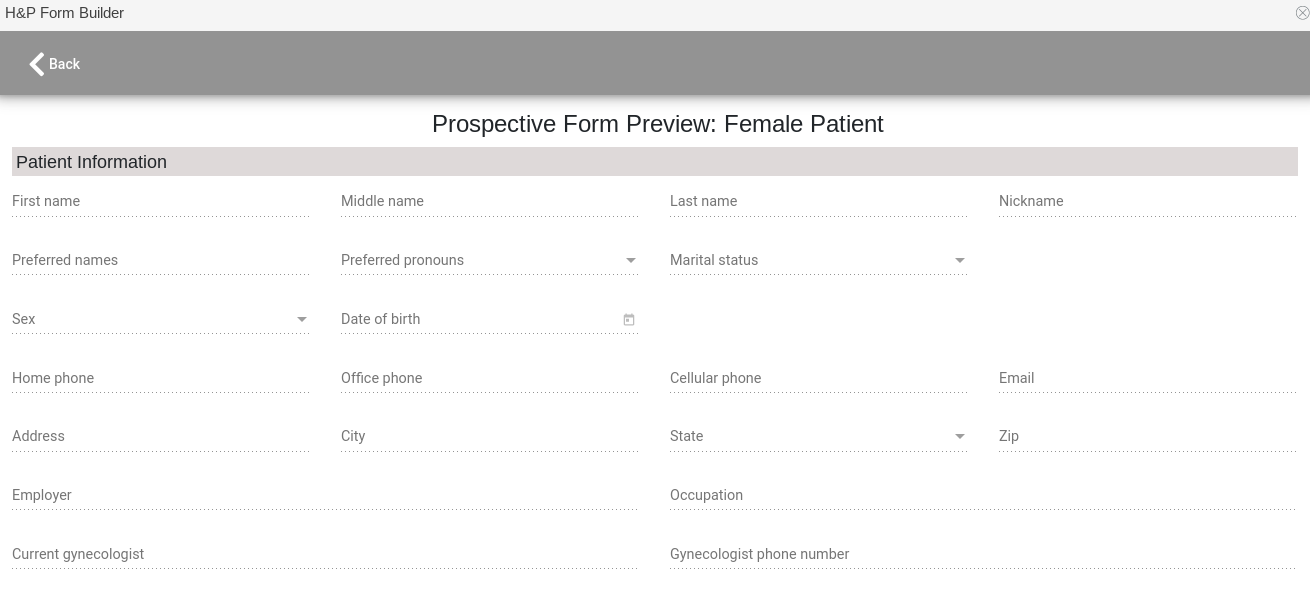
This will allow you to preview the form as it will appear in the Prospective Patient Portal.
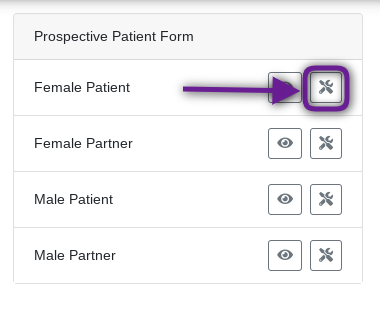
To edit the form, click the Wrench icon next to the applicable patient type.
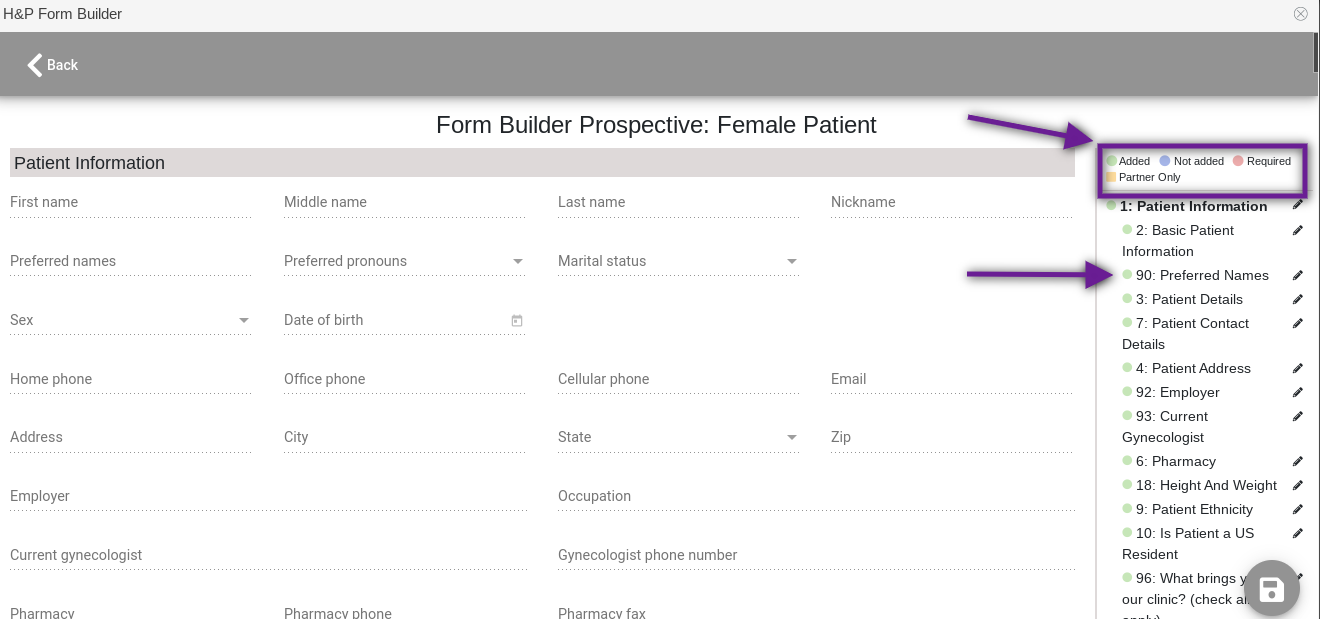
This will open the Form Builder for the Prospective Patient. The Prospective Patient Form can be viewed in the From Builder. In the top right corner, there is a color key explaining what the different colors next to the element mean:
- Green: The element has been added to the Prospective Patient H&P form.
- Blue: The element has not been added to the Prospective Patient H&P form.
- Pink: Required element.
- Orange: The element is for the partner only.
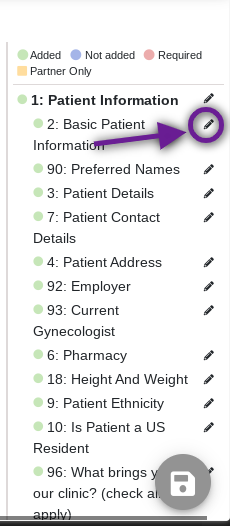
The elements are displayed in the panel on the right side of the screen. To edit an element, click the Pencil icon.
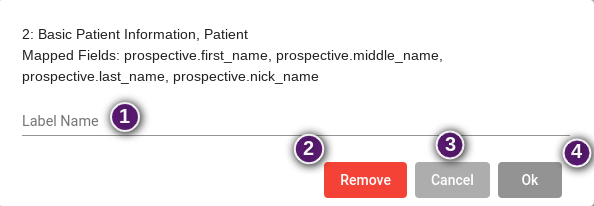
There will be four options in the edit field:
- Label Name- A label can be create for an element on the Prospective Patient form that will be displayed above that field.
- Remove- This will allow an element that is currently on the Prospective Patient form to be removed.
- Cancel- Click cancel to exit out of edit window without making any changes.
- Ok- Click Ok to save changes made in the edit field.
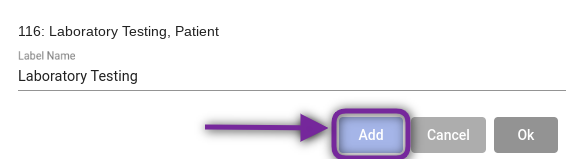
If an element is available to add but not currently on the Prospective Patient form, Add will be an option for that element.
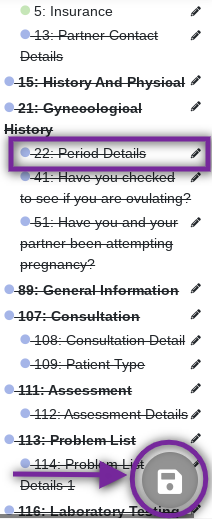
Any elements that are not currently on the Prospective Patient form will have the blue dot next to them and crossed out on the panel of elements. To save any changes made to the Prospective Patient form, click the Disk icon.
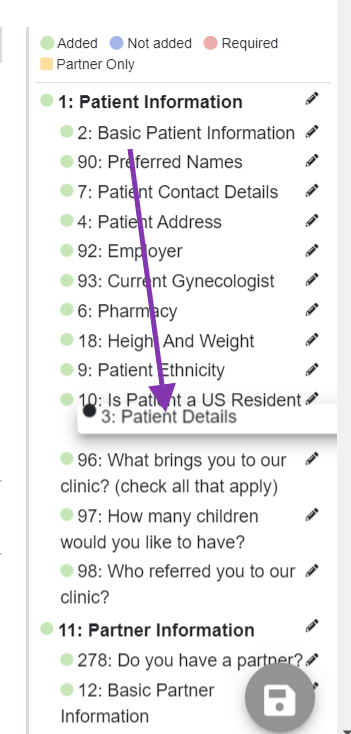
There is the ability to drag and drop the elements to a different spot for how the practice would like to have them displayed for the patient in their portal.
The Prospective Patient Form will need to be built for each patient/partner type.
H&P Form
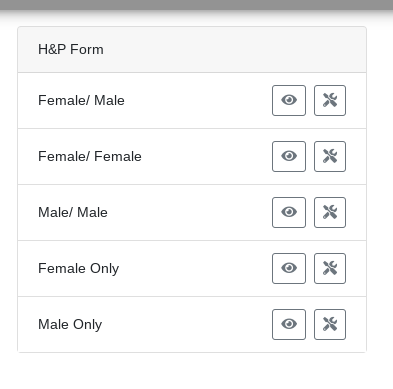
The H&P Form is the form that will appear under H&P in the chart once a prospective patient has been imported into Artisan. On this form, additional fields can be added that will only be seen by the clinic and filled out by the physician. There are 5 different categories of the H&P Form that can be customized: Female/Male couple, Female/Female couple, Male/Male couple, Female Only patient and Male Only patient.
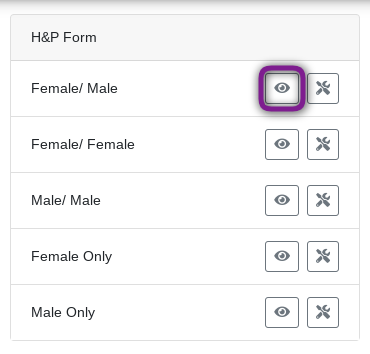
Click the Eye icon to preview the H&P Form for any category.
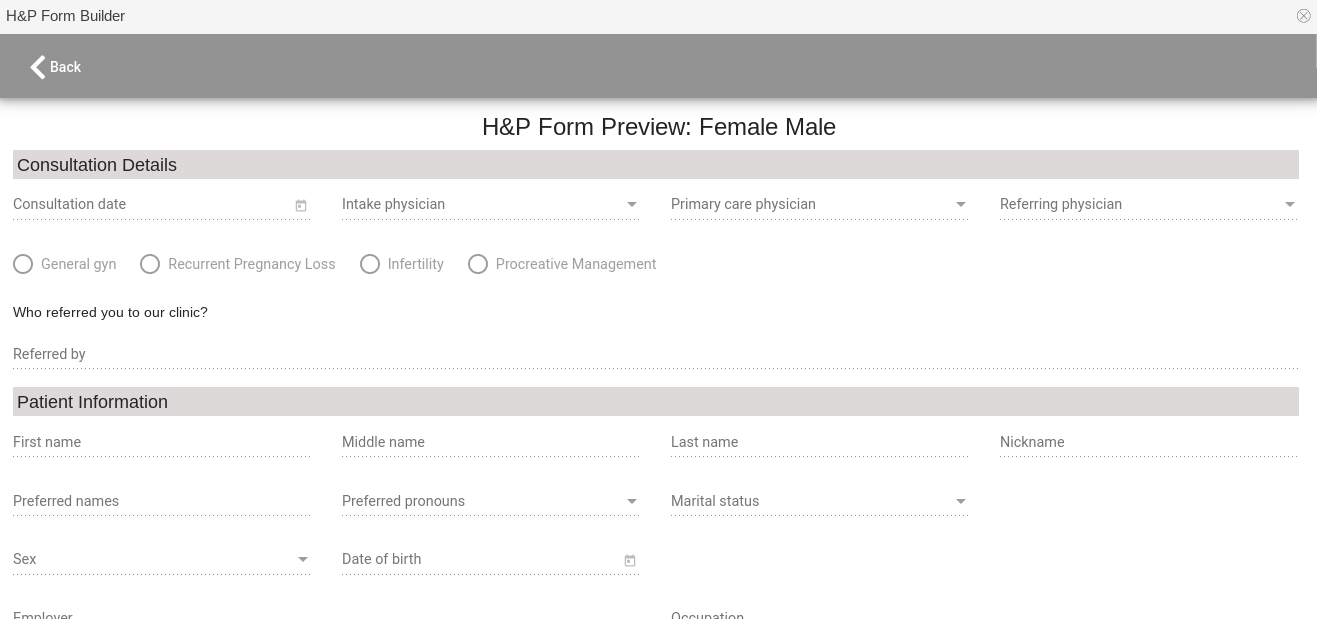
This will allow the user to preview what an H&P Form for a particular category currently looks like.
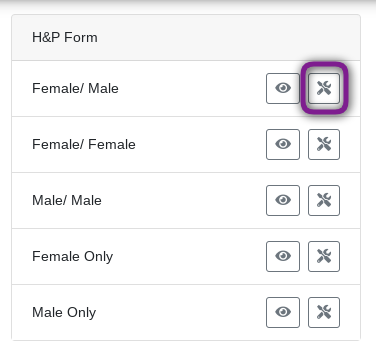
Click the Wrench icon to make edits to the H&P Form for a patient/partner category.
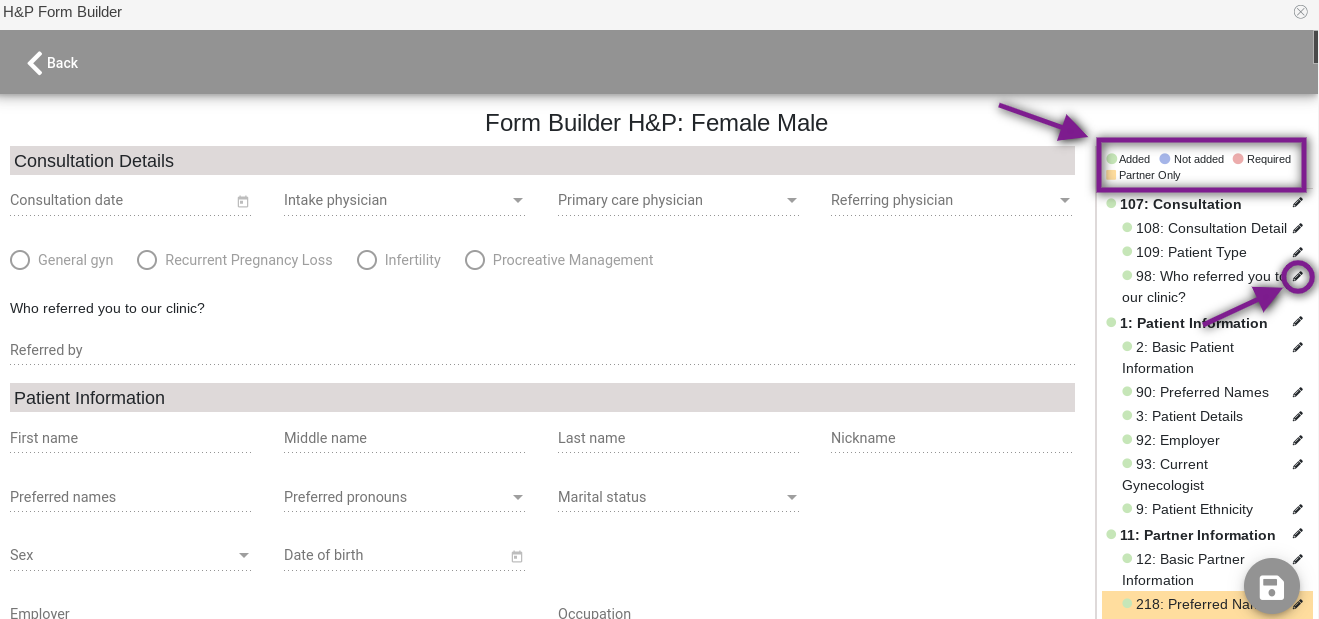
The H&P Form Builder will allow you to preview the form for the selected patient/partner type. Editing the H&P Form works similar to editing the Prospective Patient Form. The color code at the top of the element panel on the right side of the screen indicate whether an Element has been Added, Disabled, Required or for Partner Only. To Edit an element, click the Pencil icon.
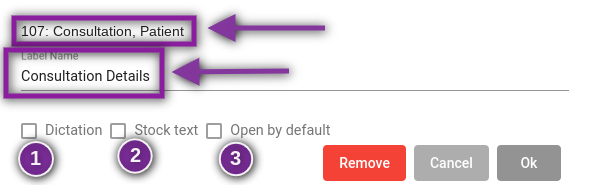
Within the edit screen, the element name will be displayed at the top. Below the element name is the label name. This is an editable field and will appear above the items in the element in the H&P Form. Below that are 3 different options that can be checked off:
- Dictation- Check this box to enable dictation in this field.
- Stock text- Check this box to enable stock text in this field.
- Open by default - This will allow the field to be open in the H&P on the patient's chart without the clinician having to click on it.
You may choose which boxes you would like to enable or choose all of them.
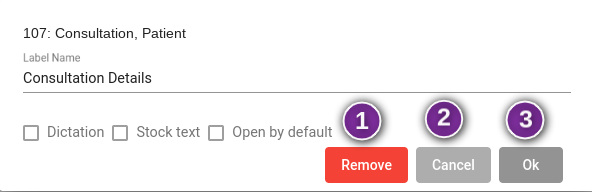
There are 3 additional buttons on the edit screen:
- Remove to remove the element from the H&P Form.
- Cancel if no changes need to be made.
- Ok to save the changes that were made.
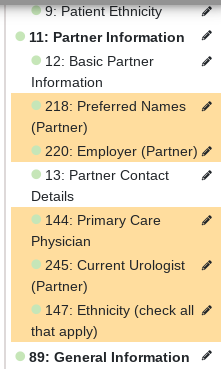
The elements that pertain to the partner will be highlighted in orange.
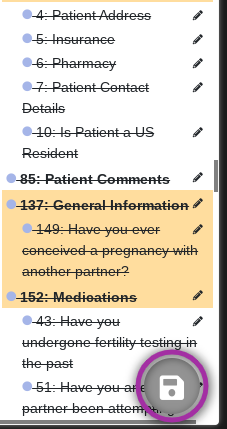
Elements that are disabled will be crossed out. Click the Disk icon to save changes.
There is the also the ability to drag and drop the elements to a different spot for how the practice would like to have them displayed in the H&P in the patient's clinical chart.
The H&P Form will need to be built for each patient/partner type.
Artisan Support
Comments