The Expense Estimator Template Setup is the area in Artisan where you will be able to customize the ART Treatment Estimator plans, modifications to the plan, and update the status library.
Navigation:
This is only accessible to Clinic Admin and Practitioner user privileges.
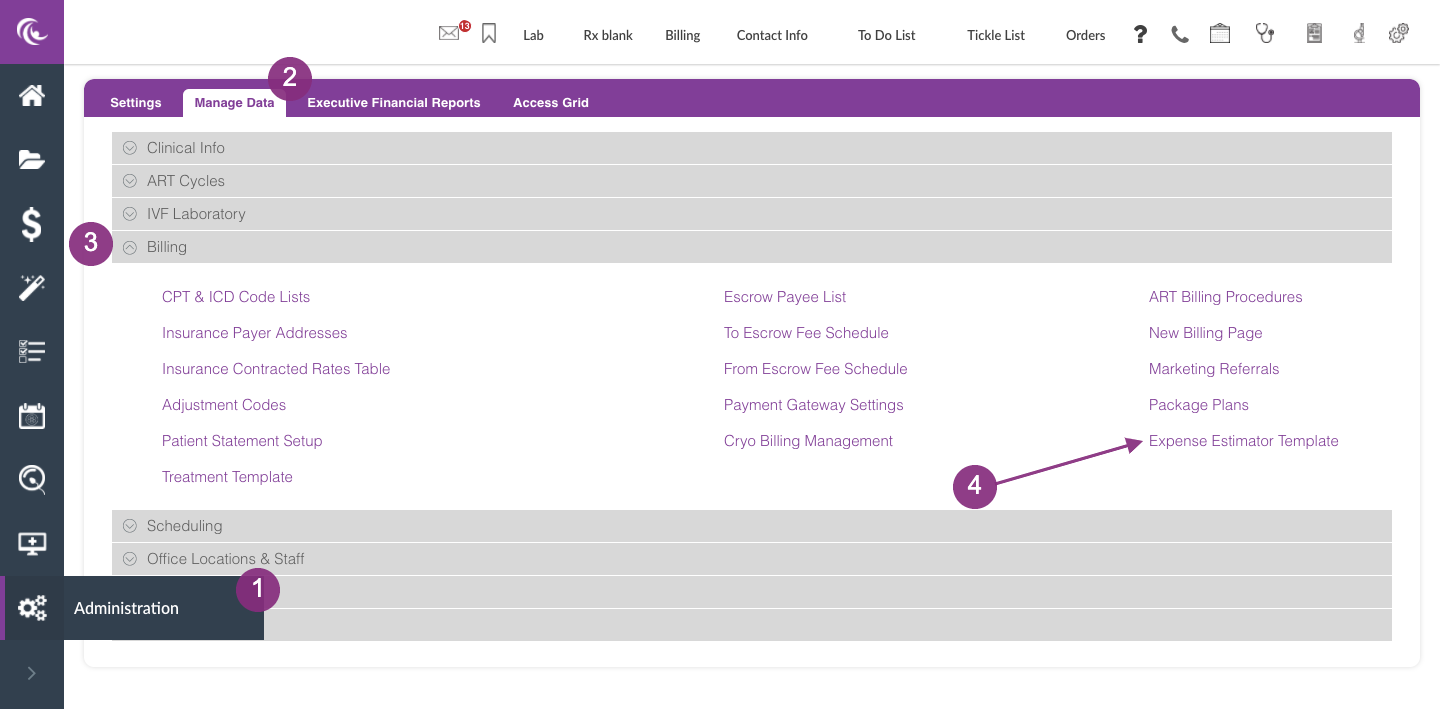
You can access the Expense Estimator Templates by clicking on the Administration (gears) icon in the Navigational tools in the bottom left-hand corner. Select the Manage Data tab and expand the Billing tab and click on Expense Estimator Templates.
ART Cycle Treatment Expense Estimator Template Libraries
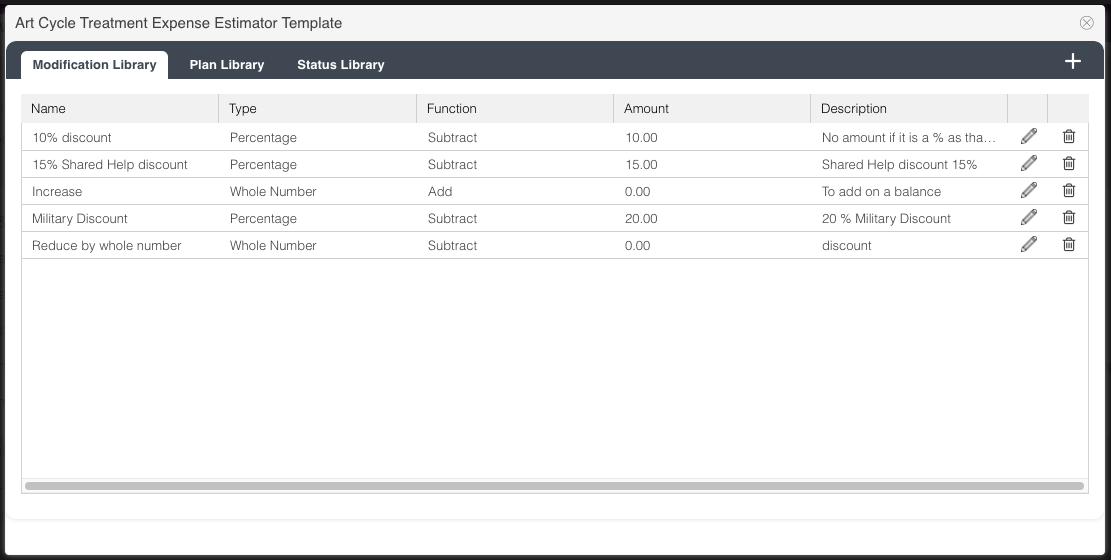
Modification Library Tab
The modification library is where you can enter whole numbers or percentages that can be added or subtracted from a single line item or overall balance of the estimate.
Click on the plus sign icon (+) in the top right-hand corner to add a new item to the library. The below screen will pop up.
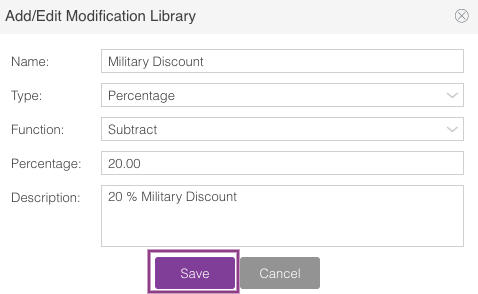
Name: this will be the name that is reflected in the estimator for this template
- Type (Percentage/Whole number): Select if this modification will be a whole number amount or a percentage
- Function (Add/Subtract): This function will determine if the whole number or percentage is added or subtracted in the calculation.
-
Percentage/Amount:
- If percentage it will reduce or add that hard coded percentage when applied
- If whole amount it will add or reduce this amount but user will have ability to override when applied.
- Description: Free text field to better describe the modification
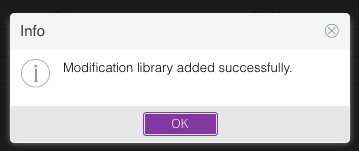
The above pop-up box will appear after saving the modification. Click OK to confirm.
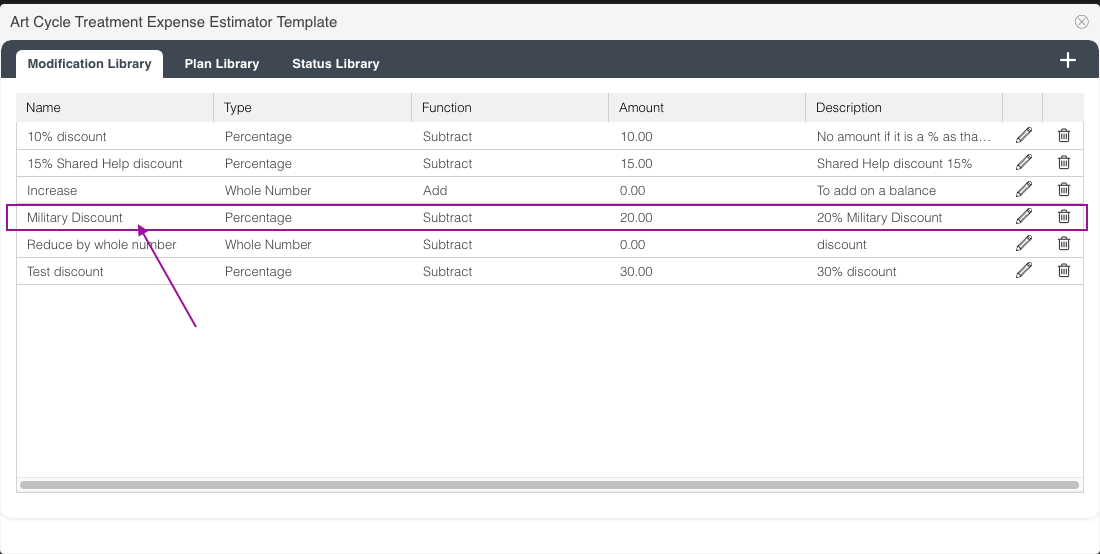
The modification will display in the library reflecting the type, function, amount, and description.
- Use the pencil icon to make any edits.
- Click the trash can icon to delete the modification.
Plan Library Tab
The plan library is where you are able to enter self-pay/global programs and plans for patients utilizing insurance coverage.
Click on the plus sign icon (+) in the top right-hand corner to add a new item to the library.

Create a Package Plan
The above screen will pop up.
- Plan Name: Patient Facing label of the plan so you can easily identify the program you are selecting, for example, IVF Global w/PGT.
- Type: Select whether this estimate is a self-pay program or one that will use the insurance of the patient.
- Heading: Patient Facing description of the plan type.
- Item Description: Patient-facing description. You can make the item description easier for the patient to understand. For example, instead of PGT Biopsy < 8 that may be listed in the CPT code description
- CPT Code: A drop-down box will allow you to select the CPT codes you want to add to this plan template. Selecting the CPT code will fill in the next box 'Description' as this pulls from your CPT library.
- Description: A drop-down box will allow you to add the procedure by its description instead of procedure code. It will auto-populate the CPT code as it pulls this information from your CPT library.
- Units: assign how many units of this procedure type will be included in this plan.
- Click on the Plan Name + to add additional lines to the plan.
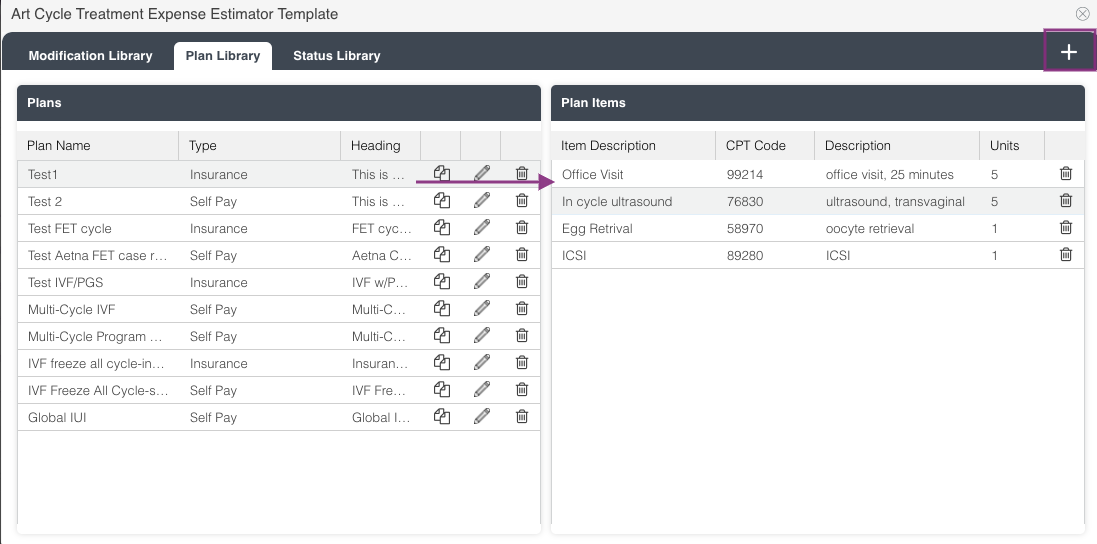
Once you complete the process of entering your self-pay and insurance plans, they will reflect in the Plan Library. Clicking on a Plan in the first box will list the Plan Items in the second box.

- To duplicate a plan, click on the pages icon.
- To edit the information entered, click on the pencil icon.
- To delete, click on the trash can icon.
Status Library Tab
Statuses will allow clinical and financial team members to understand whether a patient is financially cleared to proceed with ART treatment. The library is where you will set up these statuses to reflect in the ART Treatment Estimates and Coordination screens.
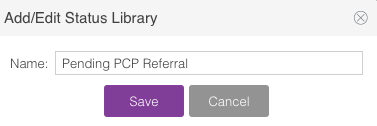
Click on the plus sign icon (+) in the top right-hand corner to add a new item to the library. The below screen will pop up. Enter the status you would like to add to the library. Click Save.
Approved, Lapsed, Plan Selected, and Updated statuses are hard-coded into the system and cannot be edited or deleted.
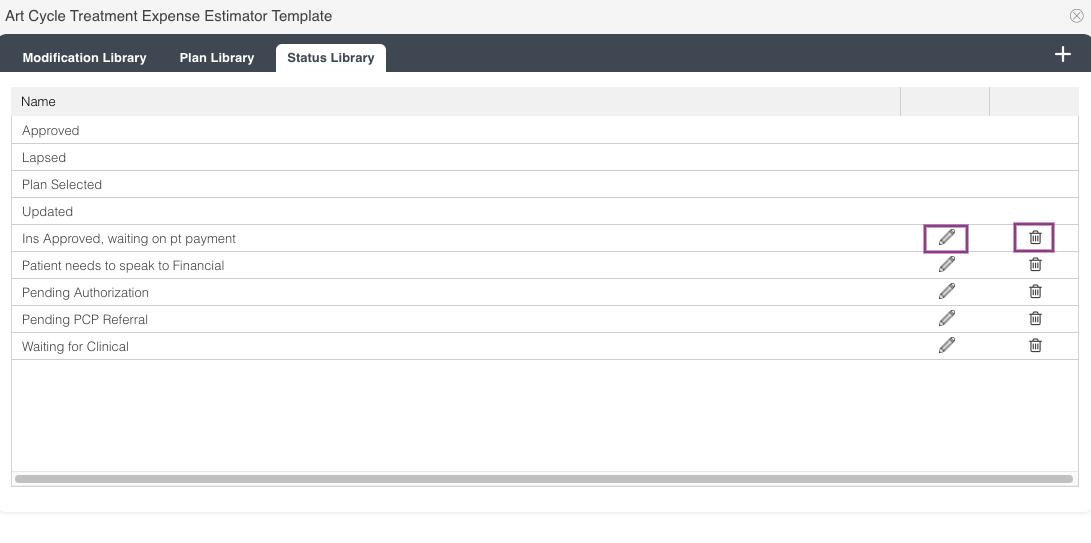
To edit the information entered, click on the pencil icon.
To delete, click on the trash can icon.
Heather Yatsko
Comments