Clinics that have an in-house hormone analyzer may choose to integrate the analyzer with Artisan. This will allow for results of the tests ordered in Artisan and run through the hormone analyzer to automatically upload to the patient's chart. When hormone labs are ordered within a cycle through an integration, the results will automatically upload to the cycle.
Initial Setup
Contact Artisan Support to begin the setup of your in-house hormone analyzer integration.
Navigation

From any patient specific screen, click the Lab button on the quick picks menu bar.
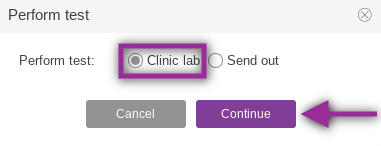
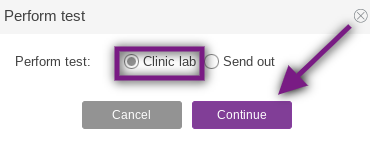
Select Clinic lab and click Continue.
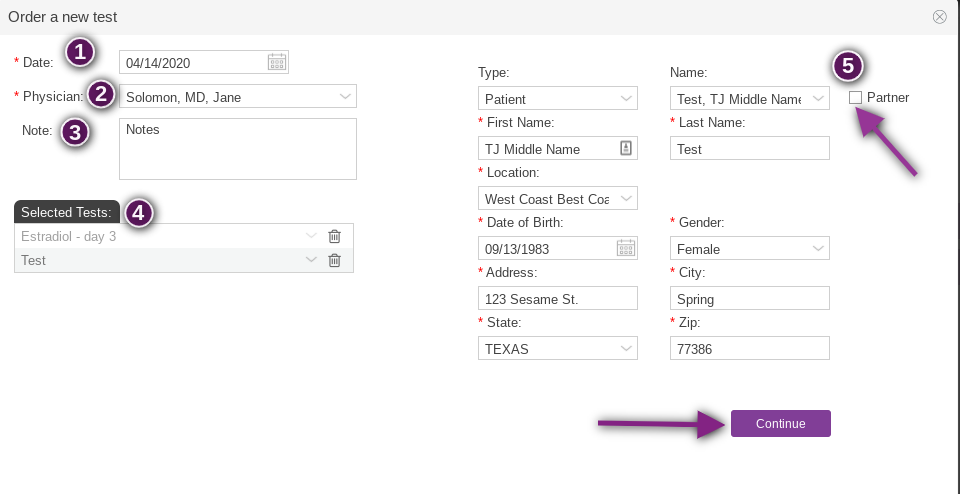
On the ordering screen, follow these steps:
- Enter the date that the test will be performed.
- The physician name will auto-populate if a primary physician is selected in the patient's contact info screen. Otherwise, use the drop down menu to select the ordering physician.
- Any special notes for the lab may be entered under Notes.
- Select the test to be performed from the drop down. You may also start typing in the name of the test to pull the test up in the drop down. This step will need to be repeated for each test that needs to be added. Any test may also be deleted from this screen by clicking the trash can icon to the right of the test. *The tests in the drop down menu are added in Edit List of Lab Tests. For detailed instructions on this, read the manual How to Manage Lab Test Choices.*
- Make sure all required patient information is filled in. If the test is for the partner of a patient, click the box for Partner.
Click Continue to order the test(s).
A screen will pop up indicating that the lab report was added successfully. Click OK.
The in-house lab test has now been ordered.
Ordering In-House Hormone Labs from Within a Cycle
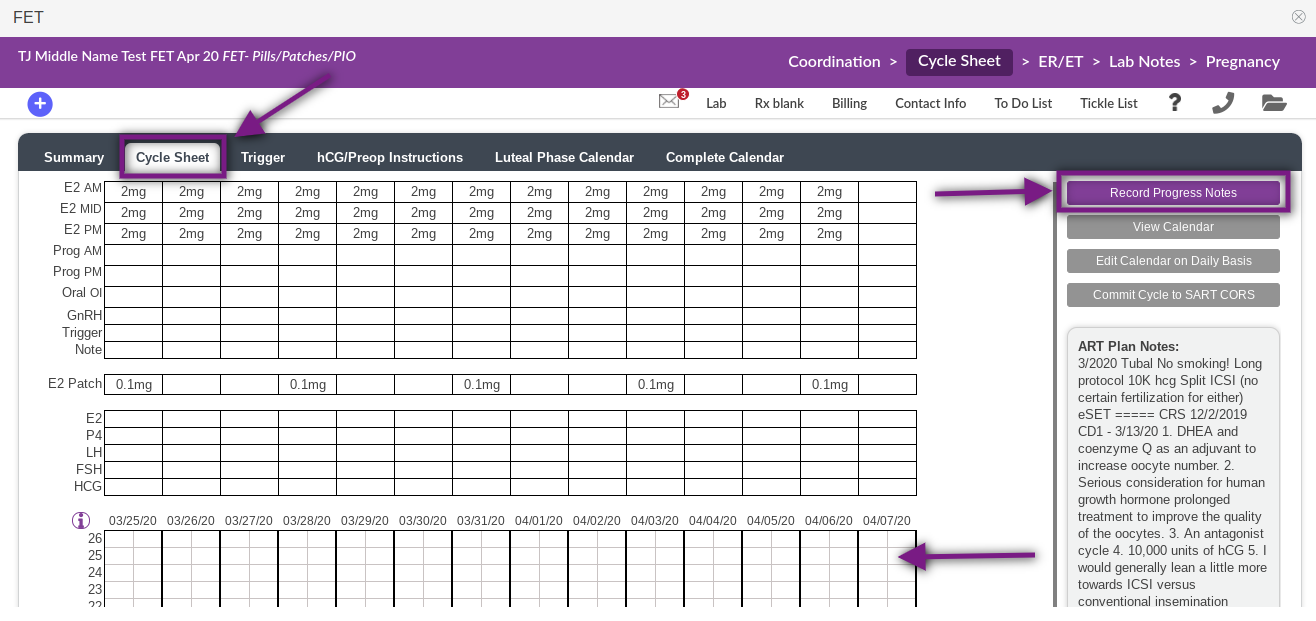
Within a cycle from the Cycle Sheet, click on Record Progress Note or click on the column in the ultrasound grid of the day that the in-house tests will need to be ordered.

Make sure the date selected is the date that the test will be performed. This is the date on the hormone grid that the results will upload to in the cycle. Click Add Lab Test.
Selecting Clinic lab and click Continue.

From here, the steps will be the same as ordering in-house labs outside of a cycle.
*Please note, only the tests that have a cycle test type selected in Edit List of Lab Tests will appear in the drop down menu when ordering within a cycle.
Hormone Analyzer Results

Once the in-house test is ordered, it will go to the Hormone Analyzer Results. This can be found under Lab Tools (microscope).
Order

The Order tab within Hormone Analyzer Results will house all of the orders that are pending results. There are several filtering fields here:
- Filter by Patient, Donor, Surrogate
- Select Patient
- Select Location (for practices with more than one location)
- Select Practitioner (this is the ordering practitioner)
- Select Status- Pending or Sample Collected
- Date
- Sort by patient name (A-Z or Z-A), sort by requisition number (ascending or descending)


The test columns will include Patient name, Order Timestamp, Requisition number, Date, Test Name, Device, Status and Practitioner. Click in the field for hormone device to activate the drop down box.
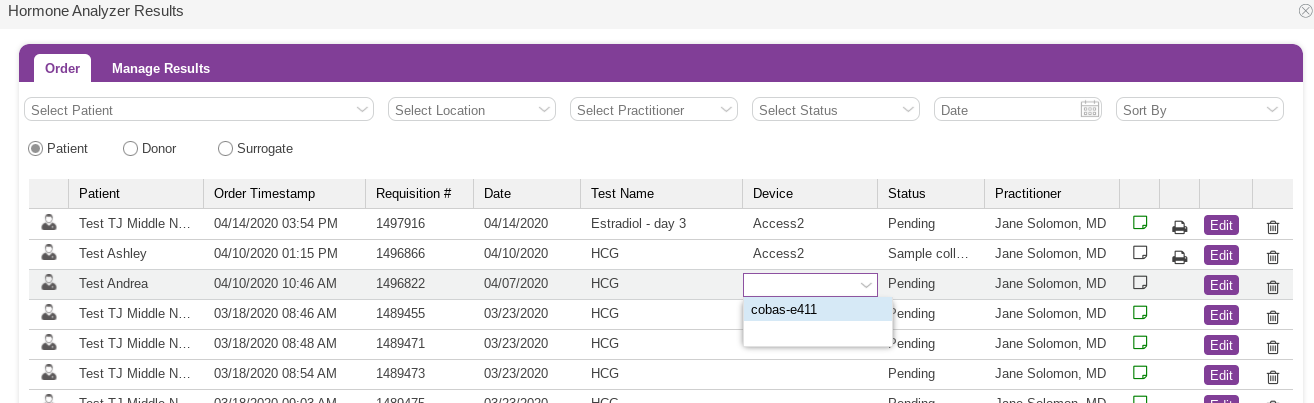
Select the device in the drop down box.
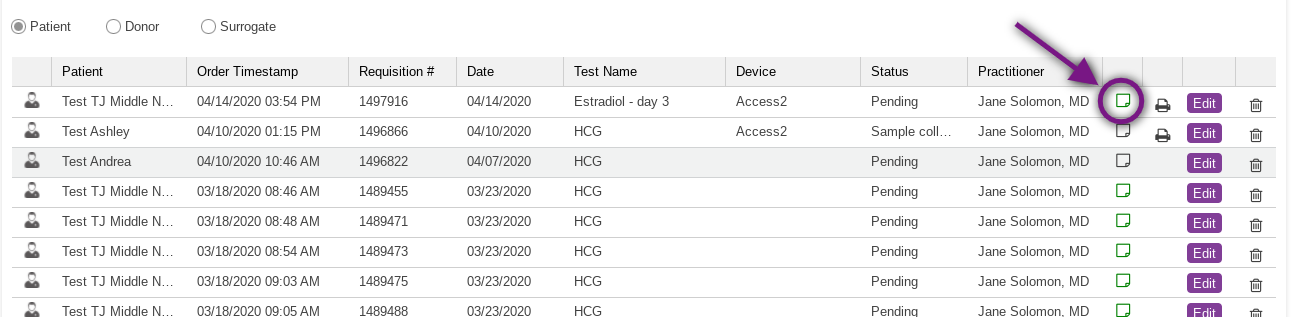
The Page icon houses any notes that were entered by the clinical staff when ordering a test. A green icon indicates there was a note added for that lab. A black icon indicates there is not a note for that test. Click on the green icon to open the note.

Click Edit to enter the specimen collection information.

Enter the sample collection date, time and who the sample was collected by. Click Save.

The specimen will now show as Sample Collected under Status. Click the printer icon to print the label.
Manage Results
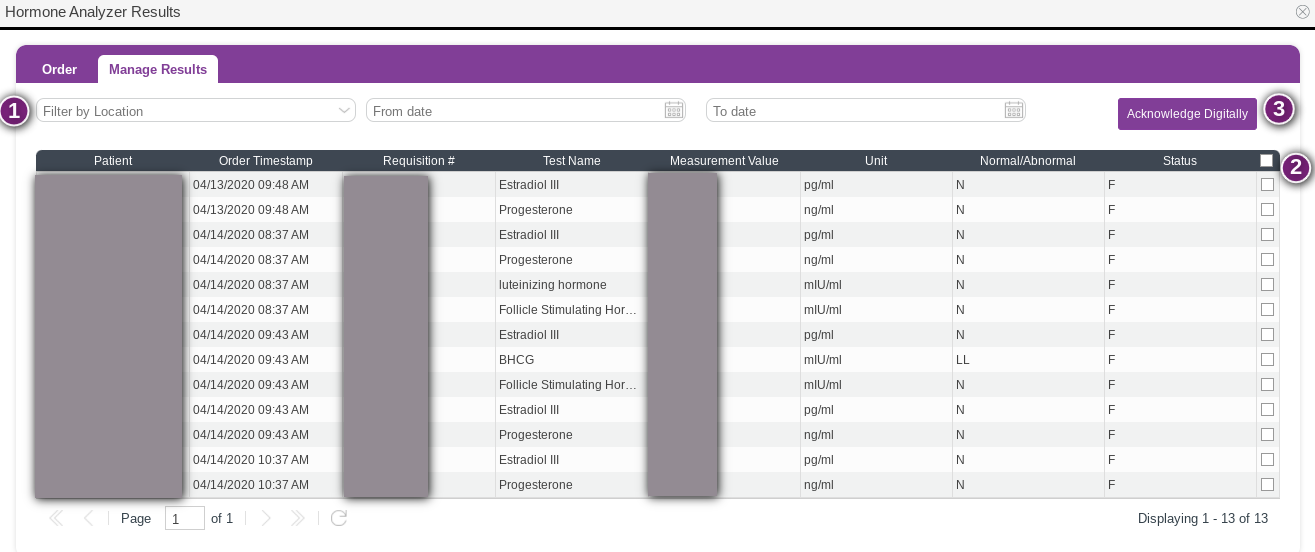
Once a test results, it will move from the Order Tab to the Manage Results tab. Here the patient name, order time stamp, requisition number, test name, test result and unit of measurement, whether the result was Normal/Abnormal and the status (F means final) will populate in columns under the headers.
- The results may be filtered by location (if the clinic has more than one location) and a date range by selecting the from date and to date.
- The boxes to the right will allow the lab staff to digitally acknowledge the results. The individual boxes may be checked or the box at the top of the box column may be checked to mark all results for digital acknowledgement.
- Click Acknowledge Digitally to acknowledge results. The user will be prompted to enter a digital signature.
Once a result is acknowledged digitally, it will fall of the Manage Results list.
- If the lab was ordered outside of a cycle, the result will go to the Coordination>Clinical Acknowledge Lab Test to be acknowledge by the clinic staff. The result will also populate in the patient chart under Laboratory Testing.
- If the lab was ordered from within a cycle, the result will go to the hormone grid on the Cycle Sheet within the cycle. These results will not go to Clinical Acknowledge Lab Test.
**All manuals are compliant with HIPPA regulations. No patient information has been released. All screenshots above were taken from a test clinic with fake patient information.
Tristan Newman
Comments