There may be times that you will need to enter EOBs manually into Artisan. Within Artisan there is a Manual EOB entry that will allow for ease in entering multi patient paper EOBs.

To navigate to the Manual EOB Entry screen, click on the EOB/ERA tab next to reports that appears in every screen of the Accounting section.
Entering EOB
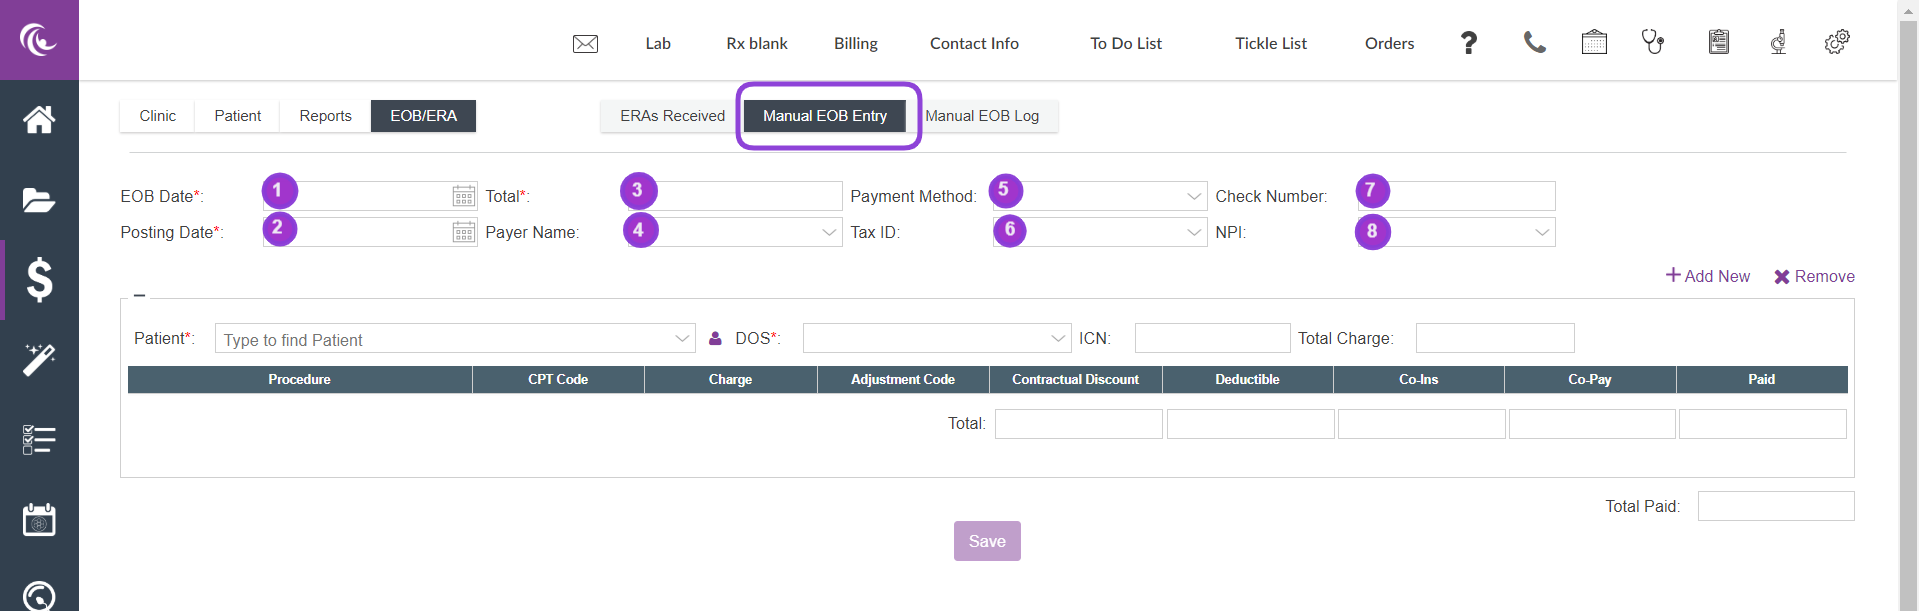
Once in the EOB/ERA screen click on the Manual EOB Entry screen at the top. This will open up the ability to start entering the Manual EOB. The top portion of the EOB is to fill in for the summary of the whole EOB.
1. EOB Date: The date the payer created the EOB. This is a required field.
2. Posting Date: The date you enter the EOB. This is a required field.
3. Total: The total payment the payer paid in this EOB. This is a required field.
4. Payer Name: This is drop down of the Payers in your system
5. Payment Method: This is a drop down with how the payer paid the EOB
Check, EFT, Credit Card, Non-payment, and Other
6. Tax ID: This is a drop down of Tax IDs in your system
7. Check Number: The transaction number received by payer for the EOB
8. NPI: This is a drop down of the NPIs in your system
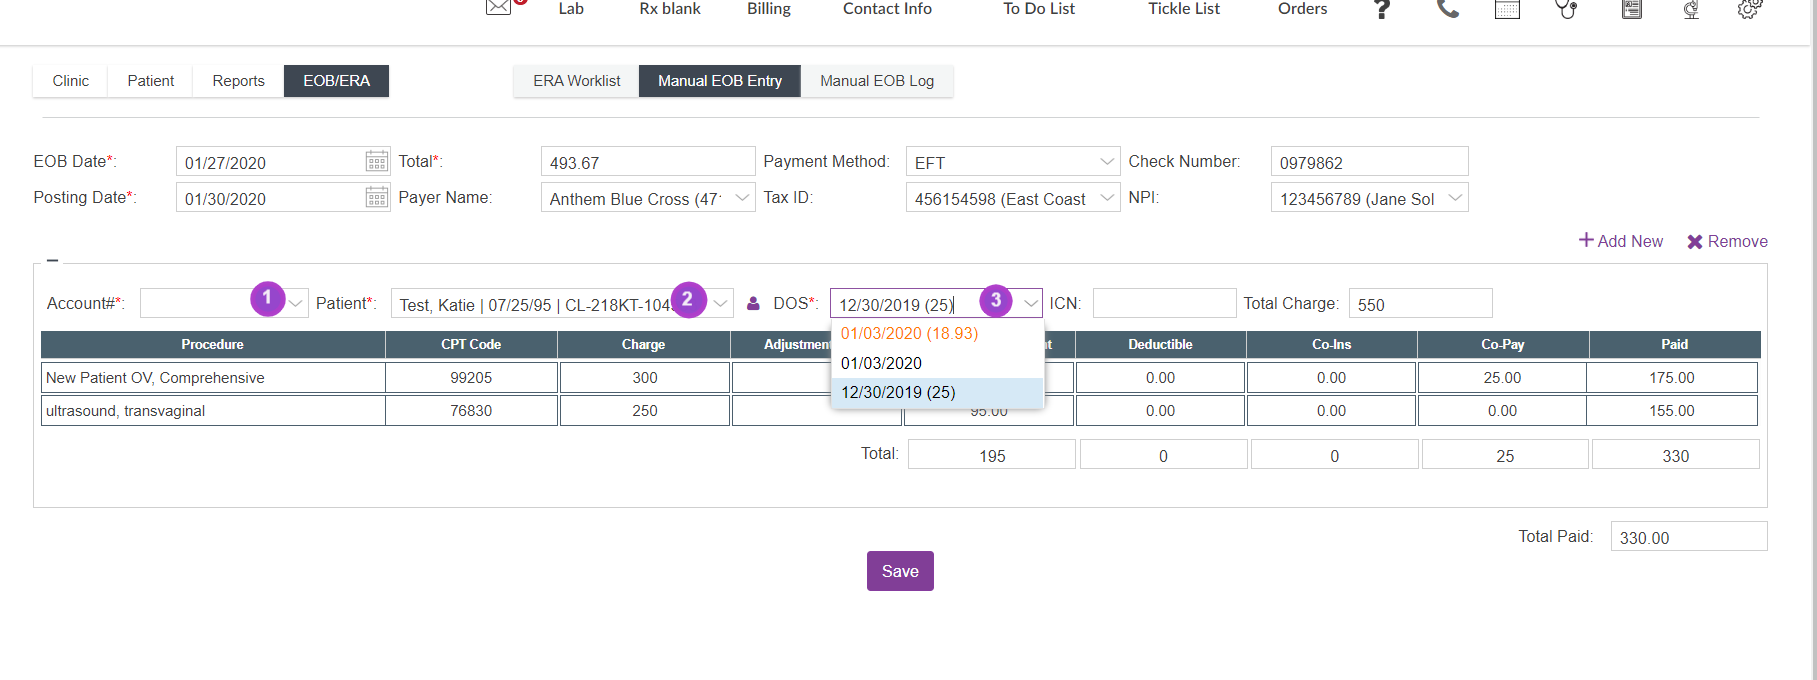
Once you fill in the top portion the next items are on the individual claims.
1. Ability to search by Account # off the EOB
2. Ability to search for the patient by name
3. The drop down for DOS is all the open insurance invoices in the account by the DOS. Orange is the partner's invoices.
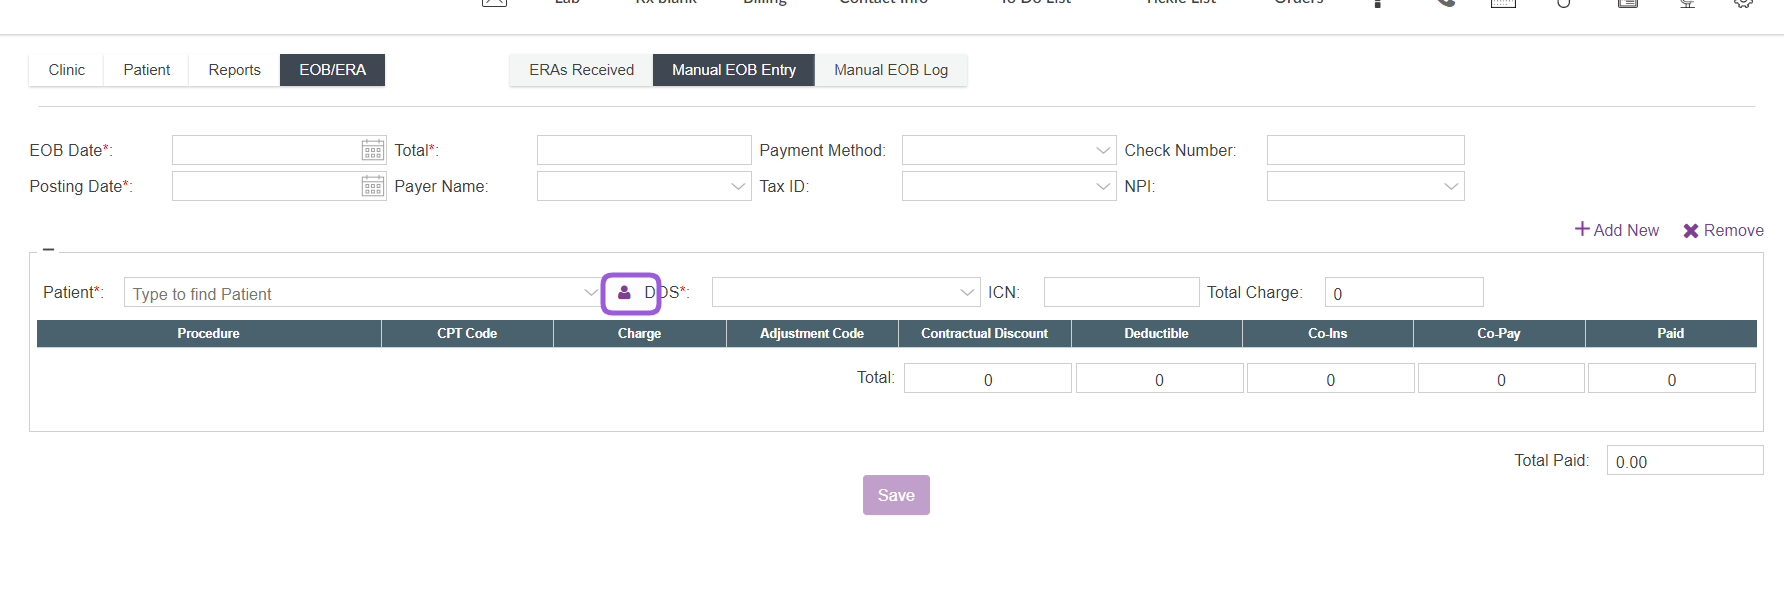
If you only have the partner's name, you can click the purple person icon and it will ask you if you want to switch to the partner. Clicking yes will switch the database search to the partner database.
Once you have selected the DOS, the total charge for the invoice, the individual descriptions, CPT codes and charges will flow into the EOB. You will fill in the rest off of the paper EOB.
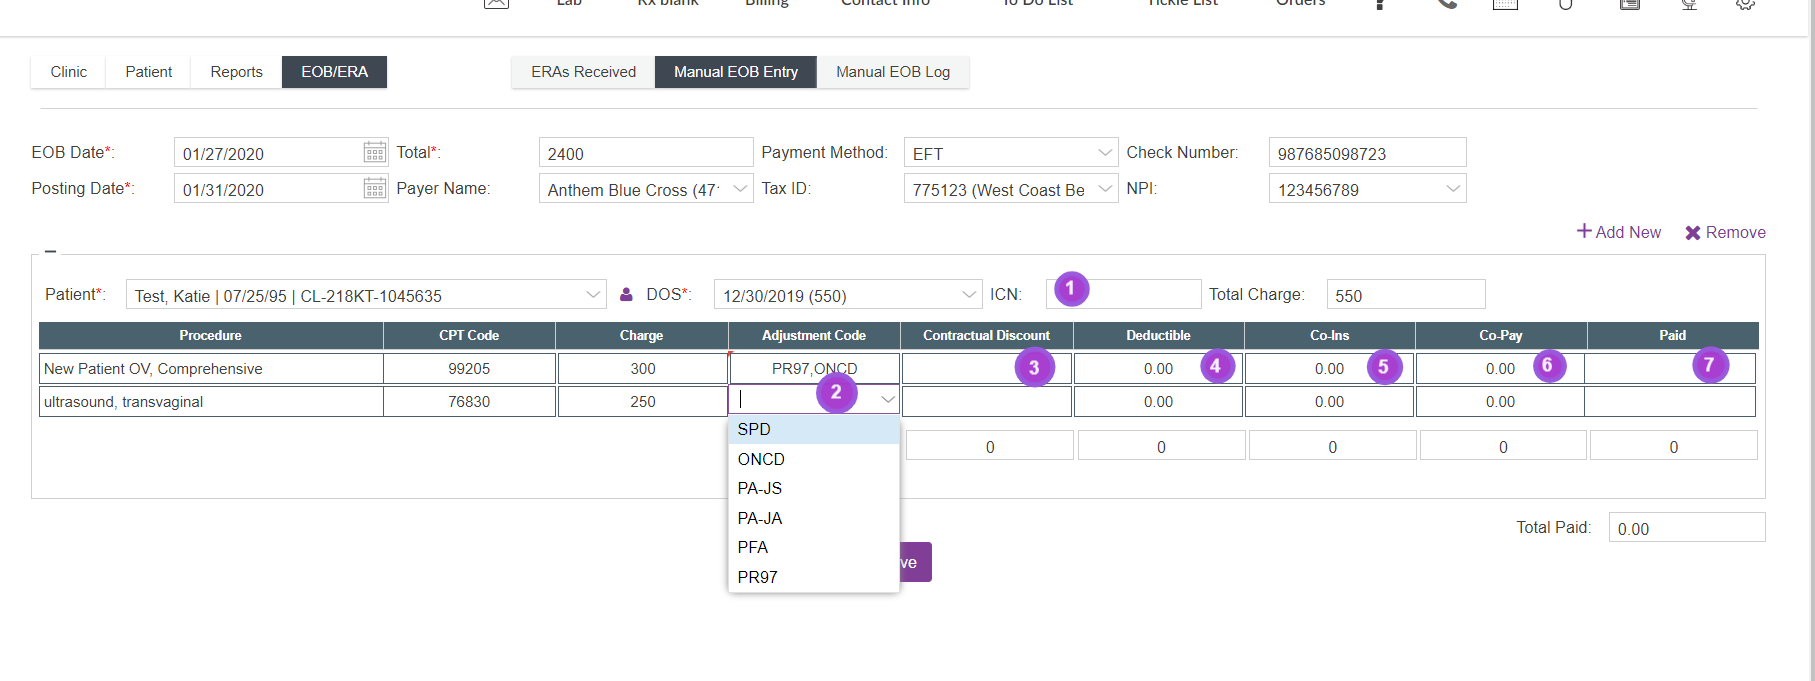
1. Individual Claim Number provided by the payer to be able to reference later
2. Adjustment codes that are multi select and pull from your adjustment code library
3. The Contractual Discount
4: The Deductible assigned.
5: The Co-ins assigned.
6. The Co-pay assigned
7. The total amount the insurance paid on this line item.
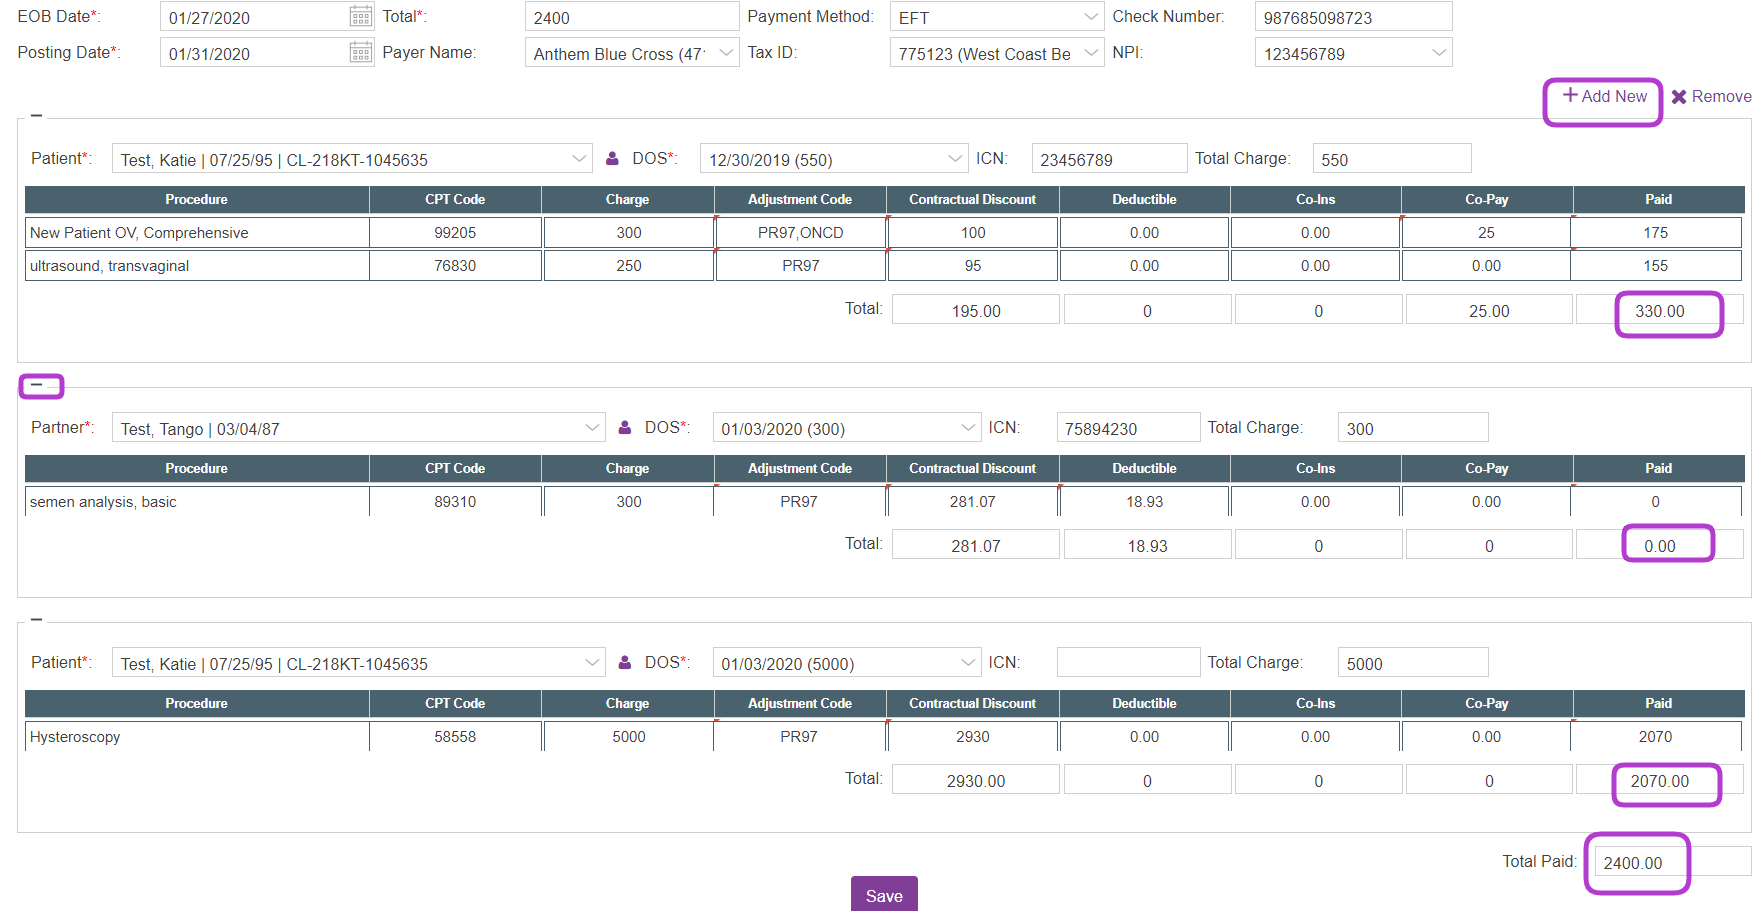
Once you fill in the information on the individual invoice, you can add a new invoice by clicking +Add New in the top right hand corner. To remove an invoice, click Remove. It will always remove the one you are working on.
To open up the invoice that has been added, click the purple + on the left of the invoice and to close it, click on the purple -.
The total paid in the bottom right will sum the total paid of each the invoices. The EOB will not allow you to save unless the total Paid in the bottom right equals the Total at the top of the EOB.
When you click Save, a pop up will tell you that the EOB has saved successfully.
The EOB posting will reflect on the invoice summary for the patient with the status updating per invoice automatically. It will switch to Closed if the balance equals zero. It will switch to Patient Responsibility if deductible, Co-Ins or Co-pay are entered in the EOB. It will stay on EOB Manually Entered if there is still a balance on invoice to be worked.

When opening the invoice you will see that it posts to the account and hovering over the patient responsibility will allow you to see what type of responsibility was assigned.
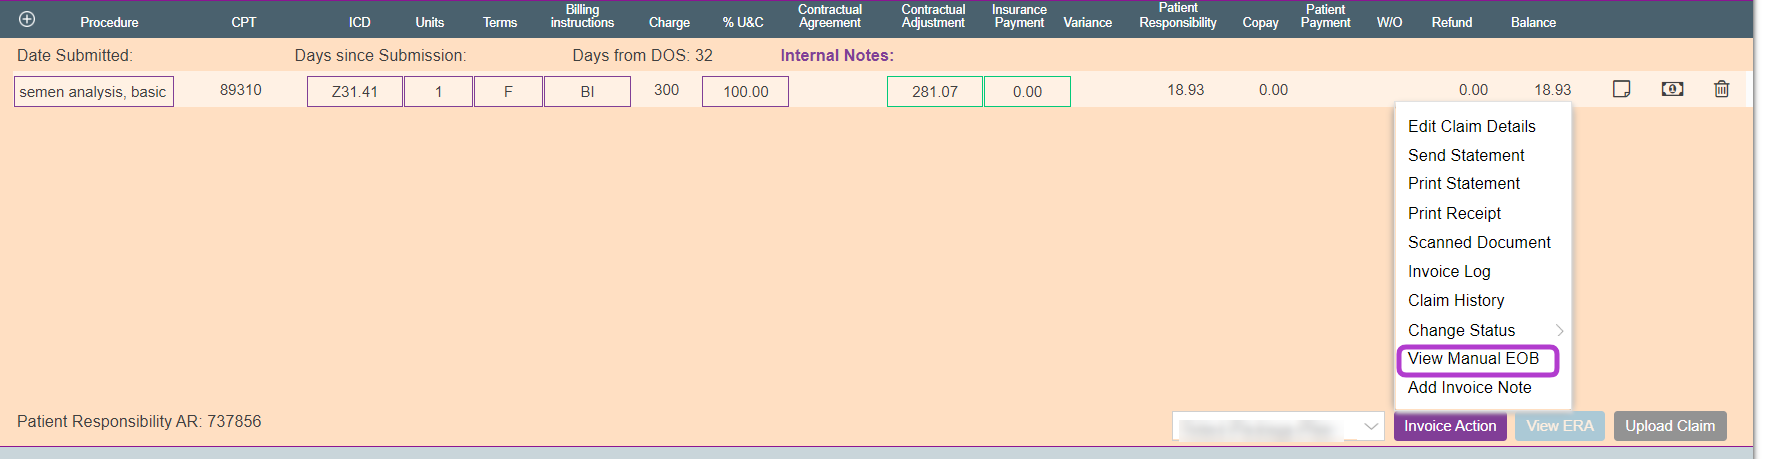
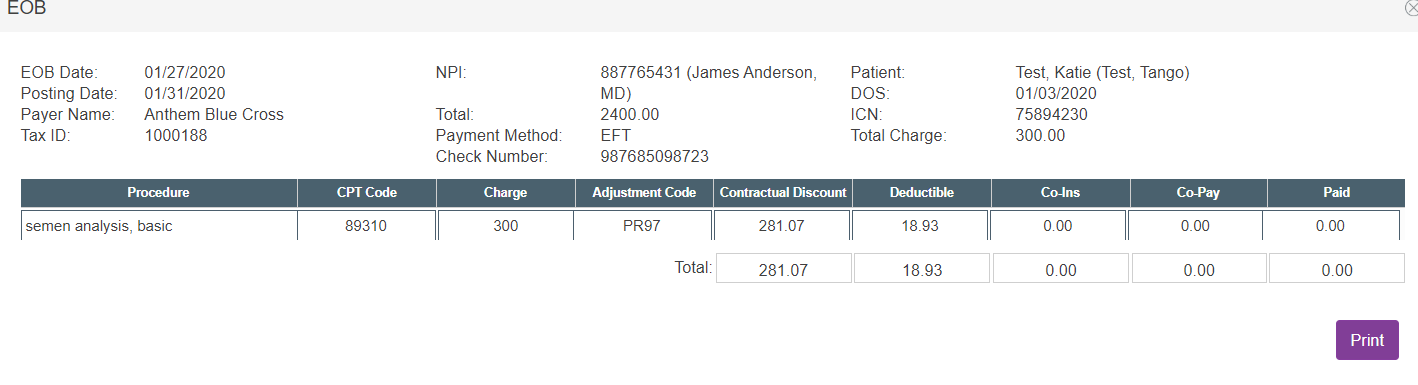
You will also be able to view and print the EOB for this individual invoice by clicking on Invoice Action and then View Manual EOB.
**All manuals are compliant with HIPPA regulations. No patient information has been released. All screenshots above were taken from a test clinic with fake patient information.
Liz Davolos
Comments