From the specimen log, you will be able to search, enter and inquire on all samples within your clinic. Within the specimen log, you are able to view Semen cryo log , enter edit, thaw, transfer and discard samples.
Navigation

Click the Lab Tools button in the Navigation bar at the top of the screen then click Specimen Log.
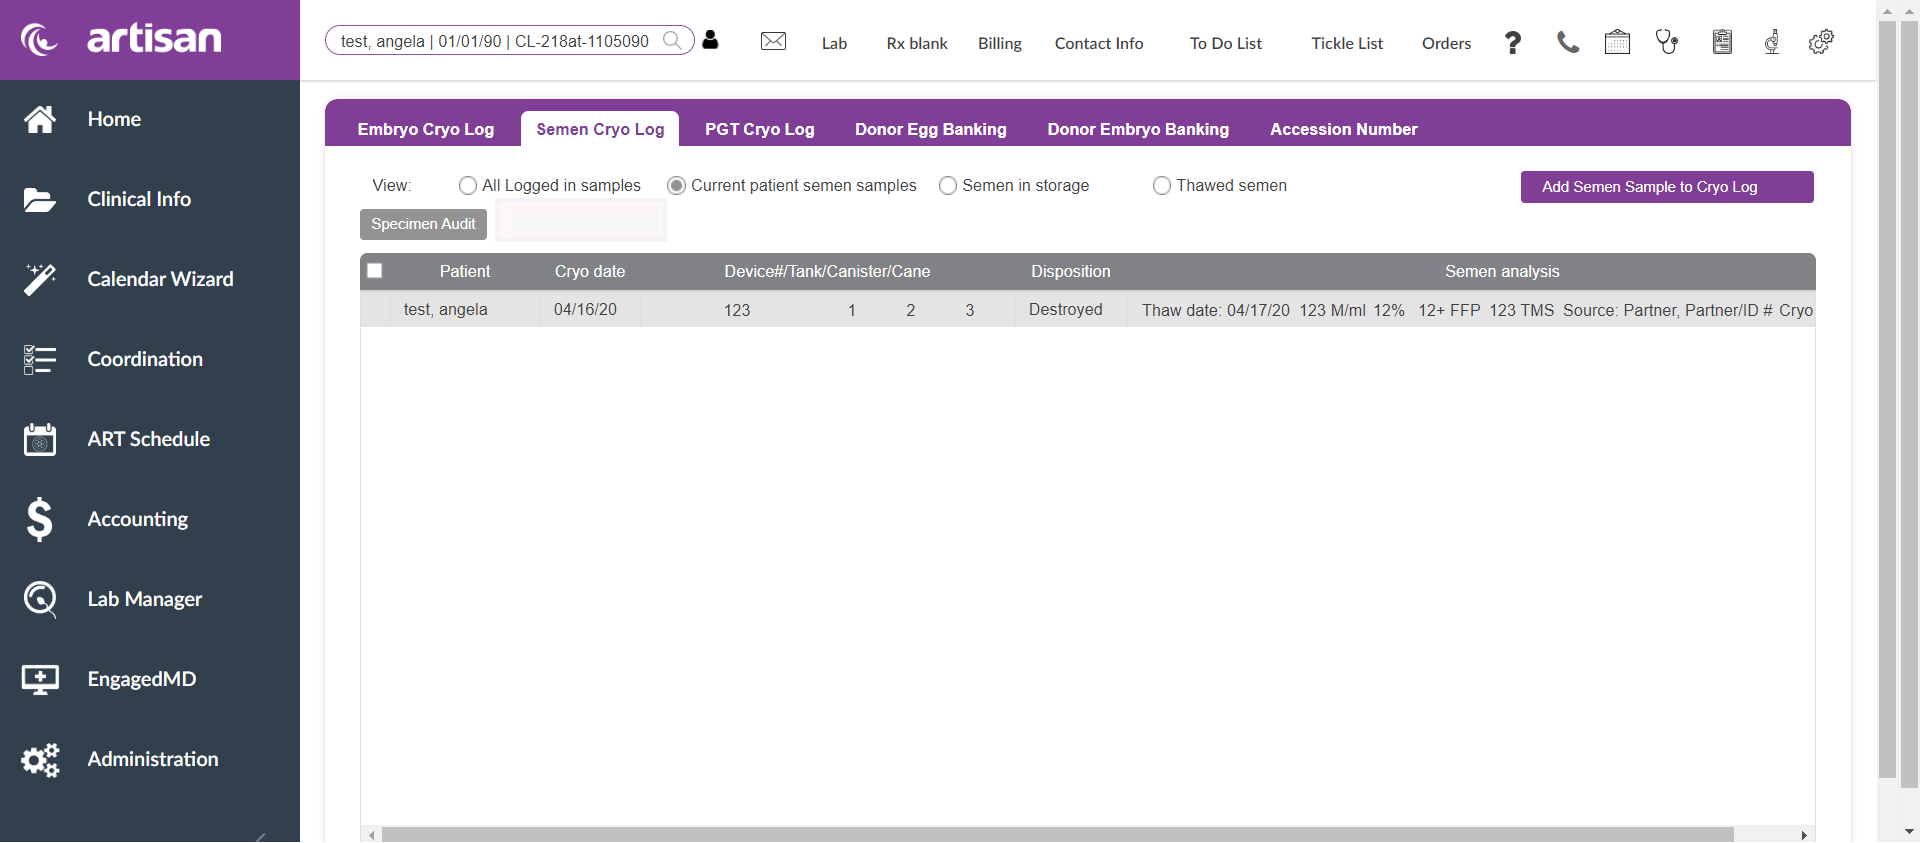
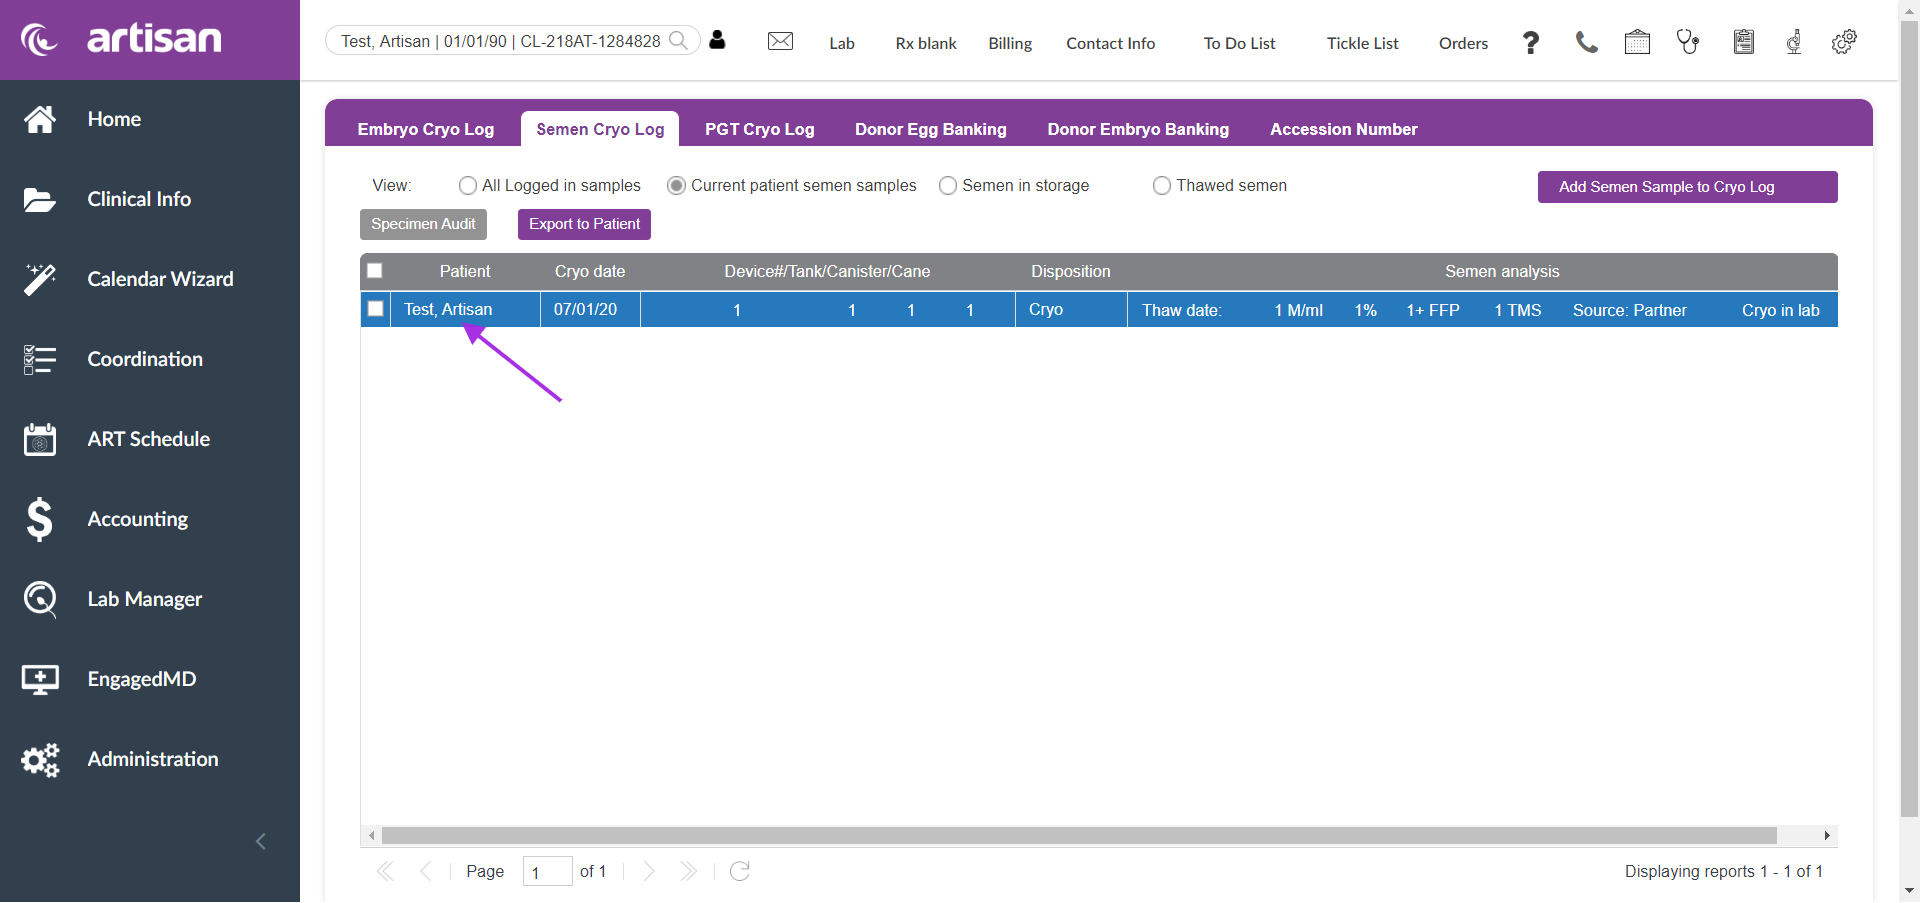
In the Specimen log, select Semen Cryo Log.
Select and Sort Semen in the Cryo Log
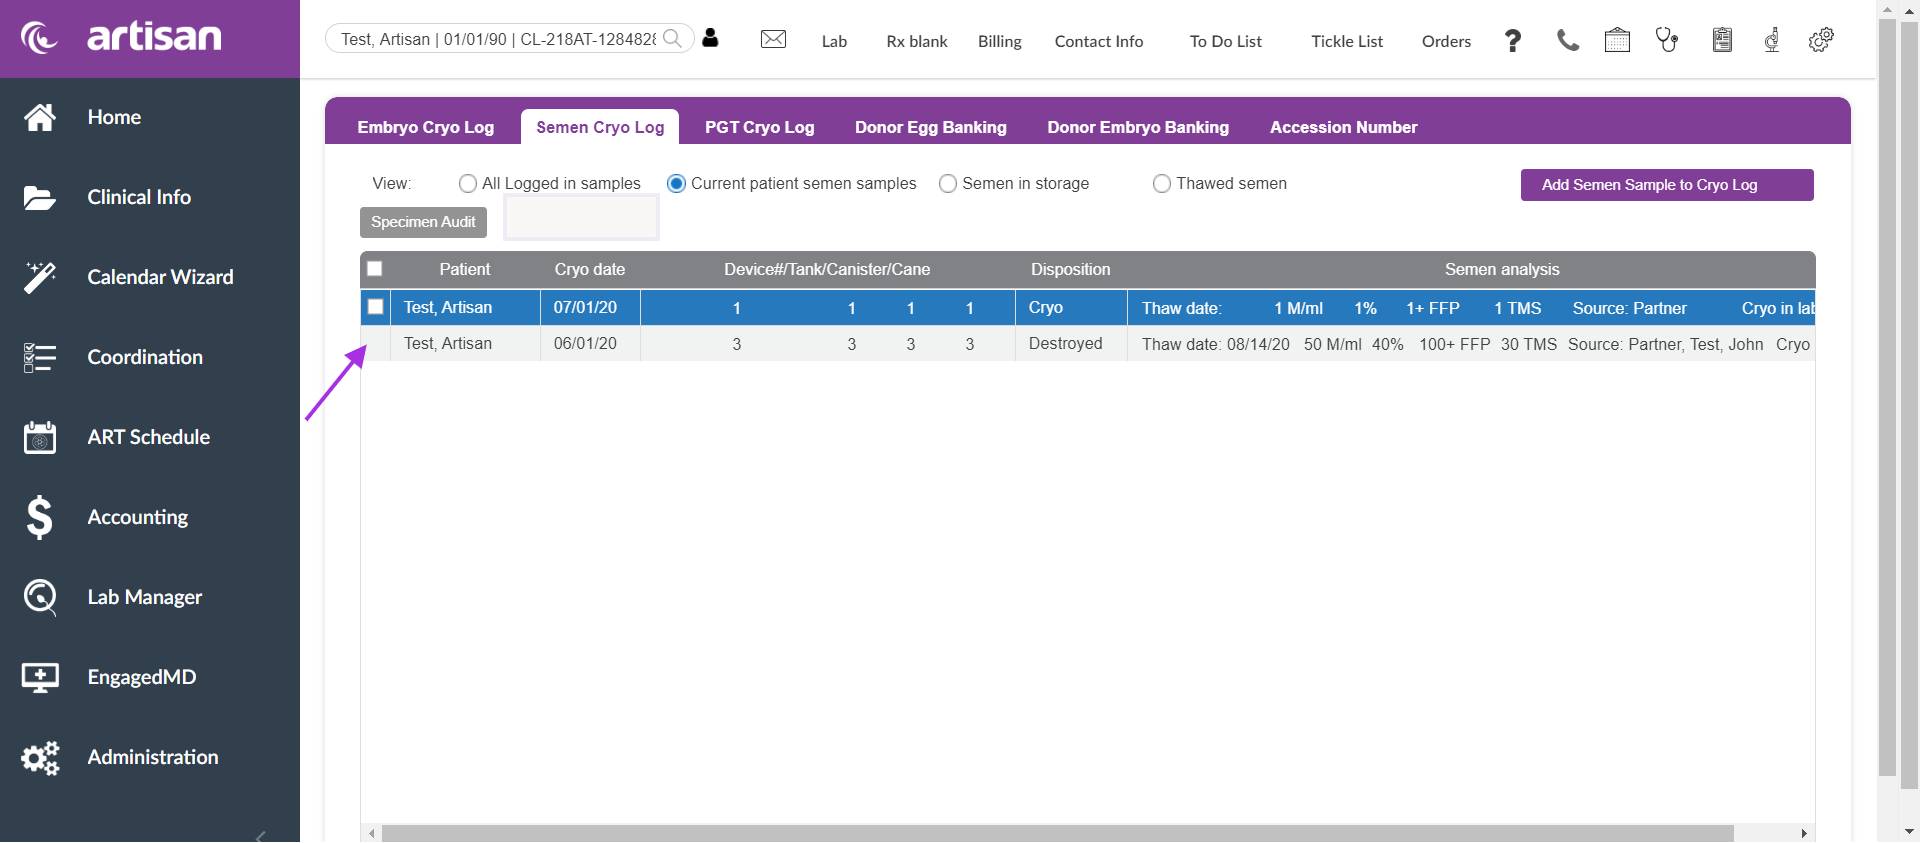
Each individual specimen has its own record in the Cryo Log.
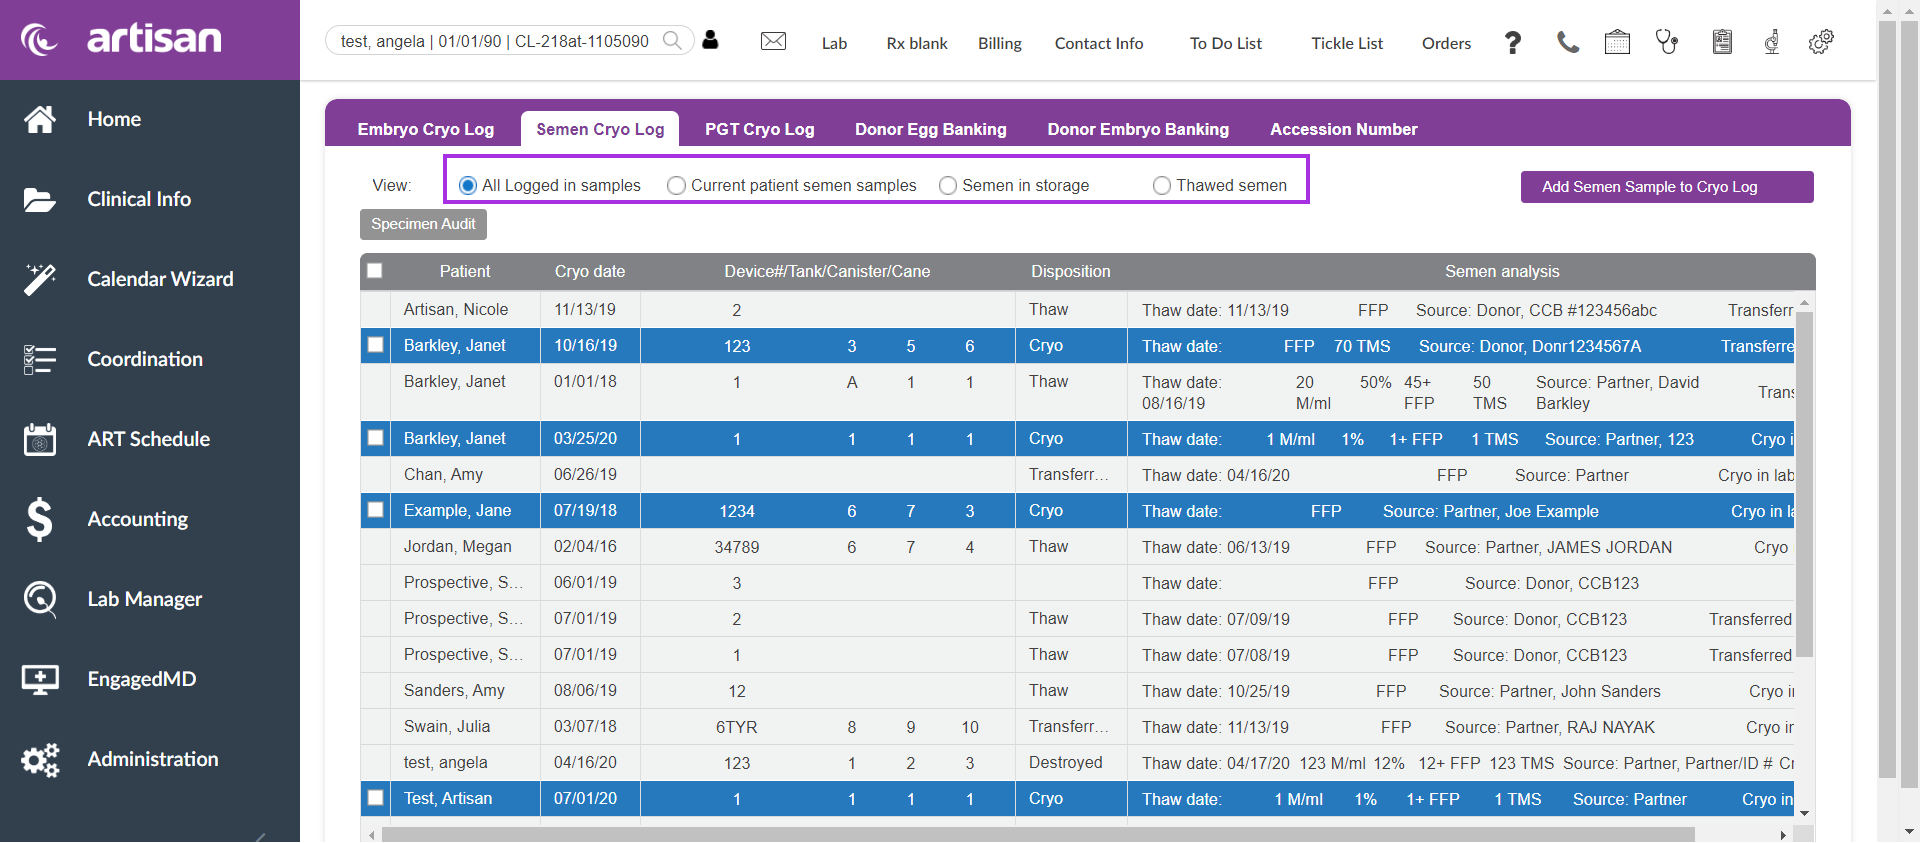
You may filter the Cryo Log to display:
- All samples listed in the Log regardless of status (cryo vs. thawed). The color blue represents the semen samples that are currently cryo'd.
- The Current patient/partner's semen samples
- All semen in storage in the tanks
- The thawed samples only
Transfer Semen Into the Lab
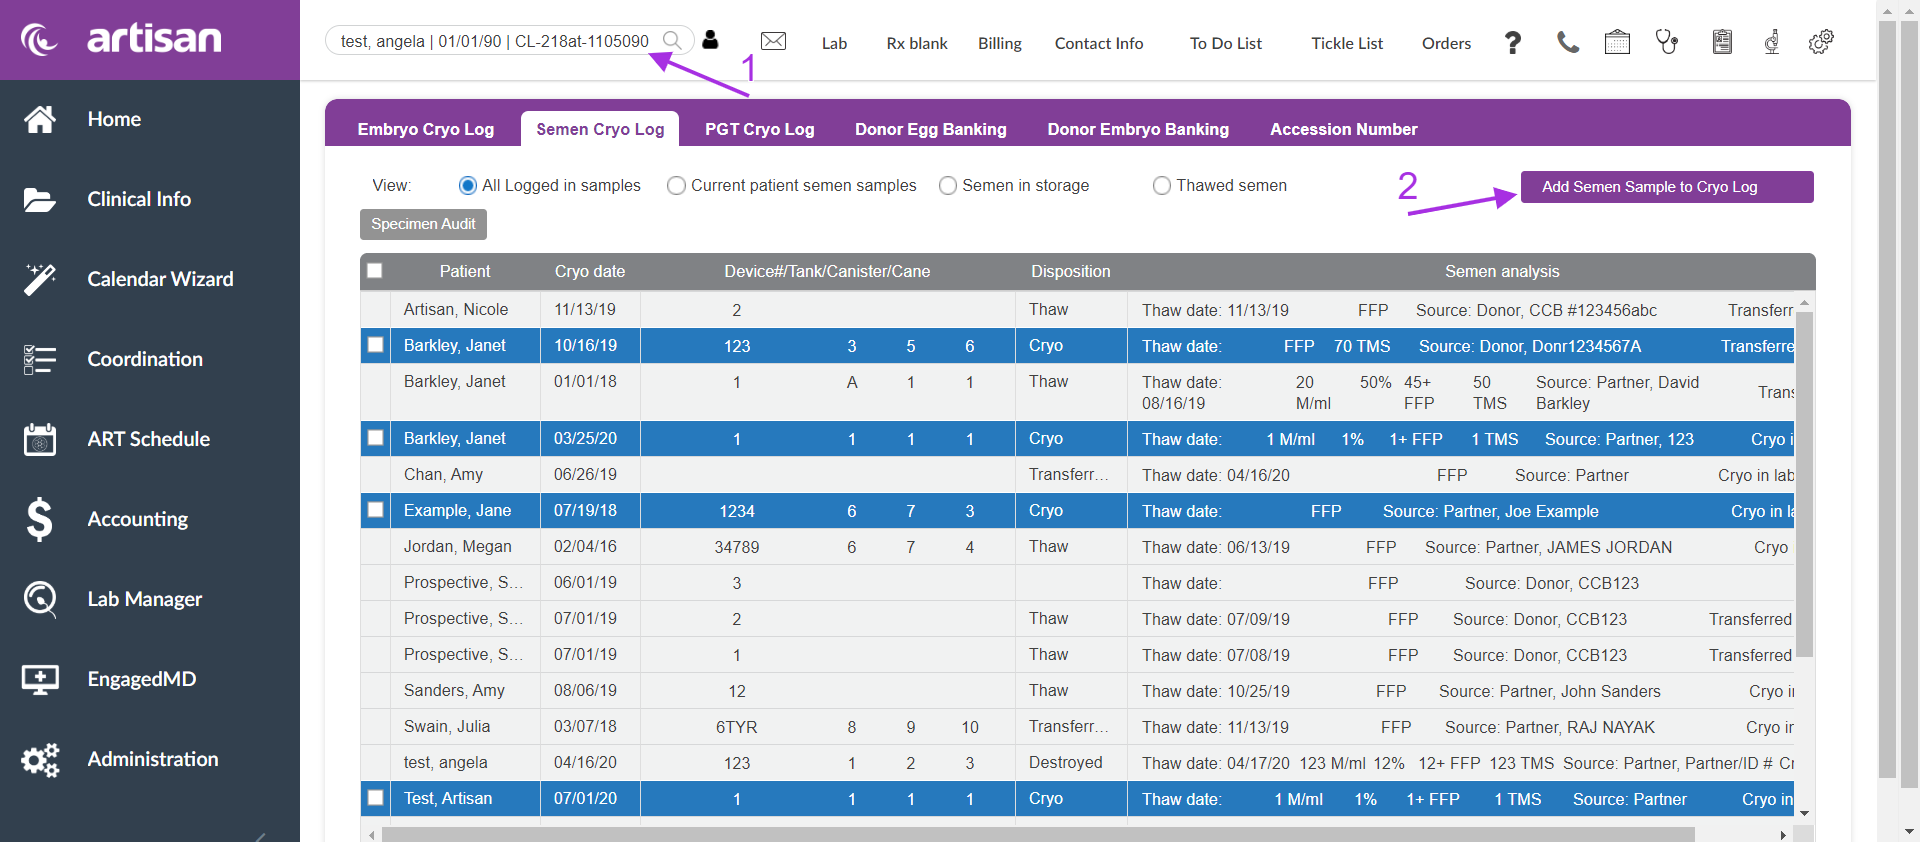
- Use the pull-down menu to select the patient/partner having semen transferred into the lab.
2. Click the Add Semen Sample to Cryo Log button.
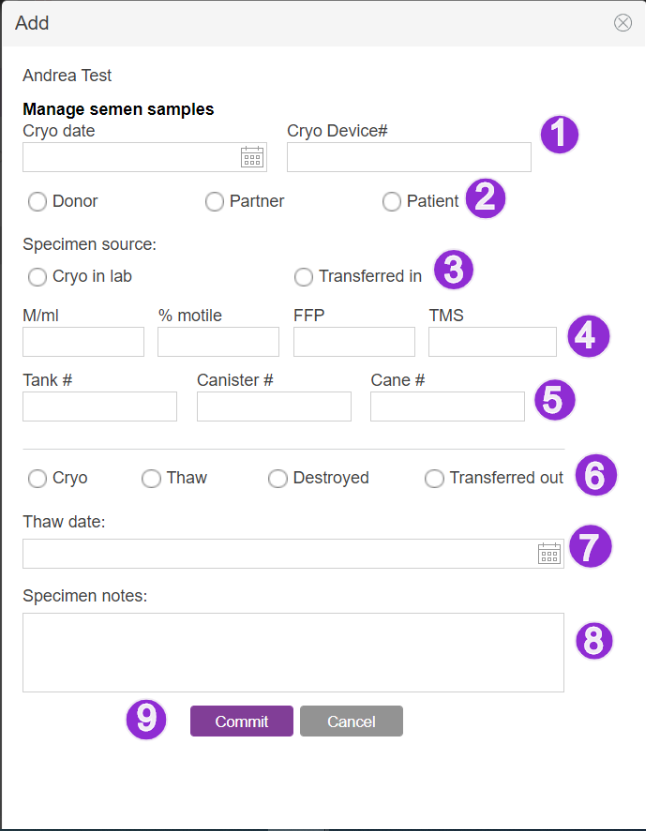
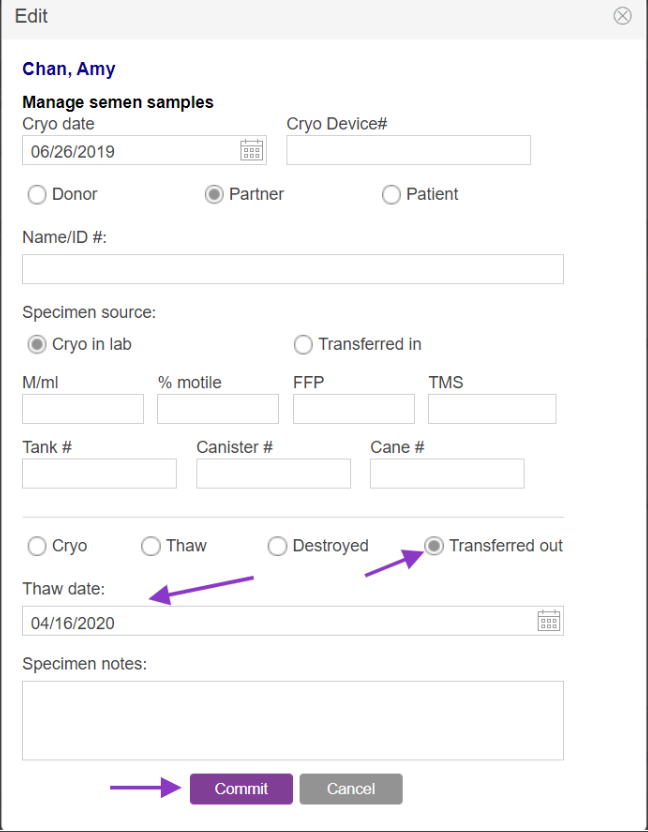
Fill in the fields to create a record in the system (they are not all mandatory, use what is appropriate):
- Date of Cryopreservation and Straw/Vial #
- Source of semen: Donor or Partner
- Source: Cryo in lab or Transferred in
- Basic Analysis
- Location in Storage
- Status: Cryo, Thaw, Destroyed, Transferred out
- Date of Thaw (if applicable)
- Notes
- Commit to save record.
Manage Semen Samples Listed in the Cryo Log
To select the current patient semen analysis filter to view the added semen sample for this particular patient.
To manage semen specimens entered in the Cryo Log - e.g., to destroy semen or transfer samples out of the lab, or to move them within the lab - use the pull-down menu to select the patient and click on the patient name.
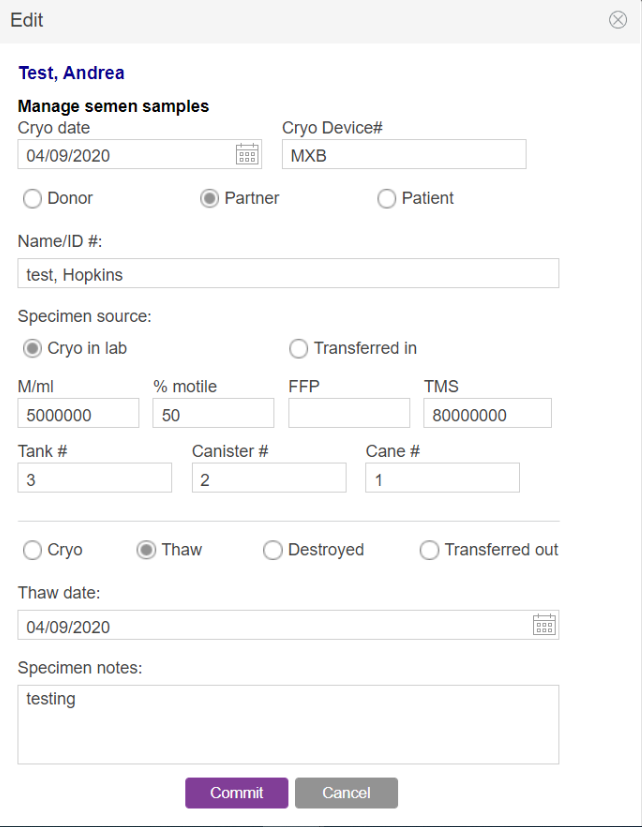
Use the dialog box to change the vial's tank location. Select Destroyed or Transferred out, if appropriate.
Semen Cryo Status Change
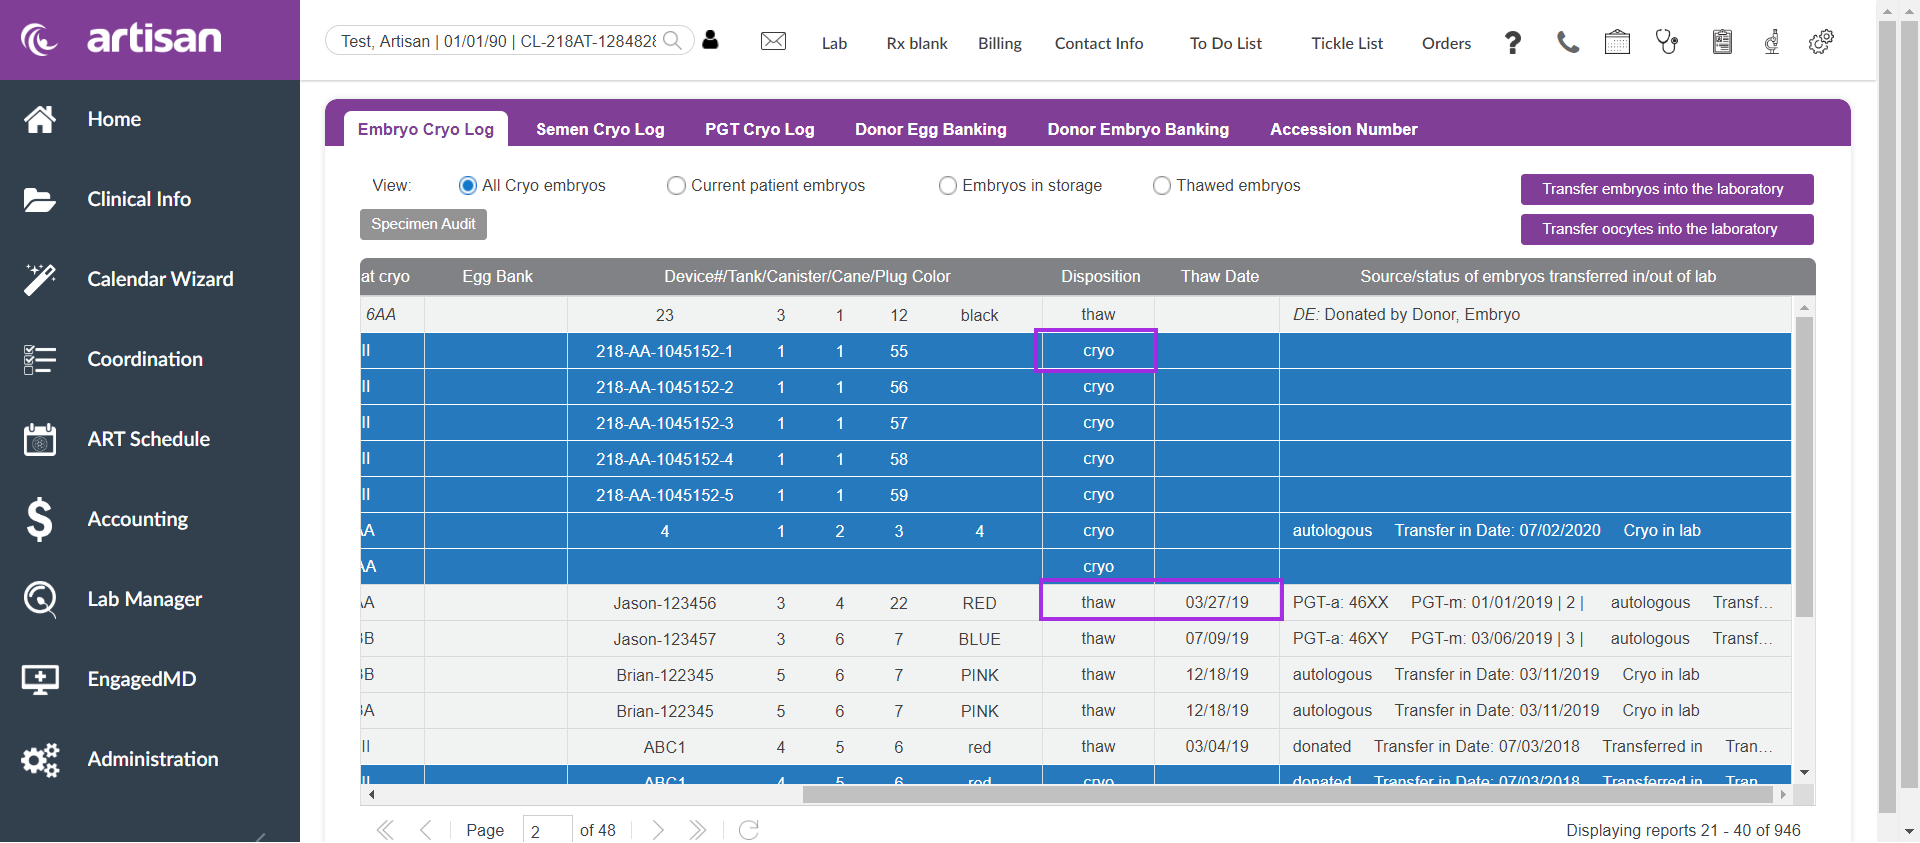
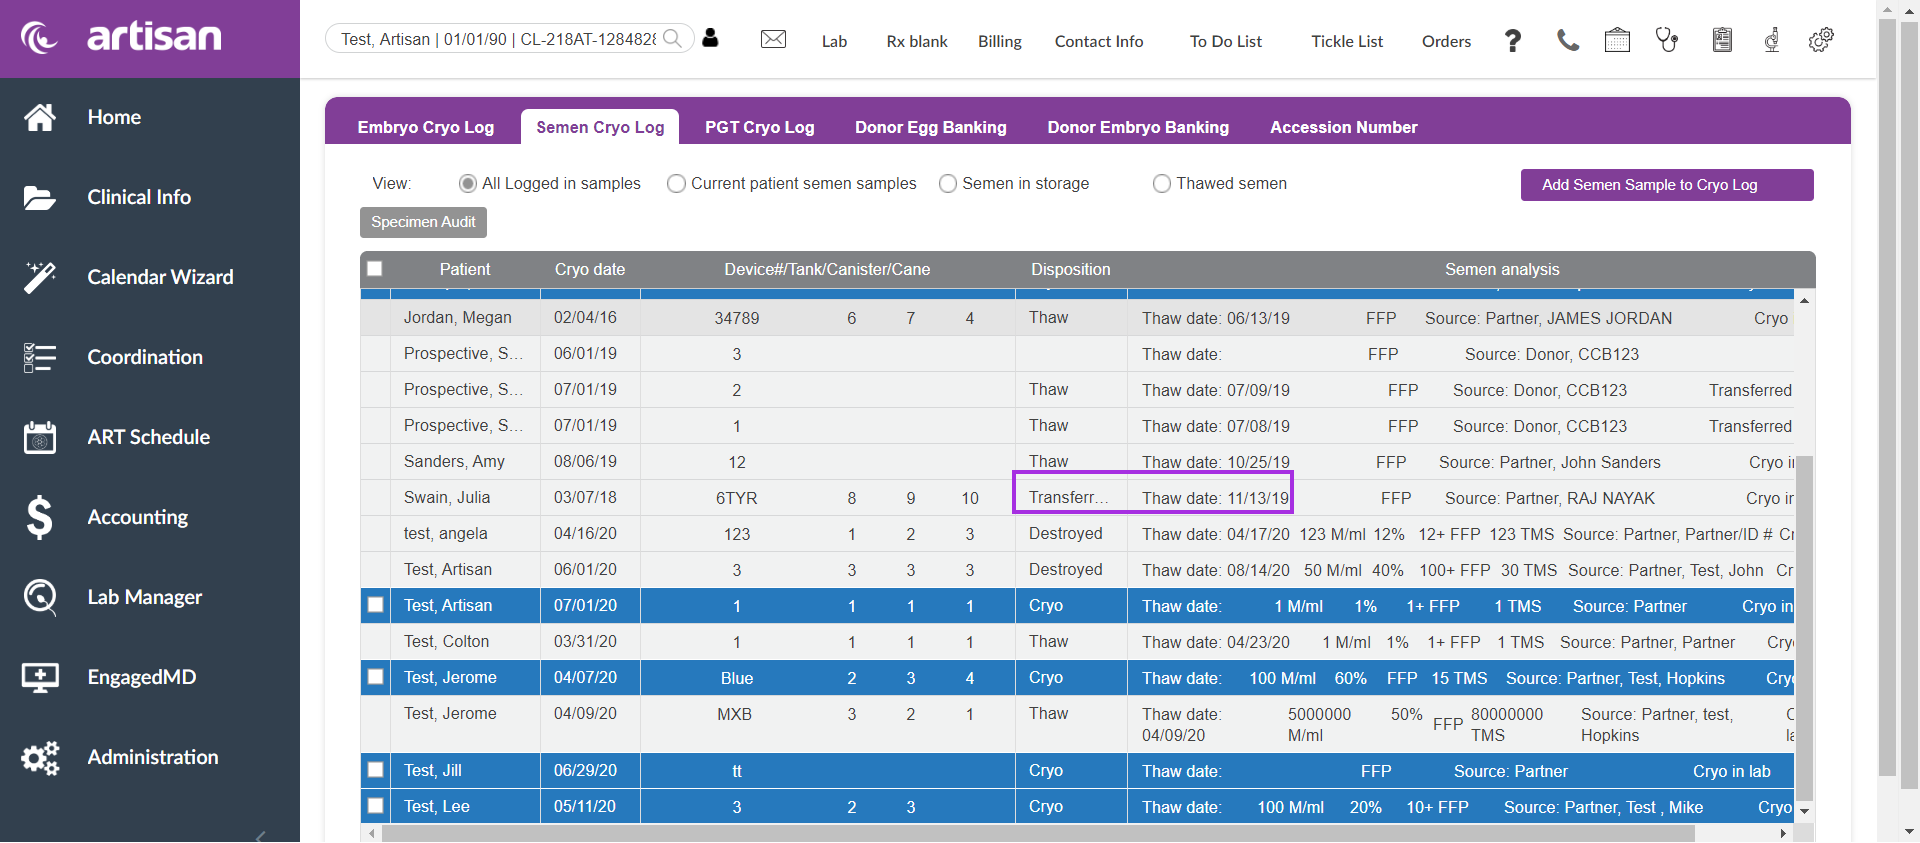
You are able to view the status of semen in the disposition column. The information displayed will indicate whether it is thawed or cryo'd as well as the thaw date.
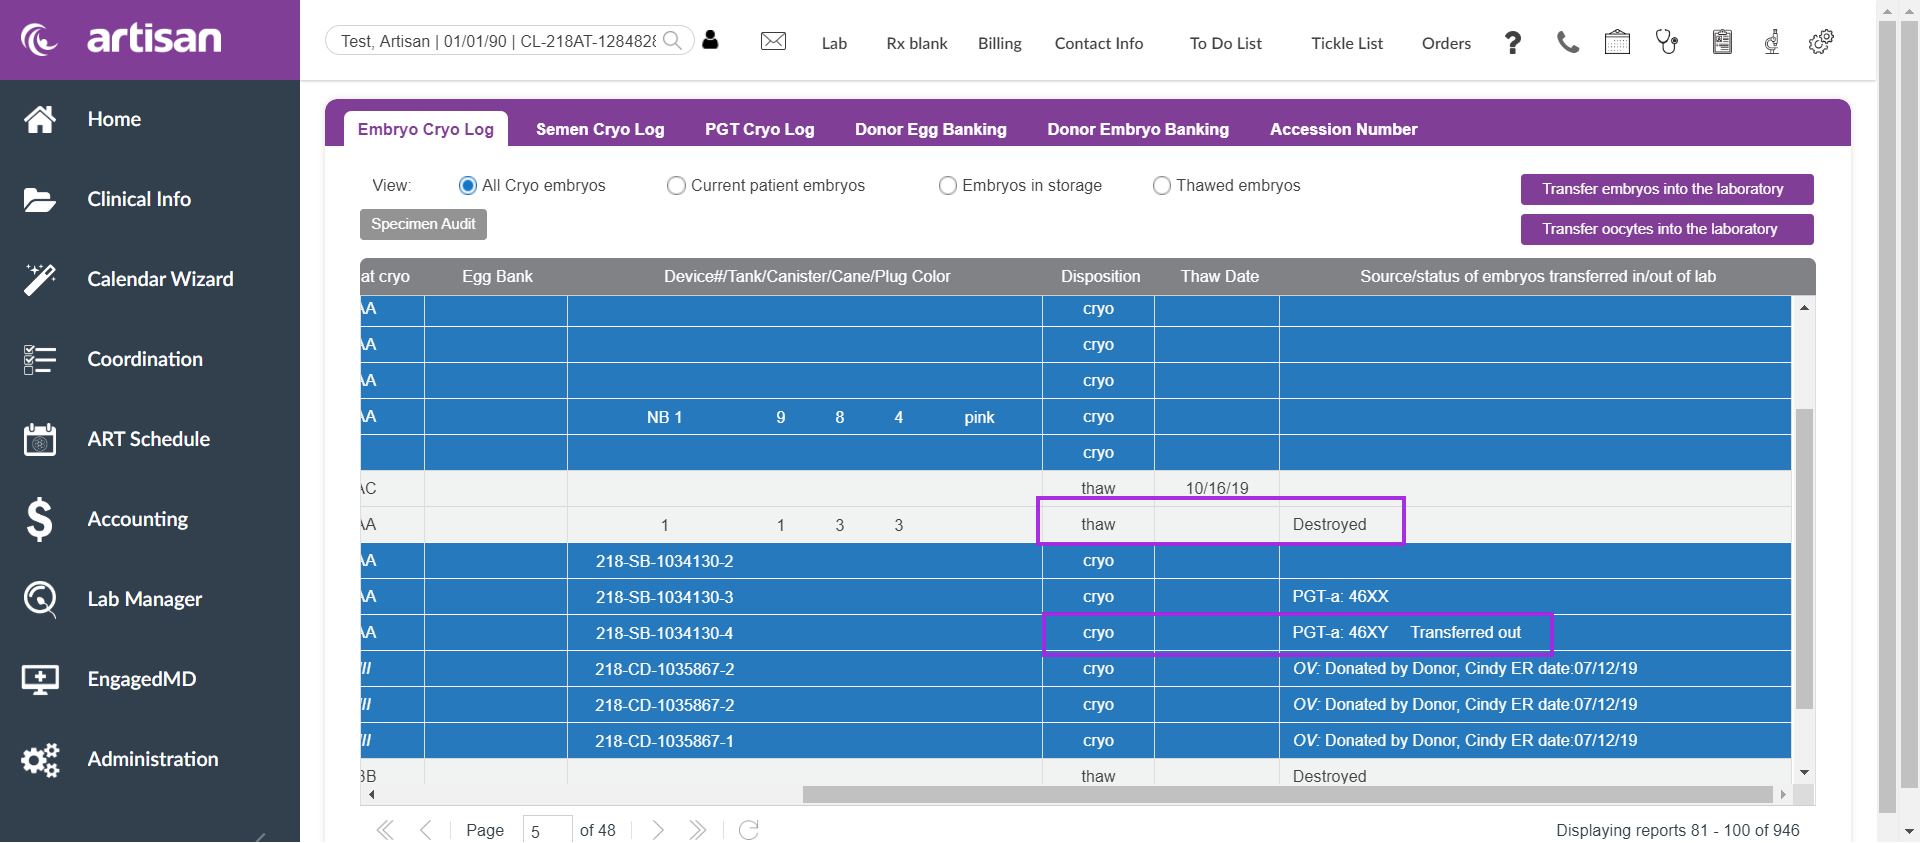
Samples that have been transferred in/out will also display with a date that is entered. Samples that have been marked as destroyed will also display as destroyed along with the date in which the sample was destroyed.
Change / Edit Disposition
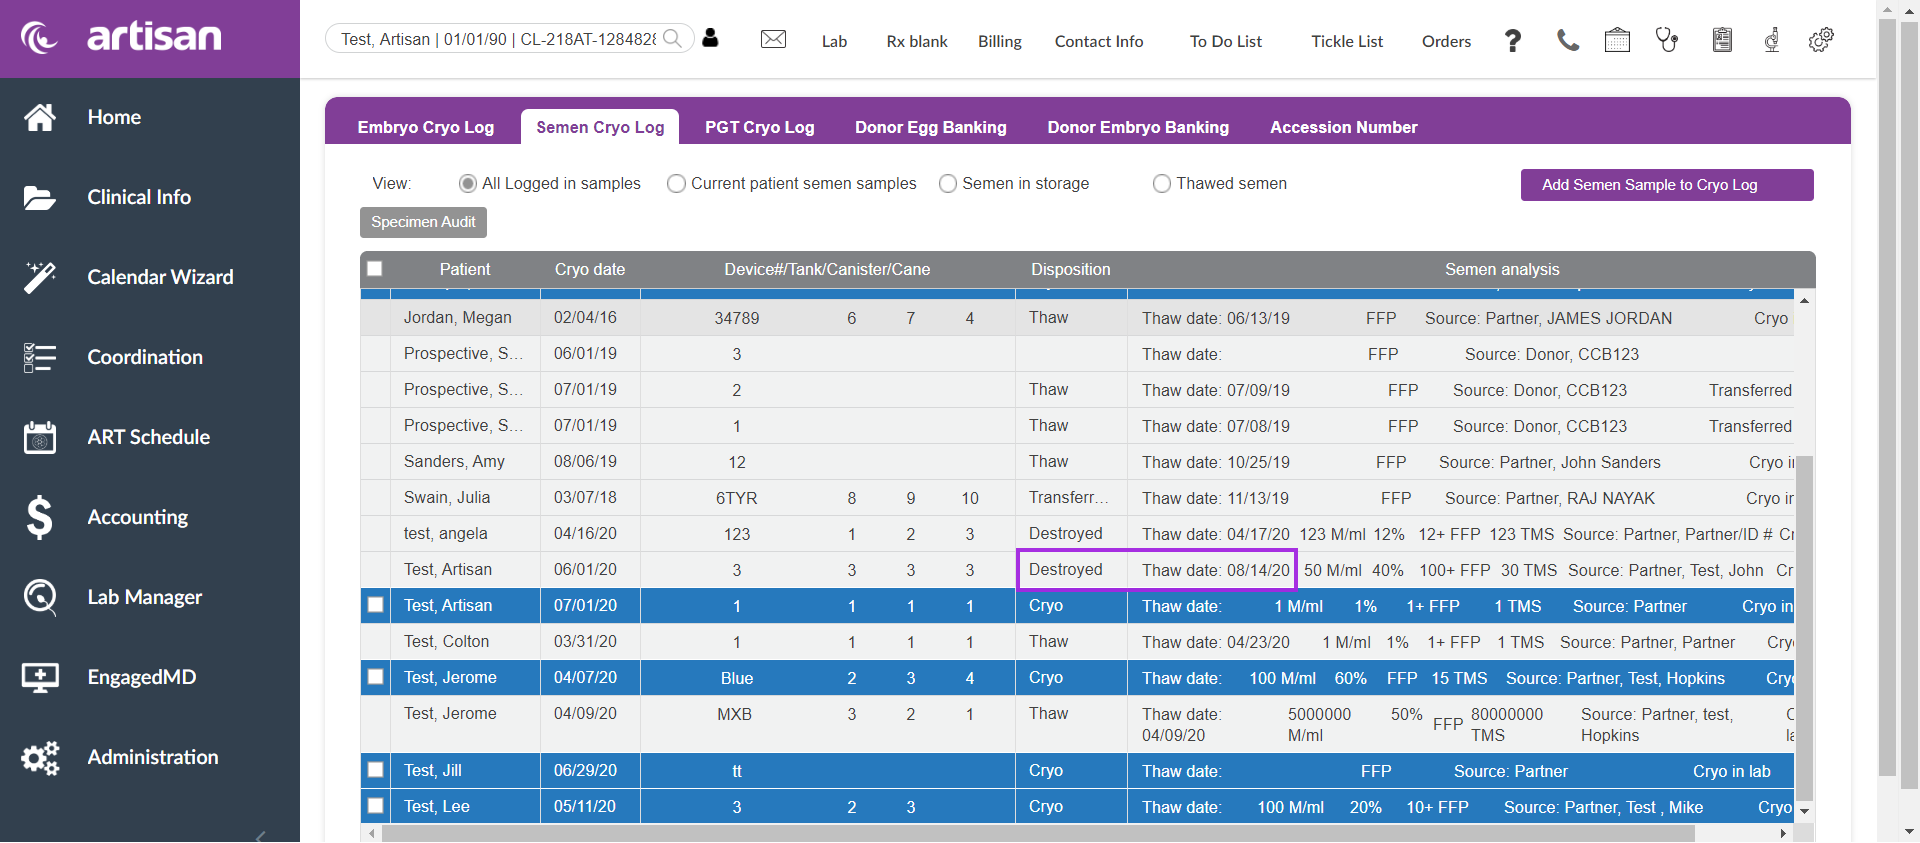
Once the disposition has been changed you are still able to select that sample and reselect a new disposition. Select the sample that you wish you edit once you select the sample a pop up window will open that will allow you to edit your selection.
Once you make your edits select commit to save the new information.
The updated disposition will now display with the new information.
Disposition Status and Edits
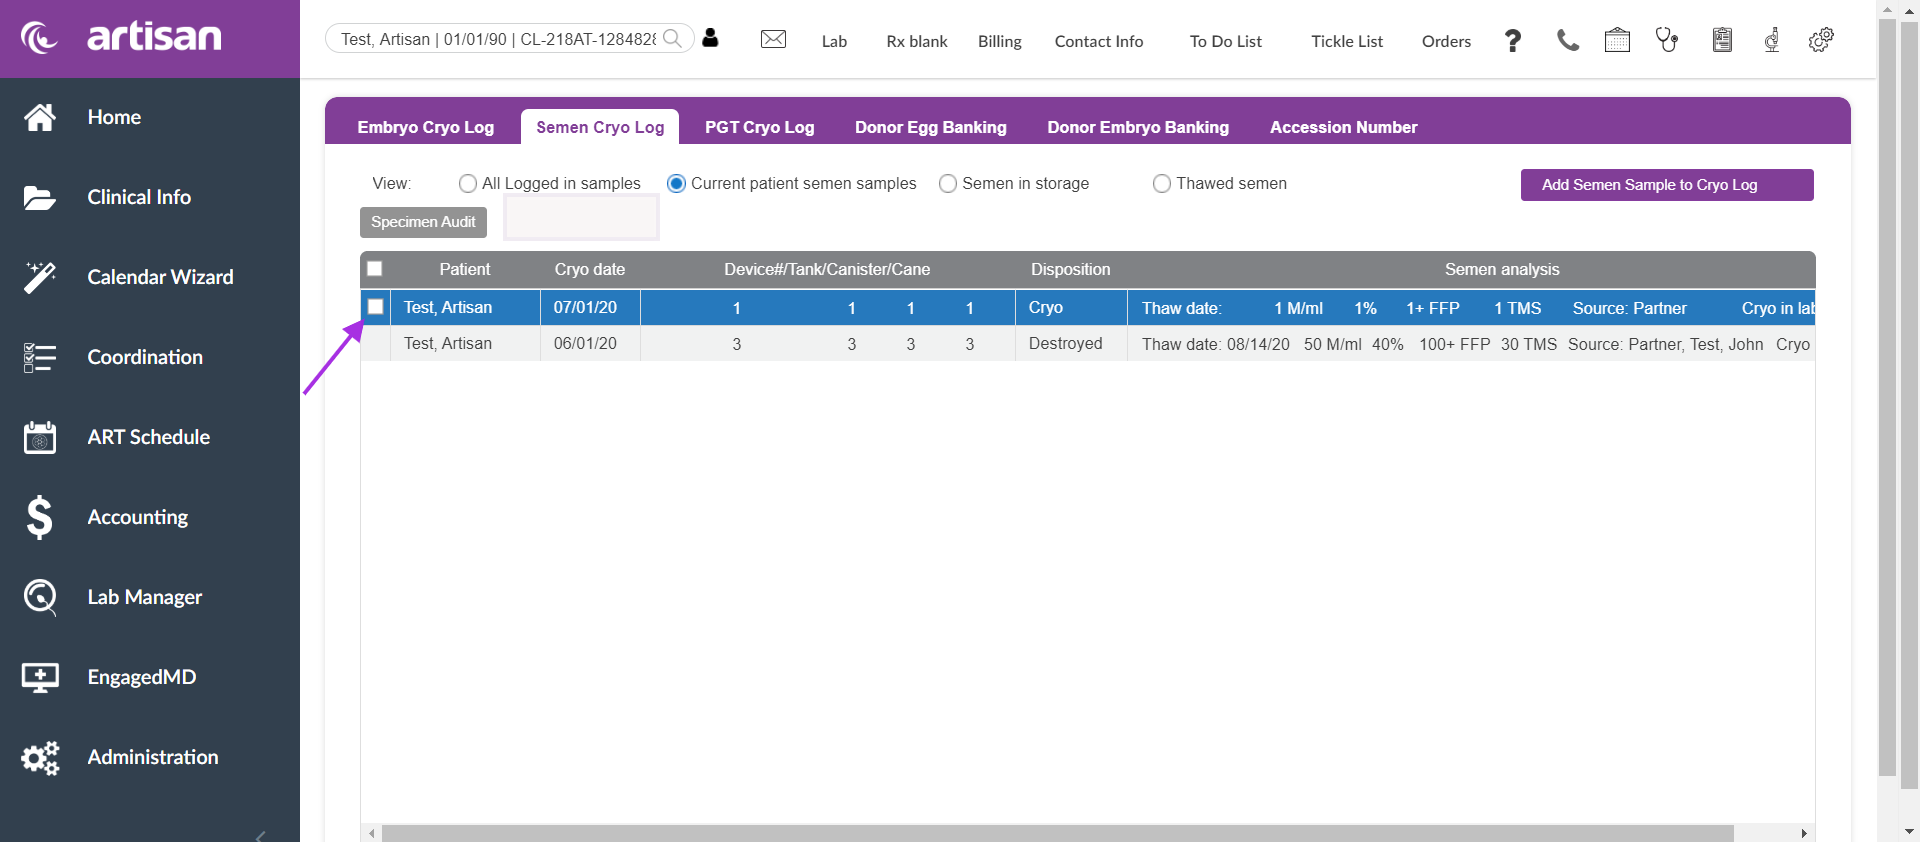
The checkboxes beside the patient name allow you to select that line to enter further information, including disposition.
If there is no box to allow you to check the box and make that selection you are still able to edit the line item. From the semen analysis screen, click on the line that no longer has the box to edit this information.

You are able to select the box at the top to select all applicable line items that are able to be selected.
See the screenshot above where the checkbox is selected and all other applicable line items are also checked off.
**All manuals are compliant with HIPPA regulations. No patient information has been released. All screenshots above were taken from a test clinic with fake patient information.
Artisan Support
Comments