Overview
The Oocyte Cryo Log is a part of the Embryo Cryo Log. It registers and tracks the status of every oocyte frozen in the lab. Additionally, the Oocyte Cryo Log permits you to transfer oocytes into or out of the laboratory.
Navigation

Click the Specimen Log link in the Lab Tools menu at the top of the screen.
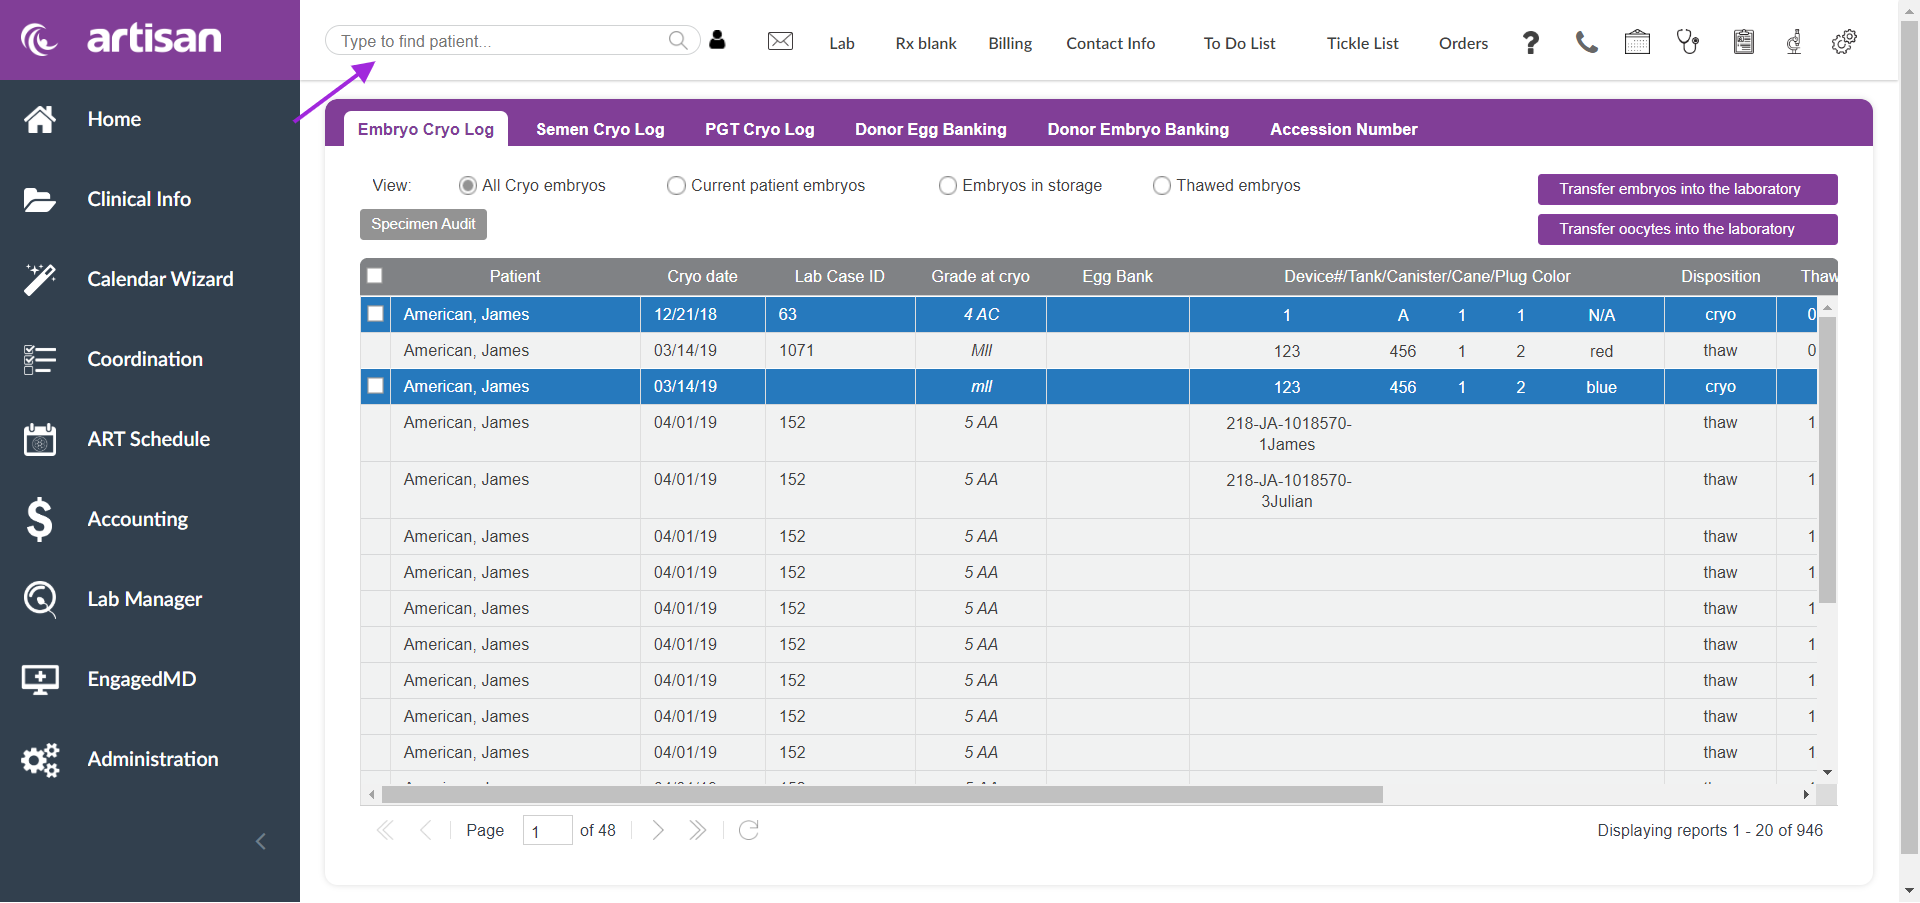
Use the patient search bar to select a specific patient.
Select and Sort Embryos/Oocytes in the Cryo Log
Each individual embryo/oocyte has its own record in the Cryo Log. Hence, cryovials that contain two or more embryos/oocytes will have multiple adjacent entries in the Log.
The Cryo Log may be sorted by either Cryo Date or Patient Name.
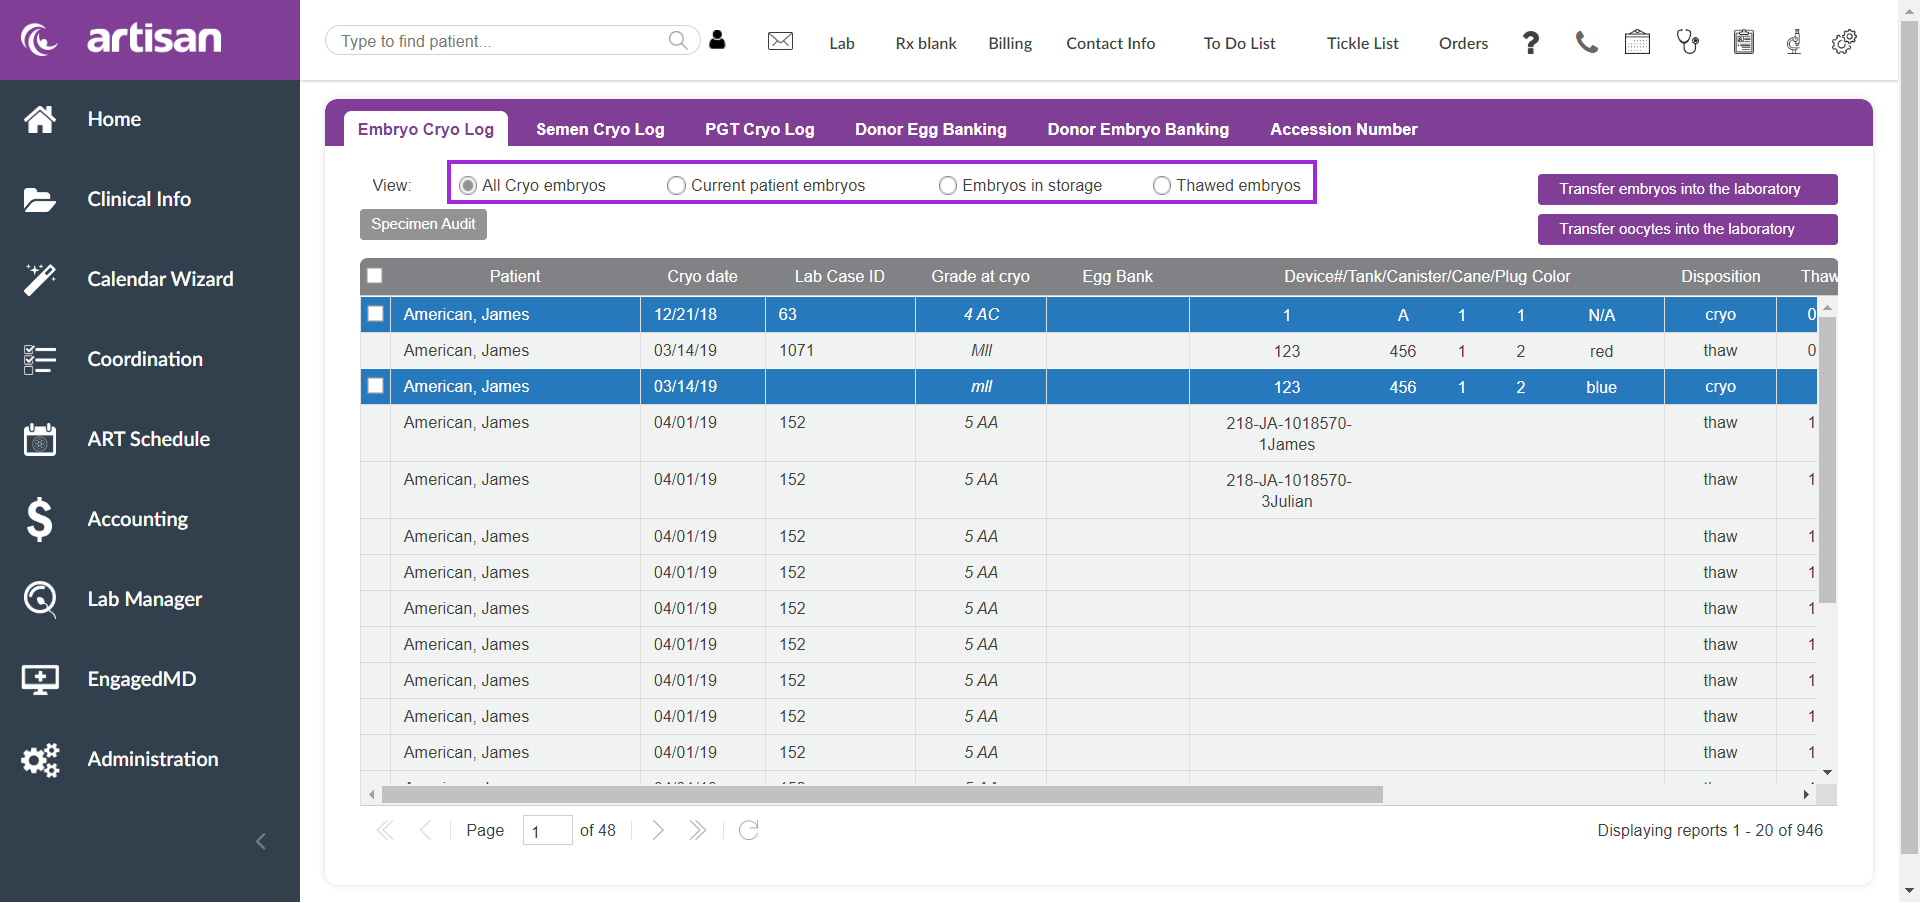
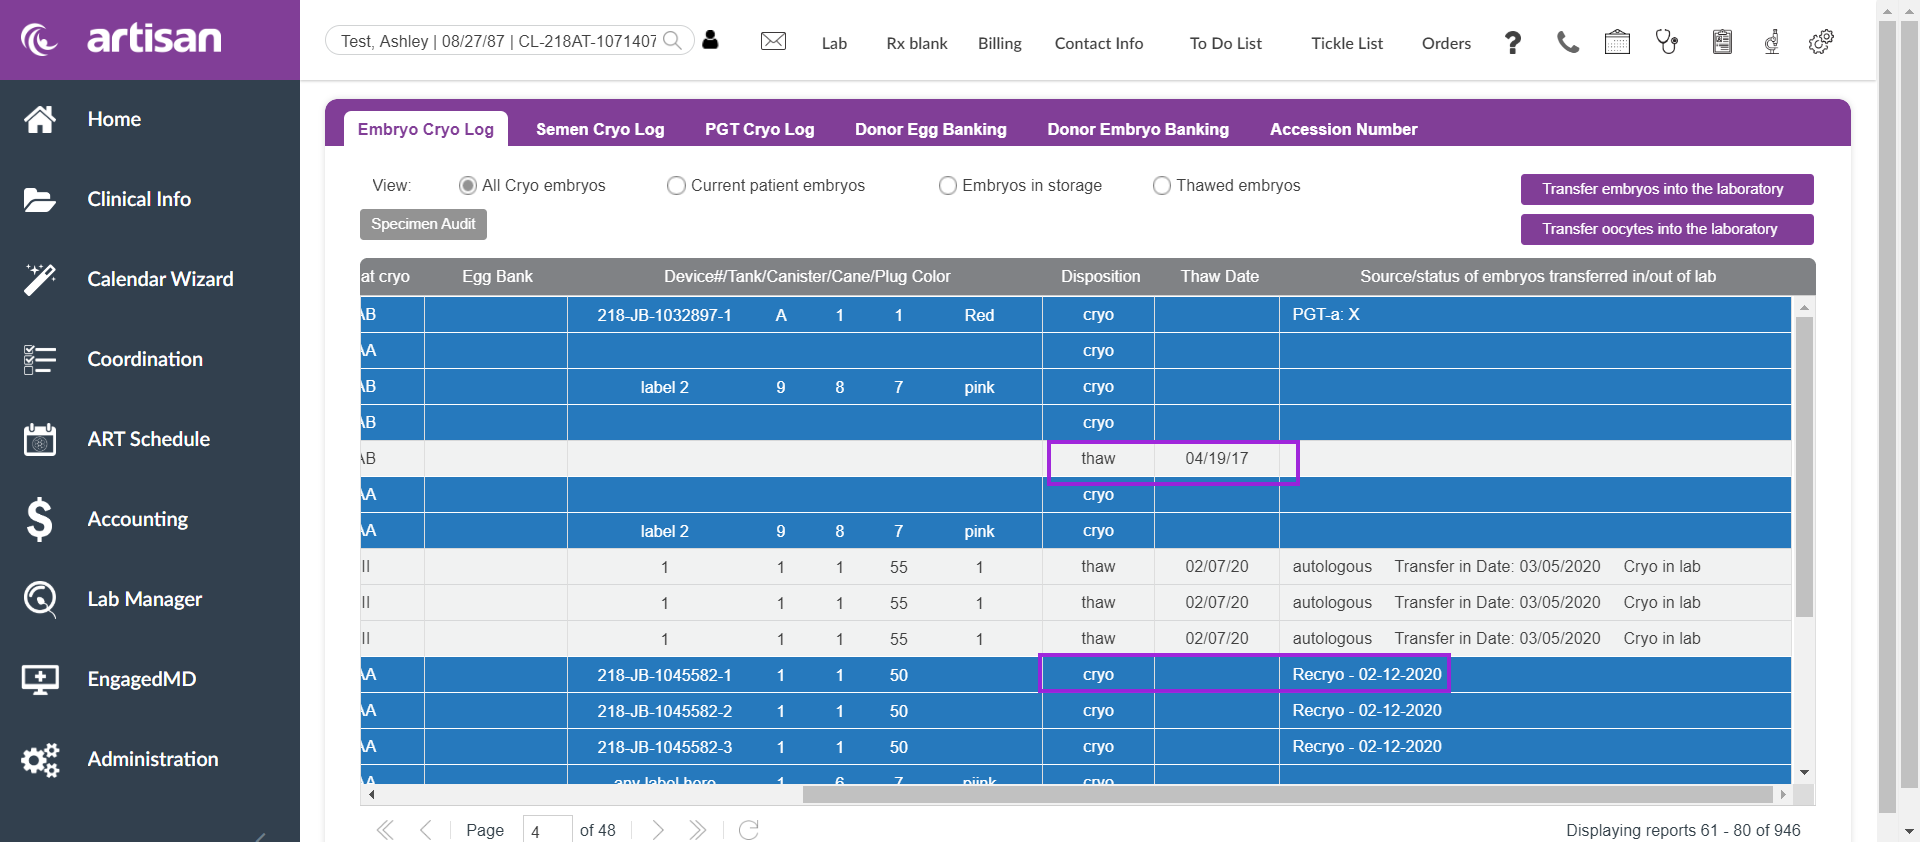
You may filter the Cryo Log to display the following:
- All cryo embryos/oocytes listed in the Log regardless of status (cryo vs. thawed). The color blue represents the oocytes that are currently cryo'd.
- The Current patient's embryos/oocytes
- All cryo embryos/oocytes in the tanks,
- All embryos/oocytes that have been thawed.
Transfer Oocytes Into the Lab
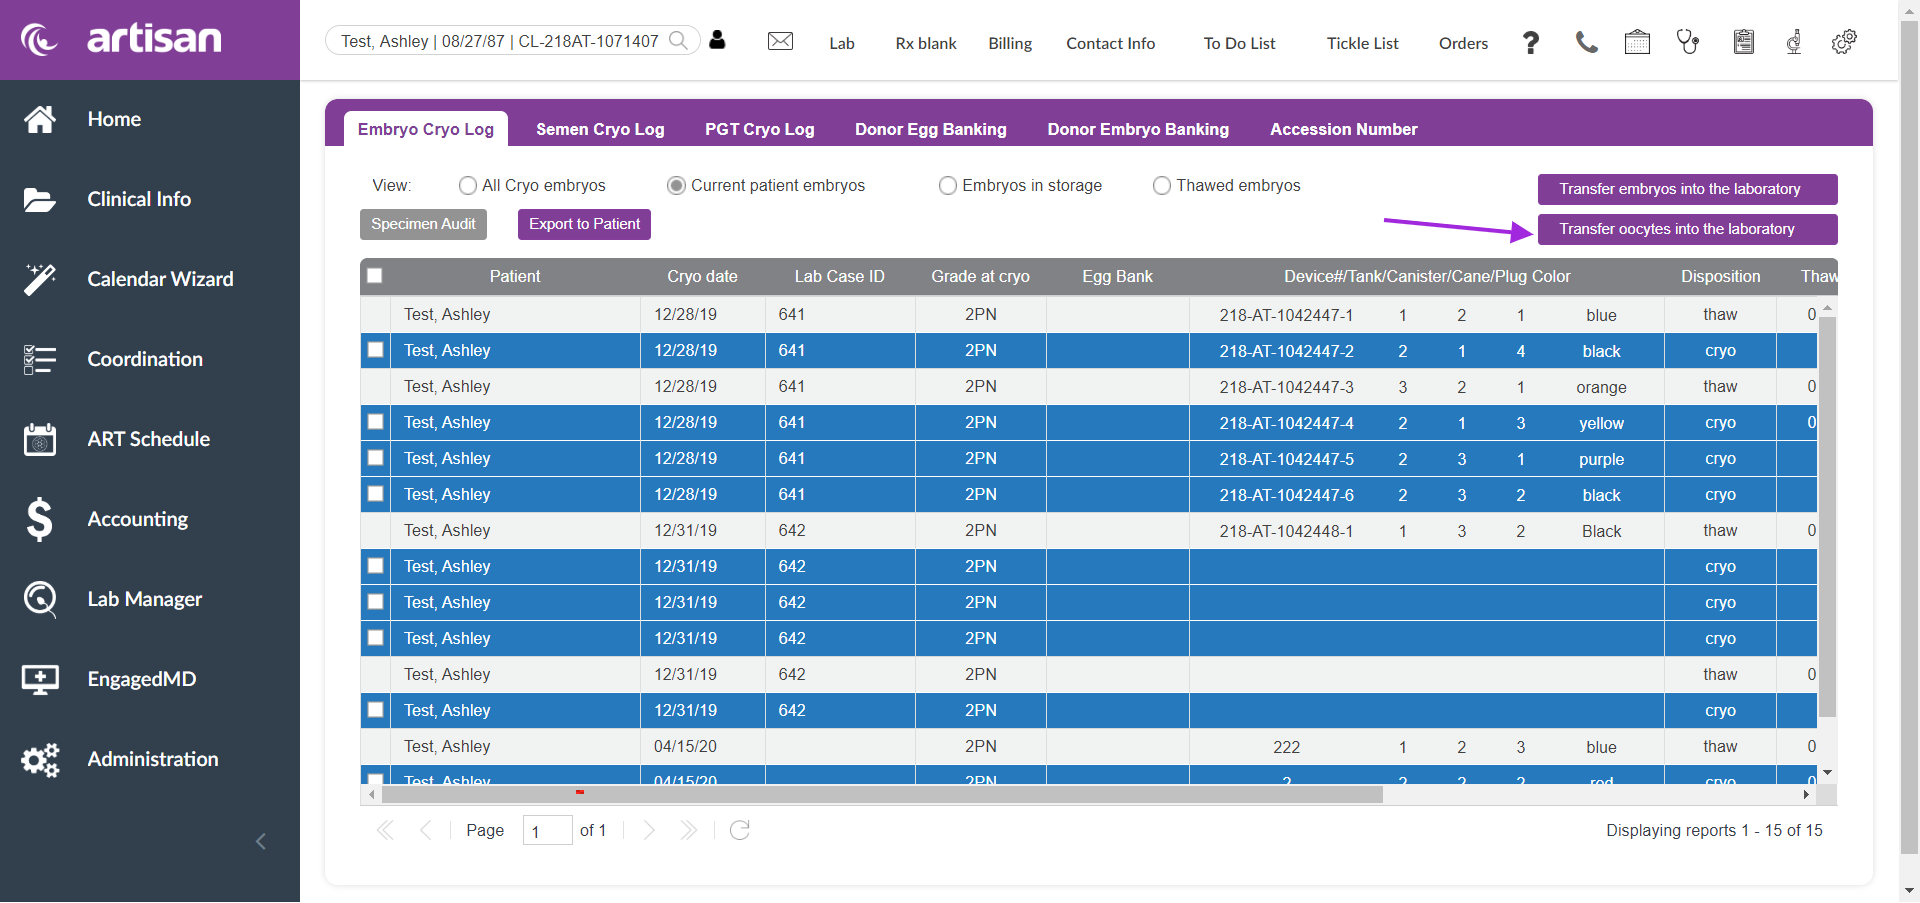
Click Transfer Oocytes into the Laboratory button to add oocytes to the log.

Select the patient or partner.
If the patient is selected the patient will display.
If the partner is selected the partner's name will display and in parenthesis, it will state (patient).
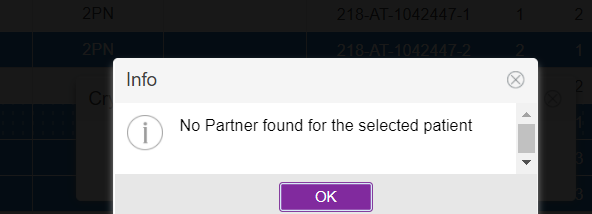
If the partner is selected and the patient does not have a partner a popup window will display informing you this patient had no partner attached.
This may be used to transfer in oocytes from an outside laboratory to your practice, or when starting with Artisan and entering your entire cryolog into the system. To add specimen notes click inside the free text box and begin entering in your note.
Fill in the fields to activate the button to Add Oocyte Details:
Transfer in date:
- Transfer in date
- Cryo in lab or Transferred in
- Source: Autologous, Donated, Egg banking
Once filled in click the button to add specific Oocyte Details.
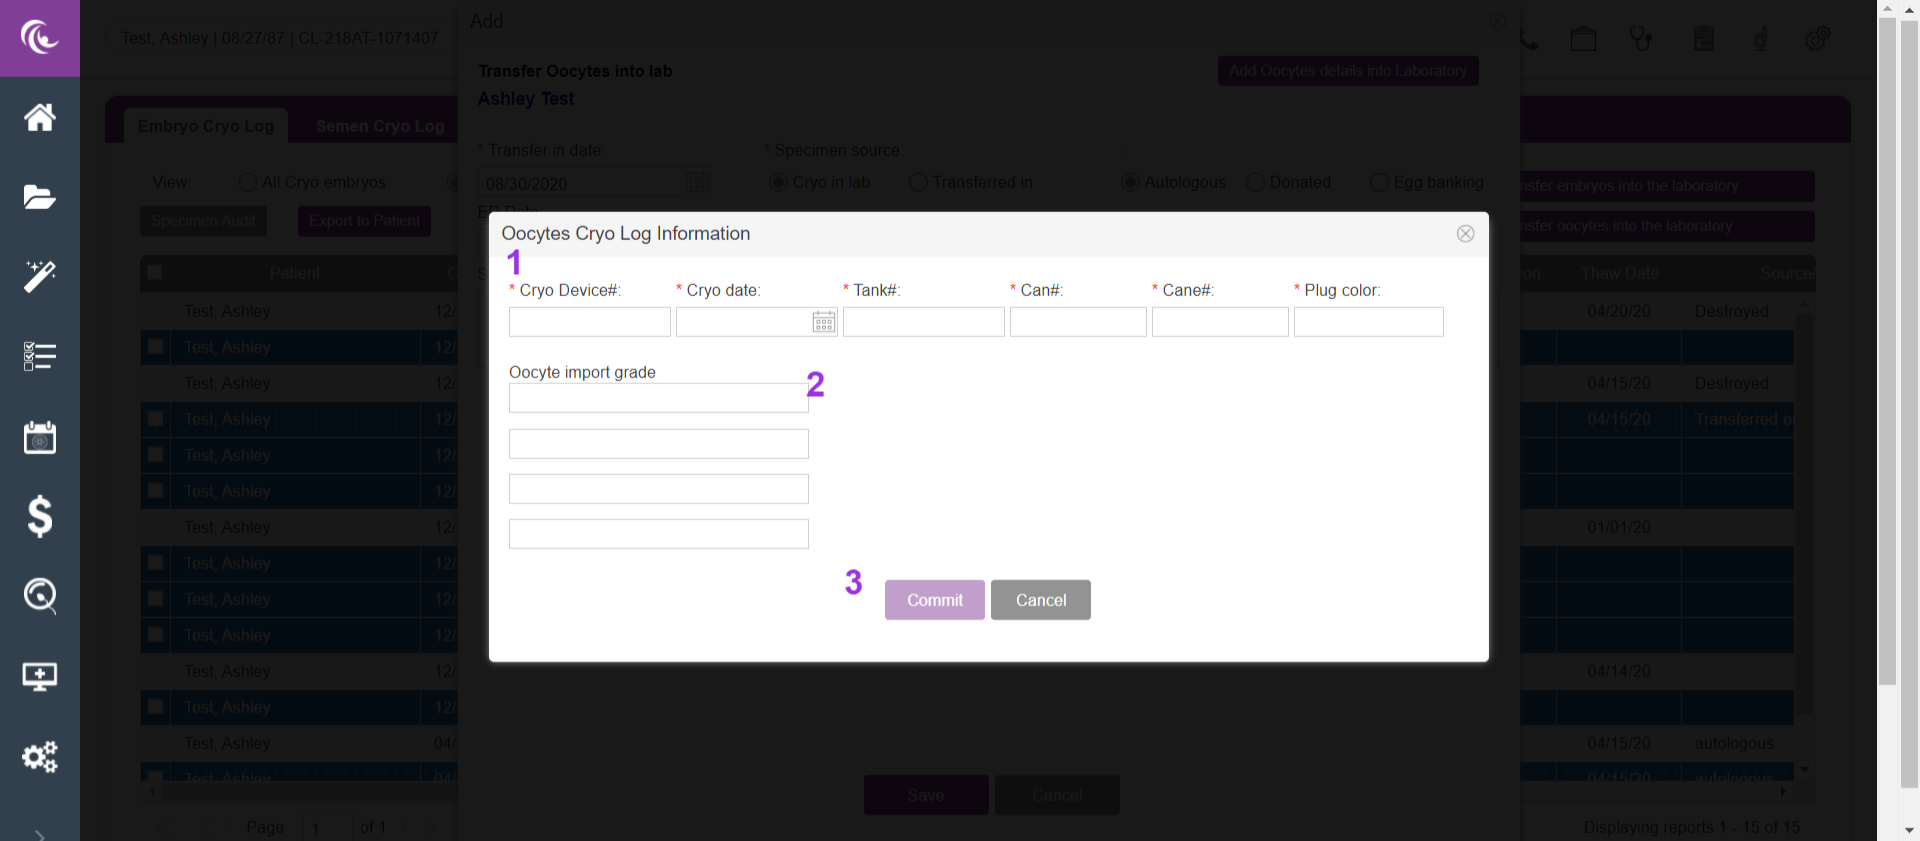
Each log screen (as above) will create a record for an individual Vial/Straw. The respective sample(s) contained within shall be listed with details here:
- Enter the required information for the Vial/Straw and it's location - Vial number, Cryo date, Tank, Canister #, Cane # and Plug Color.
- Then complete the specimen information- Oocyte Import Grade
- Then click Commit.
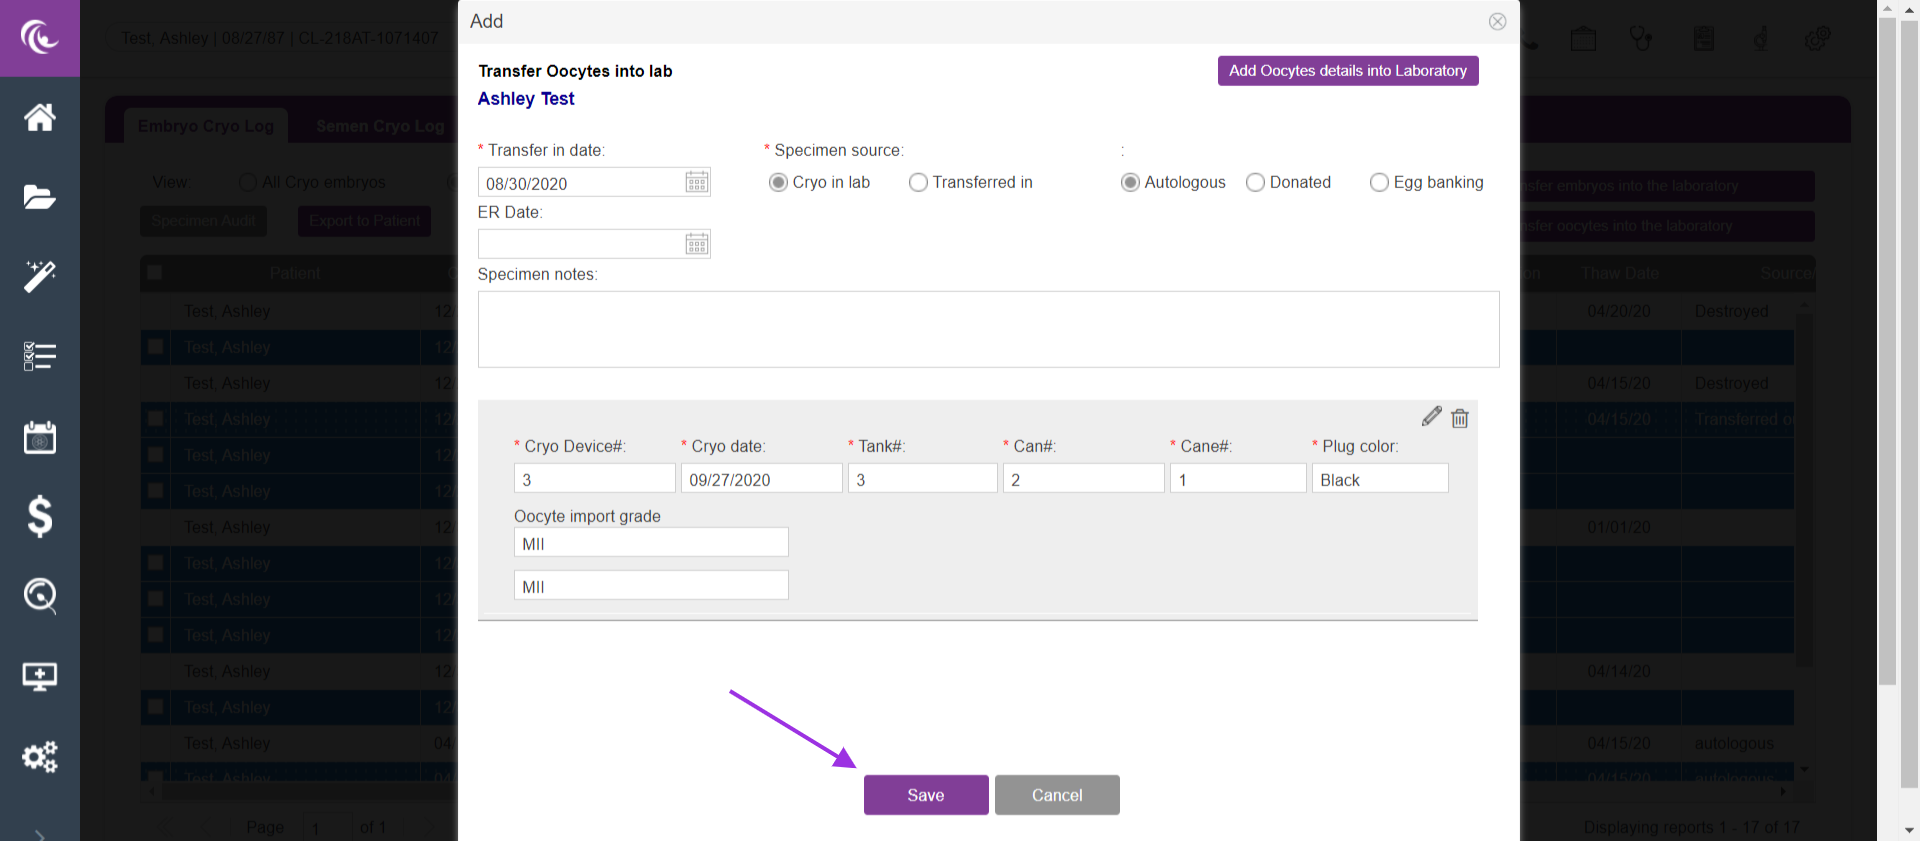
Please note that the system will create individual records for up to four oocytes contained within a single cryo vial. Once you select commit the system will display all the oocytes that you entered in one vial. When all information is entered select the save button to successfully add it to the cryo log.
Manage (Transfer Out/Discard) Oocytes in the Cryo Log

To manage oocytes entered in the Cryo Log - e.g., to destroy oocytes, transfer oocytes out of the lab, or move them within storage - click the patient's name for the oocyte of interest.
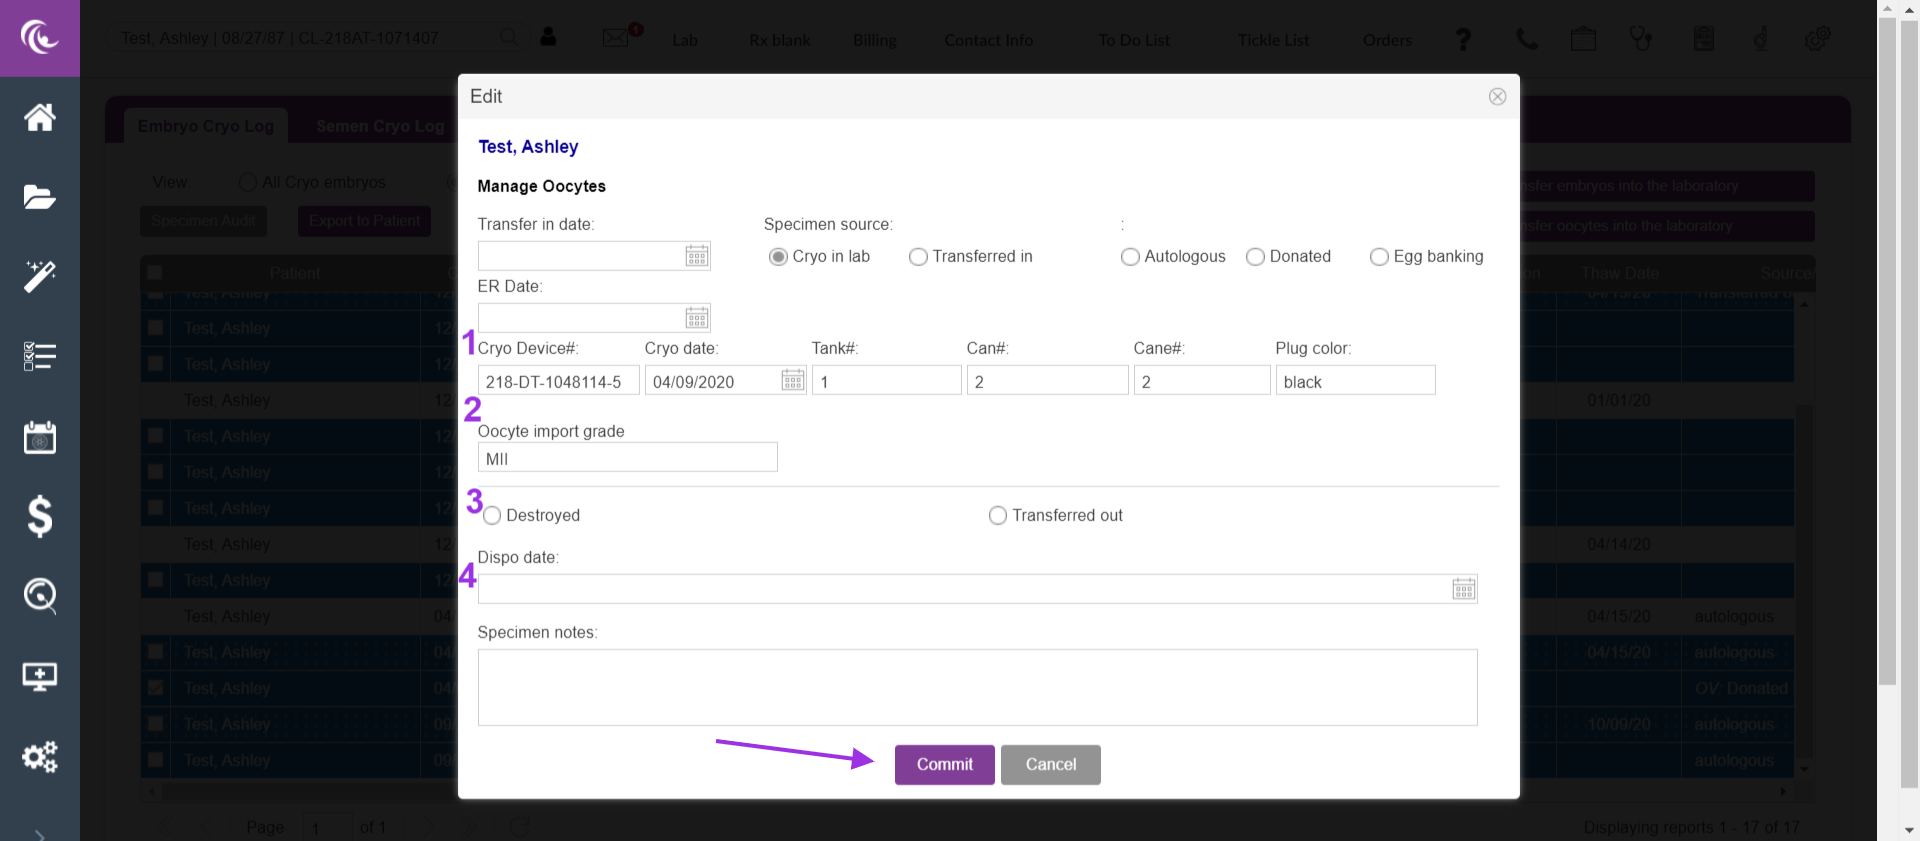
Use this window to:
- Update the vial's tank location.
- When appropriate select Destroyed or Transferred out.
- Include the date of change of status/disposition.
- Provide specimen notes.
The notation a the top will read "Embryo" as they share a log, but this is correct for the given oocyte.
If there are multiple oocytes in a vial, changing the designation for one oocyte will update the information for all other oocytes in that vial.
Oocyte Status Change
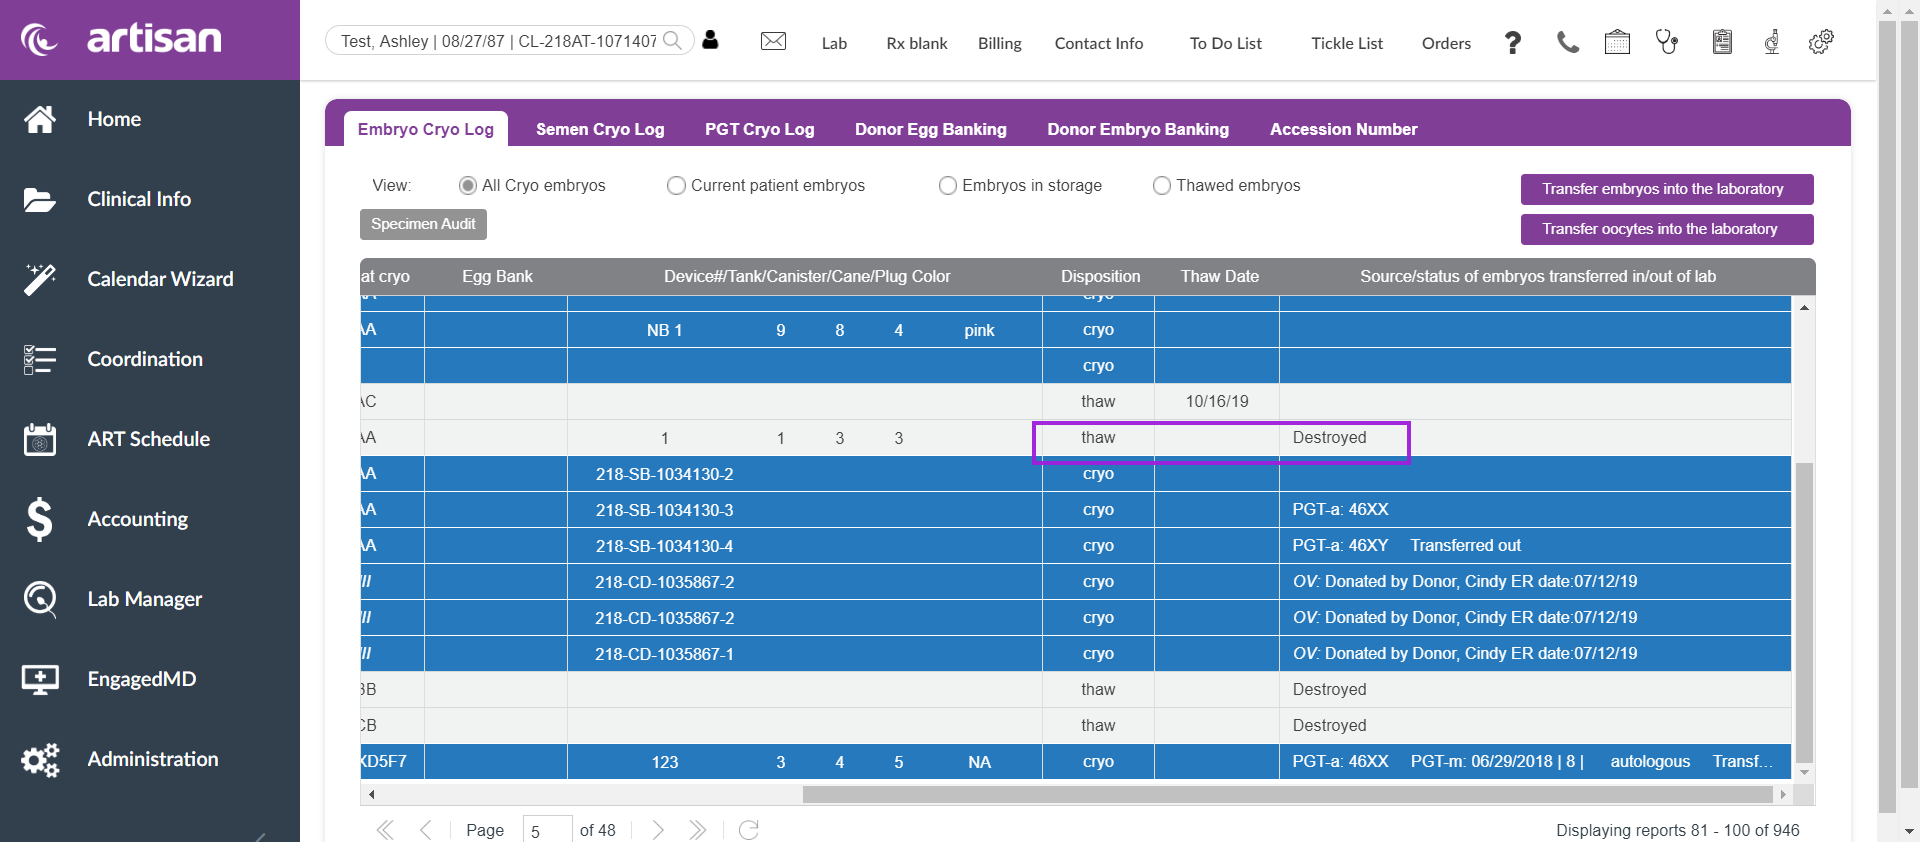
You are able to view the different dispositions and status within the cryo log. Under the disposition column, you are able to view the details of each embryo.
- Thaw date
-Cryo/ Recryo and the date of each
- Destroyed

The system will prompt you with an error message if you select an embryo that already has a disposition.
Transferred out
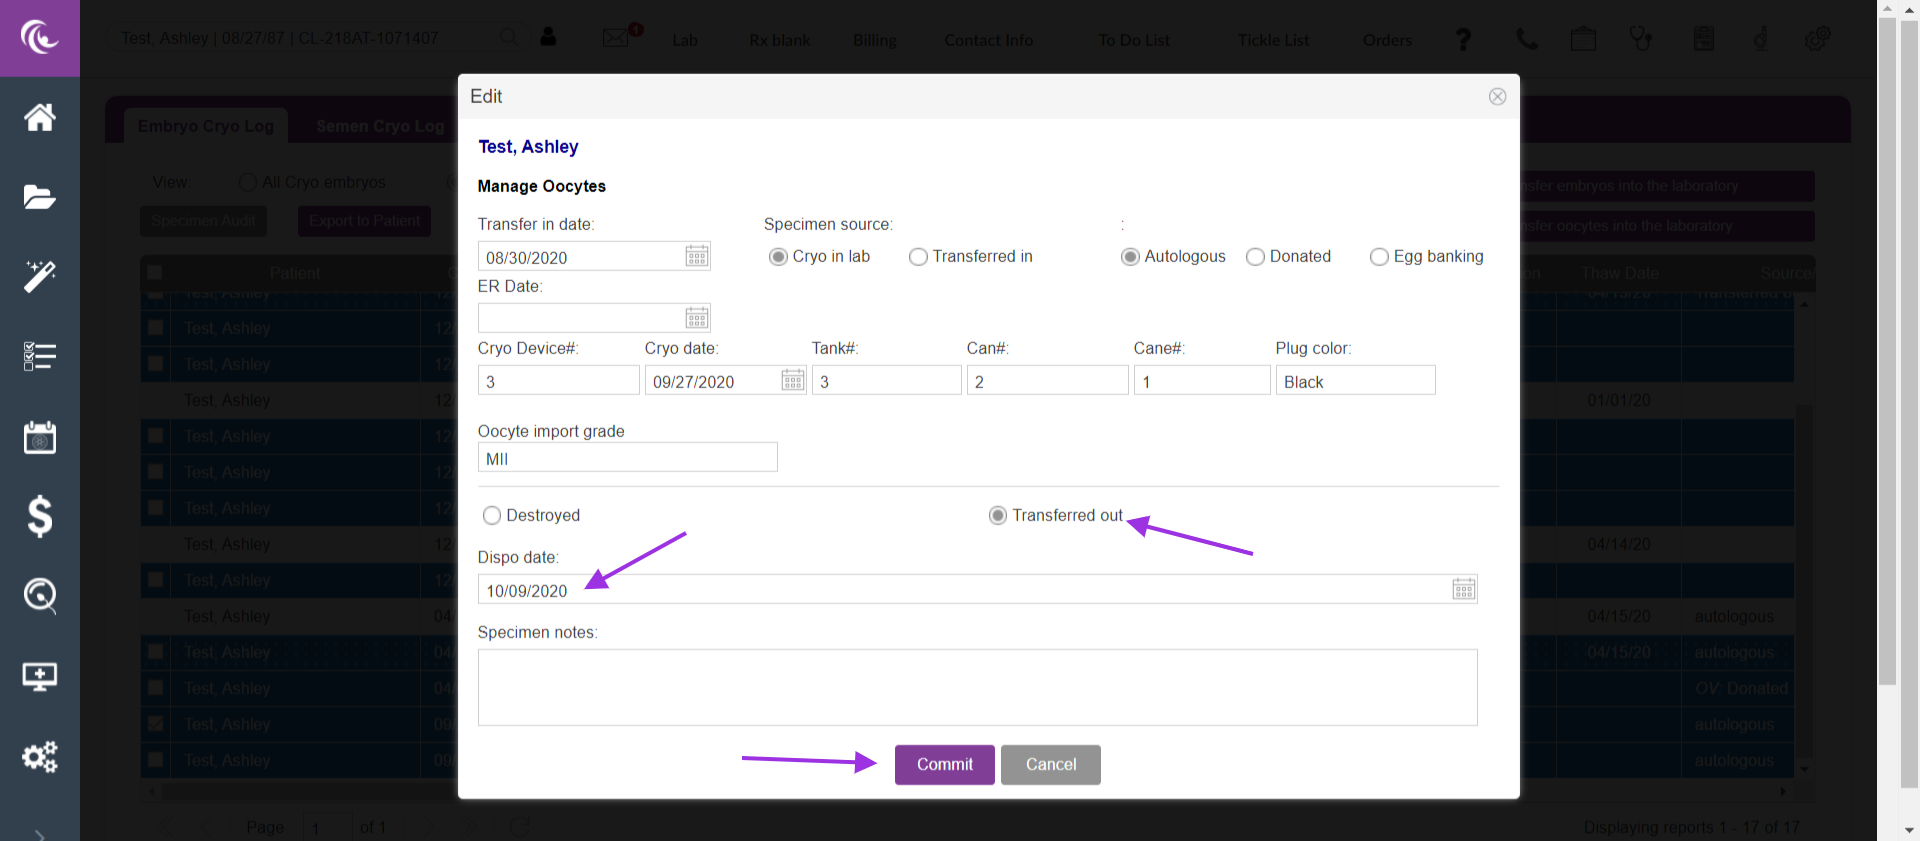
To transfer out select the disposition transfer out and enter a disposition date. If you select transferred out and do not enter a disposition date the system will prompt you to enter a date before proceeding.

When transferred out is selected the line item will stay blue with a stipple pattern.
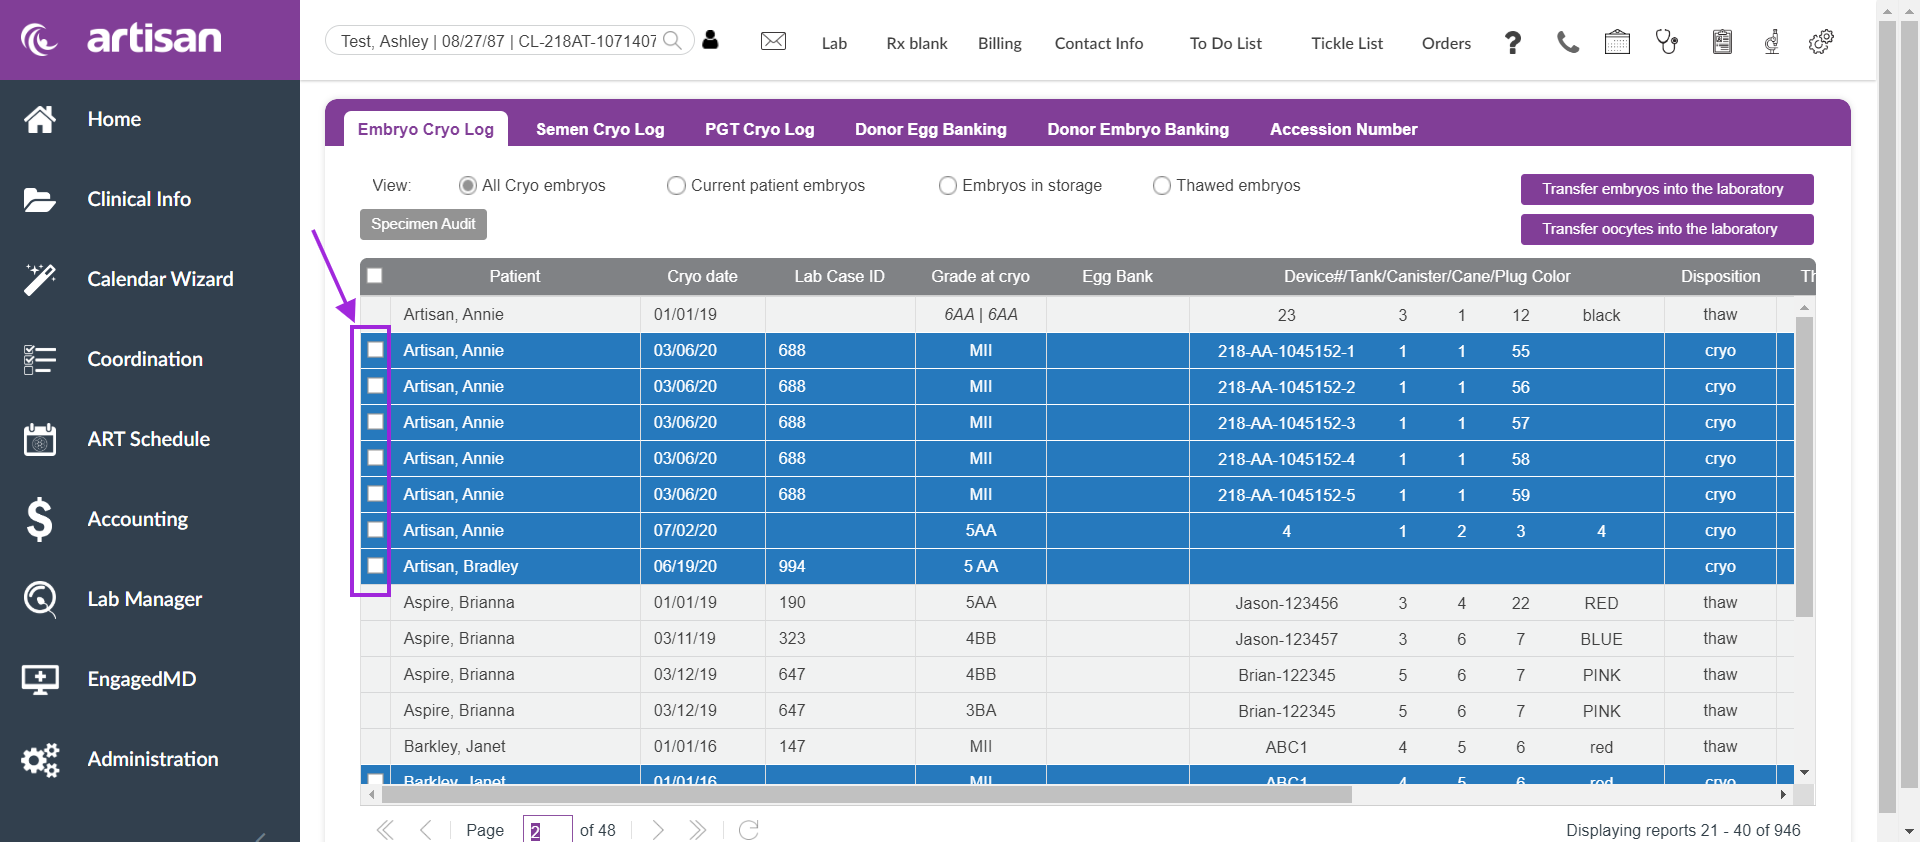
You are able to select the box at the top to select all applicable line items that are able to be selected.
See the screenshot above where the checkbox is selected and all other applicable line items are also checked off.

The checkboxes beside the patient name allow you to select that line to enter further information, including disposition.

If there is no box to allow you to check, the embryo can not be selected as a disposition has already been set. If you select a line with no box for a check mark a pop window will display.
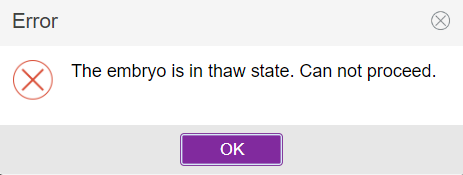
A pop up window will display informing you that this embryo already has a disposition. It will also inform you of the line items' disposition.
**All manuals are compliant with HIPPA regulations. No patient information has been released. All screenshots above were taken from a test clinic with fake patient information.
Artisan Support
Comments